Enable or Disable Night Light in Windows 10

Enable or Disable Night Light in Windows 10: With Windows 10 a new feature was introduced known as Night Light which makes your display user warmer colors and dim the display which helps you sleep and reduce strain on your eyes. The Night light is also known as Blue light because it helps in reducing the blue light of the monitor and use the yellow light which are better for your eyes. In this tutorial, we will see How to Enable or Disable Night Light in Windows 10 to reduce blue light and show warmer colors.
Enable or Disable Night Light in Windows 10
Make sure to create a restore point just in case something goes wrong.
Method 1: Enable or Disable Night Light in Windows 10 Settings
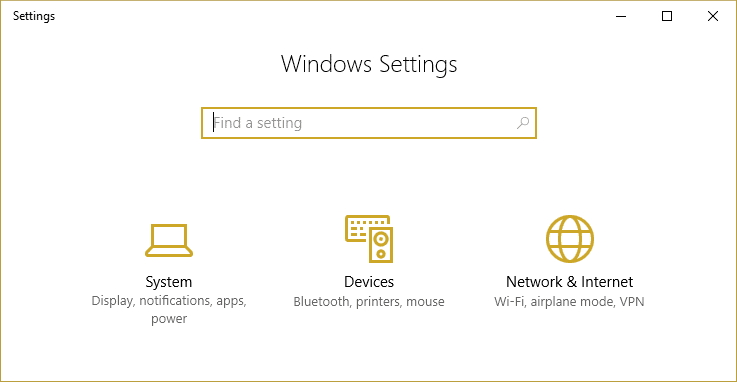
1.Press Windows Key + I to open Settings then click on System.
2.Now from the left-hand menu click on Display.
3.Under Brightness and color turn on the toggle for the Night light in order to Enable it, or turn off the toggle to disable Night light.
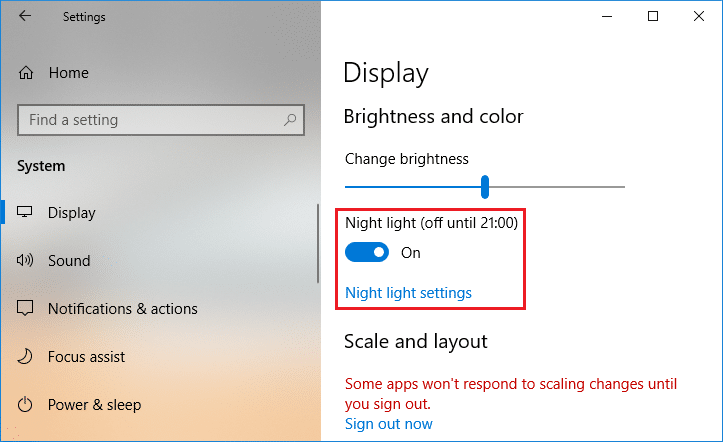
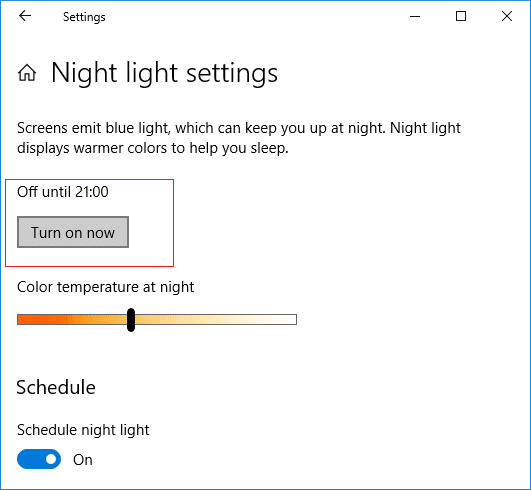
4.Once you enable the night light you can easily configure it, just click on “Night light settings” under the above toggle.
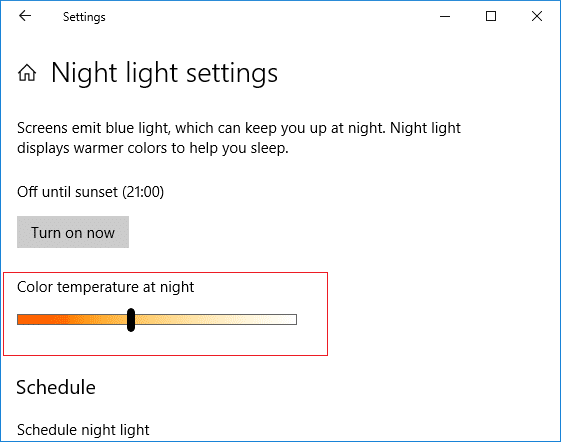
5.Select the color temperature at night using the bar, if you will move the bar towards the left side then it will make your screen look warmer.
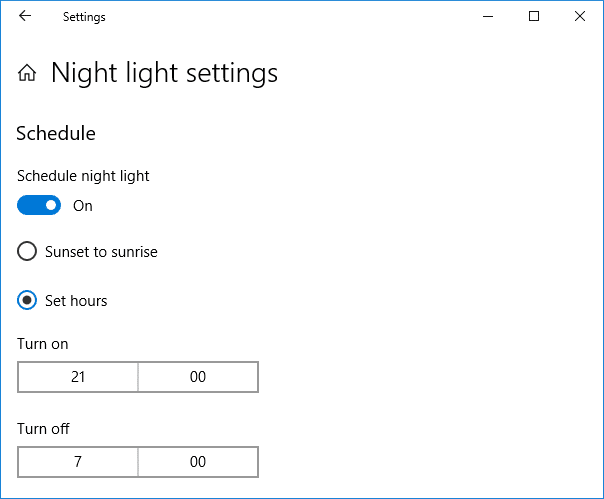
6.Now if you don’t want to manually enable or disable night light then you can schedule night light to kick in automatically.
7.Under Schedule night light turn on the toggle to enable.
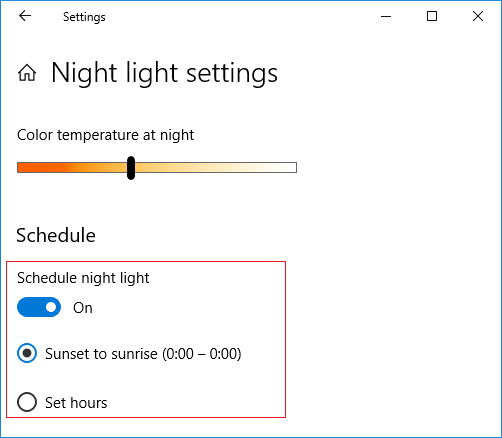
8.Next, if you want to use night light from sunset to sunrise then use the first option, otherwise select “Set hours” and configure the time for which you want to use the night light.
9.If you need to enable night light feature immediately then under Night light settings click on “Turn on now“.
10.Also, if you need to disable night light feature immediately then click on “Turn off now“.

11.Once done, close settings then restart your PC to save changes.
Method 2: Unable to Enable or Disable Night Light feature
If you are unable to enable or disable night light feature in Windows 10 Settings because the Night Light settings are greyed out then follow the below steps:
1.Press Windows Key + R then type regedit and hit Enter to open Registry Editor.

2.Navigate to the following registry key:
HKEY_CURRENT_USERSoftwareMicrosoftWindowsCurrentVersionCloudStoreStoreCacheDefaultAccount
3.Expand the DefaultAccount key then right-click and delete the following two subkeys:
$$windows.data.bluelightreduction.bluelightreductionstate
$$windows.data.bluelightreduction.settings
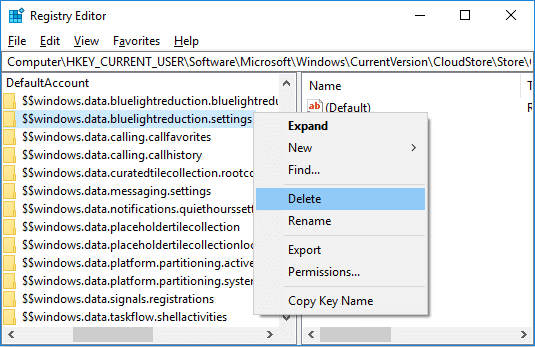
3.Close everything then restart your PC to save changes.
4.Again open Settings and this time you should be able to either Enable or Disable Night Light feature without any issues.
Recommended:
That’s it, you successfully learned How to Enable or Disable Night Light in Windows 10 but if you still have any queries regarding this tutorial then feel free to ask them in the comment’s section.