How to Delete Browser History On Android

In the modern-day and age, nearly everything gets saved (whether knowingly or unknowingly) on every item that can be remotely called a tech product. This includes our contacts, private messages & emails, documents, pictures, etc.
As you might be aware, every time you fire up your web browser and look up something, it gets logged and saved in the browser’s history. The saved receipts are usually helpful as they aid in loading the sites back again quickly but there are certain situations where one might want to (or even need to) clear their browsing data.
Today, in this article, we will go over the topic of why you should consider deleting your browser history & data on your Android phone.

Why You Should Delete Browser History?
But first, what is browser history and why is it stored anyway?
Everything you do online is part of your browser history but to be more specific, it is the list of all web pages a user has visited as well as all the data regarding the visit. Storing web browser history helps improve one’s overall online experience. It makes it smoother, faster and easier to visit those sites again.
Along with webpage history, there are a few other items like cookies and caches that get stored too. Cookies help track whatever you do on the internet which makes surfing quick and more personalized but also can make you a tiny bit uncomfortable sometimes. A lot of data about stores can be used against you; an example being that pair of red jogging shoes I checked out on Amazon following me on my Facebook feed fifteen days later.
See Also:
14 Ways to Fix AOL Mail Not Working on Android and iOS
How to Know If AirPods are Charging on Android
How to Delete Images on Chromebook Read Only
How to Delete Former Usernames on Instagram
How to Delete Your Romwe Account
Caches make the web pages load quicker but also take a lot of space on your device in the long run as it slowly gets filled with junk. Saving information like account passwords on public systems is problematic as anyone and everyone who uses the system after you can easily access your accounts and take advantage of them.
Deleting browser history can have zero to a huge impact on your online activity depending on how you do it. Surfing on someone else’s system helps people to invade your privacy and invites judgment, which is important especially if you are a teenage boy using your sister’s laptop on a lonely Friday evening.
Additionally, while your browsing history helps in building an online profile of you containing what you do on the internet, how you do it and for how long you do it for; clearing it every now and then is essentially like pressing the reset button and starting over on the internet.
How To Delete Browser History on Android
While there are a plethora of browser options available to Android users, most stick to the same three, namely, Google Chrome, Opera and Firefox. Among the three, Chrome is universally used and is the most popular by a long shot, as it is the default for most Android devices. However, the procedure to delete browser history and the associated data remains identical on all browsers across the platform.
1. Clearing Browser History on Google Chrome
1. Unlock your android device, swipe up to open your app drawer and look for Google Chrome. Once found, click on the application icon to open.
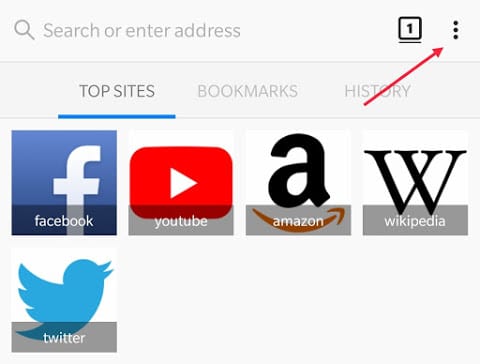
2. Next, tap on the three vertical dots located on the top-right corner of the application window.
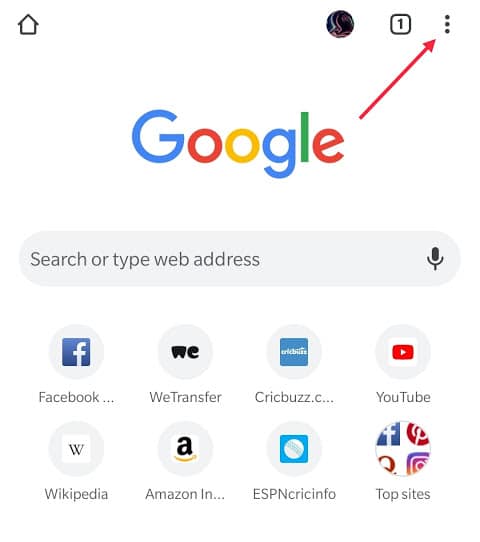
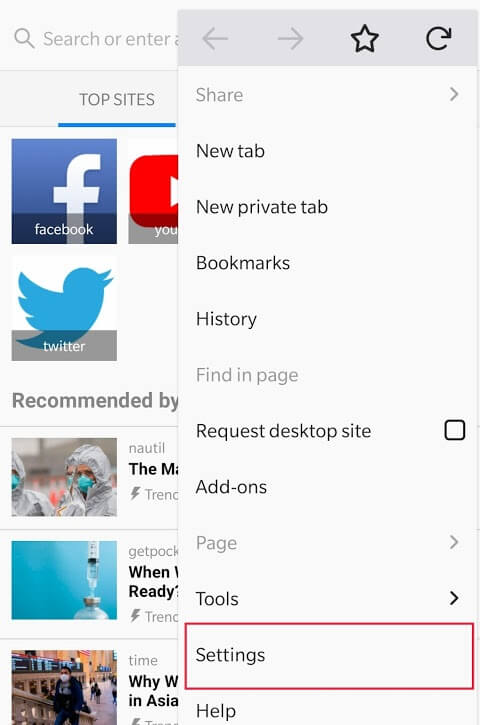
3. From the following drop-down menu, select “Settings” to proceed.
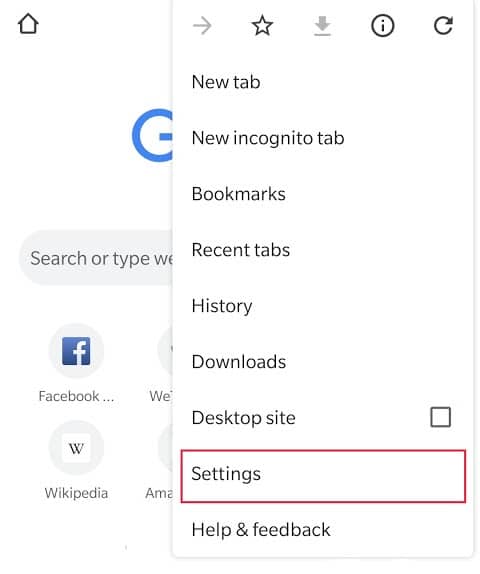
4. Scroll down the Settings menu to find “Privacy” under the Advanced settings label and click on it.
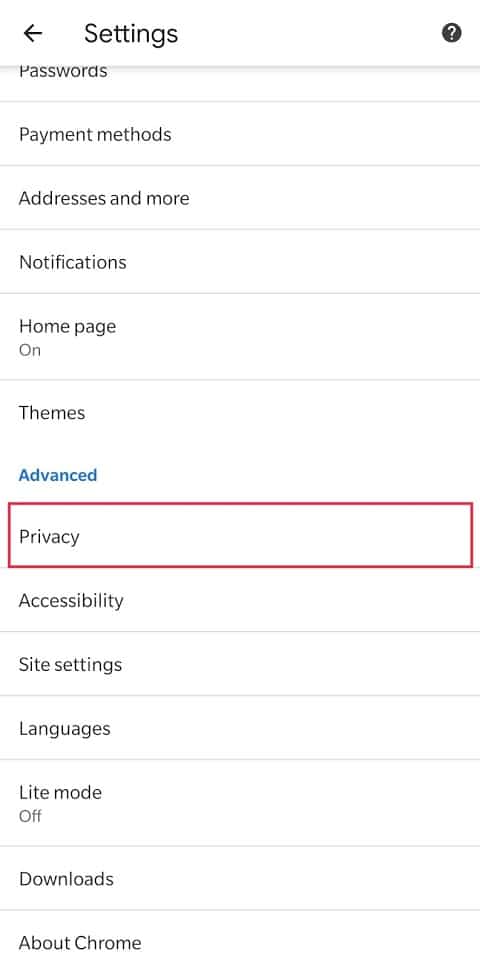
5. Here, tap on “Clear browsing data” to continue.
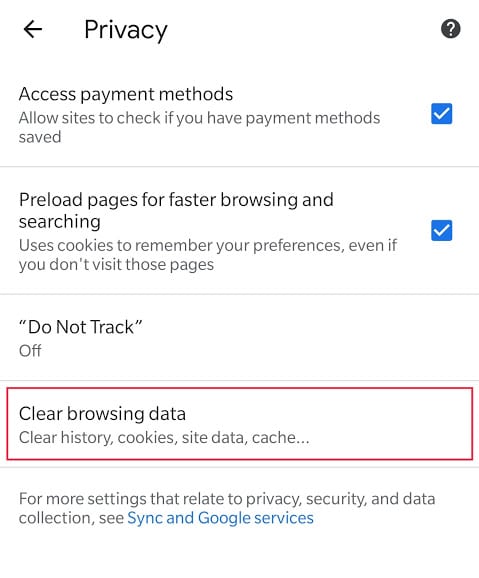
6. One can delete data ranging from the past hour, a day, a week or since the start of your recorded browsing activity that is forever!
To do so, click on the arrow to the right of “Time range”
![]()
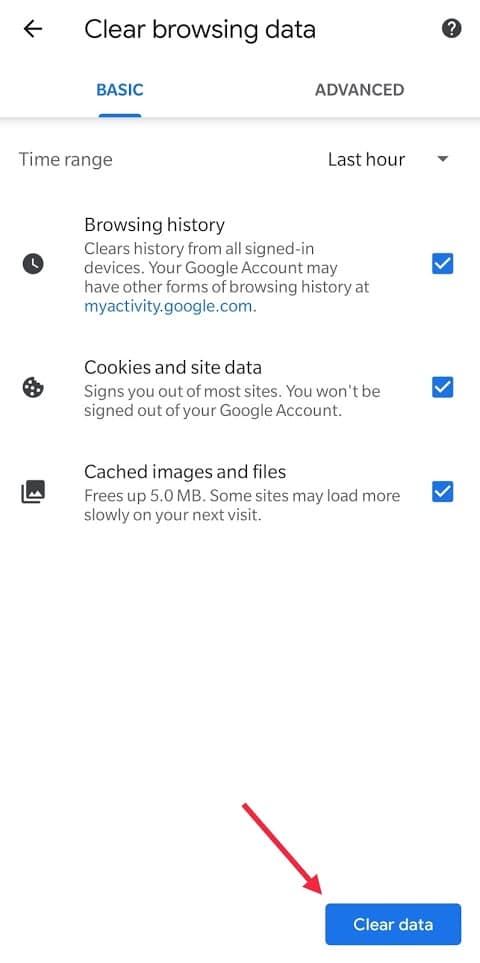
Before you check all the boxes, let’s get you re-educated about the basic settings on the menu:
- Browsing History is a list of web pages a user has visited as well as data like page title and time of visit. It helps you find a previously visited site easily. Imagine if you found a really helpful website about a topic during your midterms, you can easily find it in your history and refer to it during your finals (unless you have cleared your history).
- Browser Cookies are more helpful for your search experience than your health. They are small files stored on your system by your browser. They can hold serious information like your names, addresses, passwords, and credit-card numbers to whatever you had put in your shopping cart at 2 AM. Cookies are generally helpful and enhance your experience except when they are “Malicious”. Malicious cookies as their name suggests can intend harm, they can be used to store and track your online activity. Once there is enough information one sells this data to advertising companies.
- A cache is a temporary storage area where website data is stored. These include everything from HTML files to video thumbnails. These reduce the bandwidth that is like the energy spent on loading the webpage and is especially helpful when you have a slow or limited internet connection.
Let’s talk about Advanced settings located just to the right of Basic settings. These include the three mentioned above as well a few more not so complex but equally important ones:
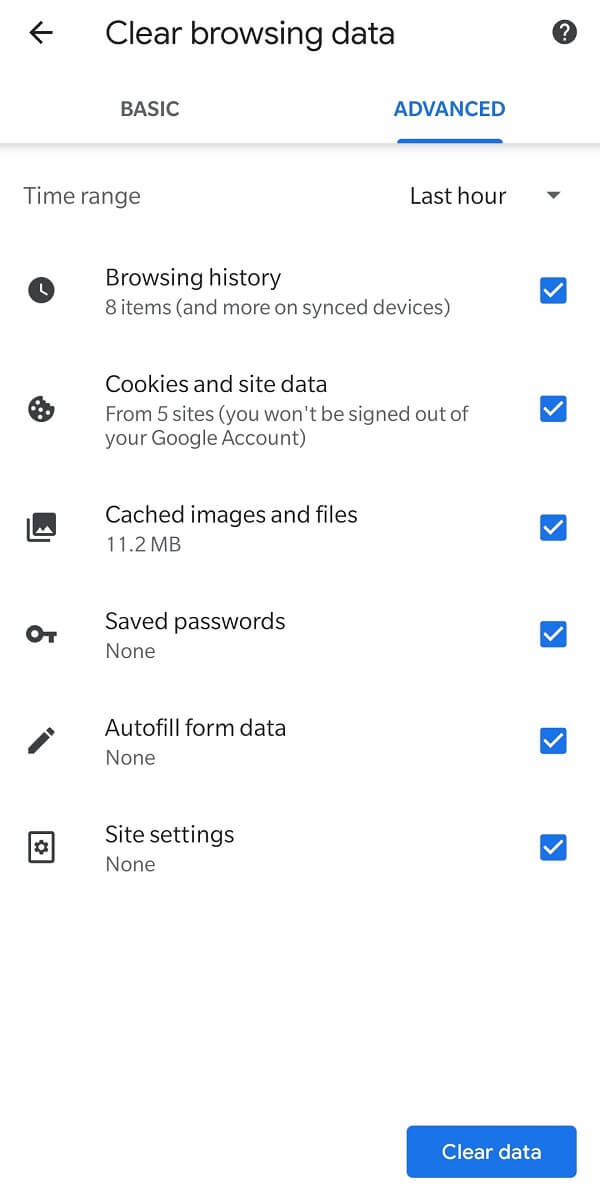
- Saved Passwords is the list of all the usernames and passwords saved on the browser. Unless you have the same password and username for all the websites (which we strongly oppose to) and don’t have the memory to remember all of them then the browser does that for you. Extremely helpful for frequently visited sites but not for the site you joined just for their first 30 days free trial program and forgot about.
- Autofill Form helps you in not typing your home address for the fourth time on your twelfth application form. If you use a public computer like the place you work at then this information can be accessed by all and be misused.
- Site Settings are the answers to requests made by a website to access your location, camera, microphone, and more. For example, if you let Facebook have access to your gallery to post pictures on the platform. Deleting this resets all the settings to the default one.
7. Once you have made up your mind on what to delete, press the blue button at the bottom of your screen that reads “Clear Data”.
8. A pop up will appear asking you to reconfirm your decision, press “Clear”, wait for a while and you are good to go!

2. Delete Browser History on Firefox
1. Locate and open the Firefox Browser on your phone.
2. Tap on the three vertical dots located on the top-right corner.
3. Select “Settings” from the drop-down menu.
4. From the setting menu, select “Privacy” to move ahead.
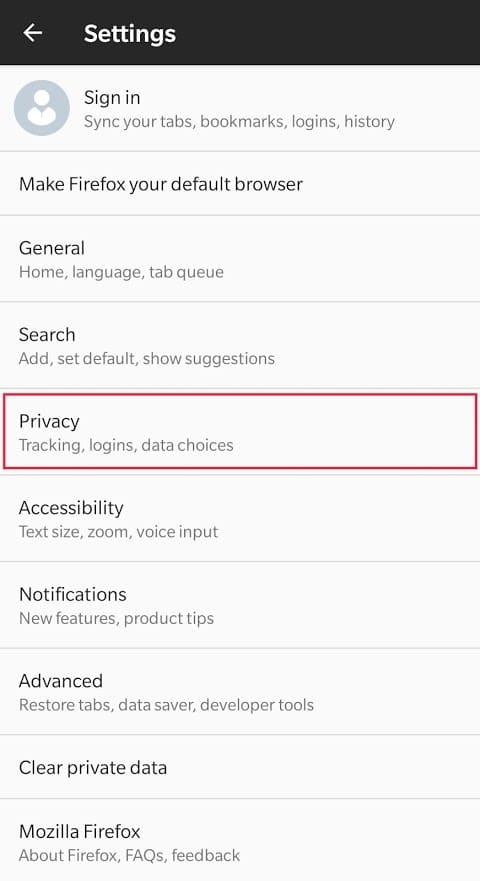
5. Check off the box located next to “Clear private data on exit”.
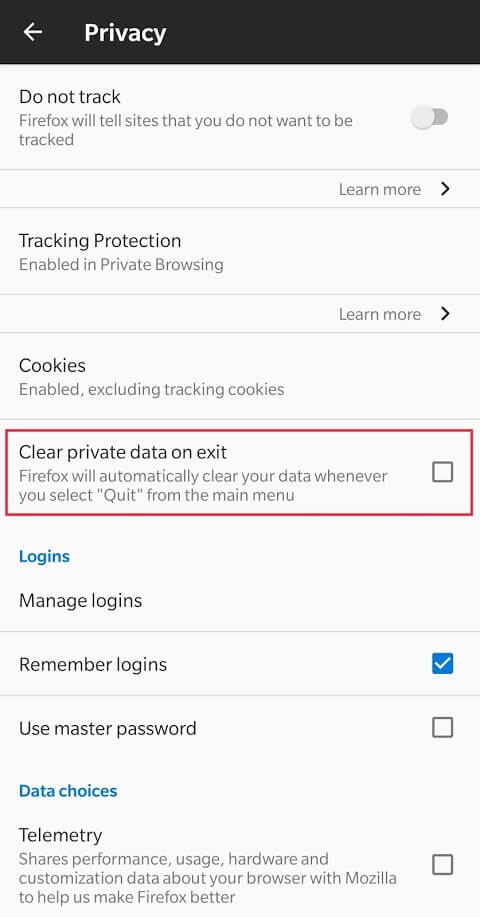
6. Once the box is ticked, a pop-up menu opens up asking you to select which data to clear.
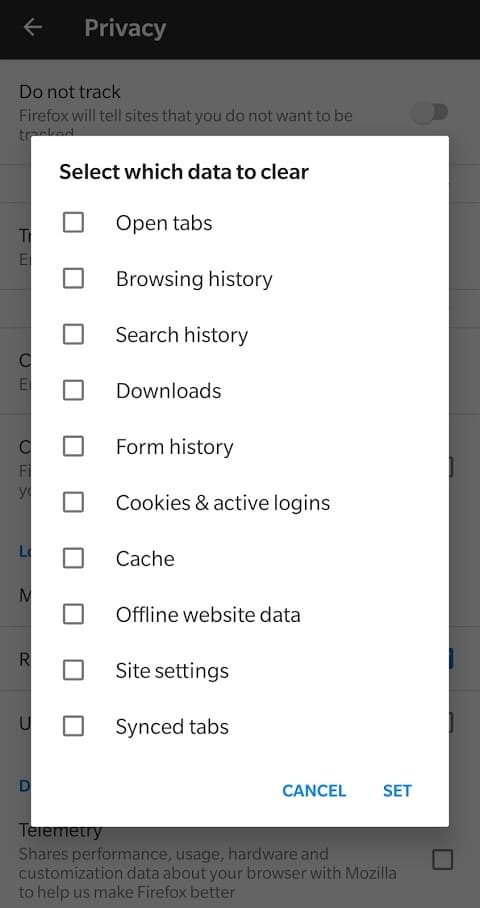
Before you go crazy and check all the boxes, let’s quickly learn what they mean.
- Checking the Open Tabs closes all the tabs that are currently open in the browser.
- Browser History is a list of all the websites one has visited in the past.
- Search History removes individual search entries from the search suggestions box and does not mess with your recommendations. For example when you type in “P-O” you end up with harmless things like popcorn or poetry.
- Downloads are the list of all files you have downloaded from the browser.
- Form History data helps in quickly and automatically filling online forms. It includes address, phone numbers, names, etc.
- Cookies & Cache are the same as explained earlier.
- Offline Website Data are the files of websites stored on the computer that allows browsing even when the internet isn’t available.
- Site Settings are the permission granted to the website. These include allowing a website to access your camera, microphone or location, deleting these sets them back to default.
- Synced Tabs are the tabs that one has open in Firefox on other devices. For example: if you open a few tabs on your phone then you can see them on your computer through synced tabs.
7. Once you are sure about your choices click on “Set”.
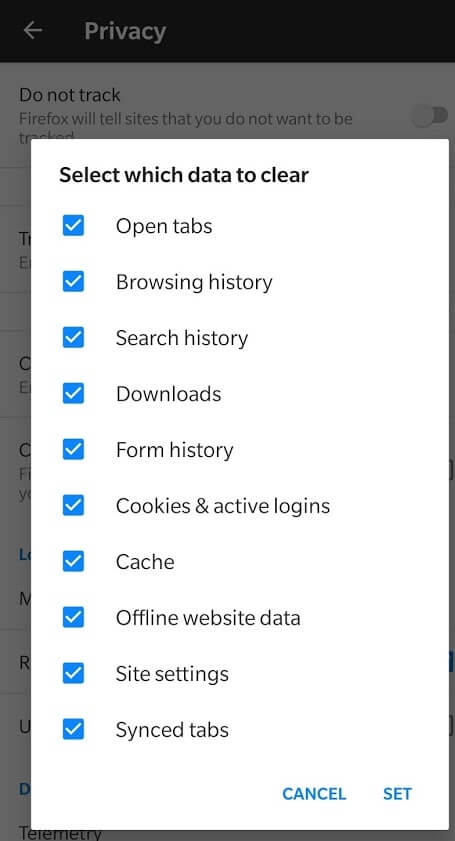
Go back to the main menu and quit the application. Once you quit, all the data you selected to delete will be deleted.
3. Clearing Browser History on Opera
1. Open the Opera Application.
2. Tap on the red “O” Opera icon located at the bottom right.
![]()
3. From the pop-up menu, open “Settings” by pressing on the gear icon.
![]()
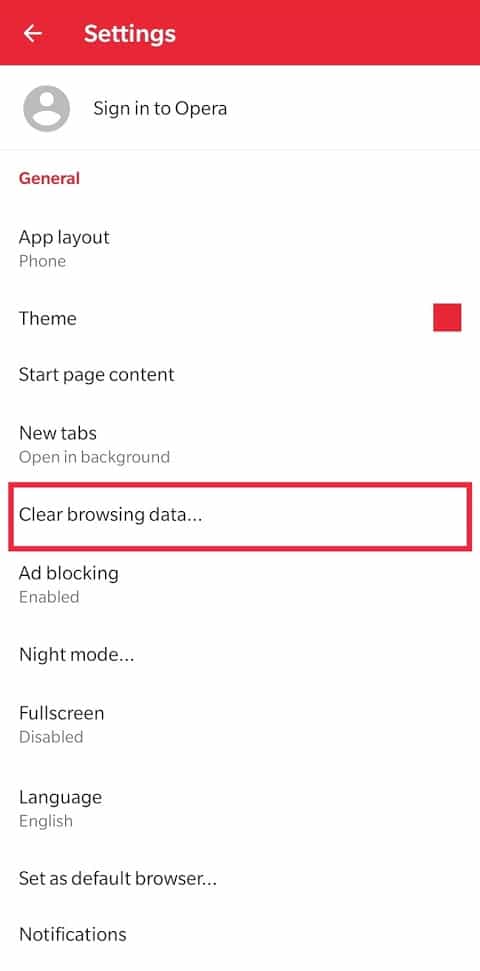
4. Pick the “Clear browsing data…” option located in the General section.
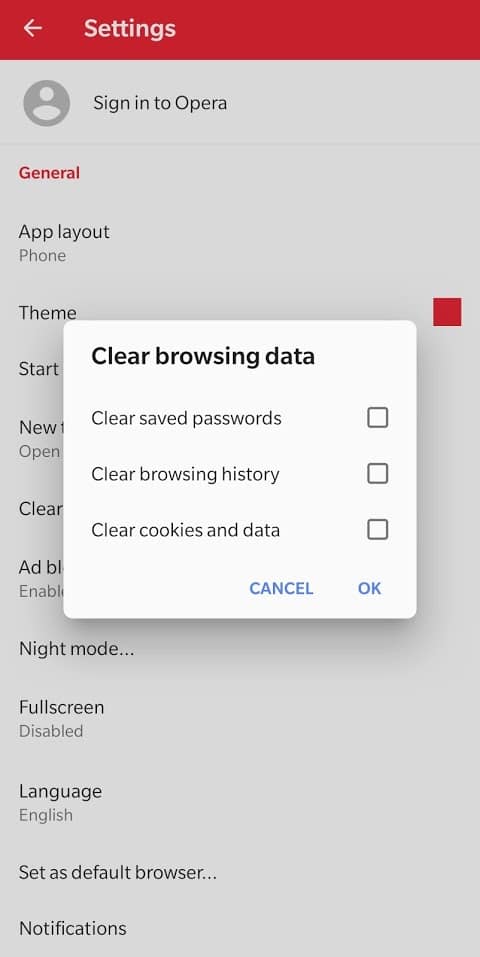
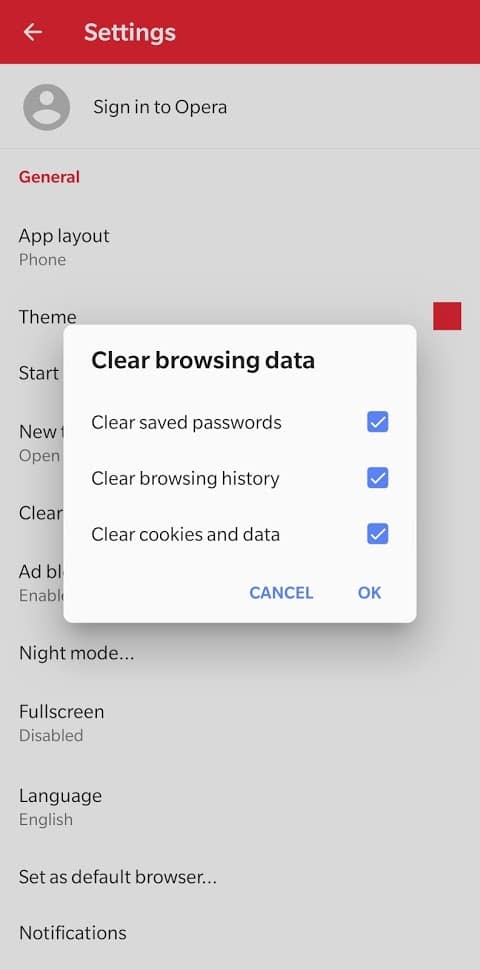
5. A Pop-up menu similar to the one in Firefox will open up asking for the kind of data to delete. The menu includes items like saved passwords, browsing history and cookies; all of which have been explained earlier. Depending on your needs and requirements, make your choice and tick the suitable boxes.
6. When you have made your decision, press “OK” to delete all your browser data.
Pro Tip: Use Incognito Mode or Private Browsing
You need to open your browser in the private browsing mode which creates a temporary session that is isolated from the browser’s main session and user data. Here, history is not saved and data associated with the session, for example, cookies and cache are deleted when the session is over.
Apart from the more popular use of hiding undesirable content (adult websites) from your history, it has a more practical use as well (like using systems that aren’t yours). When you log into your account from someone else’s system, there is a chance that you might accidentally save your details there or if you want to look like a fresh visitor on a website and avoid cookies that influence the search algorithm (avoiding cookies is exceptionally helpful while booking travel tickets and hotels).
Opening incognito mode is a simple 2 step process and very helpful in the long run:
1. In the Chrome Browser, tap on the three vertical dots located on the top right.
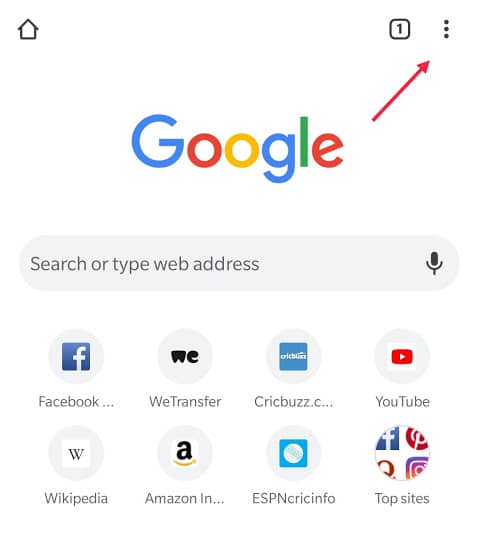
2. From the drop-down menu, select “New Incognito Tab”.
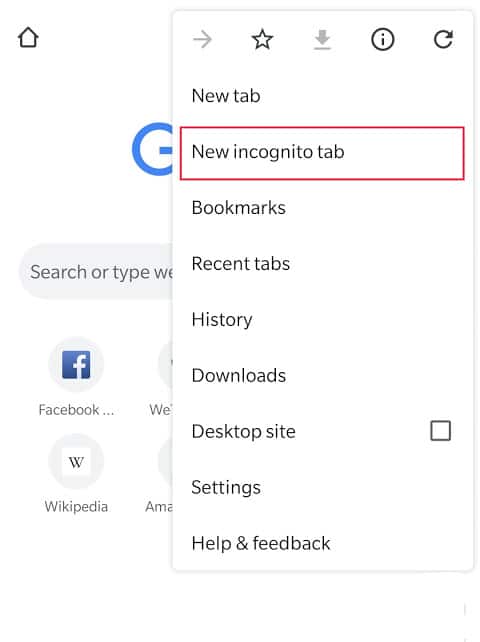
Viola! Now, all your online activity is hidden from the prying eyes and you can start afresh every time using Incognito Mode.
(A heads up: Your browsing activity isn’t completely invisible and private in incognito mode as it can be tracked by other websites or their Internet Service Provider (ISP) but not an average curious joe.)
Recommended:
That’s it, hope the above guide was helpful and you were able to delete browser history on your Android device. But if you still have any queries regarding this tutorial then feel free to ask them in the comment section.