Enable Or Disable Administrator Account On Login Screen In Windows 10
There are certain functions that you can only perform with administrator access or with an administrator account. Here is how to enable or disable administrator account on login screen in Windows 10.
When you install Windows 10 on your PC, you make a local user or a Microsoft account for all your functions. But, there is also an administrator account that comes in-built with Windows 10. The account is not active by default. The administrator account is helpful while dealing with troubleshooting issues and lock-out situations. There are various methods to enable the Administrator account on Login Screen in Windows 10. The administrator account is very powerful and responsible for almost all the functions on your Windows. Always be cautious while working with an administrator account in Windows 10.
Enable Or Disable Administrator Account on Login Screen in Windows 10
How to Enable Administrator Account on login screen in Windows 10?
There are a few ways that can be used to enable the administrator account. Enabling the administrator account can make many functions available to use but always remember to disable it after use. You don’t want to mess with the powerful functions it handles.
1. Enable Administrator Account using Command Prompt in Windows 10
It is one of the fastest ways to access the Administrator Account in Windows 10.
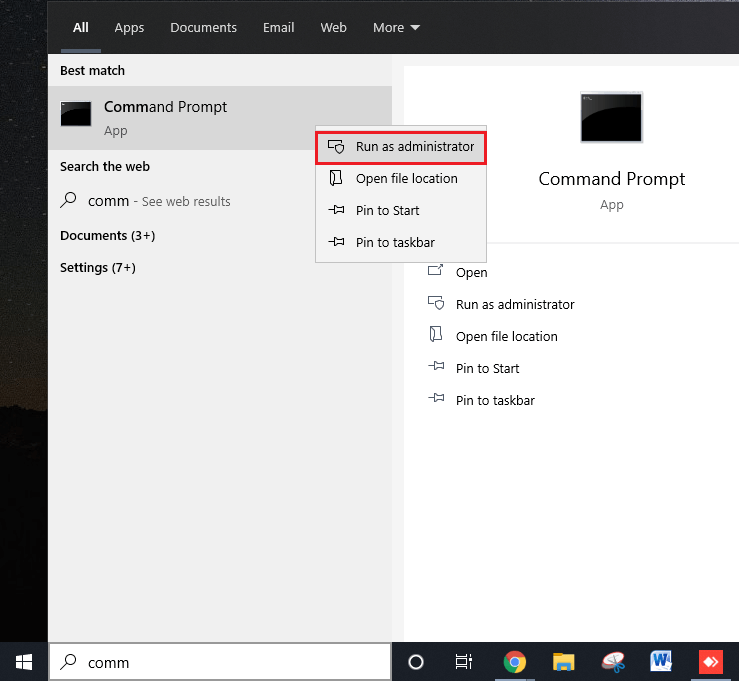
1. Type ‘cmd’ in the search field.
2. Right-click on the ‘Command prompt’ app and click on ‘Run as Administrator.’
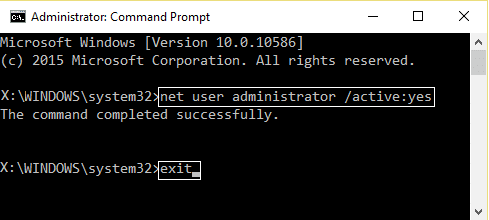
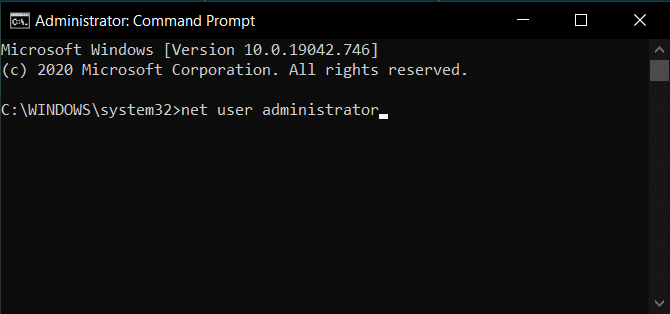
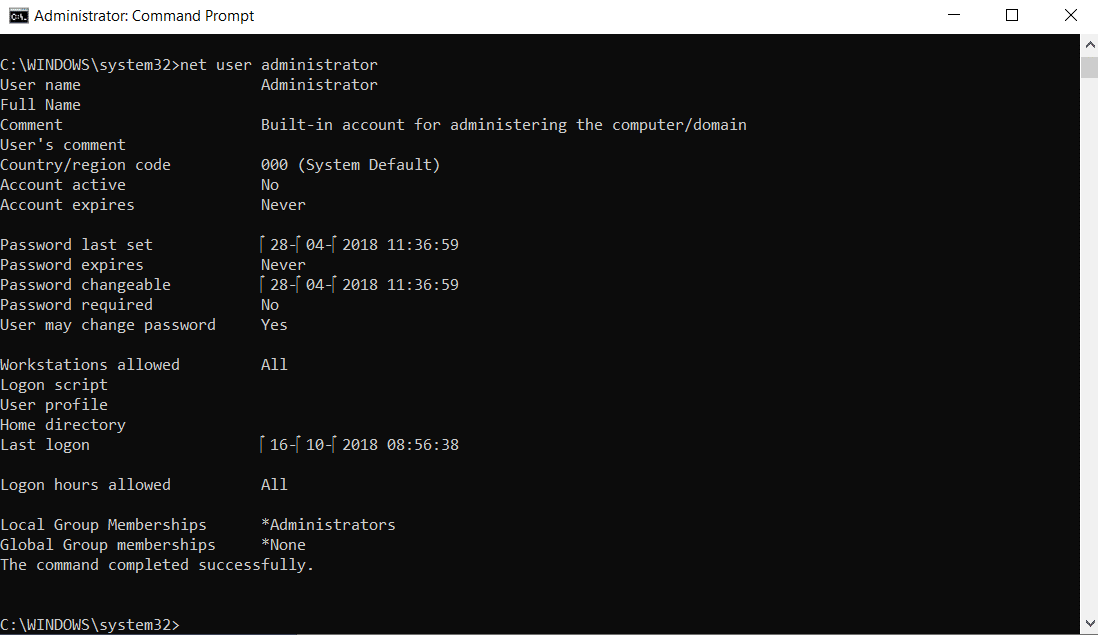
3. Type ‘net user administrator’ in the command prompt window. The present ‘Account active’ status would be ‘No.’
4. Type ‘net user administrator/active: yes’ You will receive a message ‘The command completed successfully’ after the completion.
5. To check if the Administrator Account is enabled, again type ‘net user administrator.’ The status of ‘Account active’ should now be ‘yes.’
2. Enable Administrator Account using User Management Tool to in Windows 10
Note: This method is only available for Windows 10 Pro.
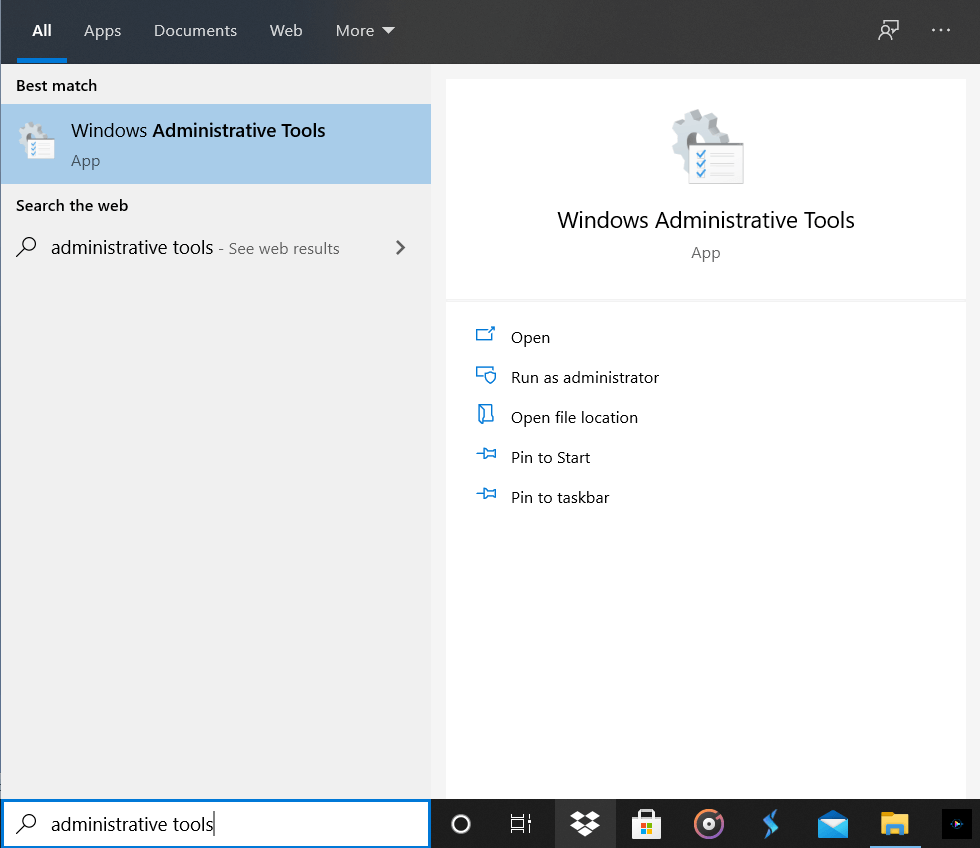
1. Open ‘Administrative tools’ via the Start Menu or using the Control Panel.
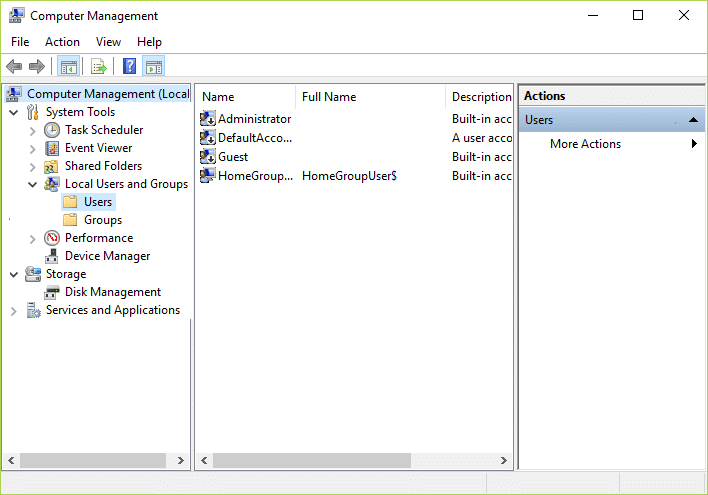
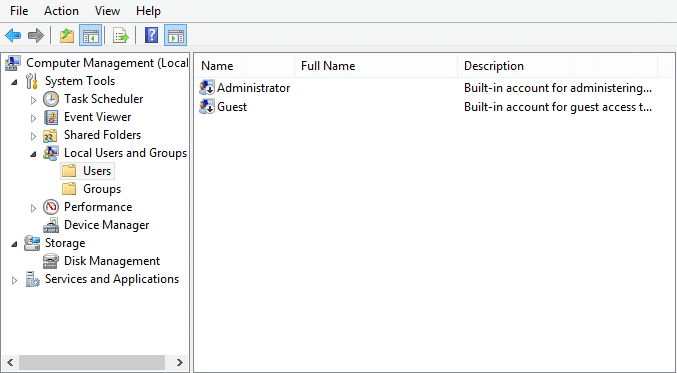
2. Click on ‘Computer Management.’ Open the ‘Local Users and Groups’ folder.
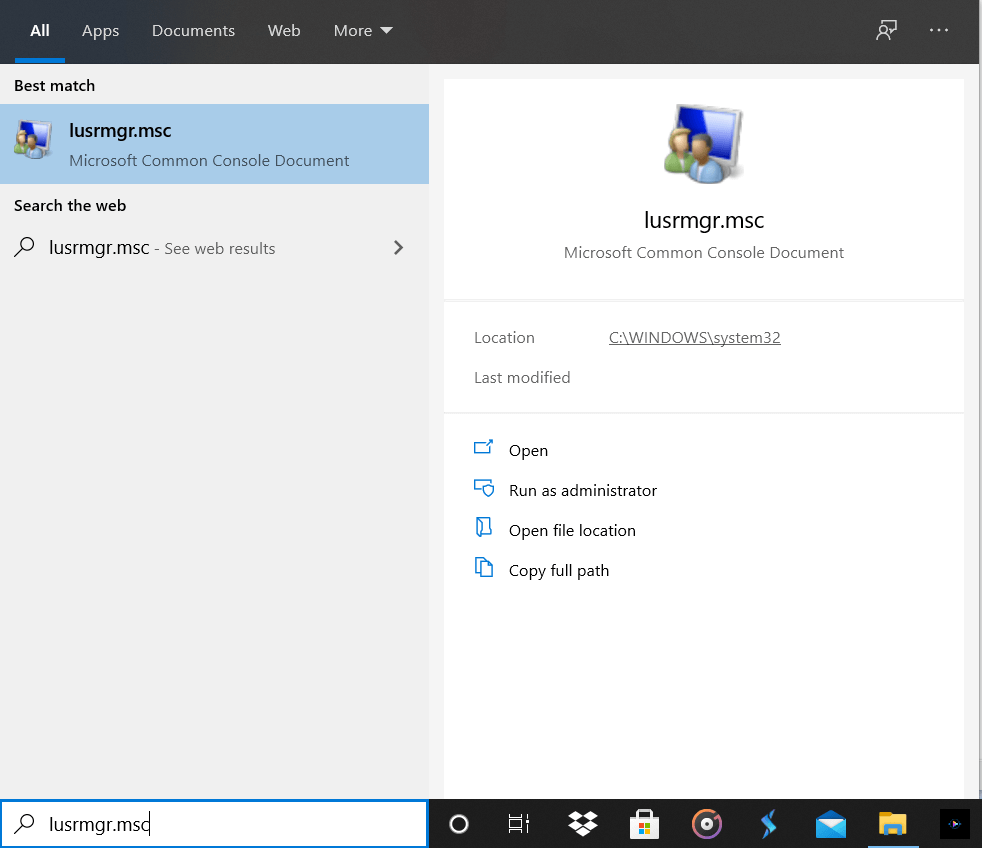
3. You can also do the above steps by directly typing ‘lusrmgr.msc’ in the search field.
4. Open the ‘Users’ folder and double-click on ‘Administrator Account.’ You can right-click and choose the Properties option as well.
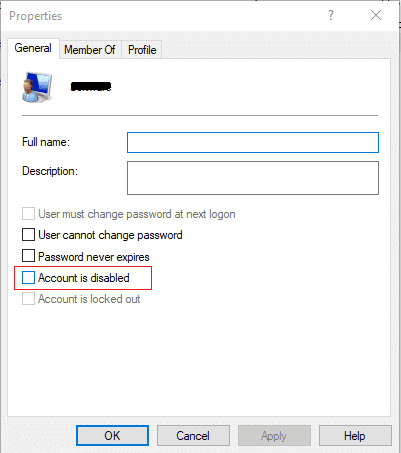
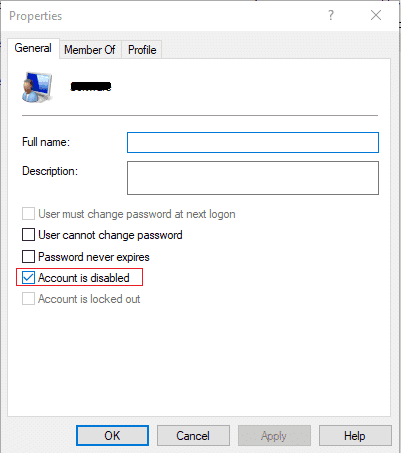
5. In the General tab, find the ‘Account is Disabled’ option. Uncheck the box and click on OK.
6. Close the window and log out from your current account.
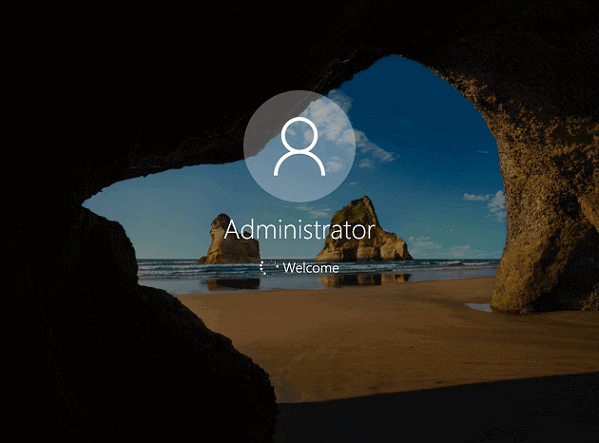
7. Sign in to the Administrator account. You can access it without any password and do all the tasks you want.
Also Read: Fix A Specified Logon Does Not Exist in Windows 10
3. Enable Administrator Account using Group Policy in Windows 10
Note: Doesn’t work for Windows 10 Home editions
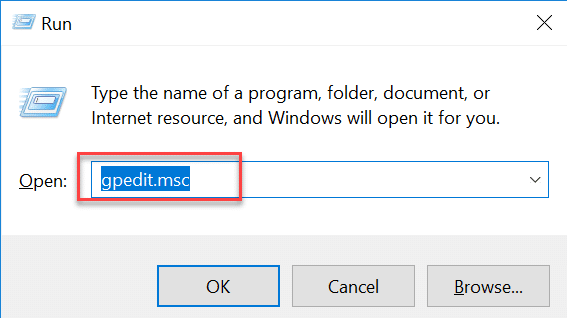
1. Press Windows Key + R together to open the run window.
2. Type ‘gpedit.msc’ and press enter.
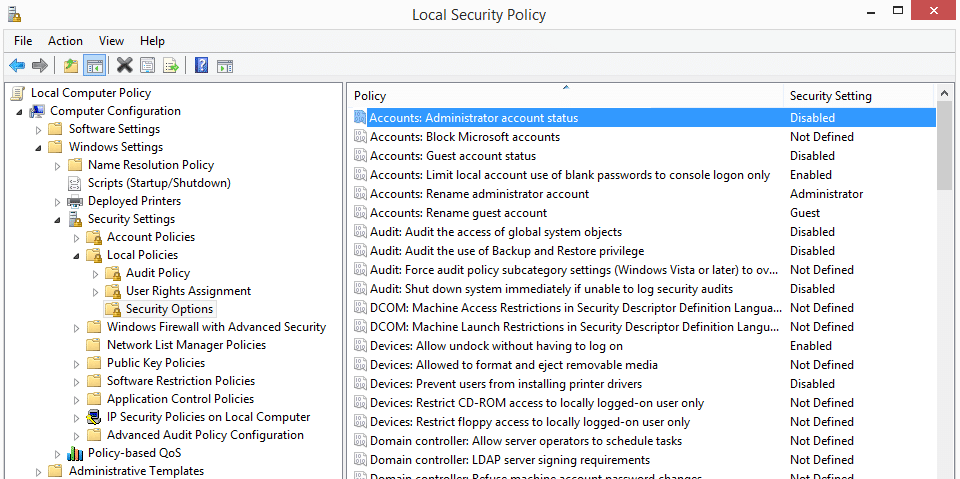
3. Click on ‘Local Computer Configuration’ and then ‘Windows Settings.’
4. Go to the ‘Security Settings’ and click on ‘Local Policies.’
5. Choose Security Options.
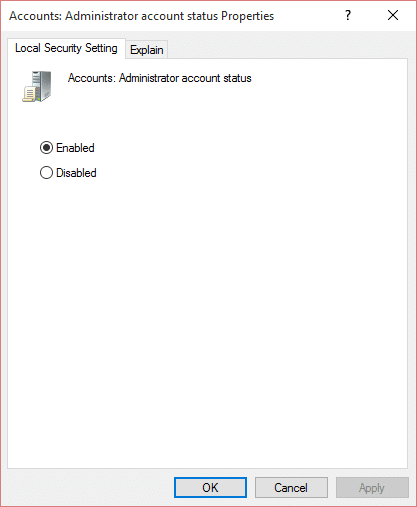
6. Checkmark Enabled under the ‘Accounts: Administrator account status.’
Also Read: [SOLVED] App can’t open using Built-in Administrator Account
How to Disable Administrator Account on Login Screen in Windows 10?
Knowing that the Administrator Account is compelling and easily misused, you should always disable it after finishing your required tasks. It can be disabled by command prompt and user management tools.
1. Disable Administrator Account using Command Prompt in Windows 10
1. Log out from the Administrator Account and log in again with your original account.
2. Open the Command Prompt window from the search menu and select Run as Administrator.
3. Type ‘net user administrator’ to check the status of your Administrator account.
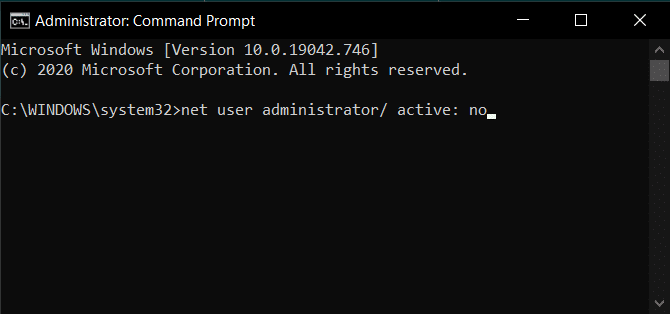
4. Once you have confirmed the status, type ‘net user administrator/ active: no’ to disable the Administrator account.
5. You’ll receive the message ‘The command completed successfully’ after the completion.
6. To check if the Administrator account is disabled, again type ‘net user administrator.’ The status of ‘Account active’ should now be ‘No.’
2. Disable Administrator account using User Management Tool to in Windows 10
1. Open ‘Administrative tools’ via the Start Menu or using the Control Panel.
2. Click on ‘Computer Management.’ Open the ‘Local Users and Groups’ folder.
3. You can also do the above steps by directly typing ‘lusrmgr.msc’ in the search field.
4. Open the ‘Users’ folder and double click on ‘Administrator Account.’ You can right-click and choose the Properties option as well.
5. In the General tab, find the ‘Account is disabled’ option. Check the unchecked box and click on OK to apply the changes.
Recommended:
An administrator account is powerful to access all the functions and data in your system. You can access your system even if you have been locked out if your administrator account is enabled. This can be very helpful but can be exploited very quickly as well. You should leave it disabled if you don’t have urgent requirements of the Administrator account. Enable or Disable administrator account on login screen in Windows 10 with caution.
