Fix Miracast Not Working on Windows 10

Suppose you found a great movie or a show on your laptop, and you want to cast it to your TV, or maybe to another PC using Miracast. Miracast is an application that allows a device to discover other devices and share its screen with others. With Miracast, users can easily cast their device screen onto another device without needing HDMI cables to do so. The only drawback is that the screen of the casting device will have to be turned on the whole time for screen sharing to take place. Or perhaps, you want to cast your phone screen to your TV or your PC. But, every time you try to do so, you get the error: Your PC doesn’t support Miracast. In this guide, we will learn to resolve Miracast not working on Windows 10 systems.
You can get Miracast from the Microsoft Store.
Many users complained that Miracast for Windows 8 and Miracast for Windows 10 don’t work. Fortunately, there are various methods by which you can fix your PC doesn’t support Miracast issue and continue enjoying your favorite shows and movies.
How to Fix Miracast Not Working on Windows 10
Here are some general reasons for Miracast not working on Windows systems:
- Intel Graphics not enabled: Miracast will only work on your PC if Intel Graphics are enabled. You also need to ensure that the graphics card drivers are updated or else, it will result in Miracast not supported by Graphics driver error.
- No Wi-fi connection: The devices sharing the screen and receiving the screen need to be connected to a Wi-Fi network, preferably the same network. Make sure that the said internet connection is stable.
- Incompatibility with Miracast: The error message you receive may mean that your device is not compatible with Miracast. You can check this out by running diagnostics, as explained later on in the article.
- Wireless Adapter Settings: If the wireless adapter settings of your PC are set to 5GHz, it might be causing the error message.
- Third-party software interference: Your PC may not be able to connect with Miracast because of third-party software interference. Other software like AnyConnect may conflict with Miracast.
Now that you have a better idea about why your PC doesn’t support Miracast error, let us discuss the possible solutions for this issue.
Method 1: Verify Miracast Compatibility
The first logical thing to do is to verify if your PC is capable of supporting Miracast. The network adapter and graphics drivers of your PC are the two essential components for a successful connection of Miracast with the computer. Therefore, to check Miracast not supported by Graphics driver, you need to run diagnostics for the network adapter and graphics drivers as explained below:
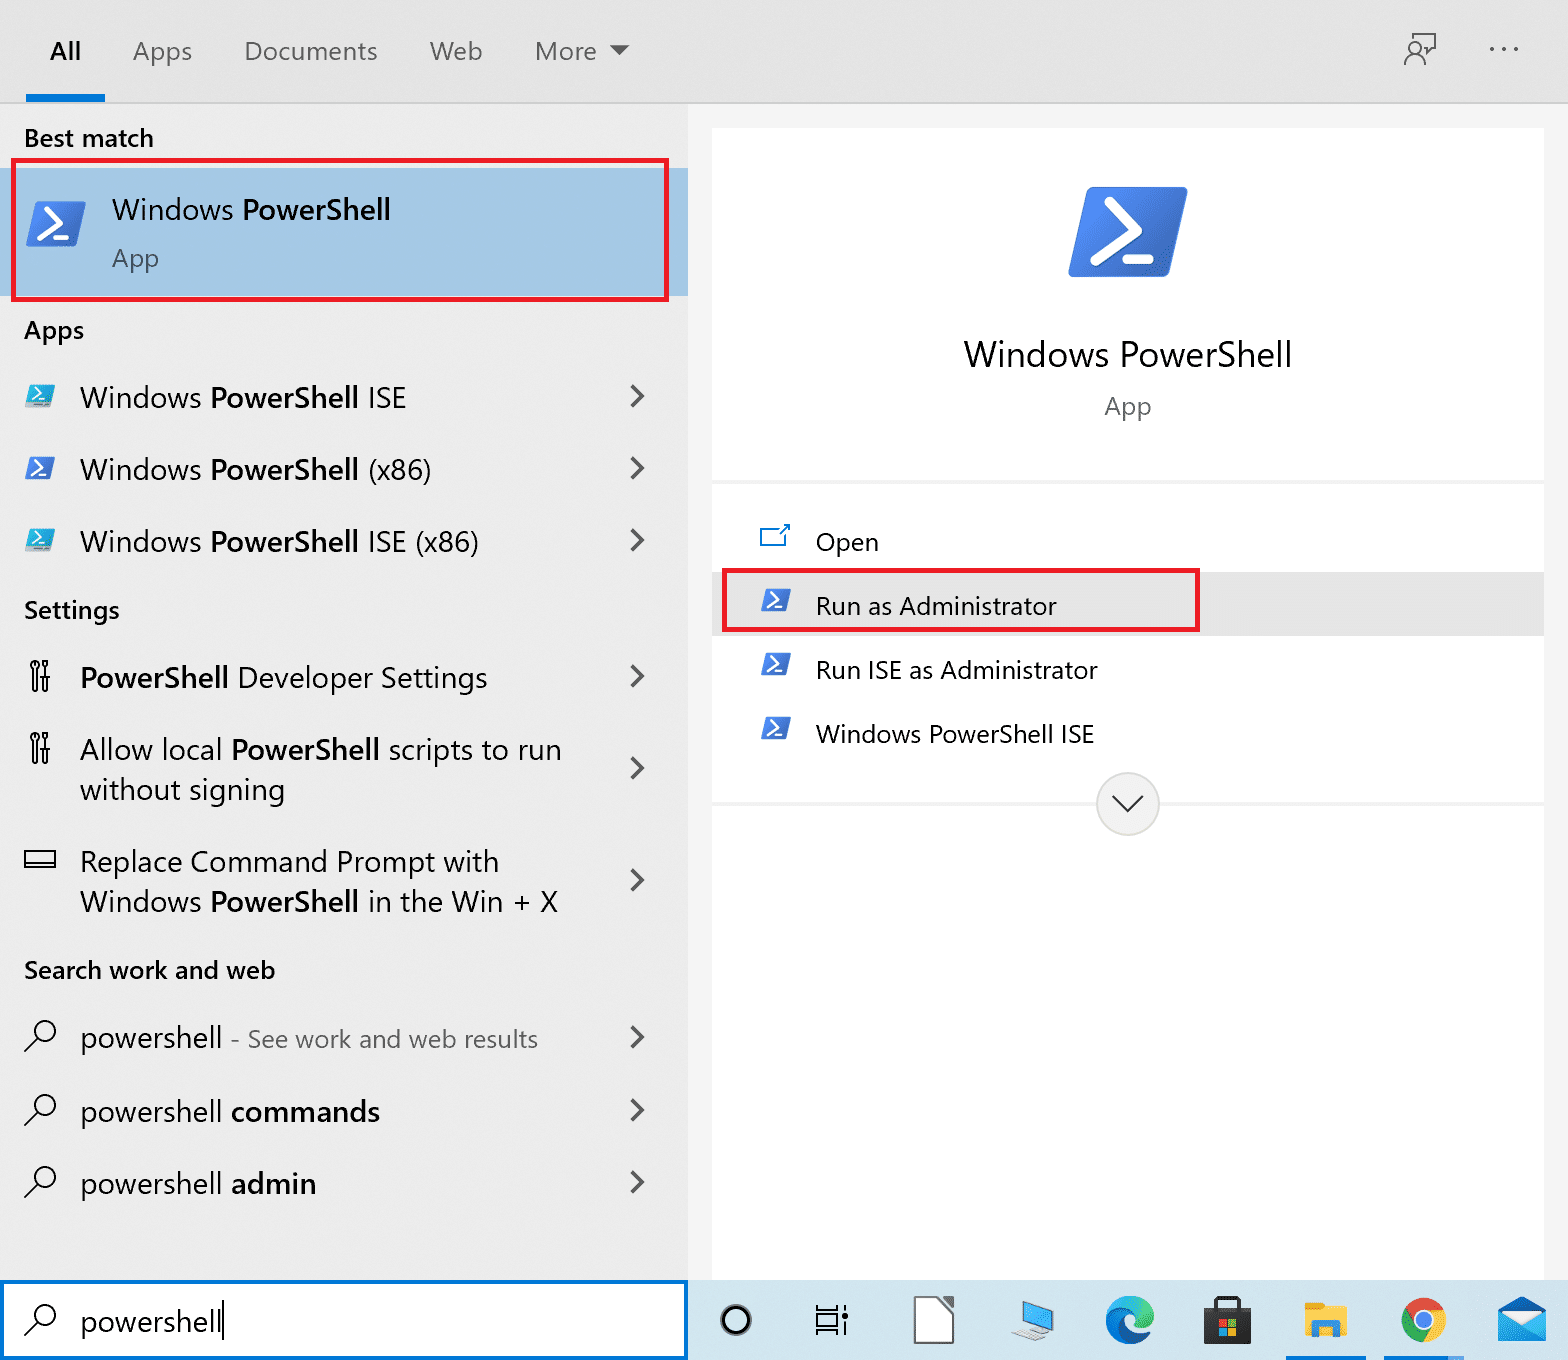
1. Type Powershell in the Windows search bar. Select Run as Administrator from the search results, as highlighted.
2. Type Get-netadapter|select Name, ndisversion in the Powershell window.
3. Then, press Enter to get information about the network adapter driver version.
4. Now, check the number under NdisVersion.
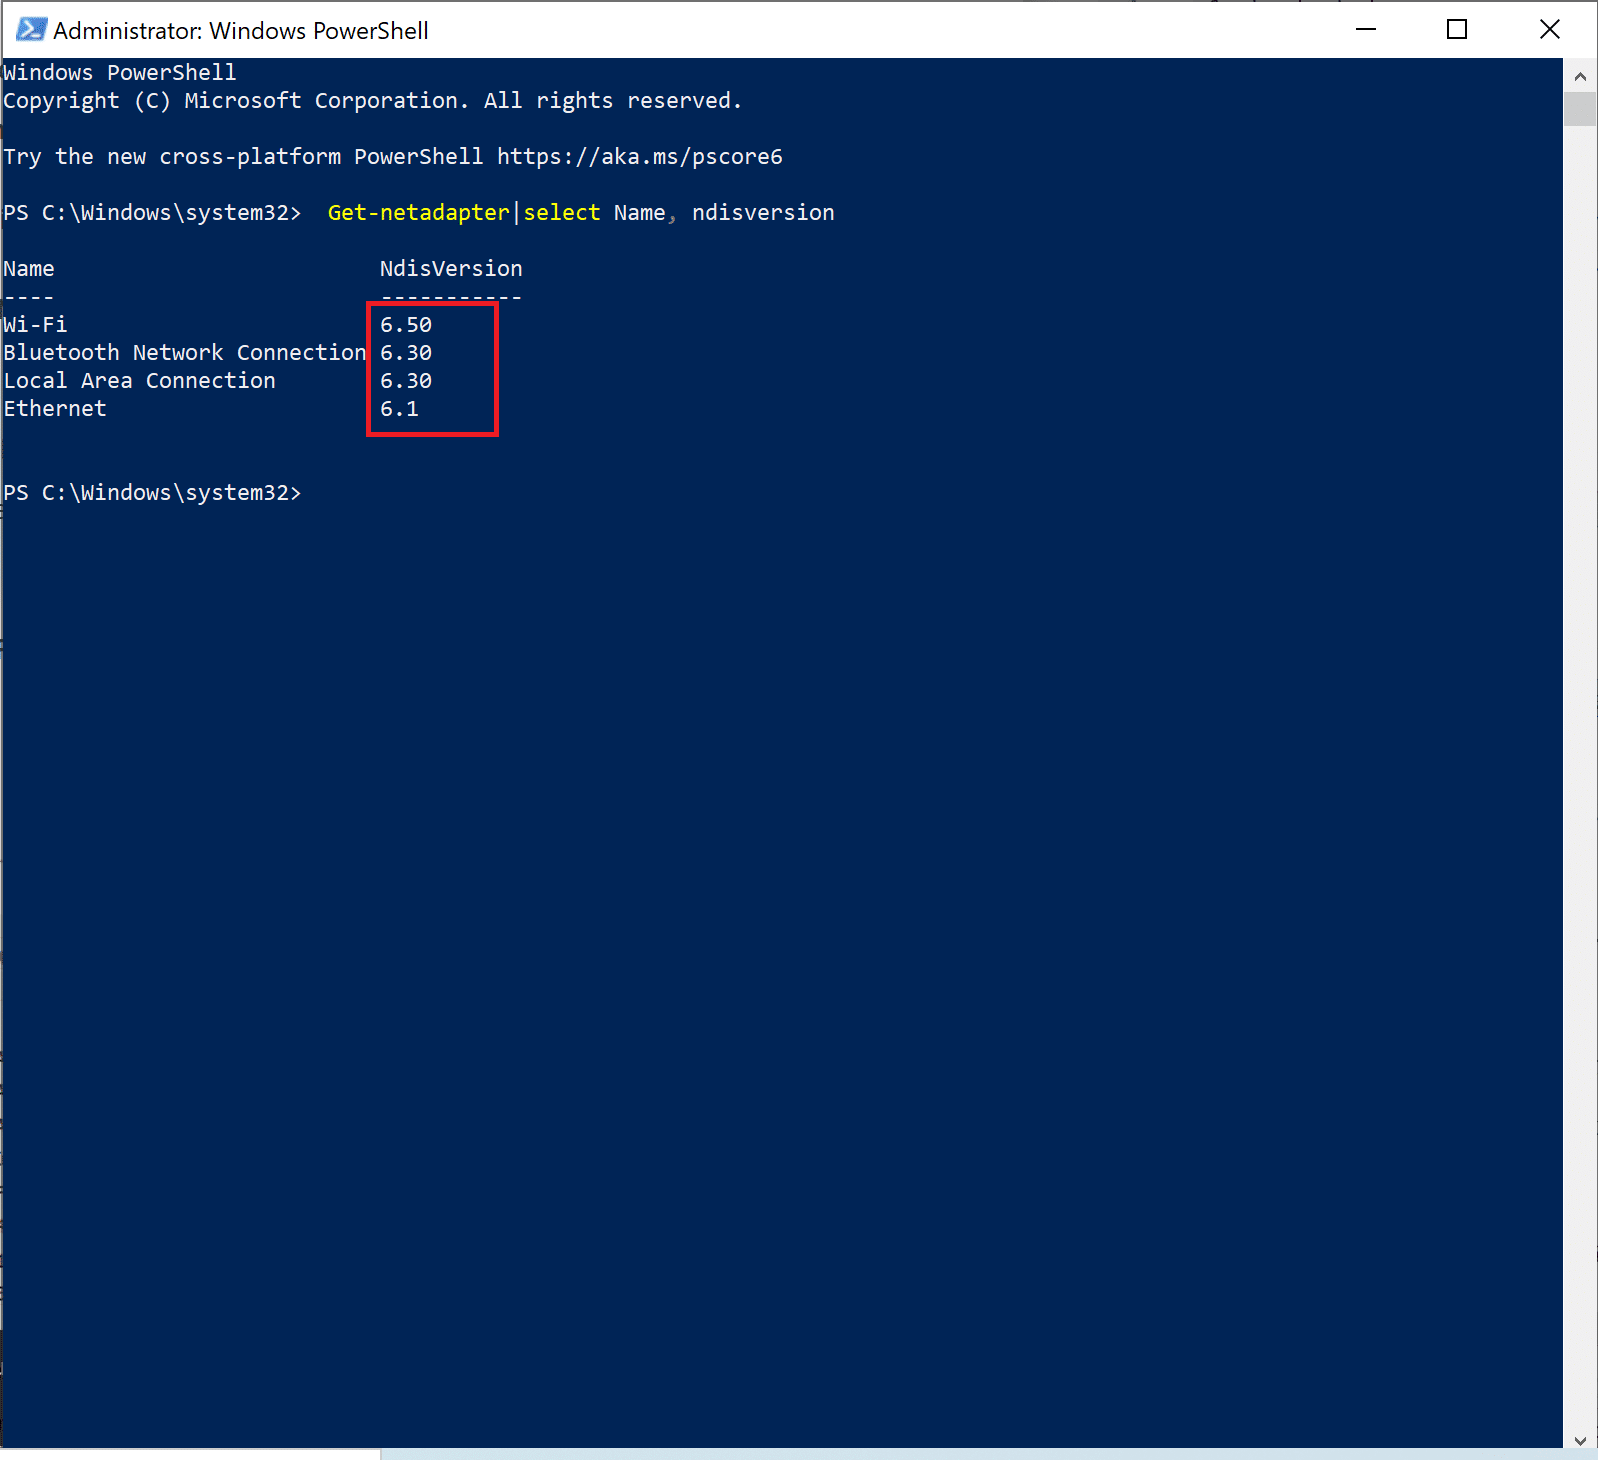
If the numbers for LAN, Bluetooth and Wi-Fi adapters is 6.30 or above, then the PC network adapter can support Miracast.
If the numbers are under 6.30, update your network adapter driver by following the next method.
Method 2: Update Wireless Network Adapter Drivers & Graphics Drivers
Part I: Running Diagnostics & then updating Network Driver
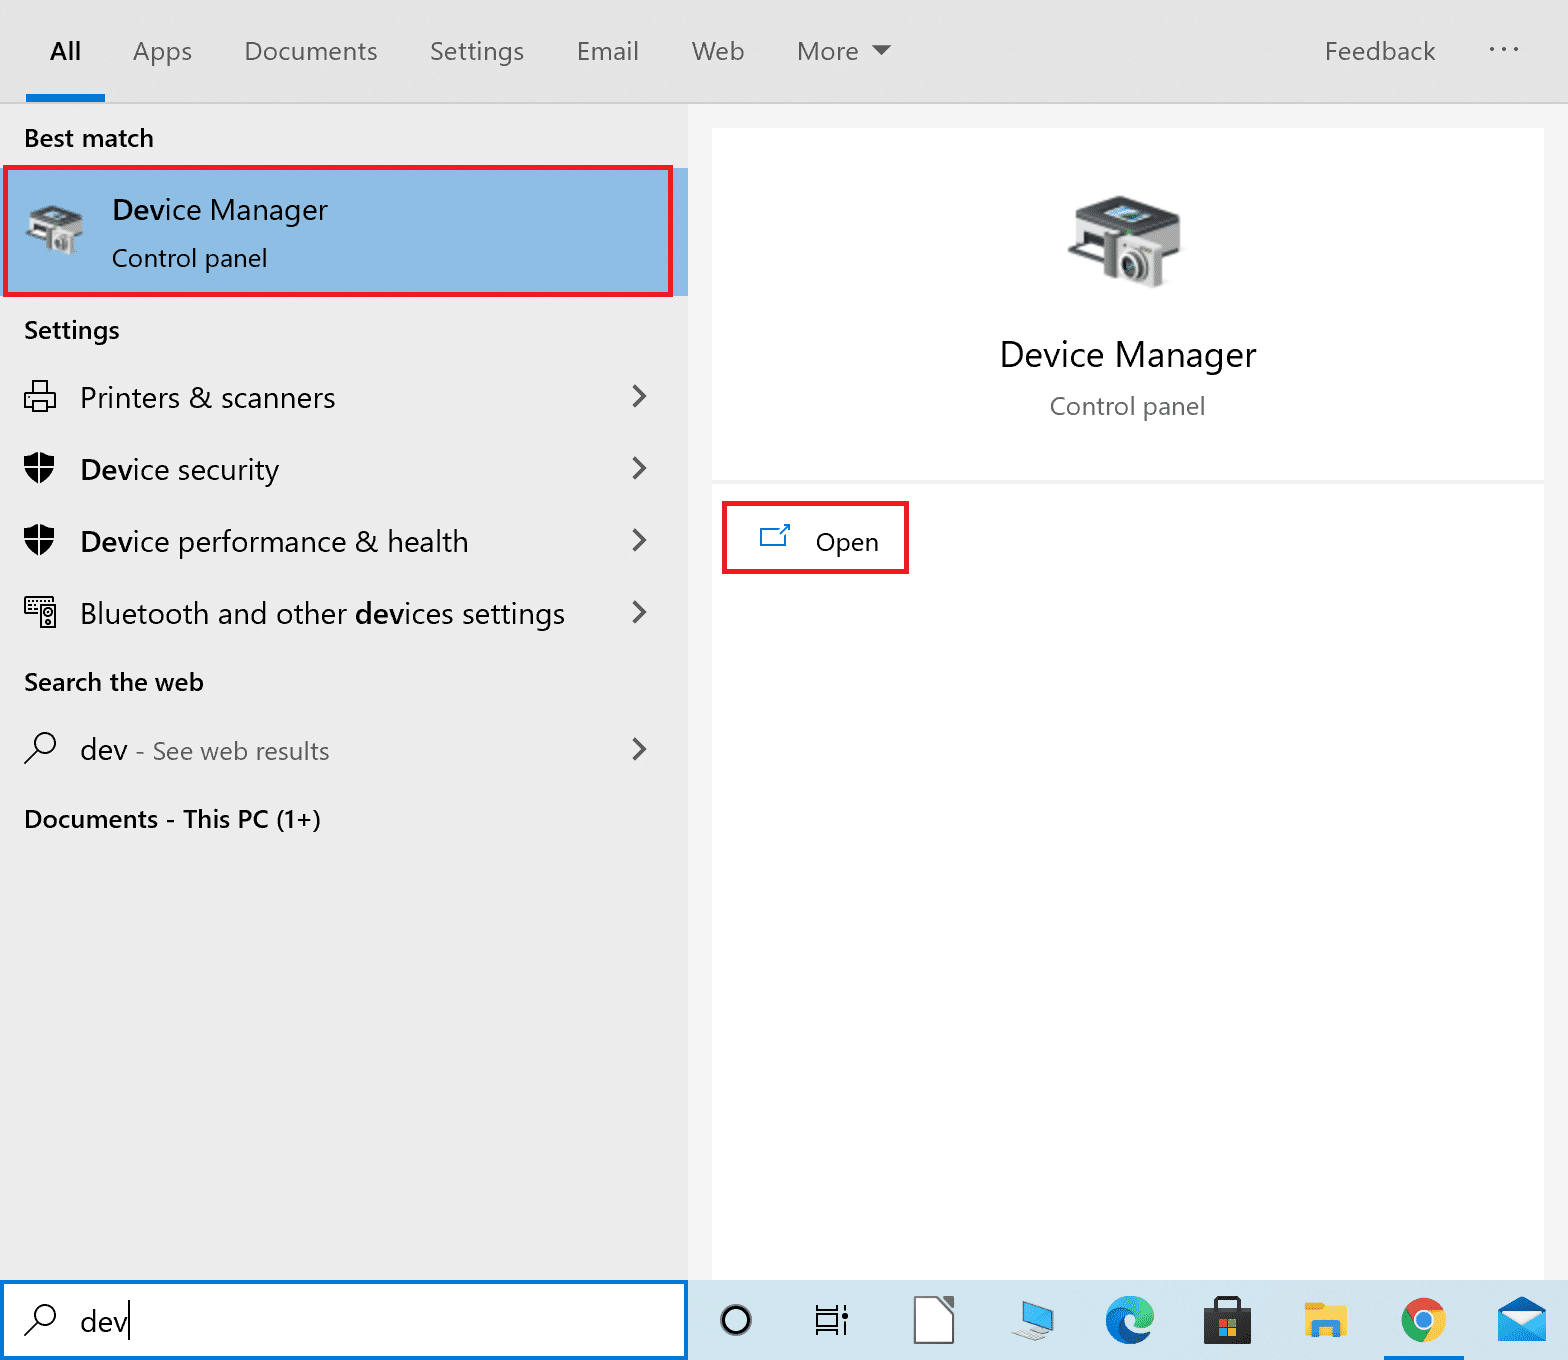
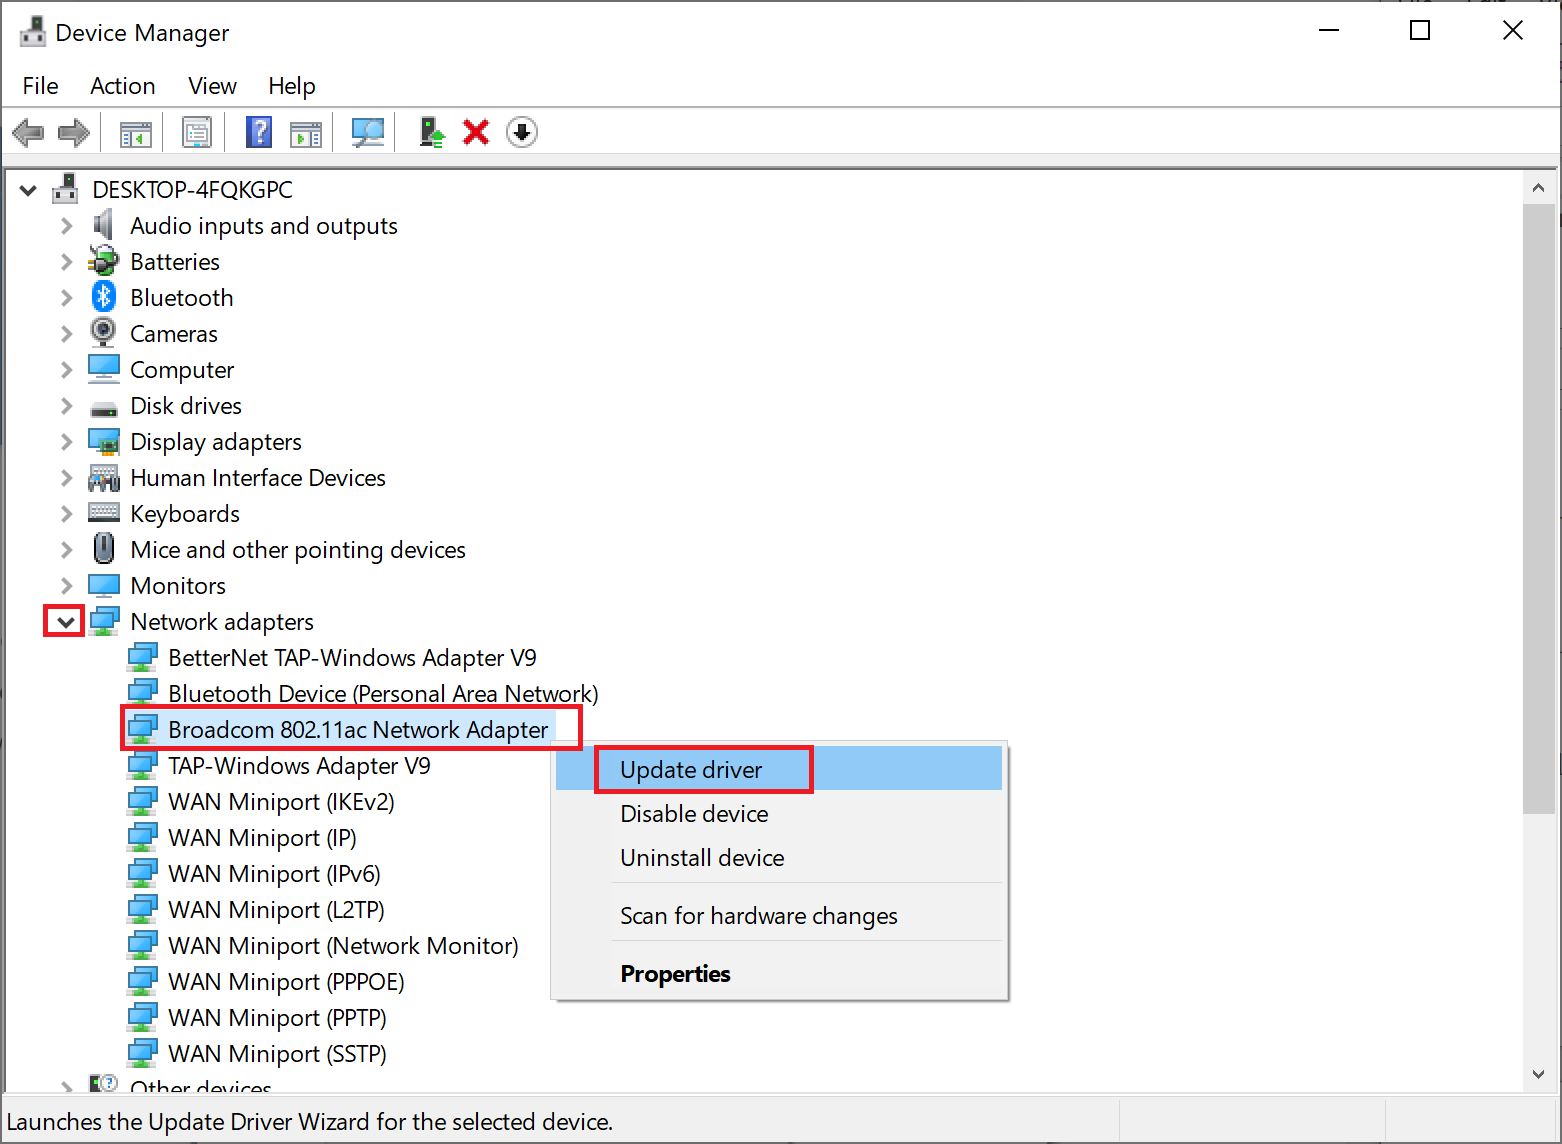
1. Type Device Manager in the Windows search bar and launch it as shown.
2. In the Device Manager window, click on the downward arrow next to Network adapters to expand it.
3. Right-click on the wireless network adapter driver and select Update Driver, as shown below.
Note: If the above steps did not work for you, then it means that your PC is not compatible with Miracast. You do not need to follow the rest of the methods.
Part II: Running Diagnostics & then, updating Graphics Driver
Now, run the next set of diagnostics for the equally significant component i.e., Graphics Drivers. For this, you need to run DirectX Diagnostics.
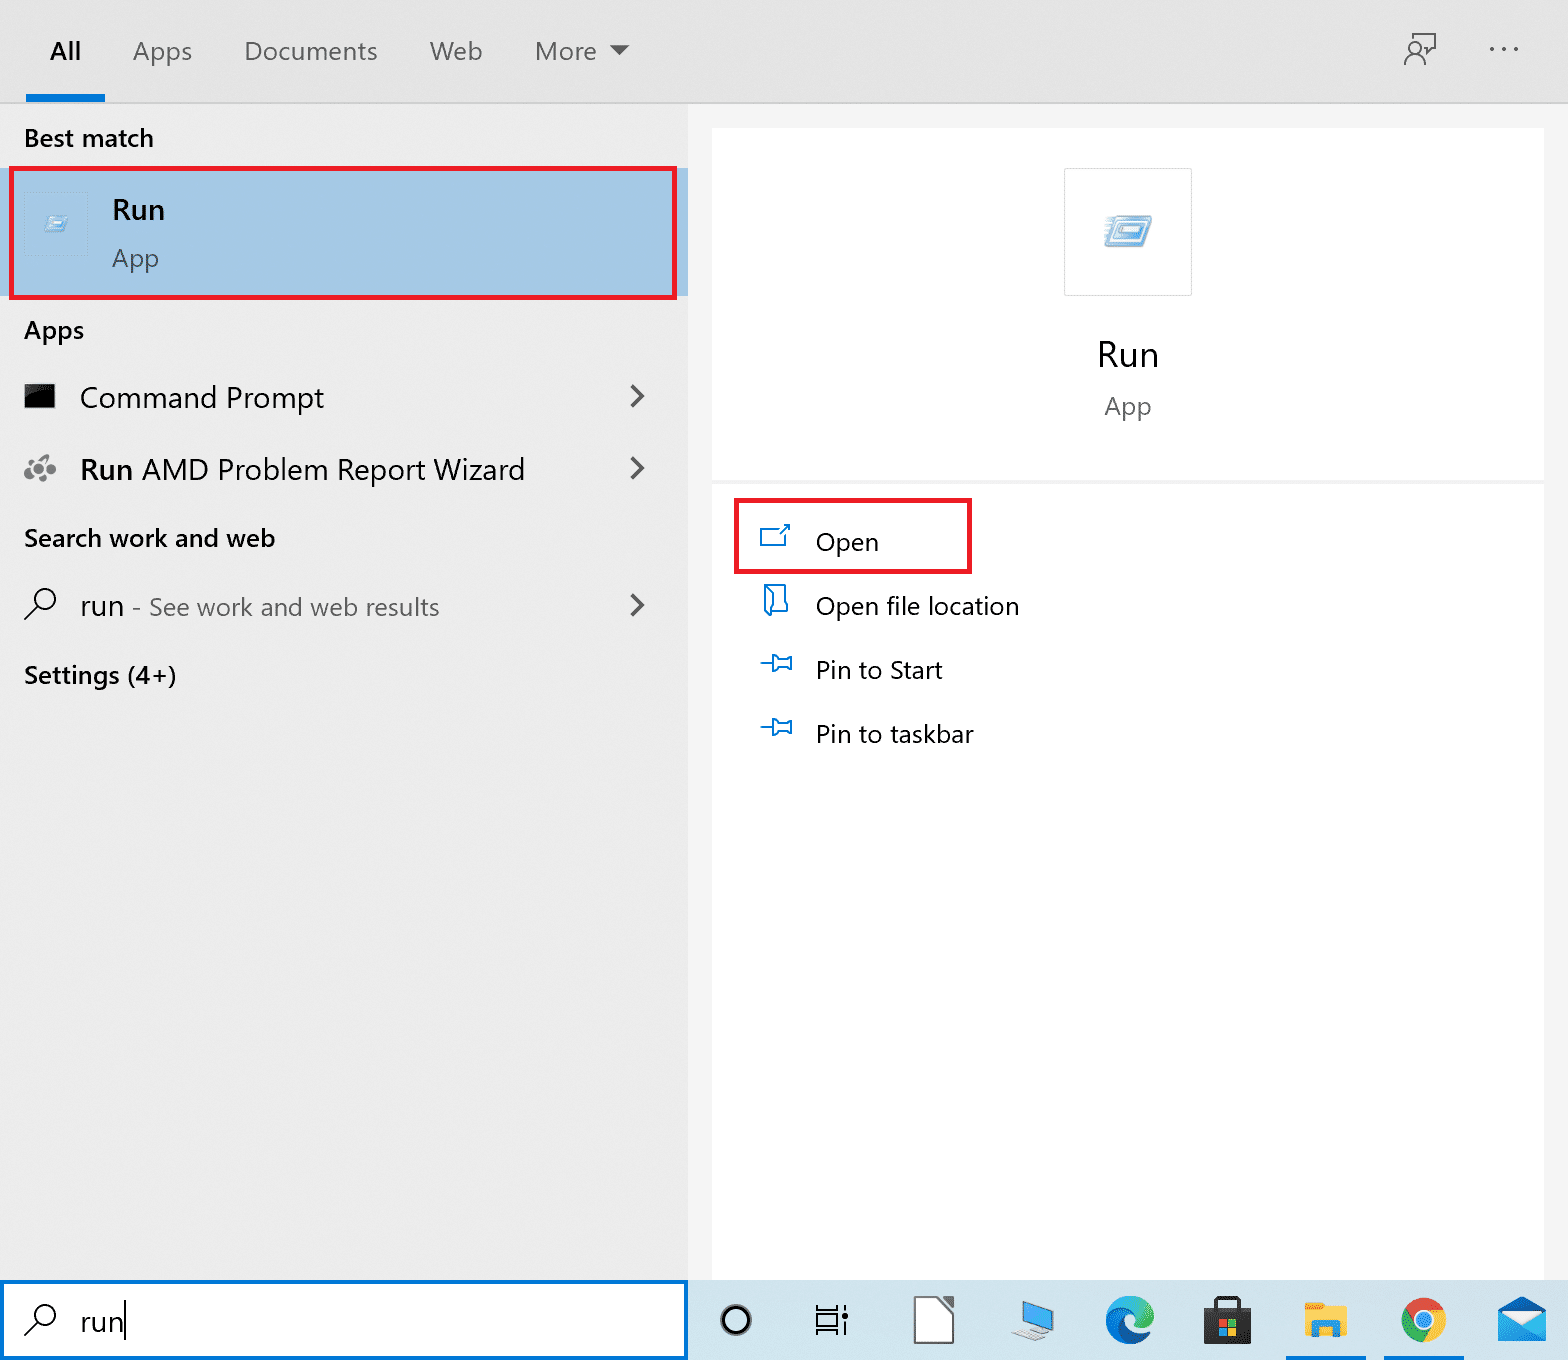
1. Type Run in the Windows search bar and launch the Run dialogue box from here.
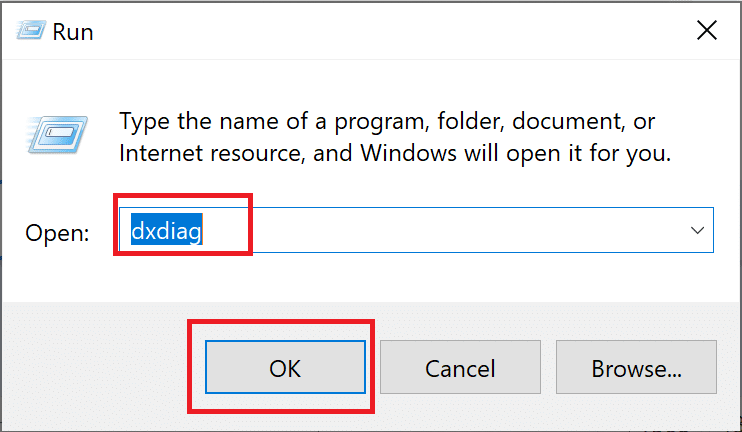
2. Next, type dxdiag in the Run dialogue box and then click on OK as shown below.
3. Now, the DirectX Diagnostic Tool will open. Click on the Display tab.
4. Go to the Drivers pane on the right-hand side and check the Driver Model, as highlighted.
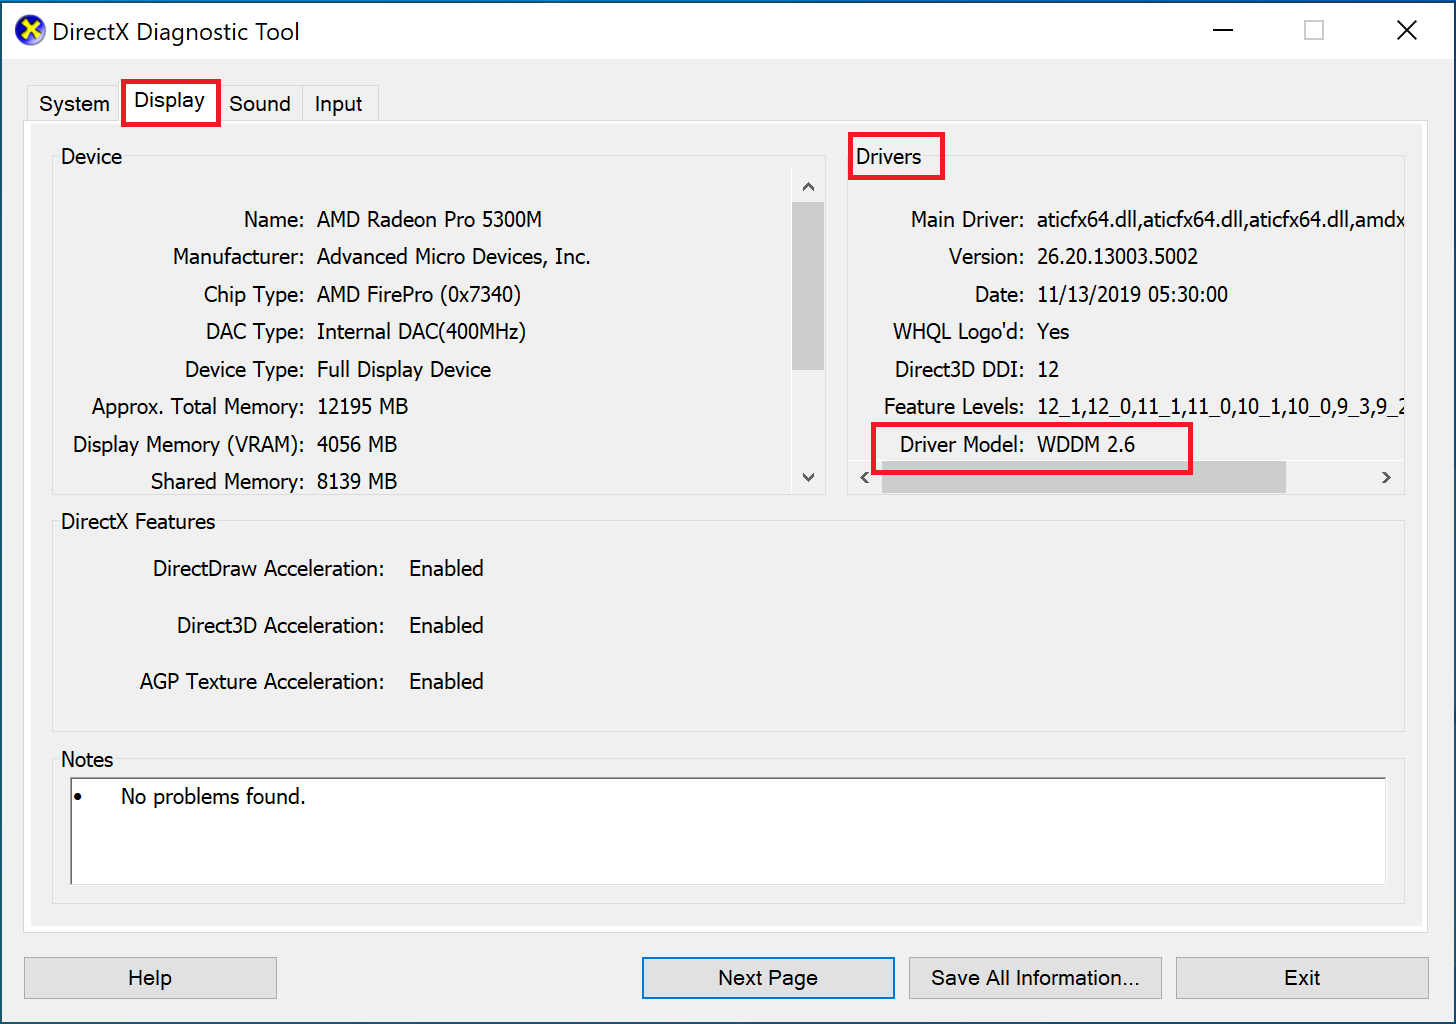
5. If the Driver Model is below WDDM 1.3, your PC is not compatible with Miracast.
If the Driver Model is WDDM 1.3 or above, then your PC is compatible with Miracast.
Also Read: How to Set up & Use Miracast on Windows 10
Method 3: Enable Wi-Fi on Both Devices
Miracast does not need both devices to be connected to the same Wi-Fi network, but both devices should have Wi-Fi enabled on them. Here’s how to fix Miracast not working Windows 10 issue:
1. Type Wi-Fi in the Windows search bar. Launch Wi-Fi settings from the search results as shown.
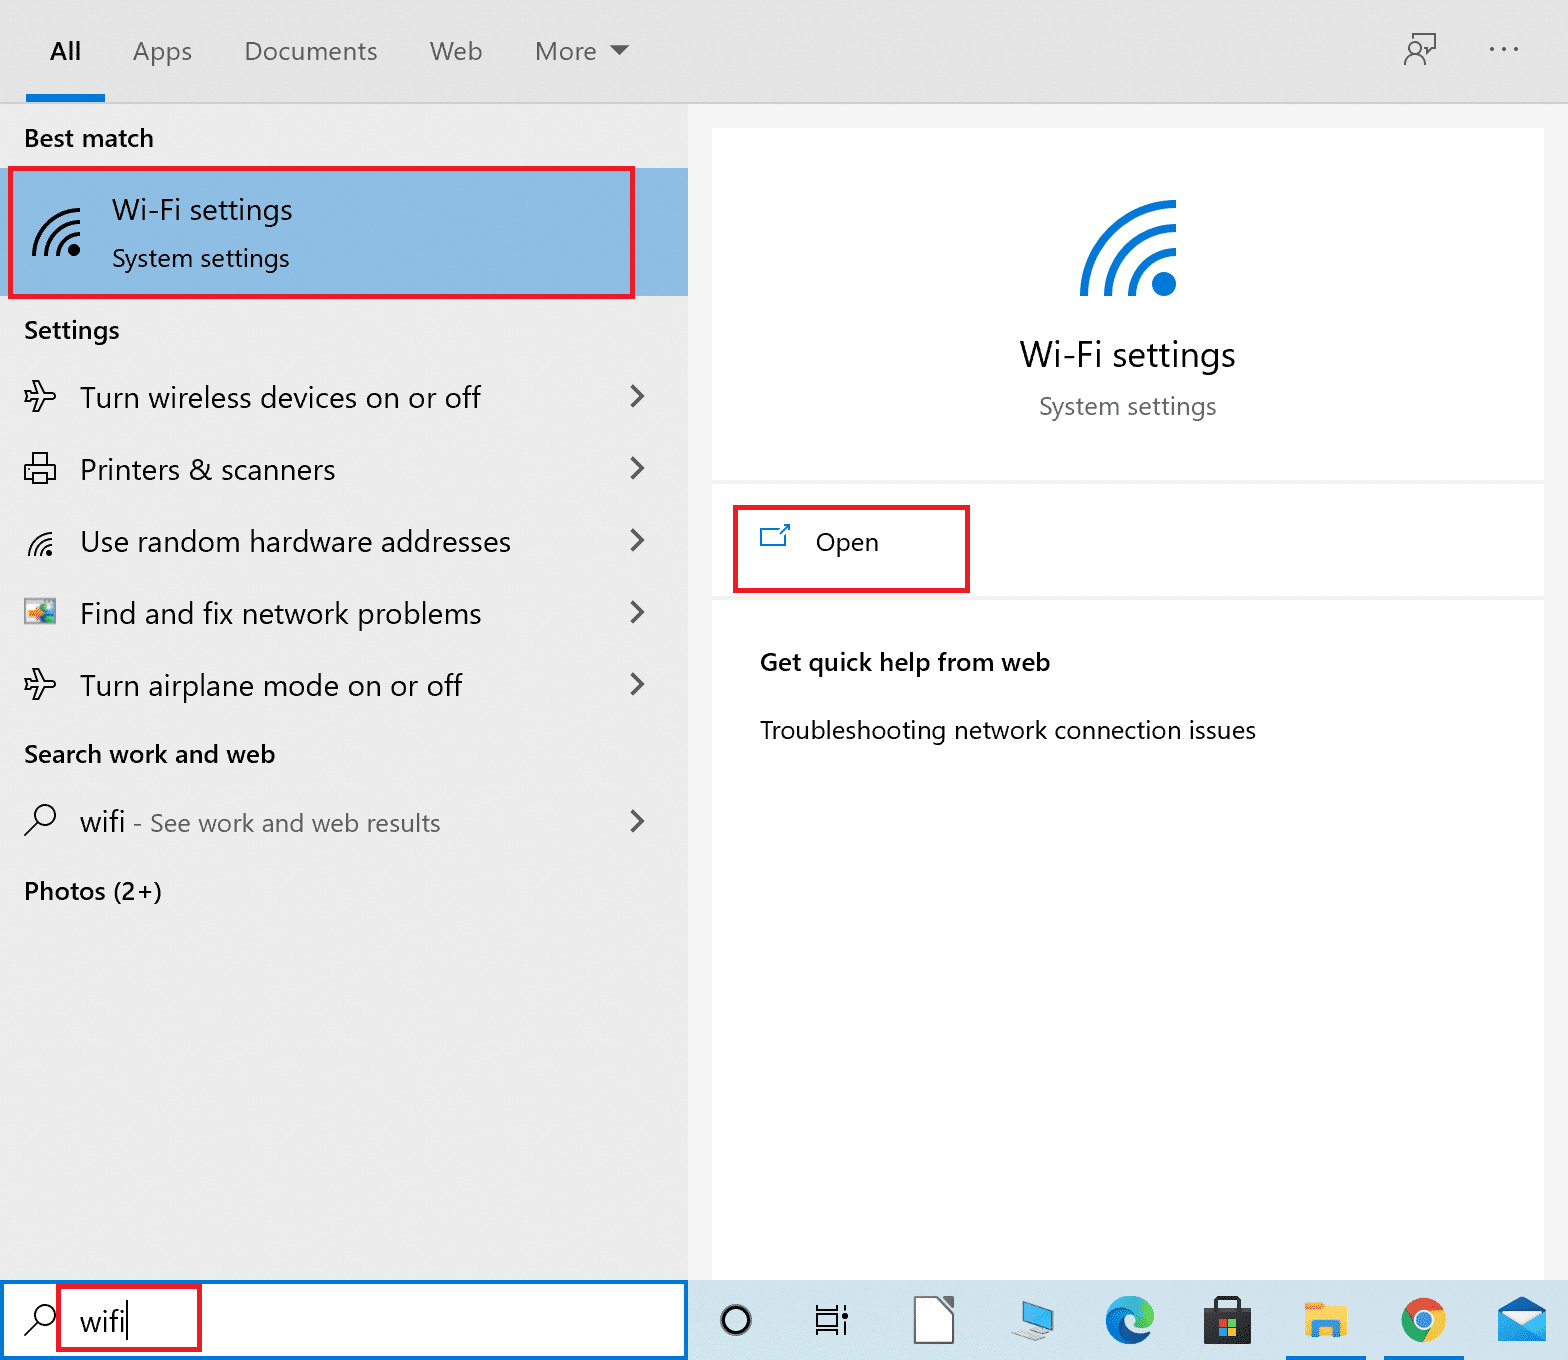
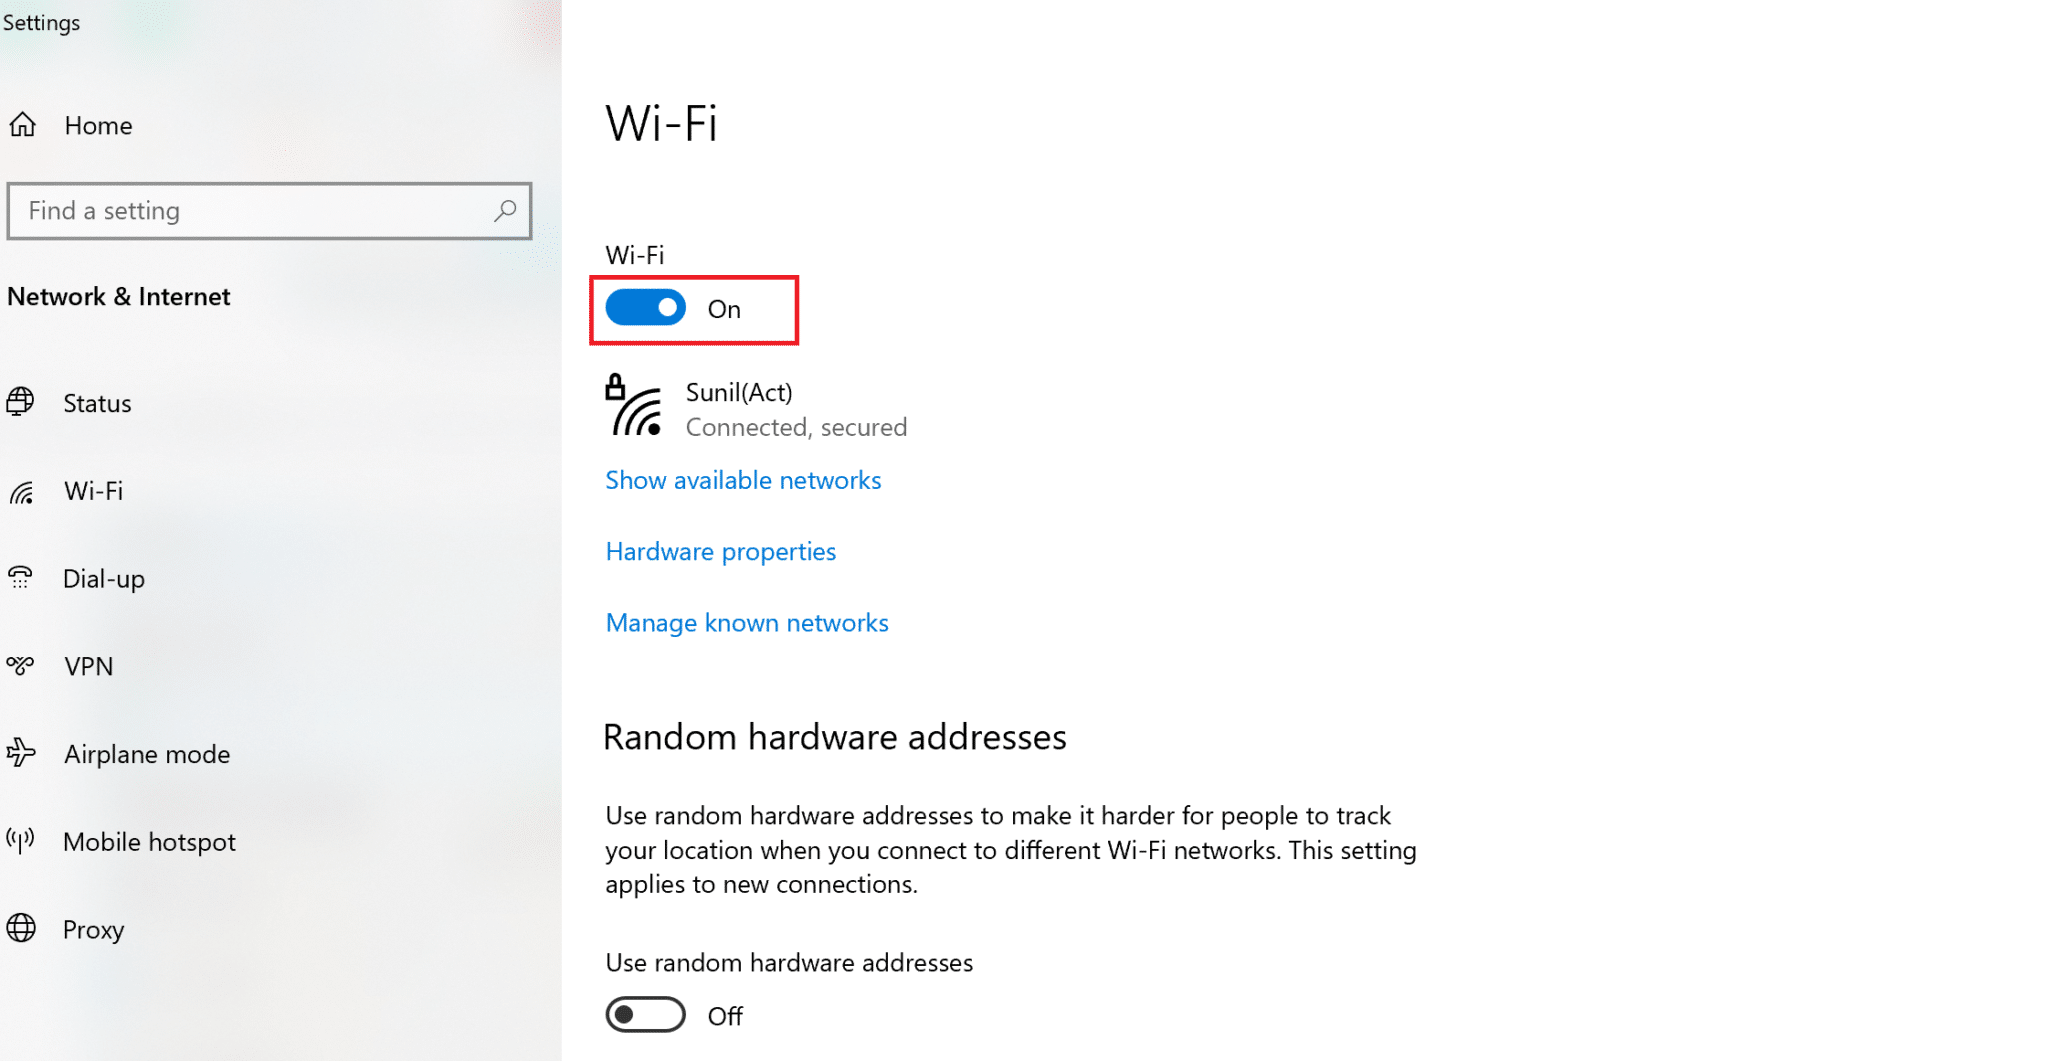
2. On the right-pane of the settings window, ensure to toggle on Wi-Fi.
3. Similarly, enable Wi-Fi on your smartphone, as illustrated.
![]()
Method 4: Enable Integrated Graphics
For a Miracast connection to work, you need to ensure that the Intel Integrated Graphics are enabled on your PC. Here’s how to fix Miracast not supported by Graphics driver issue by modifying Graphics settings in the BIOS settings of your Windows 10 computer.
1. Follow our guide on How to access BIOS in Windows 10 to do the same on your computer.
Note: BIOS menu will look different for different motherboards. For information regarding the BIOS of a particular model or brand, visit the manufacturer website or check the user manual.
2. Once you enter the BIOS screen, go to Advanced settings or Expert settings.
3. Next, locate and click on Advanced Chipset Features from the left panel.
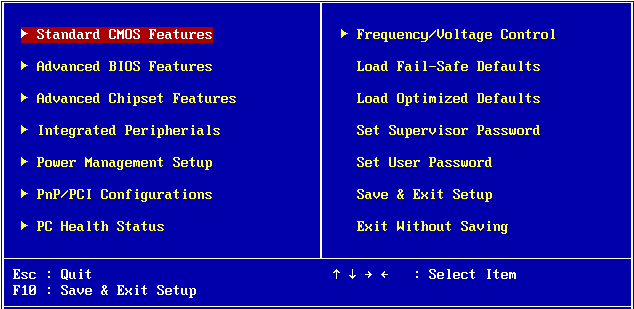
4. Here, go to Primary Graphics Adapter or Graphics Configuration.
5. Then select IGP > PCI > PCI-E or iGPU Multi-Monitor to enable Integrated Graphics on your device.
Also Read: Fix Graphics Card Not Detected on Windows 10
Method 5: Change Wireless Adapter Settings
There is a high chance that the wireless adapter is set to Auto instead of 5GHz or 802.11blg and thus, causing Miracast not working on Windows 10 issue. Follow the steps given below to change the wireless adapter settings:
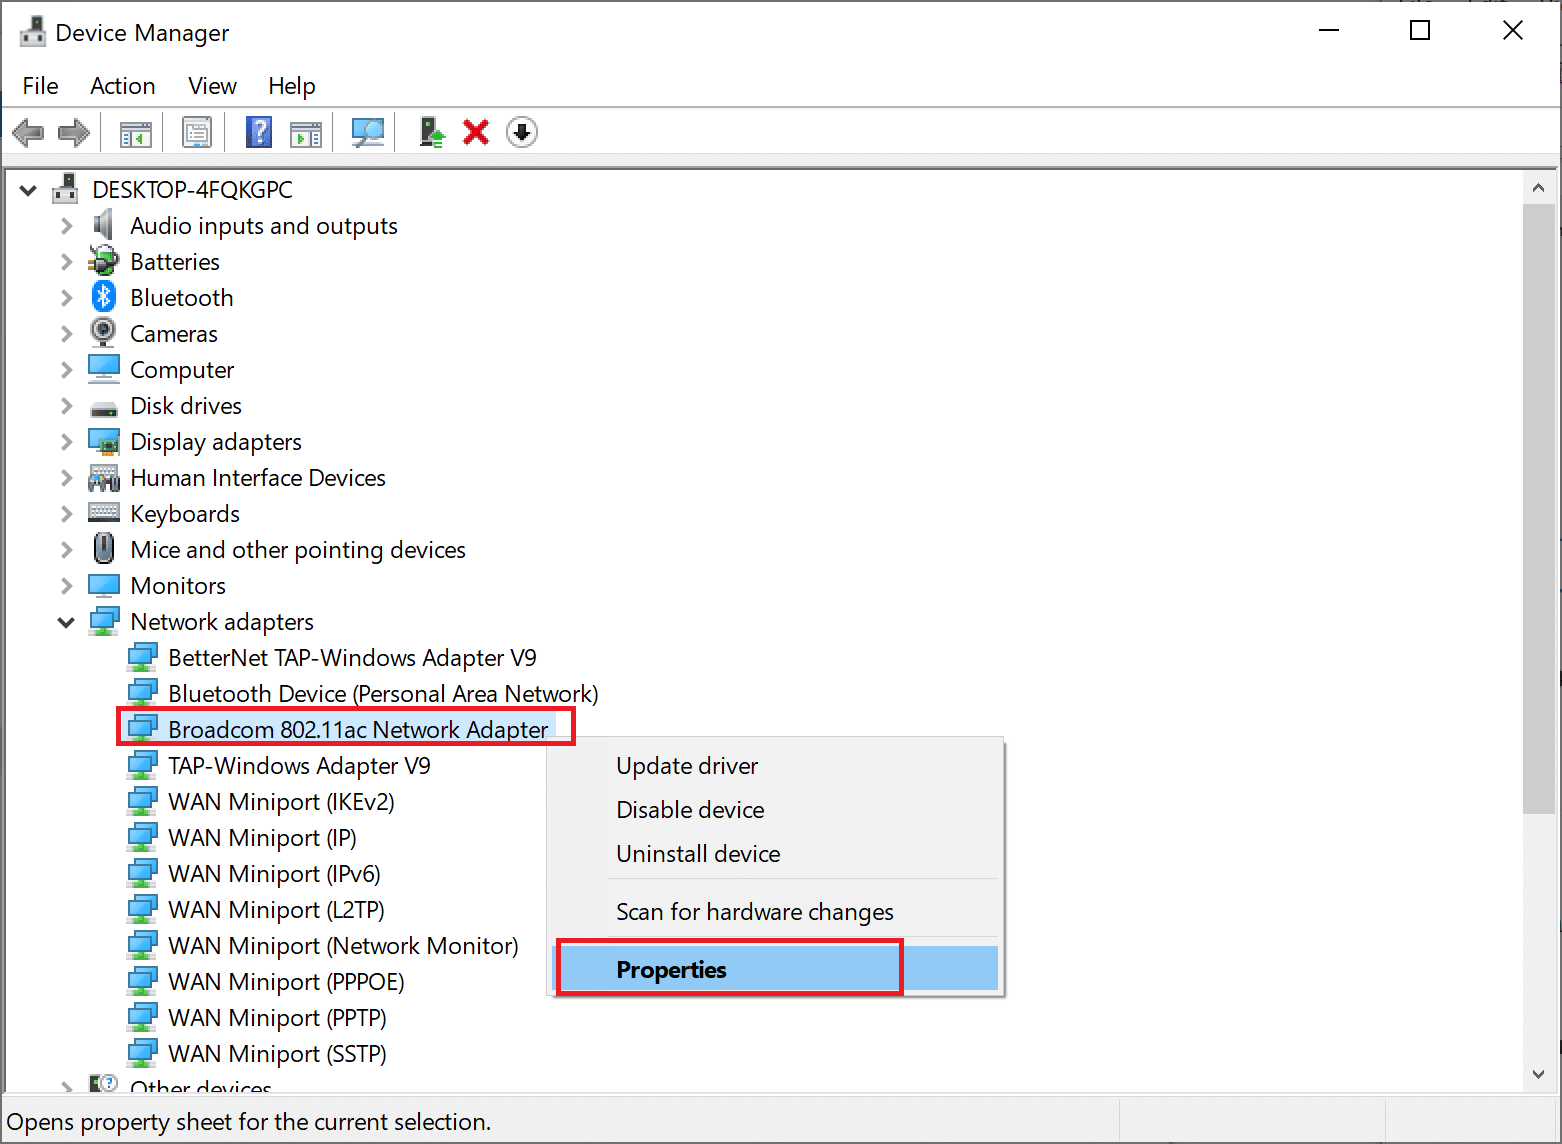
1. Launch Device Manager and expand Network adapters as explained in Method 2.
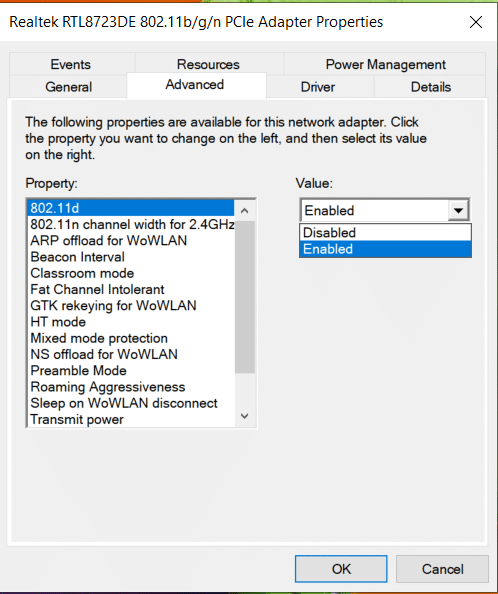
2. Then, right-click on the wireless network adapter and select Properties, as depicted.
3. In the Properties window, switch to the Advanced tab.
4. Under Property, click on Wireless Mode Selection.
5. From the Value drop-down, select Enabled and click on OK.
Restart the computer and then check if Your PC doesn’t support Miracast error is rectified.
Method 6: Disable VPN (If applicable)
If a third-party VPN is enabled on your computer, it will interfere with Miracast connection. Therefore, disable it as follows:
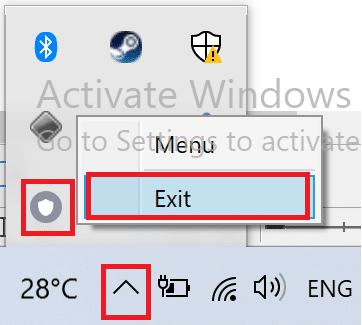
1. Go to the bottom right side of the Taskbar and right-click on the third-party VPN software.
2. Then, click on Exit or a similar option, as shown.
Also Read: What is VPN? How it Works?
Method 7: Reinstall Wireless Network Adapter Drivers
If updating Wireless Network Adapter Driver and disabling conflicting programs didn’t work, there is a good chance that doing so will fix the Miracast not working on Windows 10 issue. Just follow the steps below to uninstall and then, install drivers for wireless network adapter.
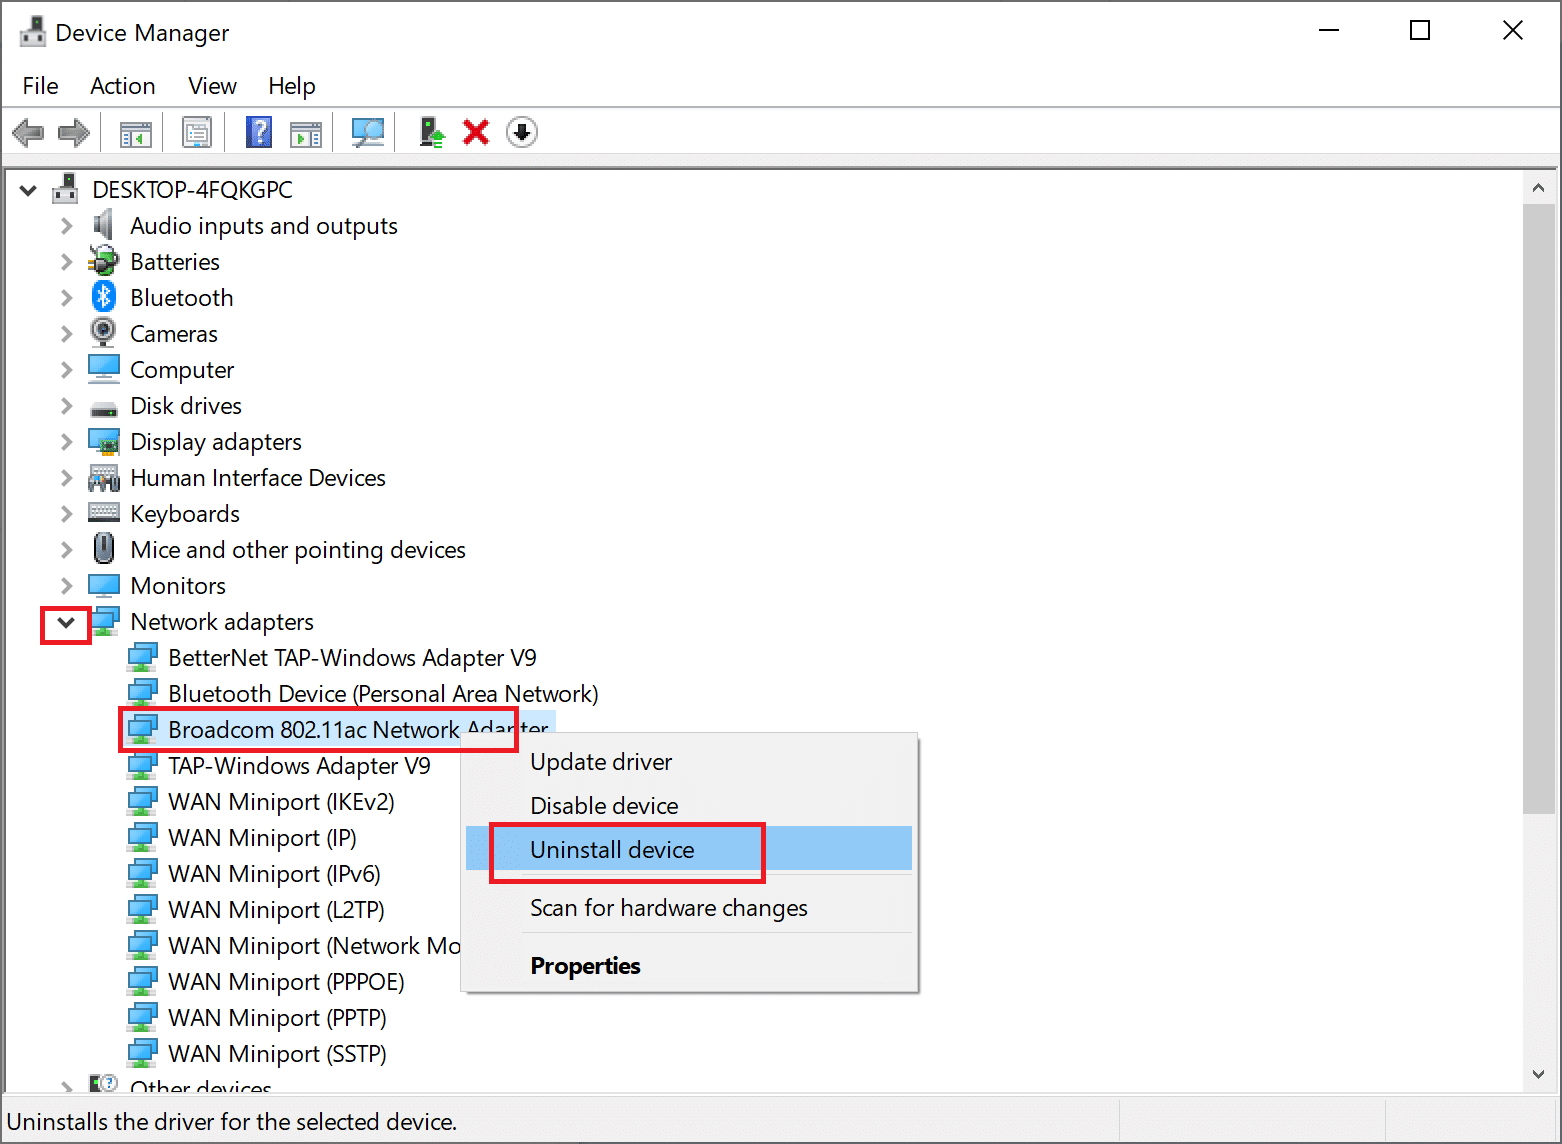
1. Launch Device Manager as explained previously.
2. Now, expand Network adapters in this window.
3. Right-click on the wireless network adapter and then select Uninstall device as highlighted.
4. Select Uninstall in the pop-up box to confirm the uninstallation.
5. Finally, restart your PC. Windows will automatically reinstall the missing wireless network adapter drivers when the computer restarts.
Recommended:
We hope that this guide was helpful and you could fix Miracast not working or your PC doesn’t support Miracast issue on your Windows 10 desktop/laptop. Let us know which method worked for you. Also, if you have any questions or suggestions, feel free to drop them in the comments section below.