How to Disable Search Indexing in Windows 11

Windows Search Index provides search results quickly by looking for a file or app or setting from within predefined areas. Windows Search Index offers two modes: Classic & Enhanced. By default, Windows indexes and returns search results using Classic indexing which will index data in user profile folders such as Documents, Pictures, Music, and the Desktop. By default, the Enhanced indexing option indexes the full contents of your computer, including all hard disks and partitions, as well as Library and Desktop. Today, we have explained how to enable or disable Windows search indexing in Windows 11 PCs.
How to Disable Search Indexing in Windows 11
Despite its obvious advantages, switching to the Enhanced indexing options may increase battery drainage and CPU usage. Thus, follow any of the given methods to disable Windows search indexing options in Windows 11 PCs.
Option 1: Stop Windows Search Service in Services Window
Here are the steps to disable Windows search indexing through Services app:
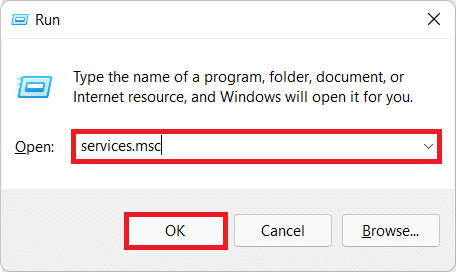
1. Press Windows + R keys together to open Run dialog box.
2. Type services.msc and click on OK to open Services window.
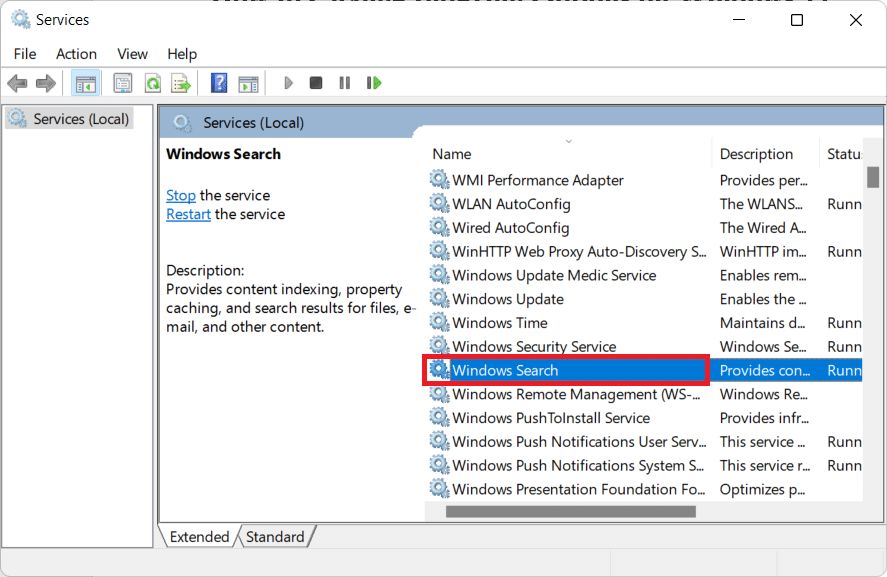
3. Scroll down and find Windows Search service in the right pane and double-click on it, as shown.
4. In Windows Search Properties window, click on Stop button, shown highlighted.
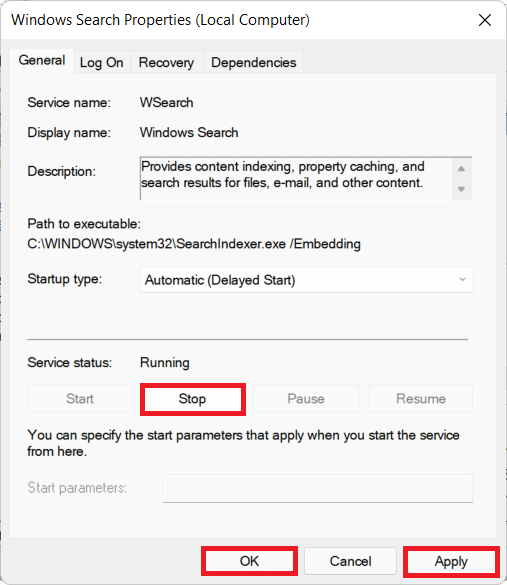
5. Click on Apply > OK to save these changes.
Also Read: How to Restore Missing Recycle Bin Icon in Windows 11
Option 2: Run Stop Command in Command Prompt
Alternatively, run given command in CMD to disable Windows Search Indexing feature:
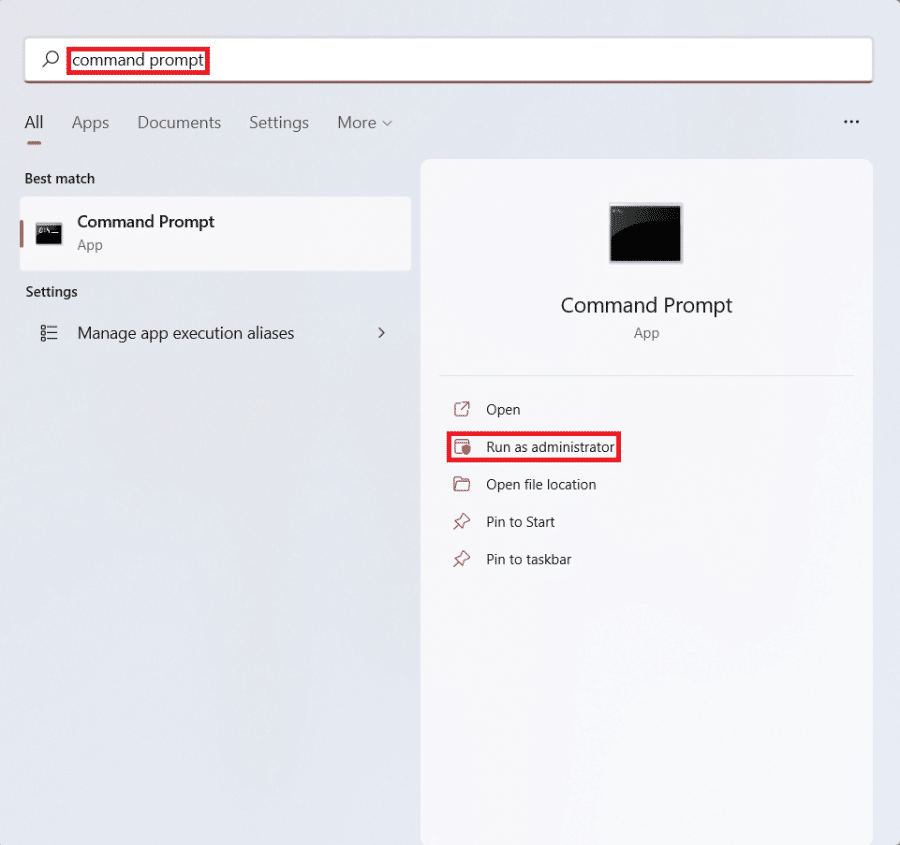
1. Click on the Search icon and type Command Prompt. Click on Run as administrator.
2. In the Command Prompt window, type the following command and hit Enter:
sc stop "wsearch" && sc config "wsearch" start=disabled

Also Read: How to Disable Online Search from Start Menu in Windows 11
How to Enable Windows Search Indexing
Read here to learn more about Windows Search Overview. Try either of the the options listed below to enable search indexing in Windows 11 systems:
Option 1: Start Windows Search Service in Services Window
You can enable Windows search indexing options from the Windows Services program as follows:
1. Press Windows + R keys together to open Run dialog box
2. Type services.msc and click on OK, as shown, to launch Services window.
3. Double-click on Windows Search service to open Windows Search Properties window.
4. Here, click on Start button, as depicted, if the Service status: displays Stopped.
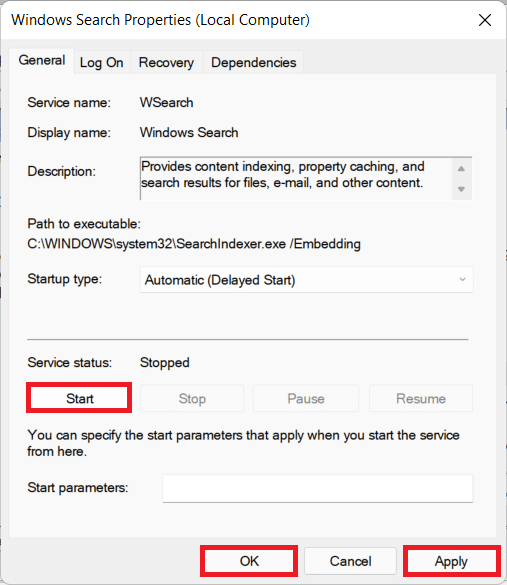
5. Click on Apply > OK to save changes.
Also Read: How to Fix Windows 11 Taskbar Not Working
Option 2: Run Start Command in Command Prompt
Another way to enable Windows search indexing options is to use Command Prompt, just as you did to disable it.
1. Launch Elevated Command Prompt with administrative privileges, as shown.
2. Click on Yes in the User Account Control confirmation pop-up.
3. Type the given command and hit Enter to execute:
sc config "wsearch" start=delayed-auto && sc start "wsearch"

Recommended:
We hope this article taught you how to enable or disable Search Indexing Options in Windows 11. We love to hear your suggestions and questions via the comment section below. Stay tuned to our site for more!