Fix Remote Desktop Cannot Connect to the Remote Computer

With advancing technology and the necessity to have interconnected systems in an organization, the users try to connect the PCs in the area using a common Network Connection. However, Remote Desktop cannot connect to the Remote Computer for one of these reasons issue occurs on the PCs. This issue prevents the users from having the PCs connected to the same network and causes an issue with sharing the files. You can read the article to fix the issue of Remote Desktop can’t connect to the Remote Computer in Windows 10.
How to Fix Remote Desktop Cannot Connect to the Remote Computer
The list of causes for the issue of Remote Desktop can’t connect to the Remote Computer in Windows 10 is given below.
- Remote Computer is turned off- The Remote Computer you are trying to connect to may have been turned off.
- Remote Computer is not connected to the Network Access- The Remote Desktop and the Remote Computer may not be connected to the same network access.
- Remote Access to Server is not enabled- The Remote access to the Network Server may not be enabled on the Remote Desktop and Remote Computer.
- Pubic Network Profile- The Network Profile of the Internet Connection may be set to Public.
- Conflicts from Software- The Security Software such as Windows Defender Firewall may conflict with the Remote access setting in the Remote Desktop and Remote Computer. Another cause of the issue is the VPN service on your Desktop and Computer.
- An issue with Windows Update- The latest versions of the Windows OS update may conflict with the remote access to the Remote Desktop and Remote Computer.
- Incompatible Windows version- One of the important causes for the issue is trying to connect a PC with the incompatible Windows version. The remote access is only applicable on Windows 10 Pro and other higher versions.
- Incorrect Configuration of Ports- The Ports for the Internet Connection may be configured incorrectly.
Method 1: Basic Troubleshooting Methods
The basic troubleshooting methods to fix Remote Desktop cannot connect to the Remote Computer issue are given here.
Method 1A: Troubleshoot Internet Connection
The first approach to fix the issue is to check if the Internet Connection of the Network Server is working or not. You can run a speed test to check the speed of the Internet Connection.
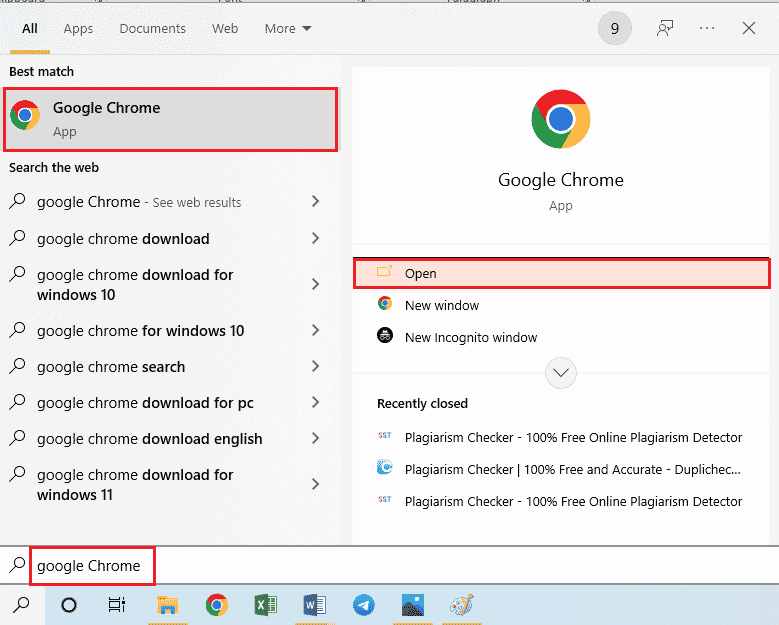
1. Press the Windows key, type Google Chrome and click on Open.
2. Open the official website of the SpeedTest and click on the Go button.

3. If the Internet Connection has lower bandwidth, you can either:
- Change the Internet Connection Plan
- Use another Wi-Fi network
Method 1B: Limit Connected Networks
The capacity that can be taken by the Network access may have exceeded. To fix this issue, ensure that the Network access can take up the number of systems you have connected to the Network.
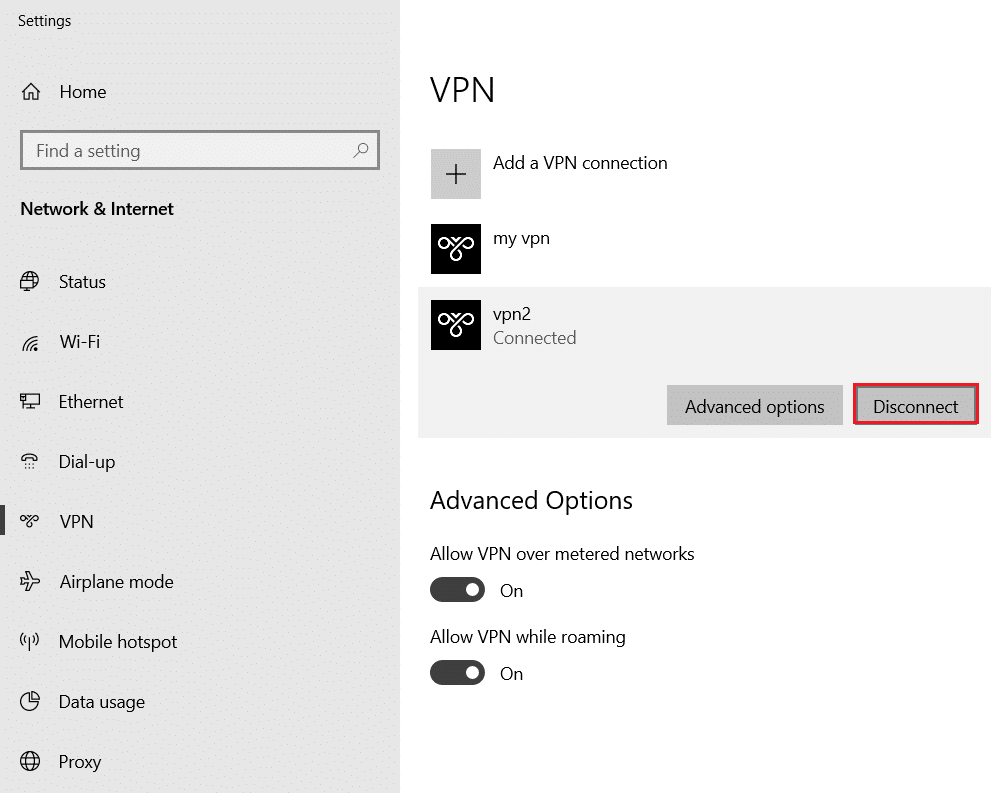
Method 1C: Disable VPN Service
Another important cause of the issue is the VPN service, you can fix the issue by disabling the VPN service on the Remote Desktop and Remote Computer. Using the link, you can know the method to disable the VPN service.
Also Read: Fix Hamachi VPN Error in Windows 10
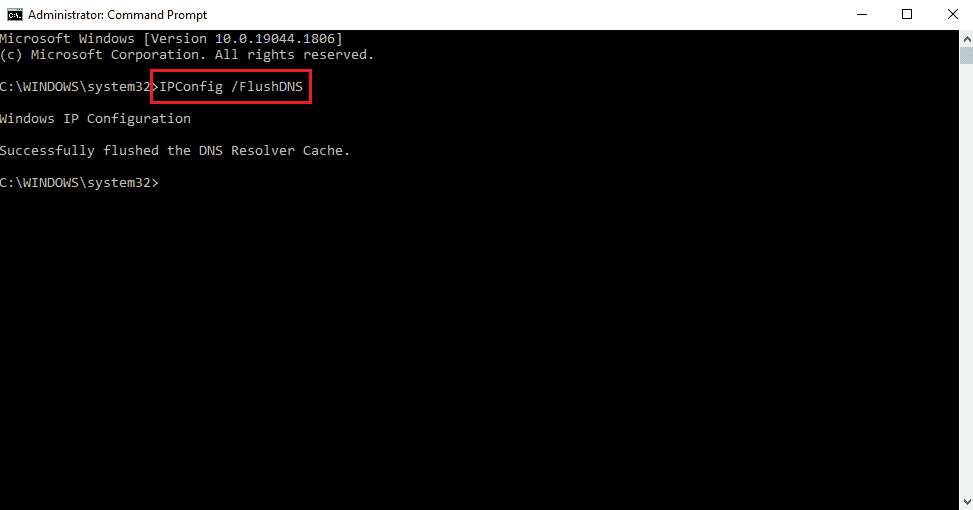
Method 1D: Flush DNS
The DNS on the PCs may have caused the issue of Remote Desktop cannot connect to the Remote Computer for one of these reasons. To fix the issue, you can flush the DNS on both the PC using the steps given.
1. Open Command Prompt by typing in the Windows search bar. Click on Run as administrator.

2. Type IPConfig /FlushDNS command and press the Enter key.
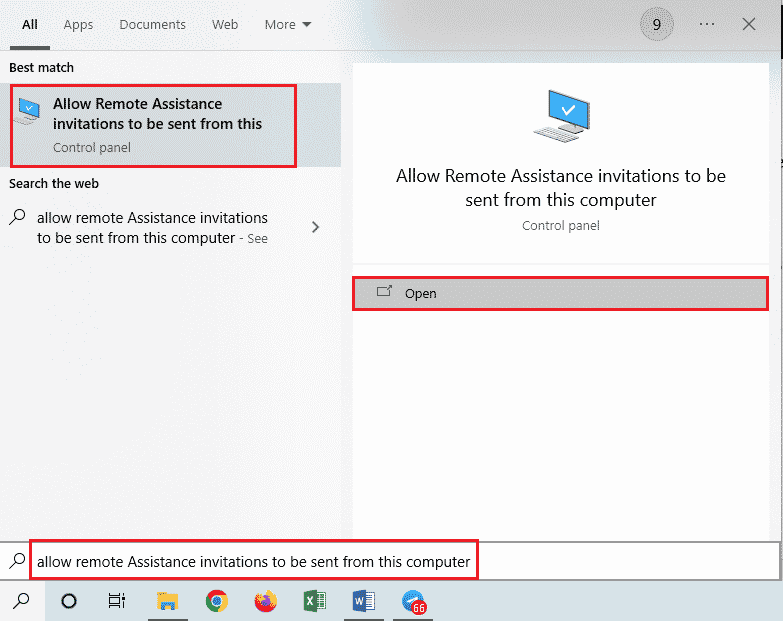
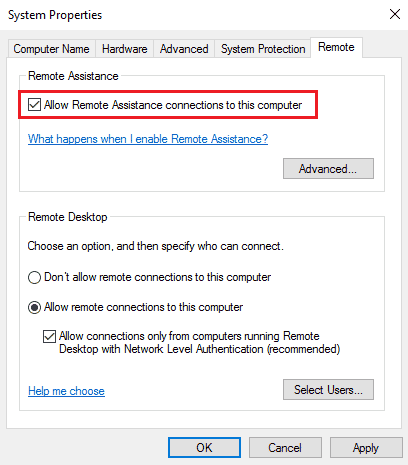
Method 1E: Allow Remote Assistance
One of the methods to fix the issue is to allow Remote assistance settings on the Remote Desktop and Remote Computer.
1. Hit the Windows key, type Allow Remote Assistance invitations to be sent from this computer, and click on Open.
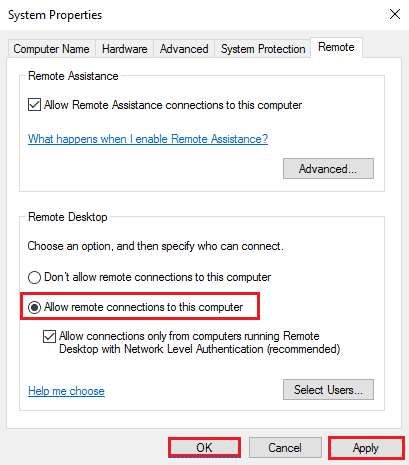
2. Tick the Allow Remote Assistance connections to this computer box in the Remote Assistance section.
3. Select the Allow remote connections to this computer and click on the Apply and OK buttons.
Also Read: How to Enable Chrome Remote Desktop on Windows 11
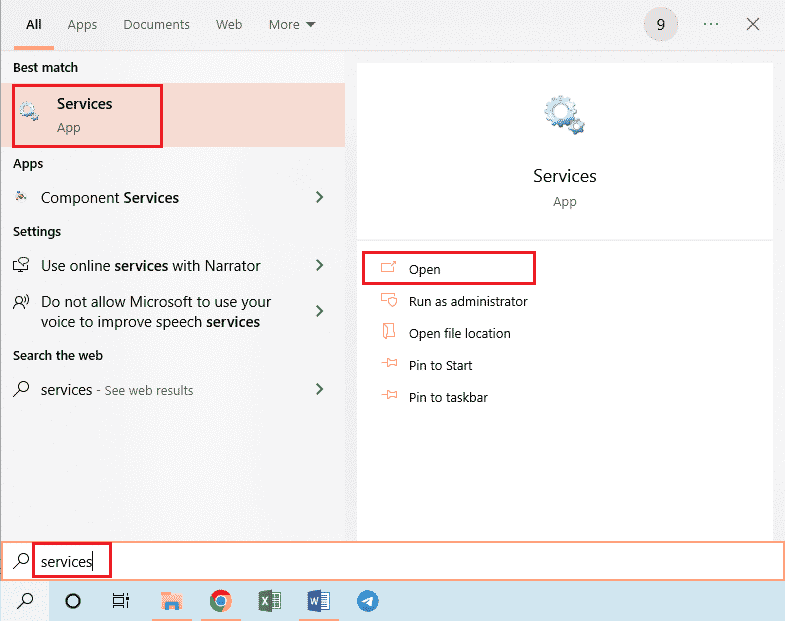
Method 1F: Restart RDP Services
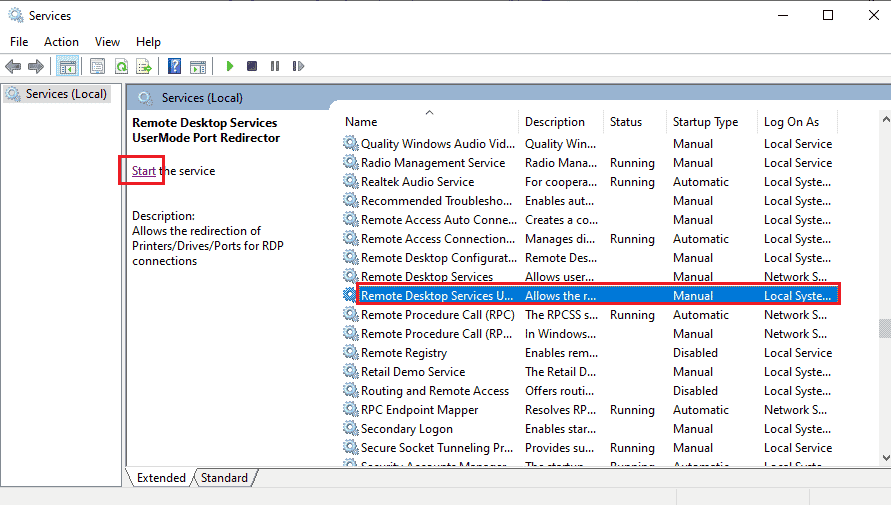
The Remote Desktop services on both the PCs may have been stuck causing Remote desktop can’t connect to the remote computer in Windows 10 issue. You can restart the services to fix the issue using this method.
1. Press the Windows key, type Services, and click on Open.
2. Select the Remote Desktop Services in the list and click on the Restart option.

3. Select the Remote Desktop Services UserMode Port Redirector in the list and click on the Restart option.
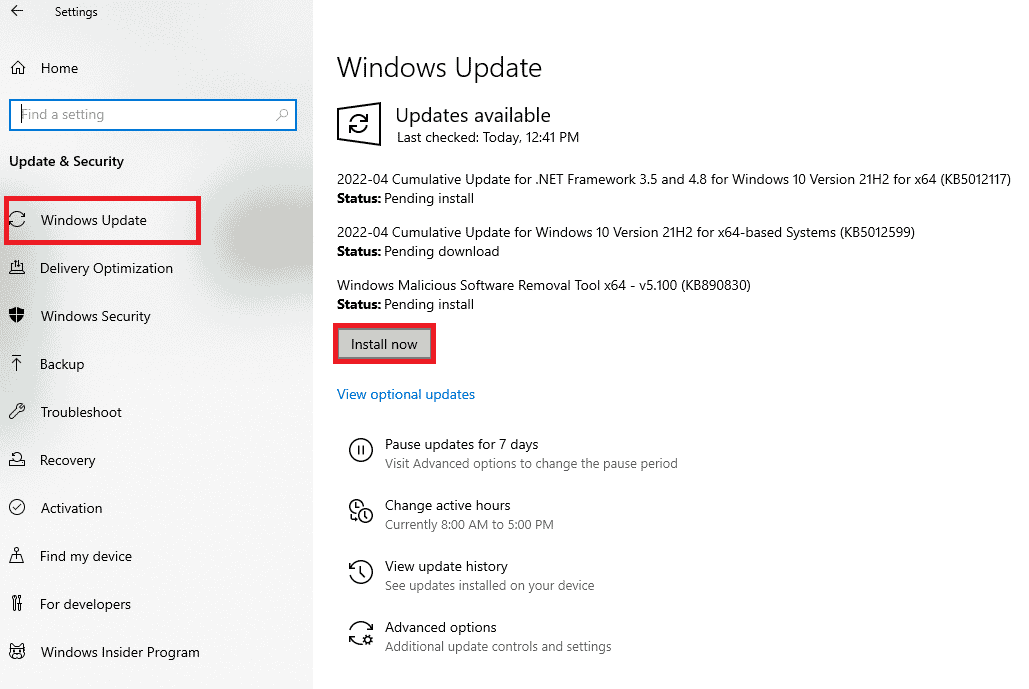
Method 1G: Update Windows OS
An outdated Windows OS on the Remote Desktop and Remote Computer may have caused the issue. Read our guide on how to download and install Windows 10 latest update.
Also Read: Fix Steam Remote Play Not Working in Windows 10
Method 2: Reinstall Network Adapters
To fix Remote Desktop cannot connect to the Remote Computer for one of these reasons issue, you can reinstall the Network Adapters on both PCs.
Step I: Uninstall Network Adapter
The first step is to uninstall the Network Adapter on the PCs using the Device Manager. You have to reinstall all the WAN Network Adapters in the list using the steps given here.
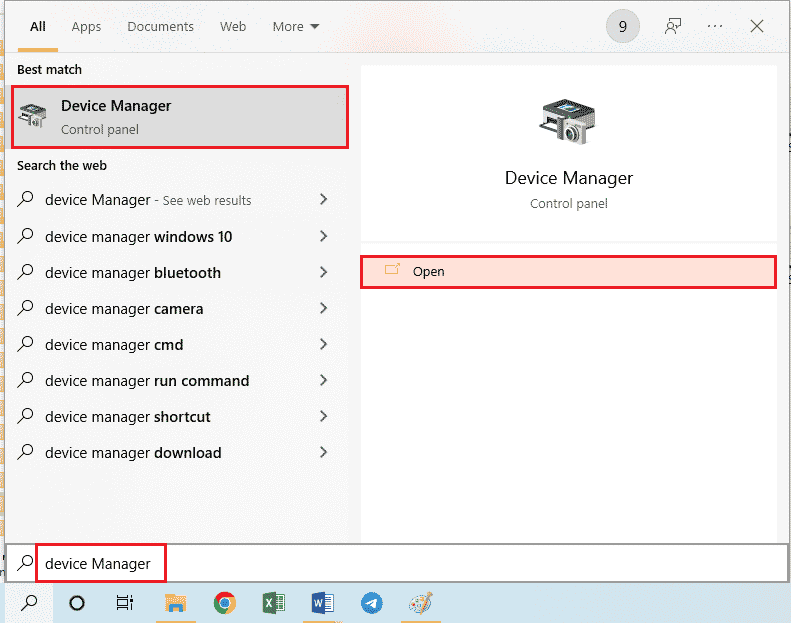
1. Hit the Windows key, type Device Manager, and click on Open.
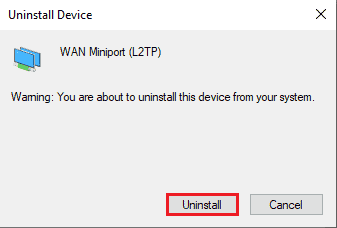
2. Expand the Network adapters option in the list, right-click on the network adapter, and click on the Uninstall device option in the list.

3. Click on the Uninstall button on the Uninstall Device confirmation window.
Step II: Reinstall Network Adapter
The next step is to reinstall the Network Adapters automatically using the Device Manager.
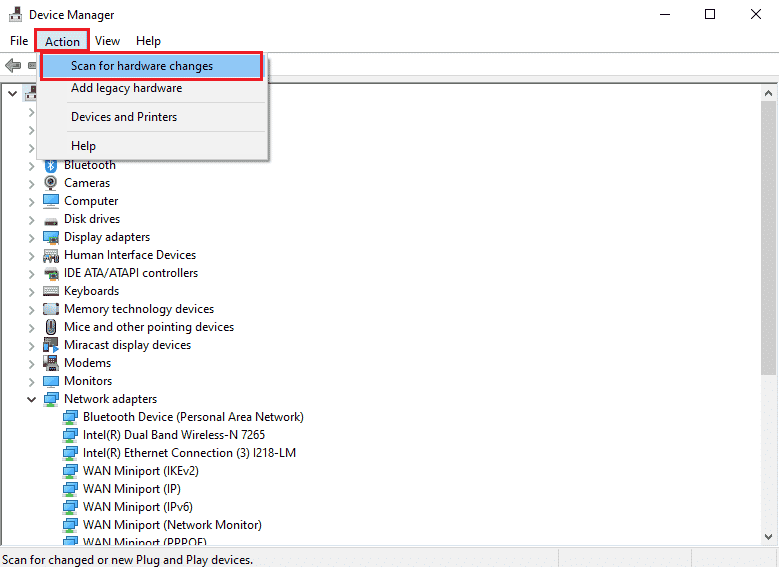
1. Open Device Manager and expand the Network adapters.
2. Click on the Action tab and click on the Scan for hardware changes option in the list displayed.
Also Read: What is a Device Driver? How Does It Work?
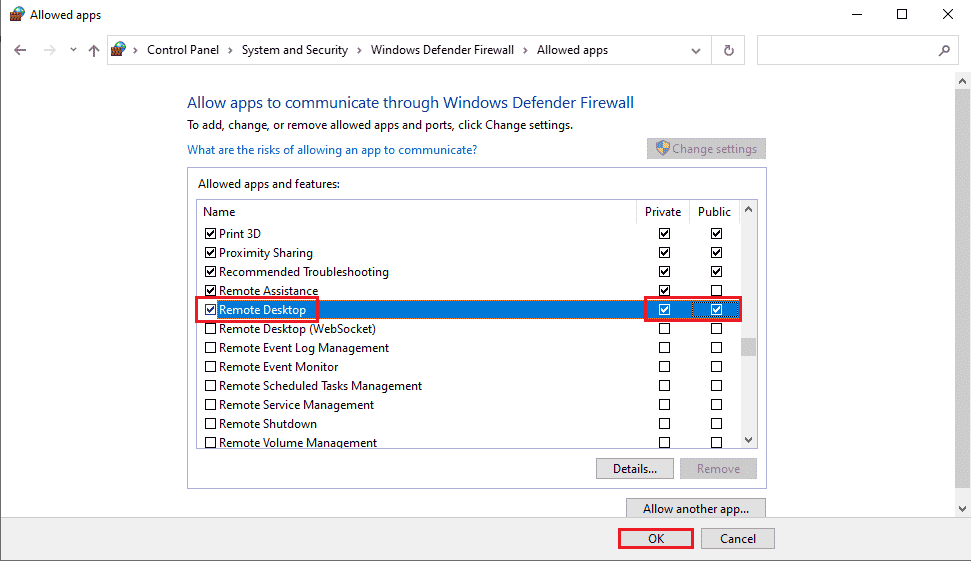
Method 3: Allow Remote Desktop Through Windows Firewall
The conflict from the security software or Windows Firewall can be resolved by allowing the Remote Desktop access option through Firewall.
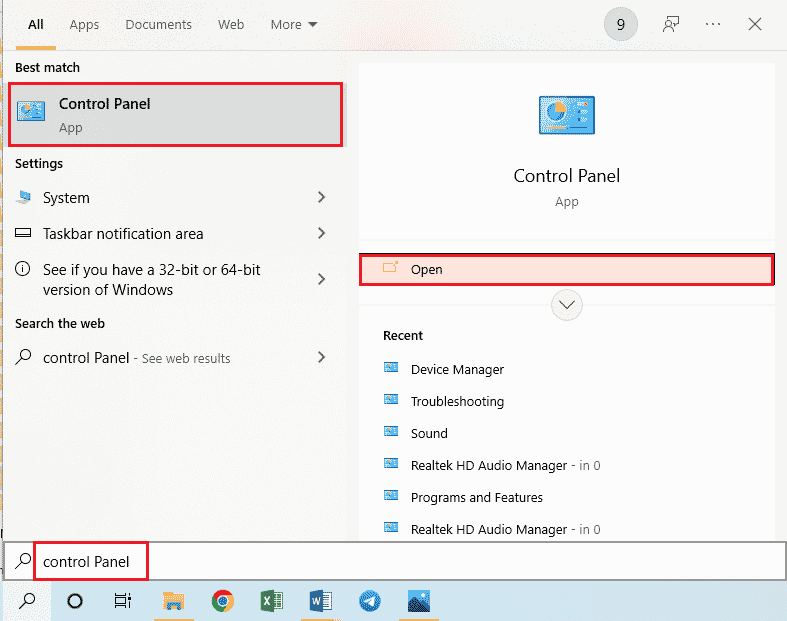
1. Press the Windows key, type Control Panel, and click on Open.
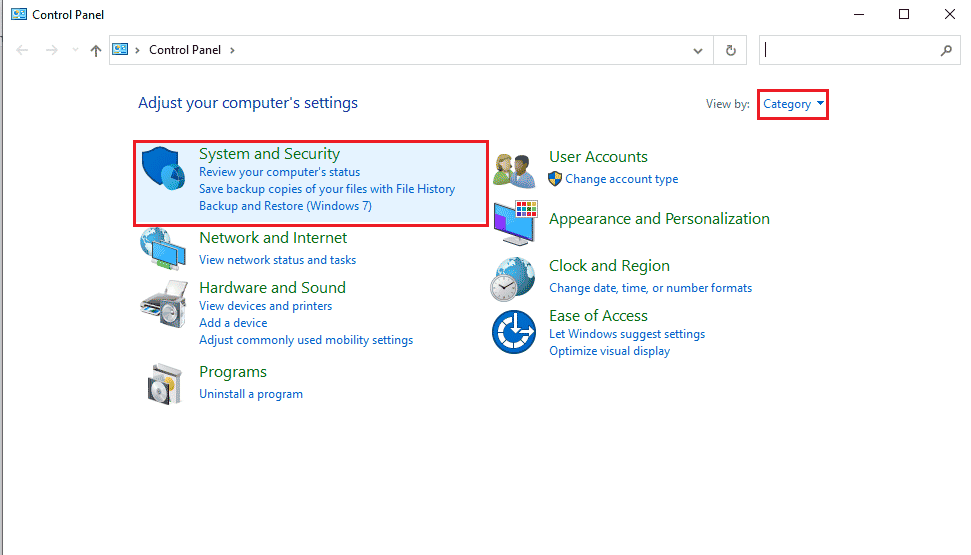
2. Select the Category option in the View by drop-down menu and click on the System and Security option in the menu.
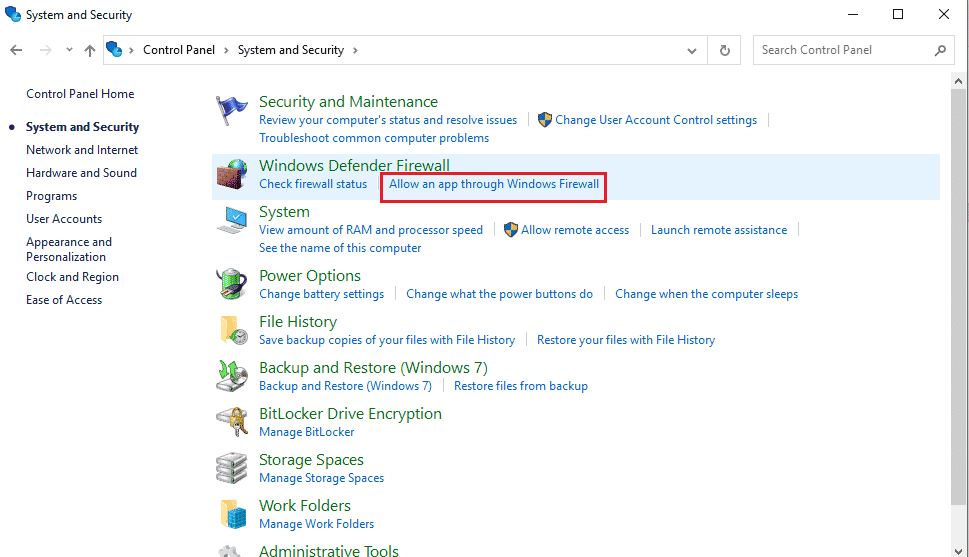
3. Click on the Allow an app through Windows Firewall option under the Windows Defender Firewall section.
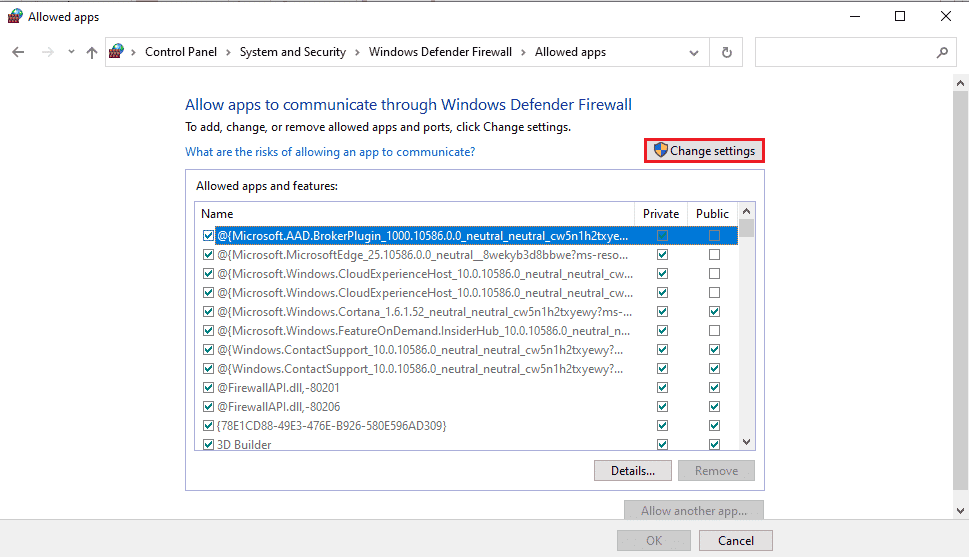
4. Click on the Change settings button on the next window.
5. Tick the Remote Desktop option in the list, tick the Private and Public boxes, and click on the OK button.
Method 4: Modifications in Remote Desktop Connections
The issue of Remote Desktop cannot connect to the Remote Computer for one of these reasons can be fixed by modifying the Remote Desktop Connections on both PCs.
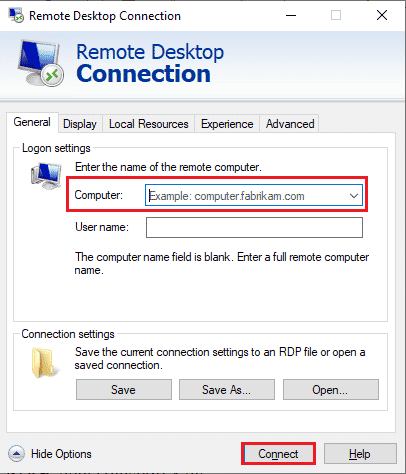
Method 4A: Enter Correct User Credentials
The first approach to fix the issue is to ensure that you have entered the correct user credentials in the Remote Desktop Connection.
1. Hit the Windows key, type Remote Desktop Connection, and click on Open.

2. Enter the correct IP address in the Computer bar and click on the Connect button.

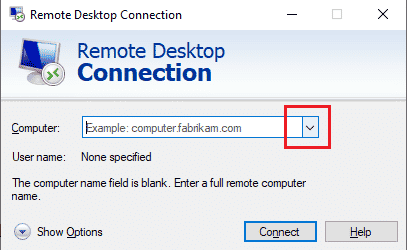
Method 4B: Re-add Remote Computer
To fix the issue with the remote connection, you can re-add the PC to the Network connection.
Step I: Delete Username
The first step is to delete the PC username added to the Remote Connection on the Remote Desktop.
1. Launch the Remote Desktop Connection app.

2. Select the PC username in the Computer drop-down menu and click on the Delete option.
3. Click on the Yes button on the Remote Desktop Connection UAC window.
Also Read: Change Remote Desktop Port (RDP) in Windows 10
Step II: Re-add Username
The next step is to re-add the PC to the Network access on the Remote Desktop.
1. In the Remote Desktop Connection window, enter the IP address of the Remote Computer in the Computer field and click on the Connect button.

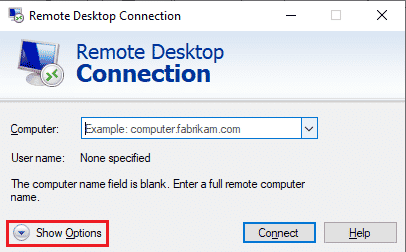
Method 4C: Set Lower Broadband for Connection
Another option to fix the issue is to set a lower bandwidth to the Network connection and then, add the Remote Computer close to the Remote Desktop.
1. Open the Remote Desktop Connection app.

2. Click on the Show Options at the bottom-left corner of the window.
3. Move to the Experience tab and select the Low-speed broadband (256 kbps – 2 Mbps) option in the Choose your connection speed to optimize performance drop-down menu.
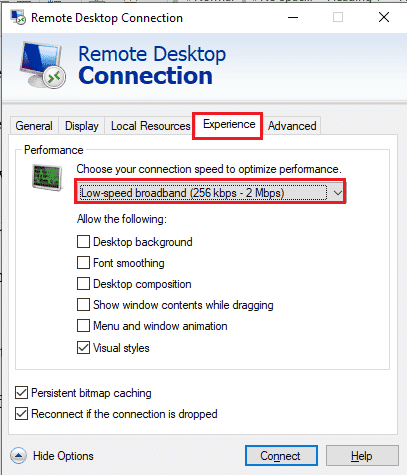
4. Move to the General tab, enter the username of the Remote Computer and click on the Connect button.
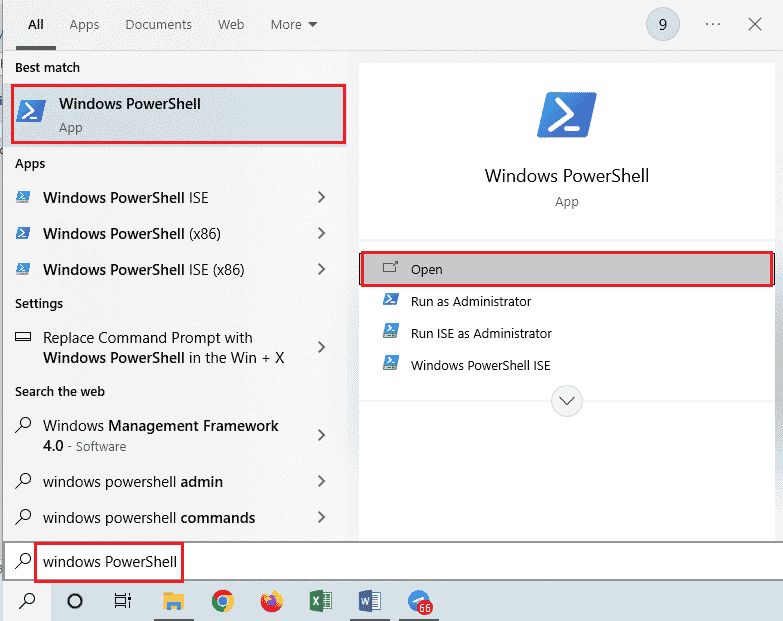
Method 5: Verify RDP Port in Windows PowerShell
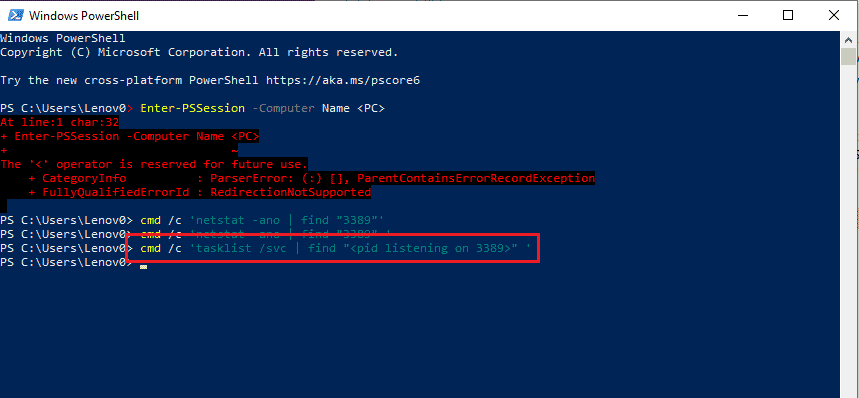
Another option to fix the issue of Remote Desktop cannot connect to the Remote Computer for one of these reasons is to check the RDP port using Windows PowerShell. The RDP port for Network Connection can be altered to ensure that the Remote Computer is connected to Port 3389 on the Remote Desktop.
1. Hit the Windows key, type Windows PowerShell and click on Open.
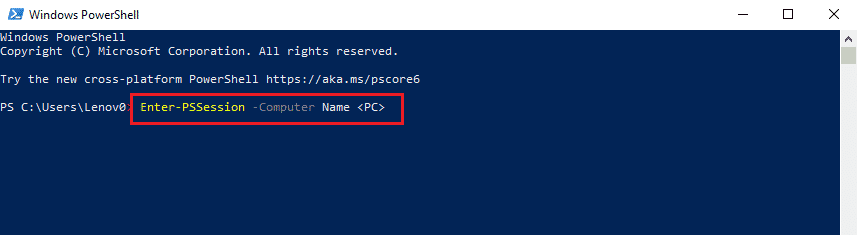
2. Type the following command and press the Enter key.
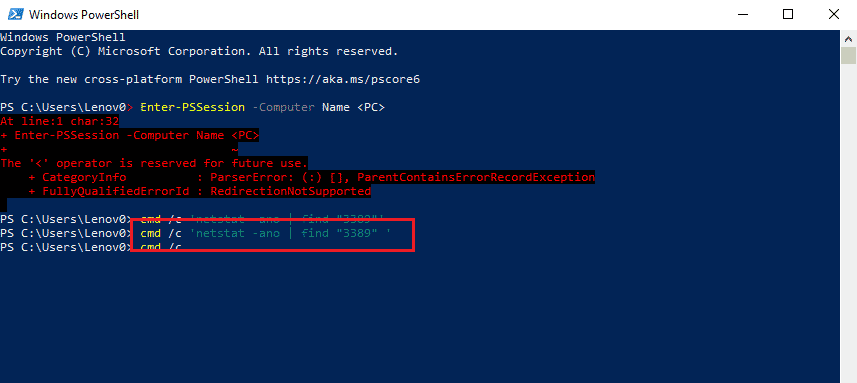
Enter-PSSsession –Computer Name <PC>
Note: You need to type the name of the Remote Computer instead of <PC> in the command.
3. Then, type the given command and hit the Enter key.
cmd /c ‘netstat –ano | find “3389”’
4. Type the following command and press the Enter key.
cmd /c ‘tasklist /svc | find “<pid listening on 3389>”
Also Read: How to Delete Folders and Subfolders in PowerShell
Method 6: Alter Permissions of MachineKeys Folder
One of the methods to fix Remote desktop can’t connect to the remote computer in Windows 10 issue with the remote connection is to provide administrative privileges to the MachineKeys folder on Windows Explorer.
1. Press the Windows + E keys simultaneously to open File Explorer and navigate to the MachineKeys folder using the location path
C:ProgramDataMicrosoftCryptoRSAMachineKeys
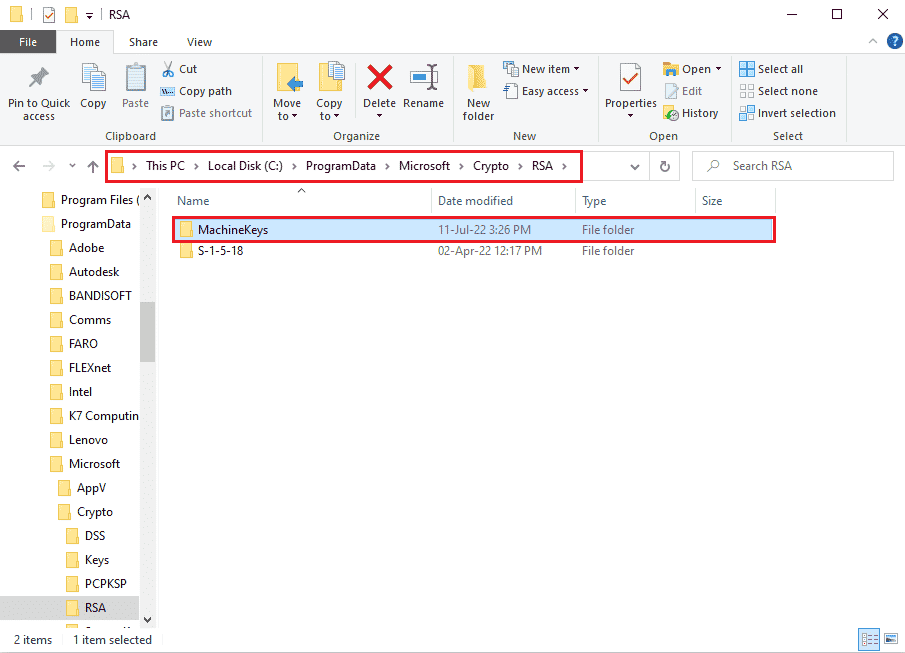
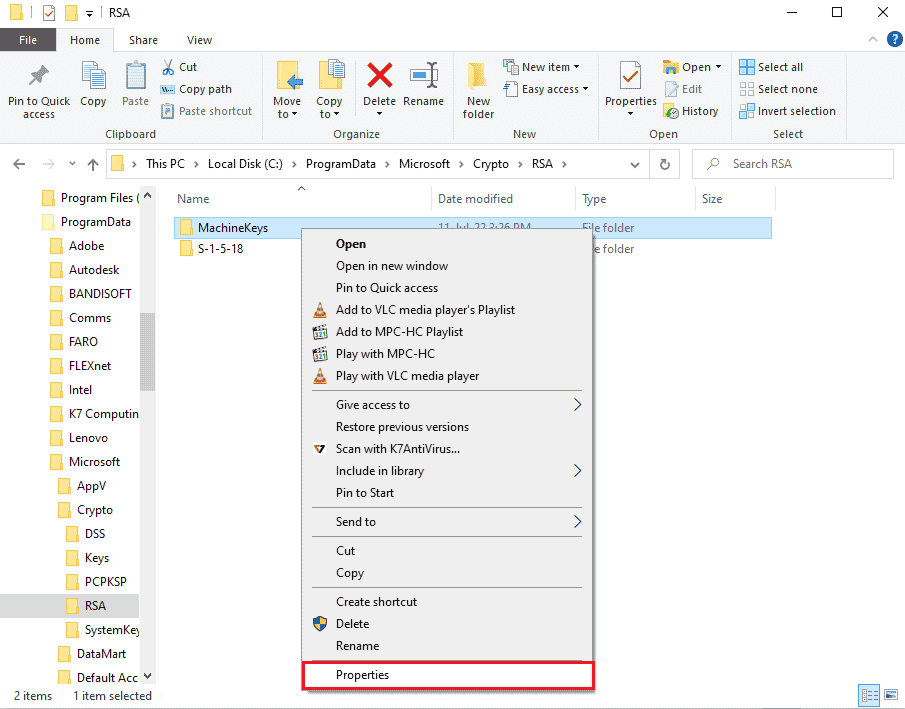
2. Right-click on the MachineKeys folder and click on the Properties option in the list.
3. Navigate to the Security tab and click on the Advanced button on the screen.
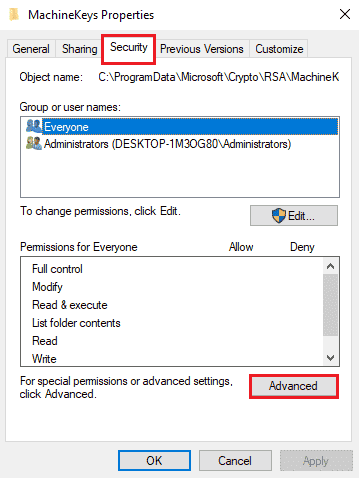
4. Select the Administrator account and click on the Change permissions button in the next window.
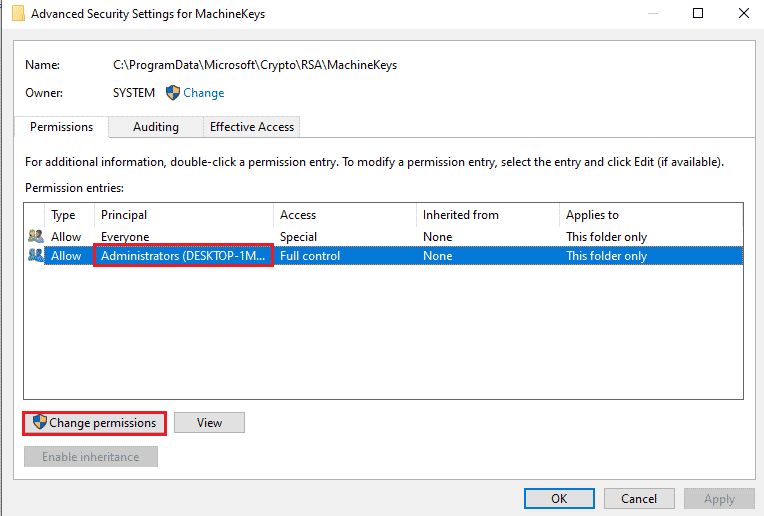
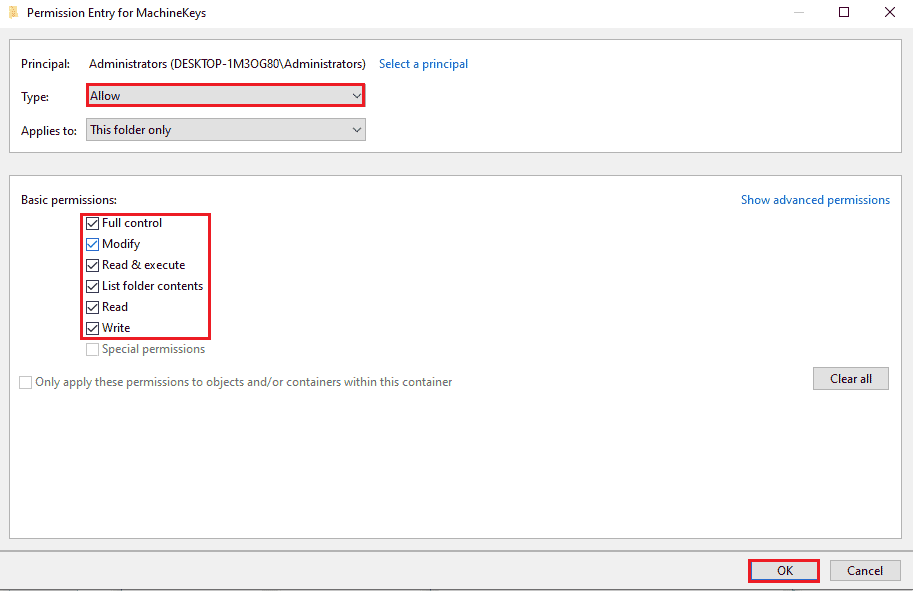
5. Select the Allow option in the Type drop-down menu, tick all the boxes in the Basic permissions section, and click on the OK button.
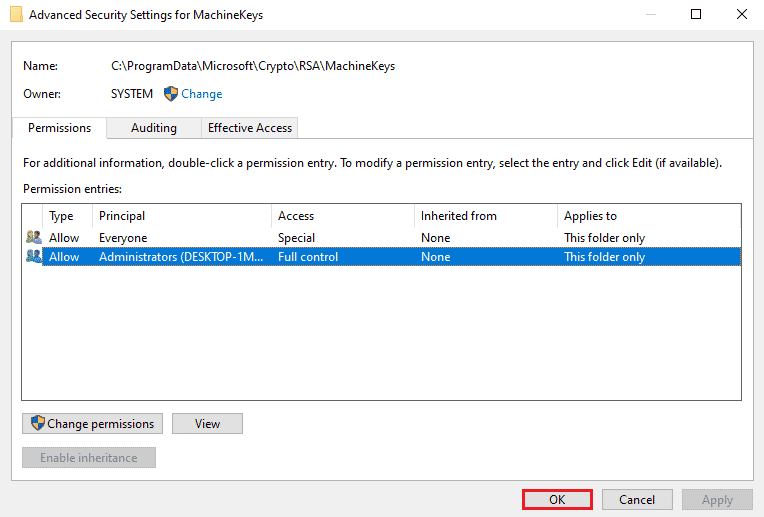
6. Click on the Apply and OK buttons on the Advanced Security Settings for MachineKeys window.
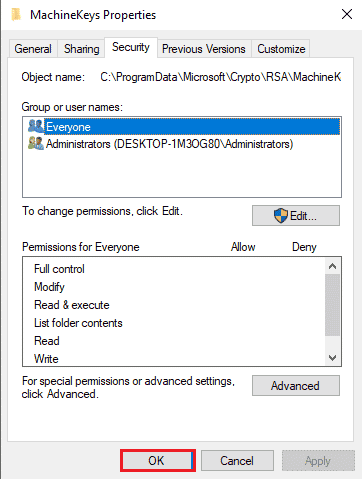
7. Again, click on the Apply and OK buttons on the MachineKeys Properties window.
Method 7: Add IP address of Remote Computer
If you cannot fix the issue of Remote Desktop cannot connect to the Remote Computer, you can try adding the IP address of the Remote Computer to the Remote Desktop manually.
Step I: Note the IP address of Remote Computer
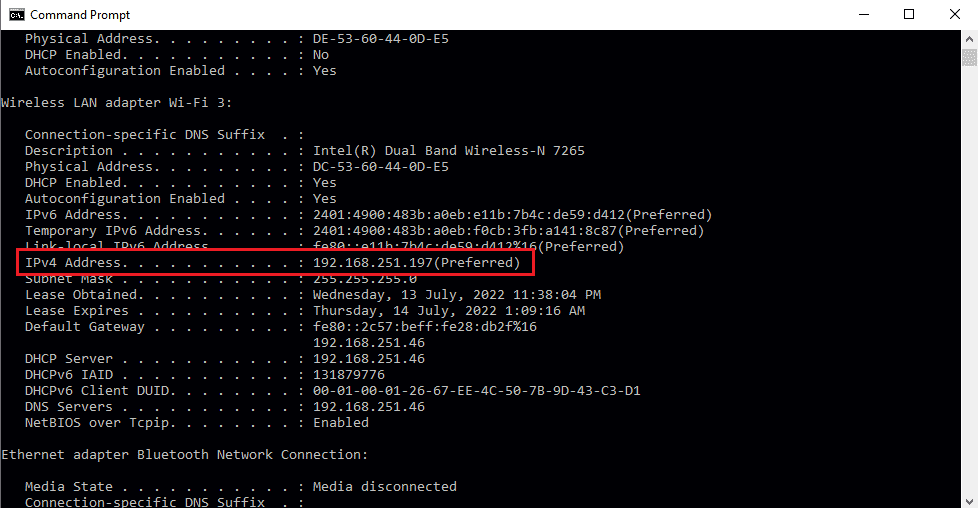
The first step is to note the IP address of the Remote Computer using the Command Prompt.
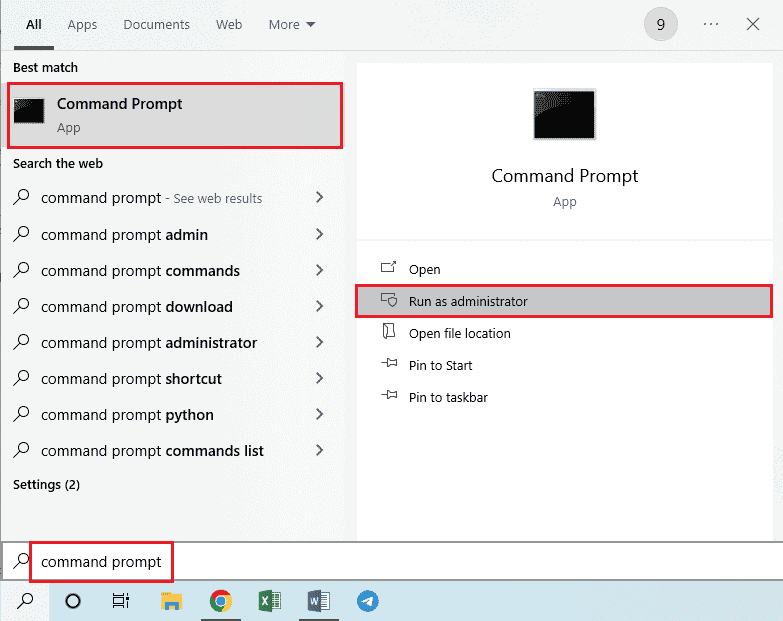
1. Press the Windows key, type Command Prompt, and click on Run as administrator.
2. Type the ipconfig /all command and press the Enter key.
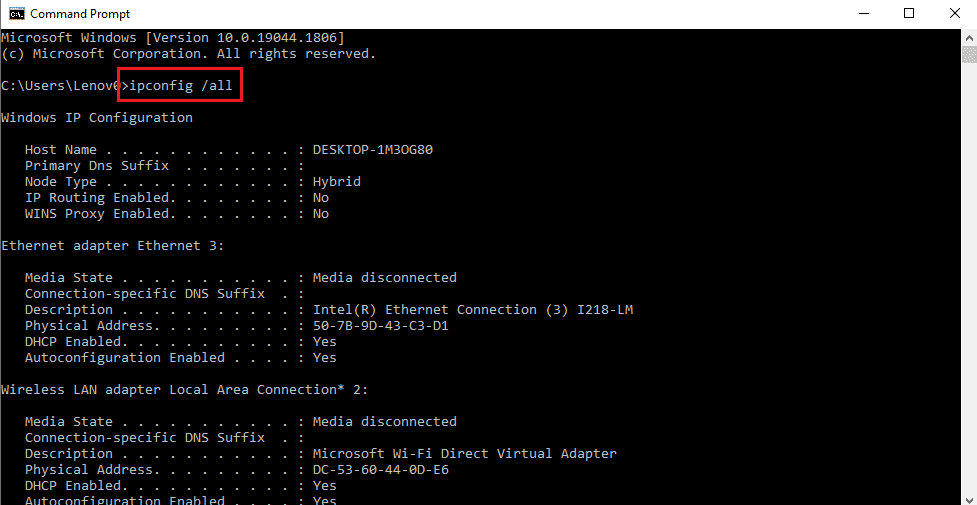
3. Note the IP address in the IPv4 Address line in the Wireless LAN adapter Wi-Fi 3 section.
Also Read: How to use the Remote Desktop app on Windows 10
Step II: View IP addresses in Remote Desktop
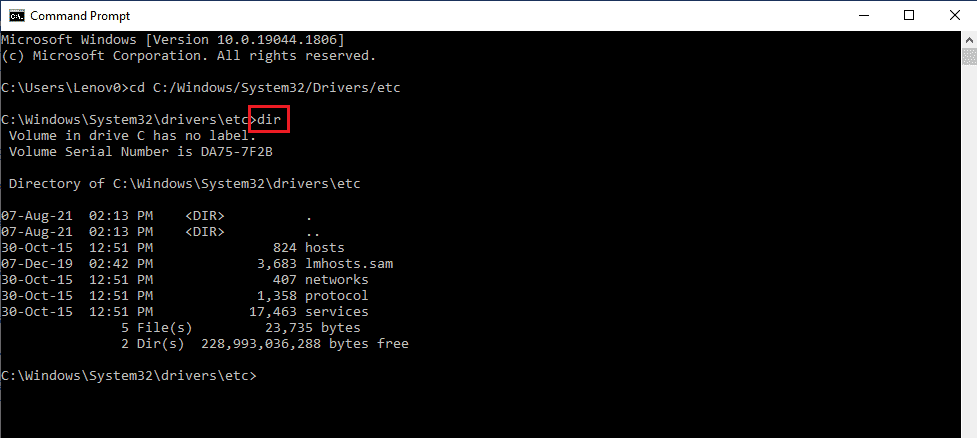
The next step is to view the IP addresses in the Remote Desktop using the Command Prompt and check if you can find the IP address of the Remote Computer on the list.
1. Open Command Prompt as administrator.

2. Type the given command and press the Enter key.
cd C:/Windows/System32/drivers/etc

3. Type dir command and hit the Enter key to view the files in the directory.
Step III: Type IP address in Hosts File
This step is an additional step if you cannot find the IP address in the previous step. Using this step, you can manually add the IP address of the Remote Computer to the Hosts file.
1. Open File Explorer by hitting Windows + E keys simultaneously and navigate to the following location path.
C:WindowsSystem32driversetc
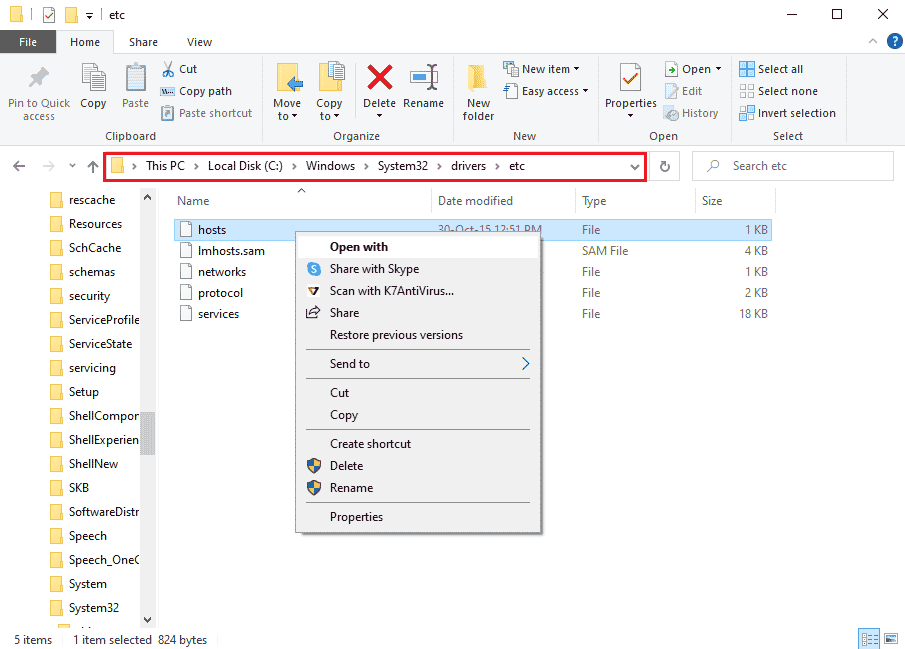
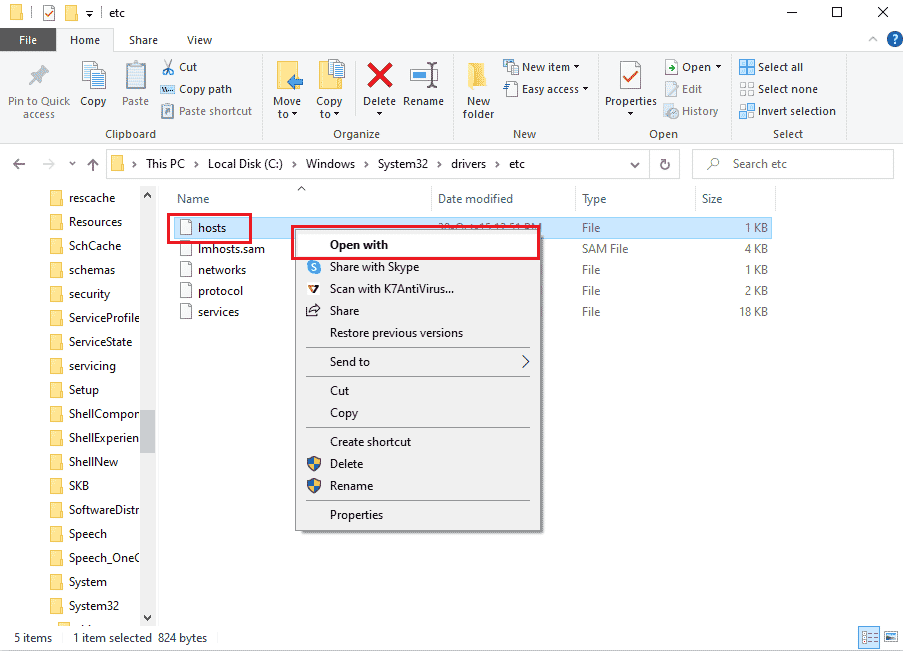
2. Right-click on the hosts file and click on the Open with option in the menu.
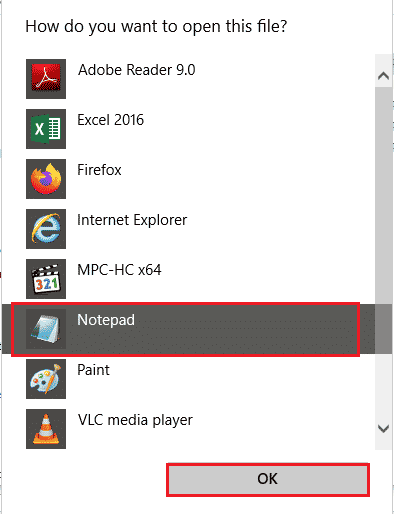
3. Click on the Notepad option and click on the OK button on the window How do you want to open this file?
4. Type the IP address of the Remote Computer in the file and press the Ctrl+ S keys to save the file.
Method 8: Modifications in Settings app
You can modify the settings on both the PCs to fix the issue of Remote Desktop cannot connect to the Remote Computer for one of these reasons.
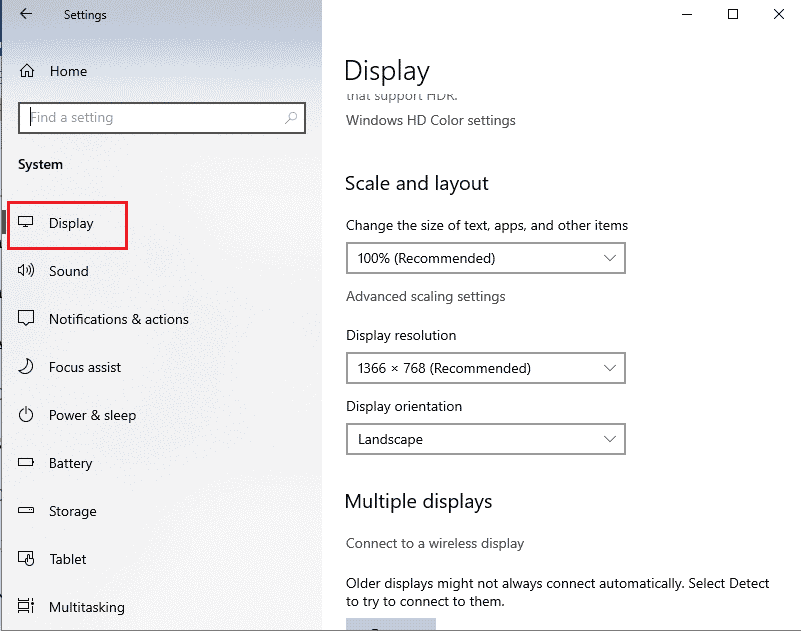
Method 8A: Turn off Custom Scaling (If Applicable)
If the Custom Scaling option is enabled on your PC, you can turn it off to fix the issue.
1. Press the Windows + I keys together to open Settings.
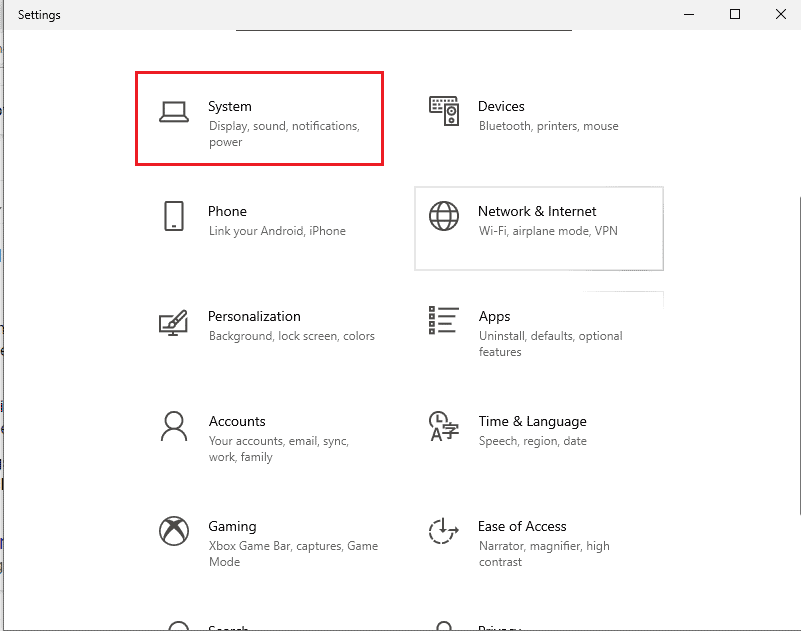
2. Click on the System setting.
3. In the Display tab, toggle off the Custom Scaling option in the Scale and layout section.
Method 8B: Enable Remote Desktop
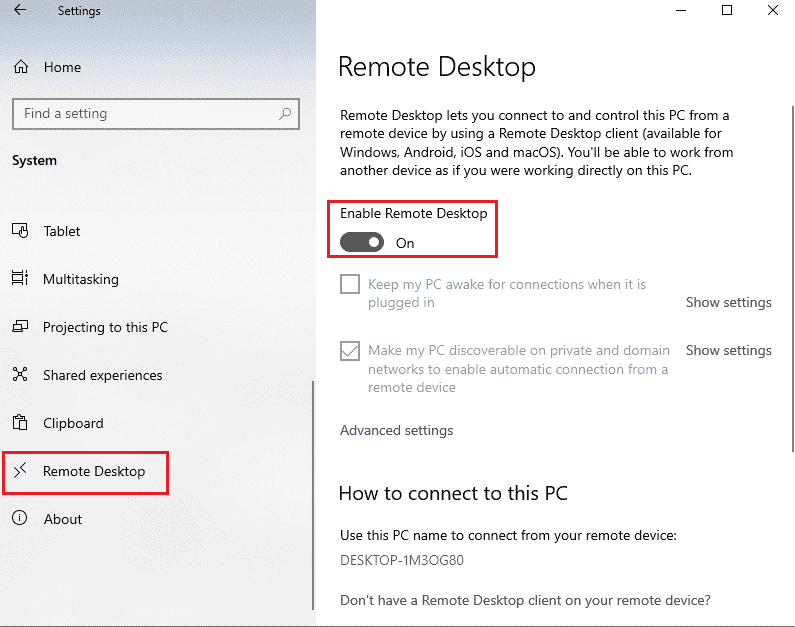
To fix Remote desktop can’t connect to the remote computer in Windows 10 issue, you can enable the Remote Desktop on the PCs.
1. Launch the Settings app.
2. Click on the System setting as highlighted in the pic below.

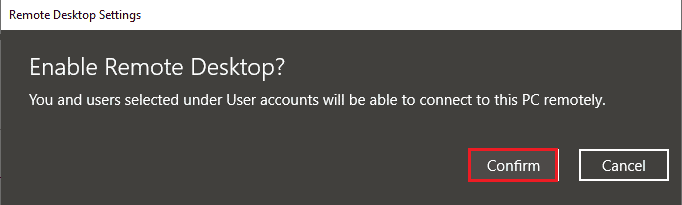
3. Click on the Remote Desktop tab in the left pane of the window and toggle on the Enable Remote Desktop option.
4. Click on the Confirm button on the Remote Desktop Settings confirmation window.
Also Read: How to Remotely Sign Out of Your Google Account on Android Phone
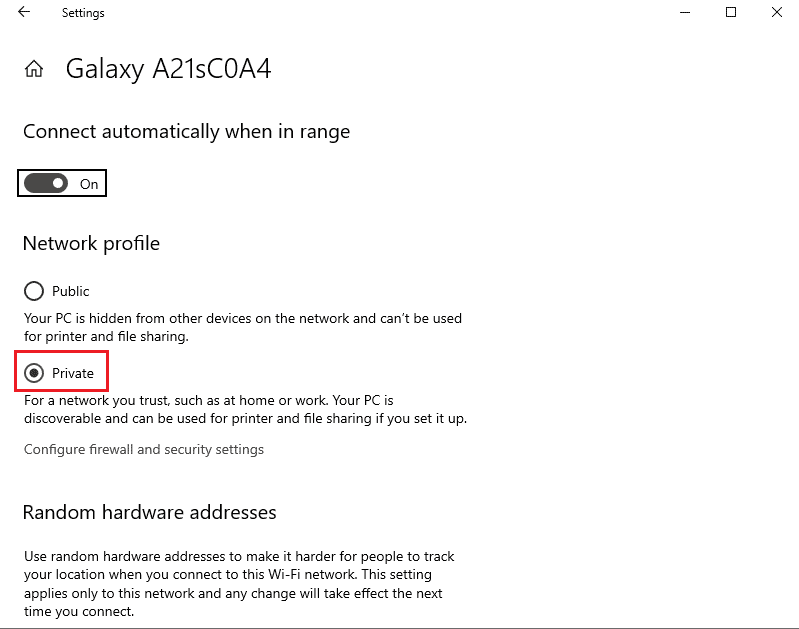
Method 8C: Set Network Connection to Private
Another method to fix the issue is to set the Network Profile of the Internet Connection to Private.
1. Hit the Windows + I keys together to open the Settings app.
2. Click on the Network & Internet setting.
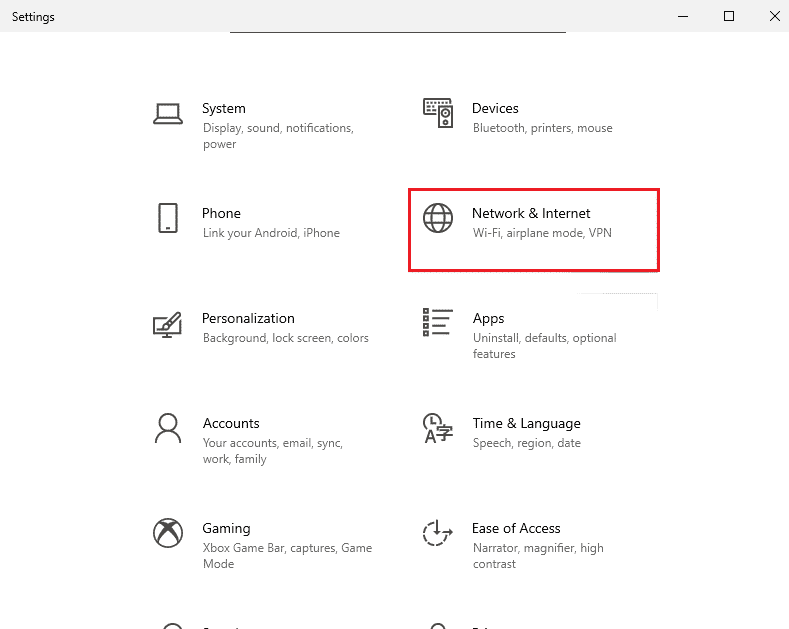
3. In the Status tab, click on the Properties button in the Wi-Fi connection under the Network status section.
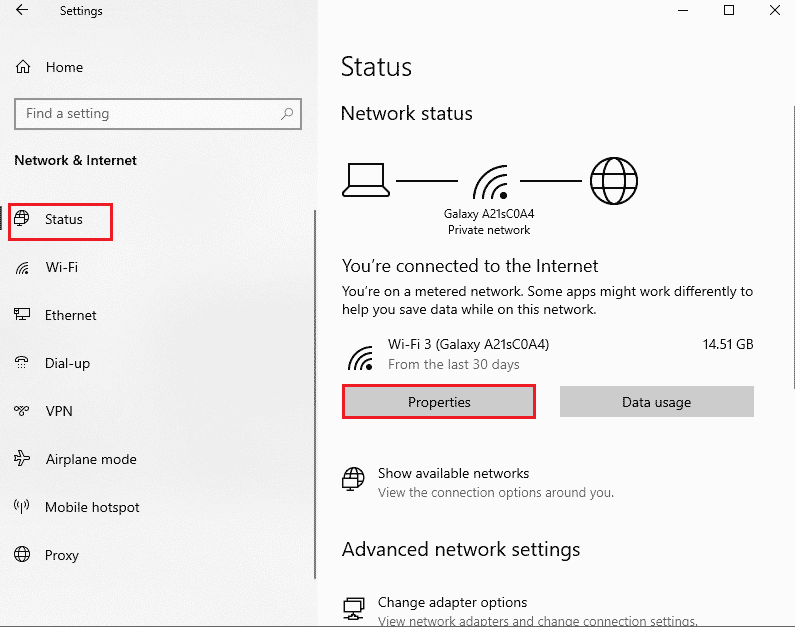
4. Select the Private option on the next screen.
Method 9: Modifications in Registry Editor
The issue of Remote Desktop cannot connect to the Remote Computer for one of these reasons can be fixed by modifying the keys in the Registry Editor.
Note: Ensure to create a backup of Registry keys before proceeding further.
Method 9A: Modify fDenyTSConnections
You can use the method to set a higher value to the fDenyTSConnections key.
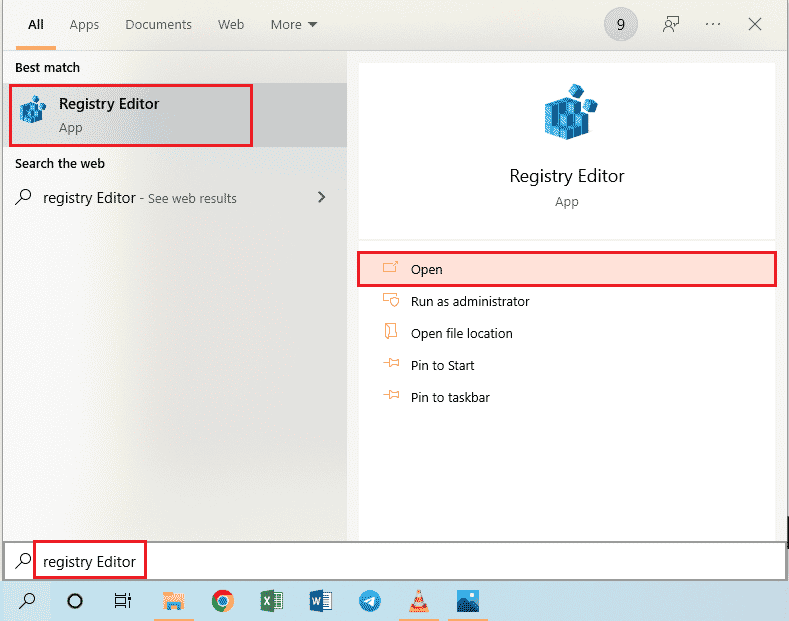
1. Hit the Windows key, type Registry Editor, then click on Open.
2. Navigate to the Terminal Server Client folder using the given location path.
ComputerHKEY_LOCAL_MACHINESYSTEMCurrentControlSetControlTerminal Server Client
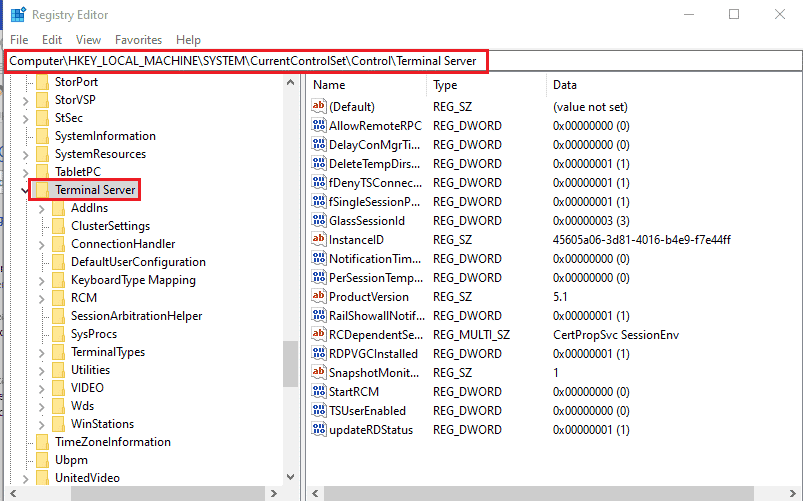
3. Right-click on the fDenyTSConnections and click on the Modify… option in the menu displayed.
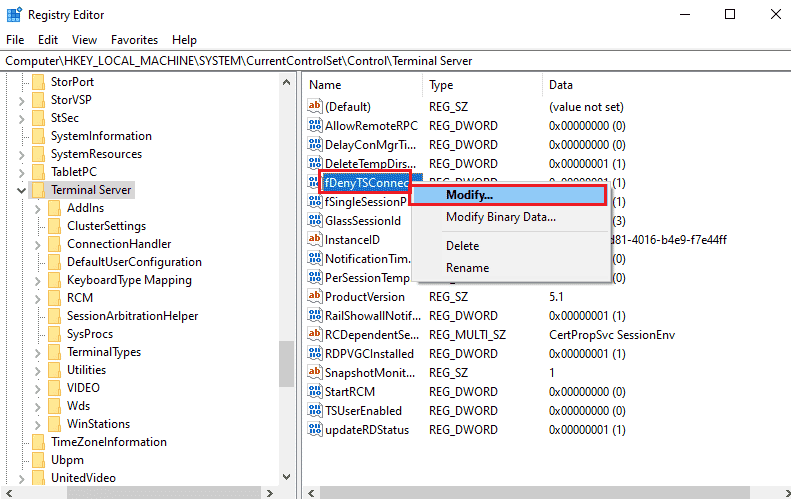
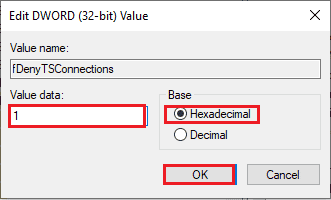
4. Select the Hexadecimal option in the Base section, type the value as 1 in the Value data bar, and click on the OK button.
Also Read: Fix The Registry editor has stopped working
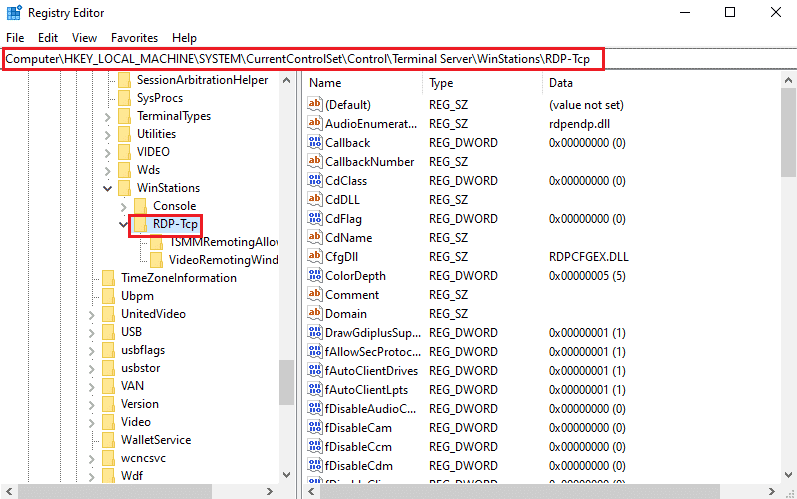
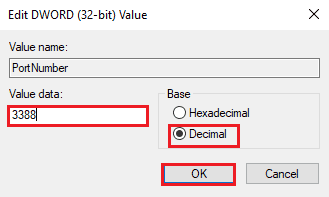
Method 9B: Alter PortNumber Key
The Port of the Internet Connection can be altered by modifying the PortNumber key to fix Remote desktop can’t connect to the remote computer in Windows 10 issue.
1. Launch the Registry Editor app.

2. Navigate to the RDP-Tcp folder using the following location path.
ComputerHKEY_LOCAL_MACHINESYSTEMCurrentControlSetControlTerminal ServerWinStationsRDP-Tcp
3. Right-click on the PortNumber key in the list and click on the Modify… option in the menu.
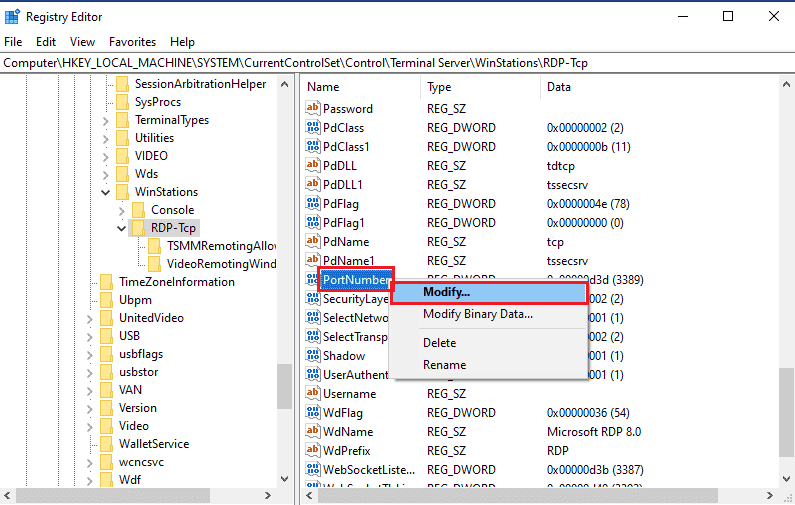
4. Select the Decimal option in the Base section, alter the value in the Value data bar from 3389 to 3388, and click on the OK button.
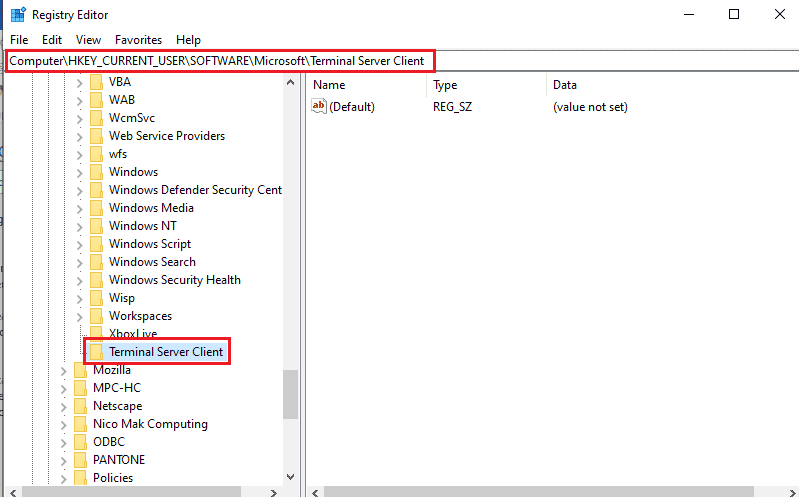
Method 9C: Modify RDGClientTransport Key
Another method to fix Remote Desktop cannot connect to the Remote Computer for one of these reasons issue is to modify the RDGClientTransport key.
1. Open the Registry Editor app.

2. Navigate to the Terminal Server Client folder using the location path.
ComputerHKEY_CURRENT_USERSOFTWAREMicrosoftTerminal Server Client
Note: If you cannot navigate to the Terminal Server Client folder, right-click on the Microsoft folder, move your cursor to the New option in the menu, and click on the Key option on the adjacent menu. Rename the new folder as Terminal Server Client and press the Enter key.
3. Right-click on the right pane of the window, move your cursor to the New option and click on the DWORD (32-bit) Value option in the adjacent menu.
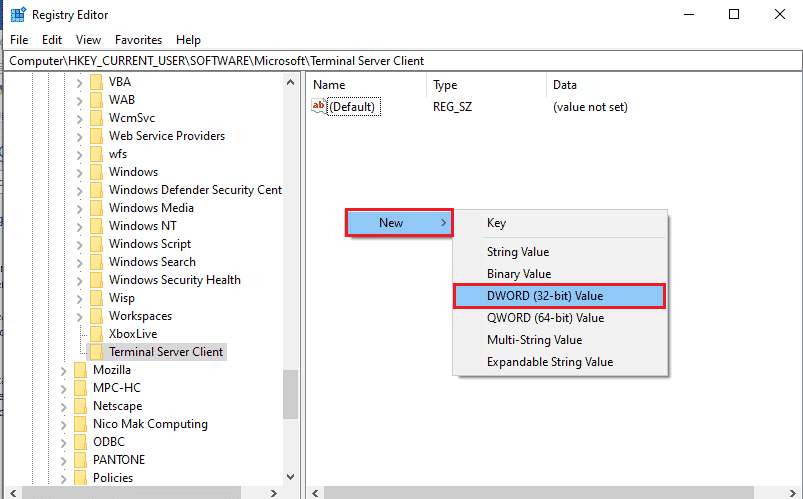
4. Rename the DWORD as RDGClientTransport and press the Enter key.
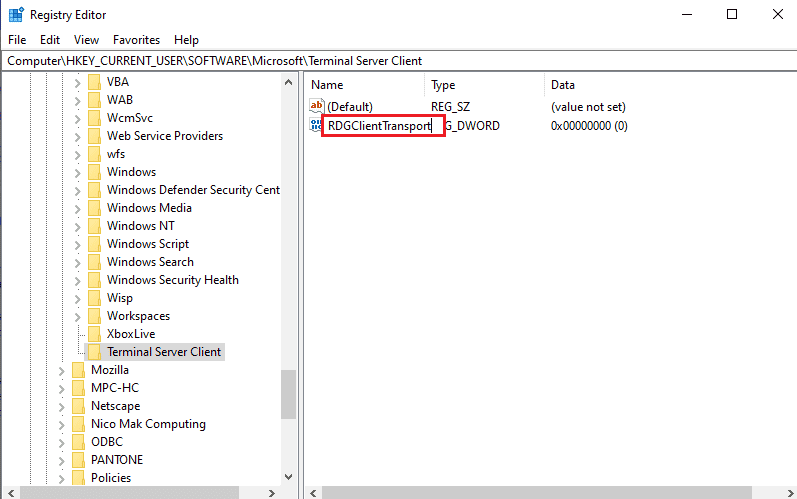
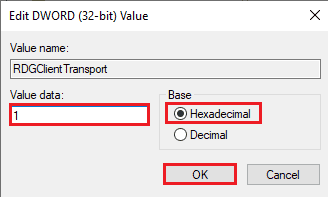
5. Right-click on the RDGClientTransport DWORD and click on the Modify… option in the menu.
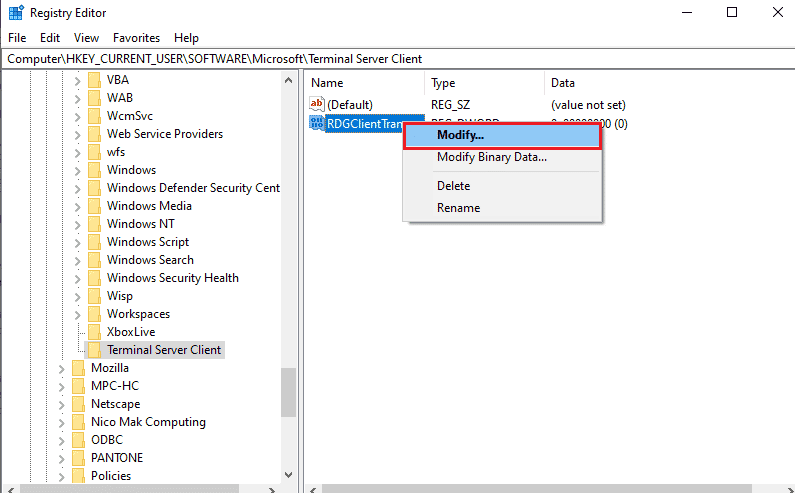
6. Select the Hexadecimal option in the Base section, type the value as 1 in the Value data bar, and click on the OK button.
Method 9D: Alter key value in Remote Computer (Only for Citrix Software)
To fix Remote Desktop cannot connect to the Remote Computer issue, you can alter the key value for the remote connections on both the PCs. This method is only applicable if you have Citrix Software for remote connection on both PCs.
Step I: Copy value of Remote Desktop entry
As a first step, you have to copy the value of the CitrixBackup entry in the Remote Desktop.
1. Launch the Registry Editor from Windows Search bar.

2. Navigate to the RDP-Tcp folder using the following location path.
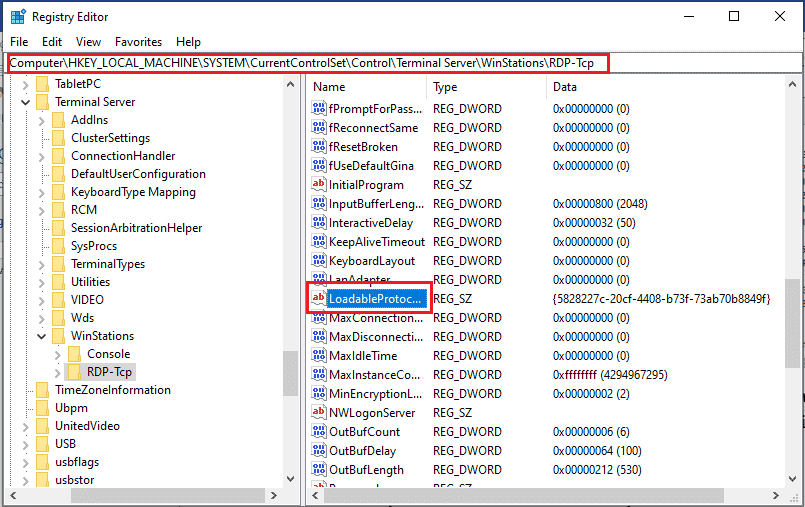
ComputerHKEY_LOCAL_MACHINESYSTEMCurrentControlSetControlTerminal ServerWinStationsRDP-Tcp
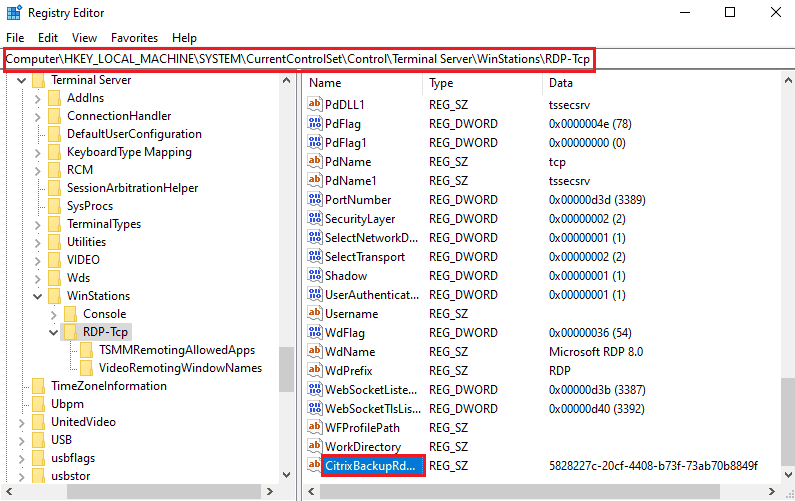
3. Double-click on the CitrixBackupRdpTcpLoadableProtocol_Object entry and note the value in the Value data bar.
Note: The value of the entry will be {5828277c-20cf-4408-b73f-73ab70b8849f}.
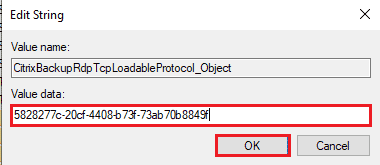
Step II: Paste entry in Remote Computer
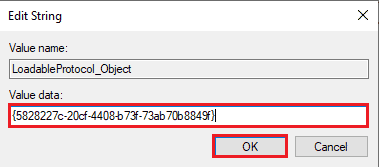
The second step is to paste the value of the entry in the LoadableProtocol_Object key in the Remote Computer.
1. Navigate to the RDP-Tcp folder in the Registry Editor on the Remote Computer by following the steps above.
2. Double-click on the LoadableProtocol_Object entry and type the given value in the Value Data bar: CitrixBackupRdpTcpLoadableProtocol_Object
Step III: Restart Remote Desktop Services
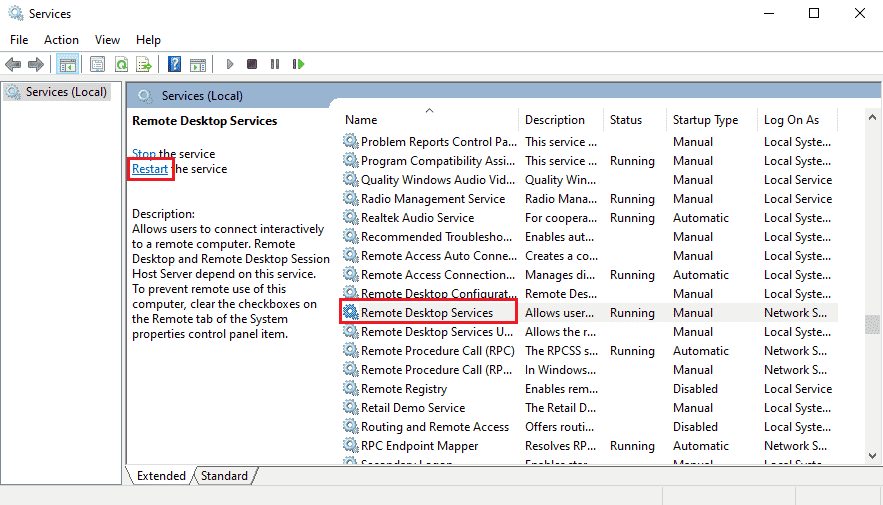
The final step is to restart the Remote Desktop service on both PCs using the Services app.
1. Launch the Services app.

2. Select the Remote Desktop Services in the list and click on the Restart option to restart the service.
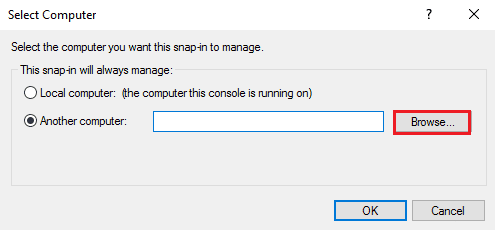
3. Right-click on the Services (Local) and click on the Connect to another computer… option in the list.
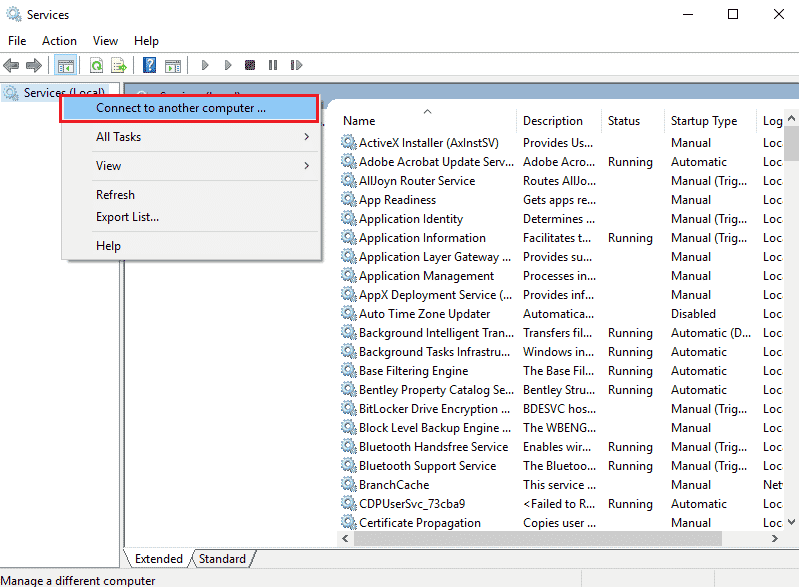
4. Click on the Browse… button on the Select Computer window.
5. Click on the Advanced… button on the next window.

6. Click on the Find now button and select the Remote Desktop on the list.
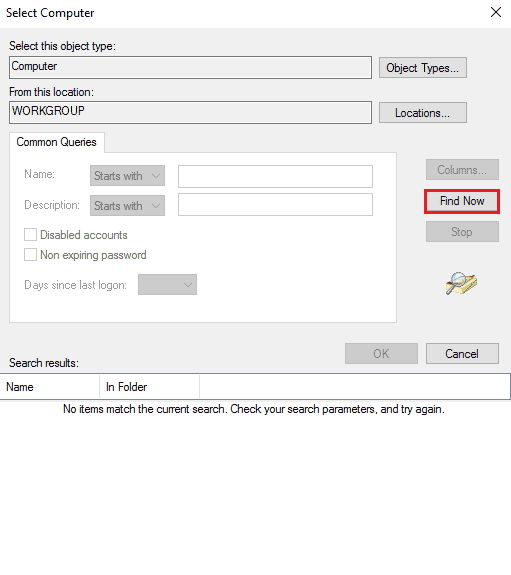
7. Click on the OK button on the Select Computer window.

Also Read: Fix Intel RST Service Is Not Running in Windows 10
Method 10: Modifications in Group Policy Editor
You can use the following methods to fix Remote Desktop cannot connect to the Remote Computer for one of these reasons issue using the Group Policy Editor.
Method 10A: Add User accounts in Allow log on through Remote Desktop Services
You can use the method to allow the Administrator in the Allow log on through Remote Desktop services entry.
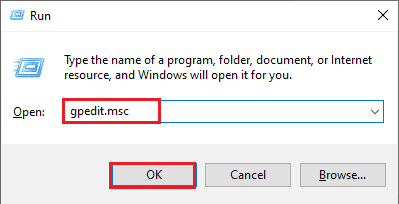
1. Press the Windows + R keys simultaneously to open the Run dialog box.
2. Type gpedit.msc and click on the OK button to launch the Local Group Policy Editor.
3. Navigate to the User Rights Assignment folder using the location path
Compute Configuration > Security Settings > Local Policies > User Rights Assignment
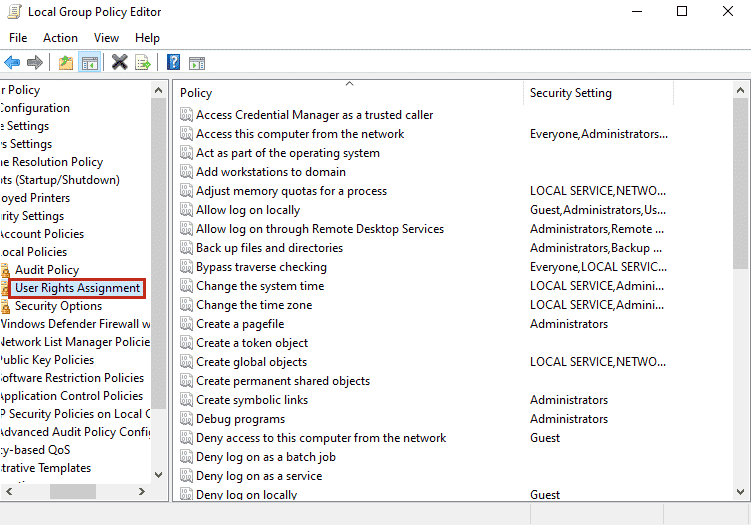
4. Double-click on the Allow log on through Remote Desktop Services in the list.
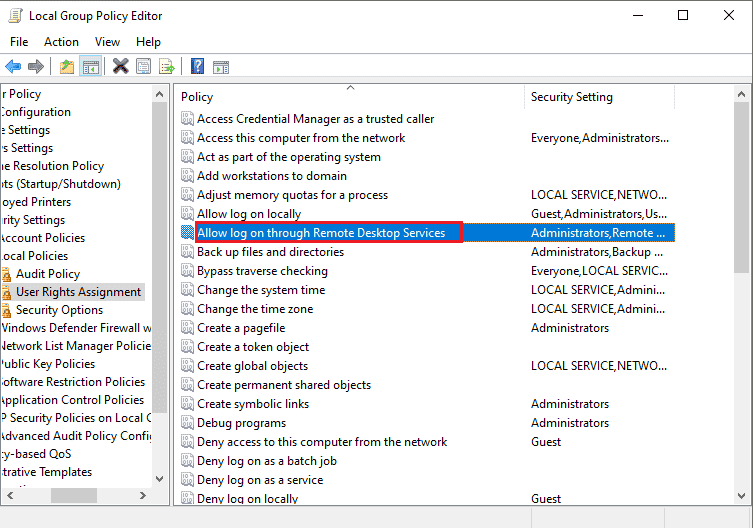
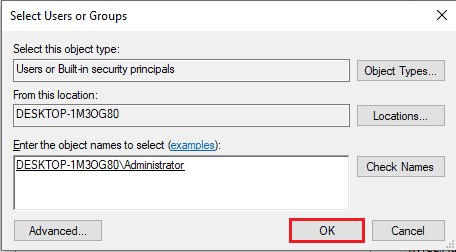
5. In the Local Security Setting tab, click on the Add User or Group… button.
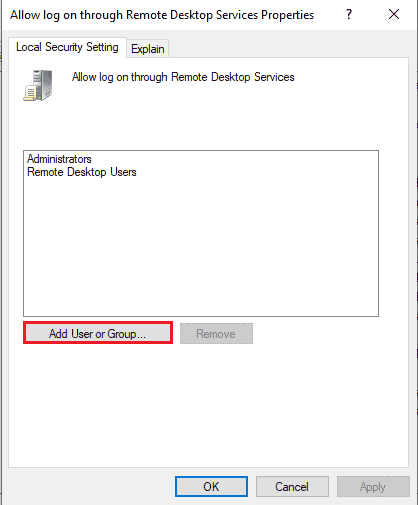
6. Click on the Advanced… button at the bottom-left corner.
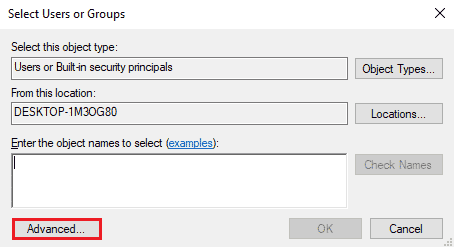
7. Click on the Find Now button, select the Administrator account, and click on the OK button.
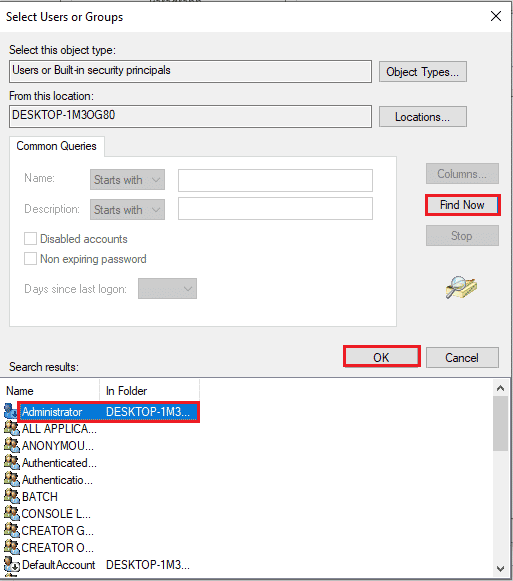
8. Click on the OK button on the Select Users or Groups window.
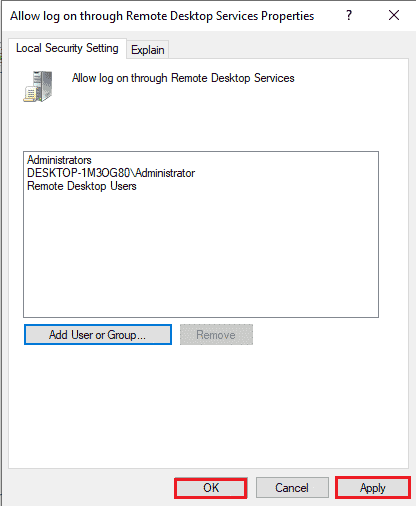
9. Click on the Apply and OK buttons on the Allow log on through Remote Desktop Services Properties window.
Method 10B: Modify Remote Desktop Service Setting
Another option to fix Remote Desktop cannot connect to the Remote Computer for one of these reasons issue is to modify the Remote Desktop service setting.
Step I: Modify Remote Desktop Services Setting
The first step is to modify the Remote Desktop Services setting on the Group Policy Editor.
1. Press the Windows + R keys together to open the Run dialog box.
2. Type gpedit.msc in the search bar and click on OK.

3. Navigate to the Connections folder using the following location path.
Computer Configuration > Administrative Templates > Remote Desktop Services > Remote Desktop Session Host > Connections
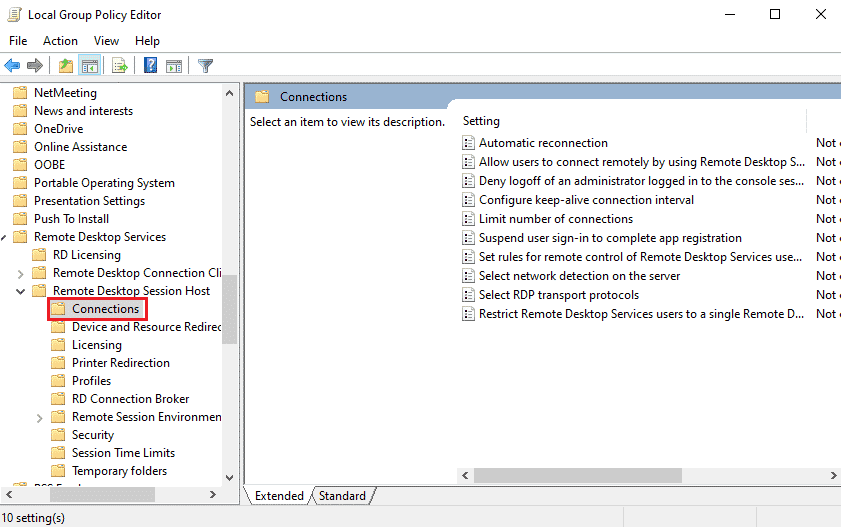
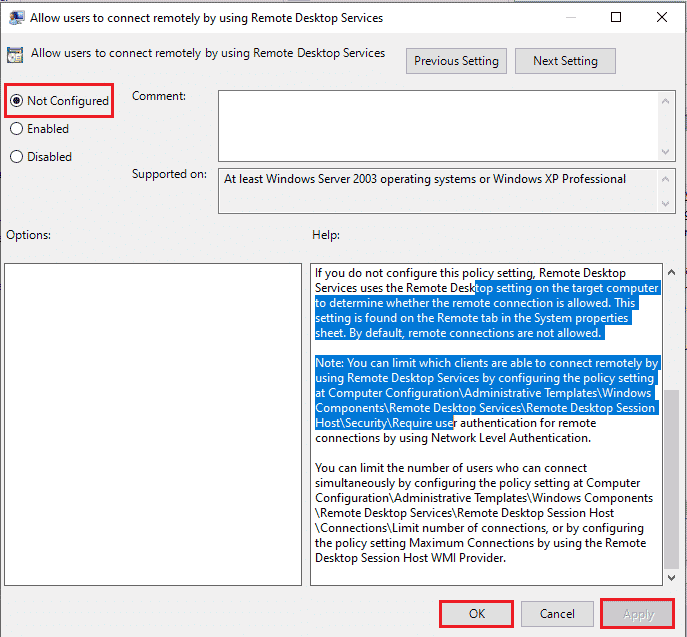
4. Double-click on the Allow users to connect remotely by using Remote Desktop Services in the list.
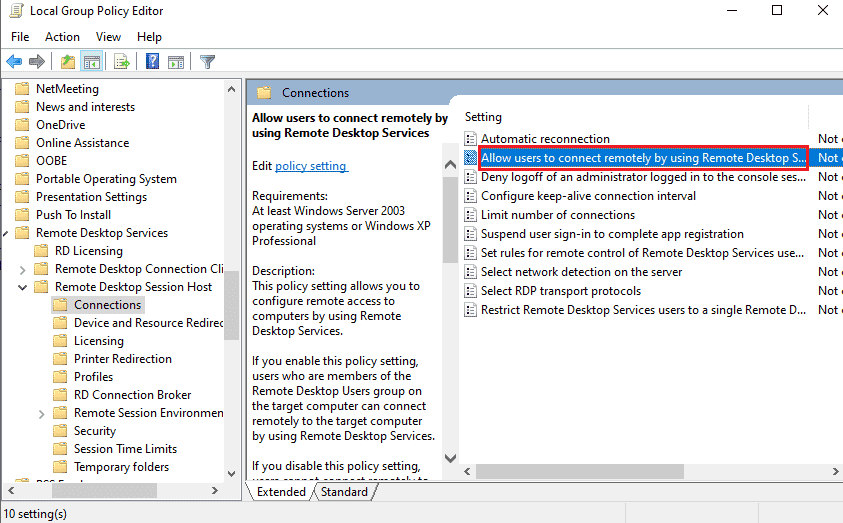
5. Select the Not Configured option in the setting window and click on the Apply and OK buttons.
Note: You can alternatively select the Enabled option in the window.
Step II: Force Update GPE
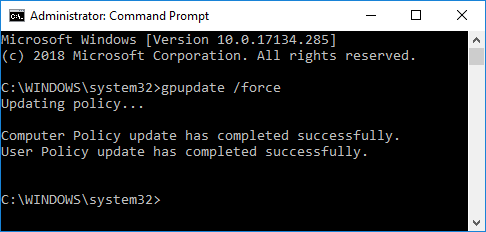
The next step is to force update the Group Policy Editor using the Command Prompt.
1. Open the Command Prompt as administrator.

2. Type gpupdate /force command and press the Enter key.
Also Read: How to Add Let’s Encrypt SSL to MaxCDN Custom Domain
Method 11: Add SSL Certificates
To fix Remote Desktop cannot connect to the Remote Computer issue, you can add the SSL certificates for the Network access.
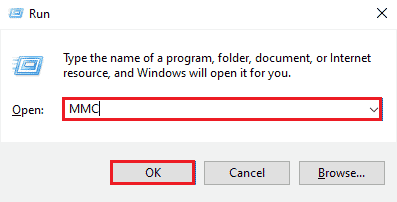
1. Press the Windows + R keys simultaneously to open the Run dialog box.
2. Type MMC in the Open bar and click on the OK button to open the Console window.
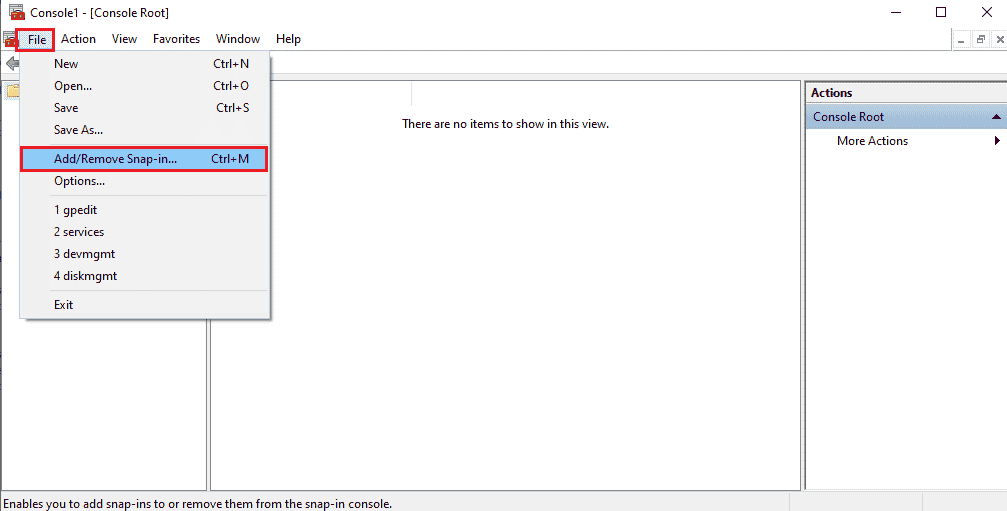
3. Click on the File tab and click on the Add/ Remove Snap-in… option in the list.
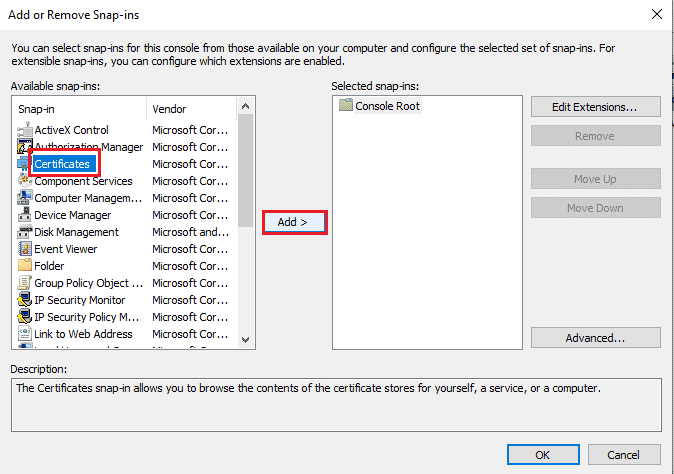
4. Select the Certificates in the Available snap-ins window and click on the Add > button.
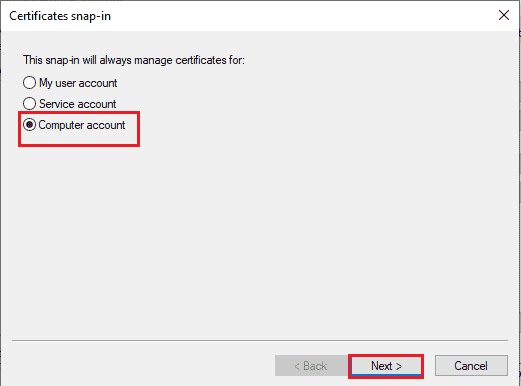
5. Select the Computer account option and click on the Next button.
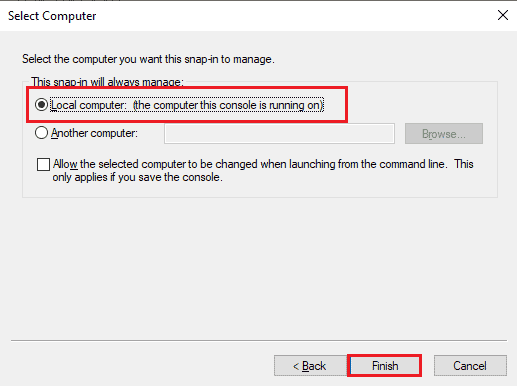
6. Select the Local Computer: (the computer this console is running on) option and click on the Finish button.
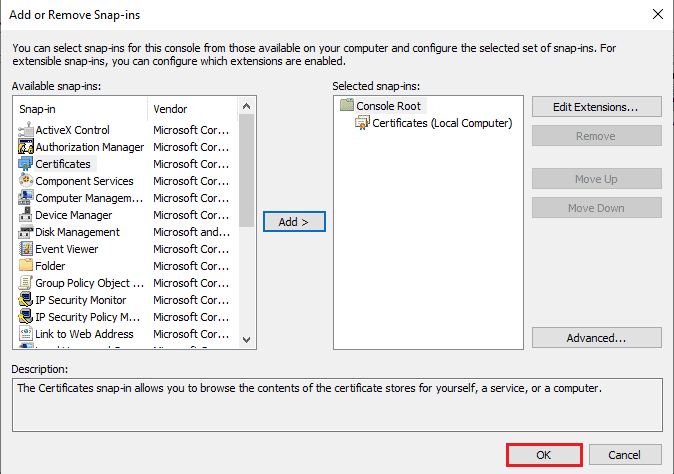
7. Click on the OK button on the Add or Remove Snap-ins window.
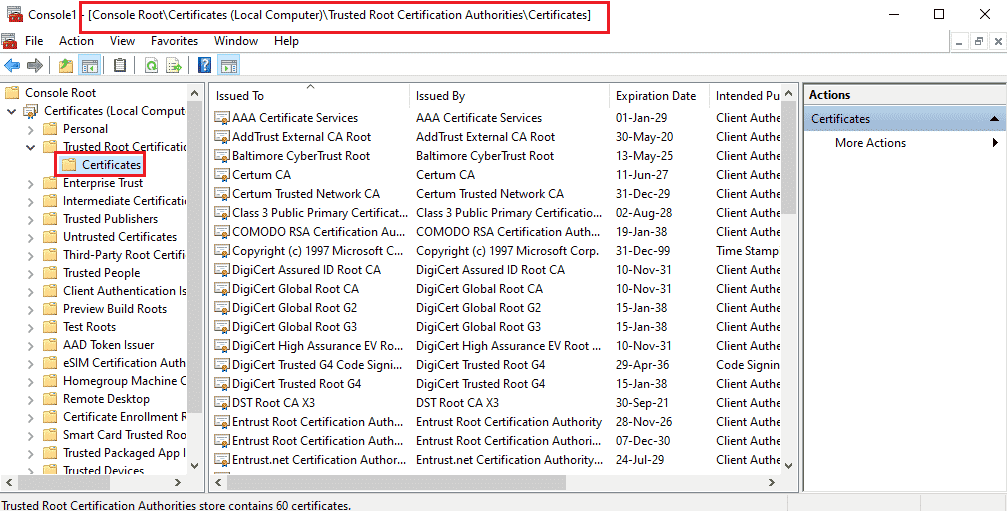
8. In the Console Root folder in the left pane of the window, navigate to the Certificates folder using the location path.
Certificates (Local Computer) > Trusted Root Certification Authorities > Certificates
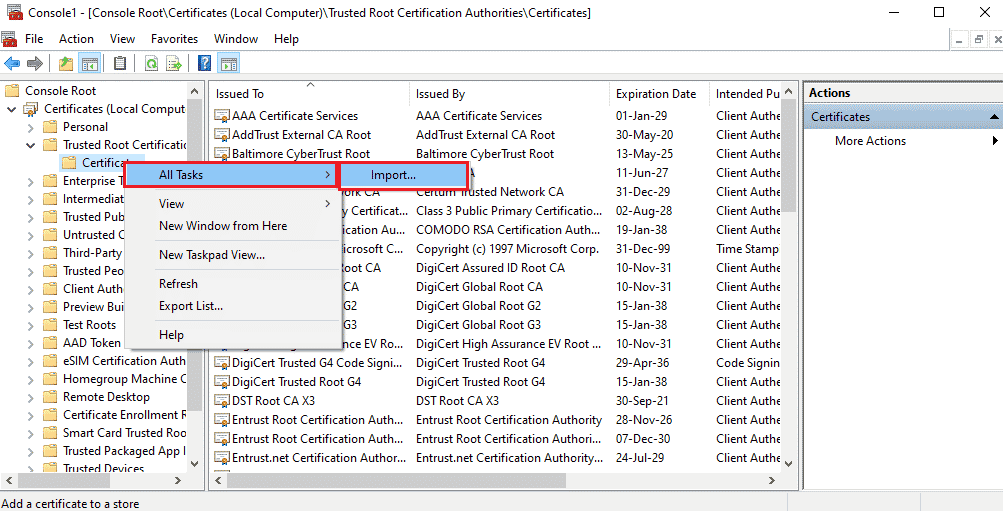
9. Right-click on the Certificates folder, move the cursor to the All Tasks option and click on the Import… option.
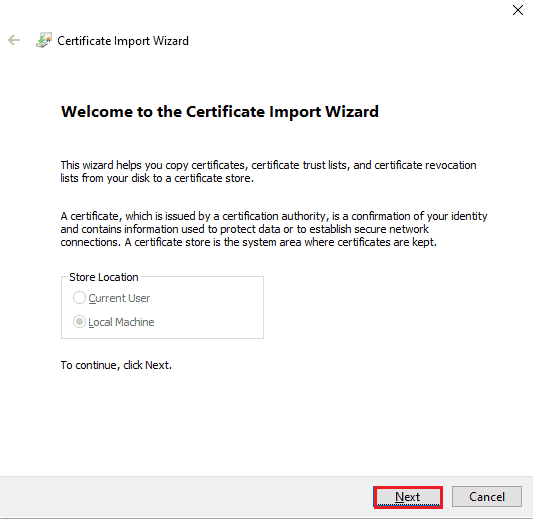
10. Click on the Next button on the Certificate Import Wizard window.
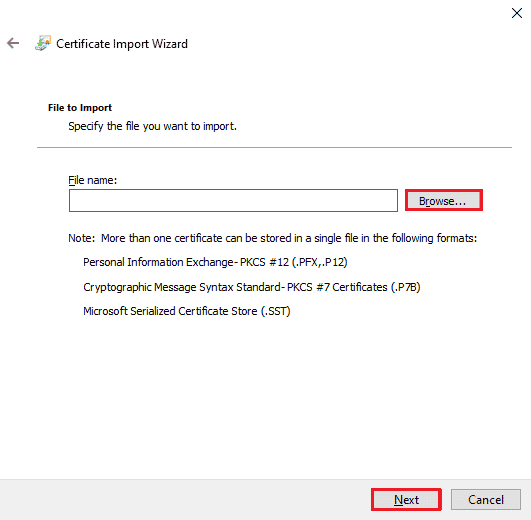
11. Click on the Browse… button, browse for the certificate file, and click on the Next button.
12. Follow the on-screen instructions and import the SSL certificates to your PC.
Recommended:
The methods to fix Remote Desktop cannot connect to the Remote Computer issue are discussed in this article. Try implementing the methods given in the article to fix the issue and please leave your suggestions in the comments. Also, if you have any queries regarding this remote Desktop can’t connect to the Remote Computer in Windows 10 topic, please leave them in the comments.