How to Disable Microsoft Word Spell Checker

Microsoft Word has revolutionized the way documents are created and edited. The easy-to-use interface along with amazing features makes it the top Docx format application in the world. Among the plethora of features the software provides, the spell checker is the one that is perhaps the most infamous. The red squiggly lines tend to appear on every single word that does not exist in the Microsoft dictionary and ruins the flow of your writing. If you have come across this issue and want to eliminate all distractions while writing, here’s how to disable the Microsoft Word spell checker.
What is the Spell Checker feature on Word?
The spell checker feature on Microsoft Word was introduced to help people minimize errors in their word document. Unfortunately, the Word dictionary has a limited capacity of words causing the spell checker to take action more often than you would like to. While the red squiggly lines of the spell-checker do not affect the document itself, it can be really distracting to look at.
How to Disable Microsoft Word Spell Checker
Method 1: How to Disable Spell Check in Word
Disabling the spell checker in Word is a simple process that can be reversed whenever you feel like it. Here’s how you can go about disabling the spell checker on Word:
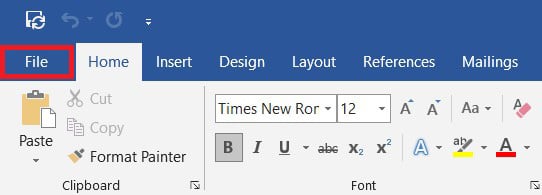
1. Open a Microsoft Word document and on the top left corner of the screen, click on ‘File.’
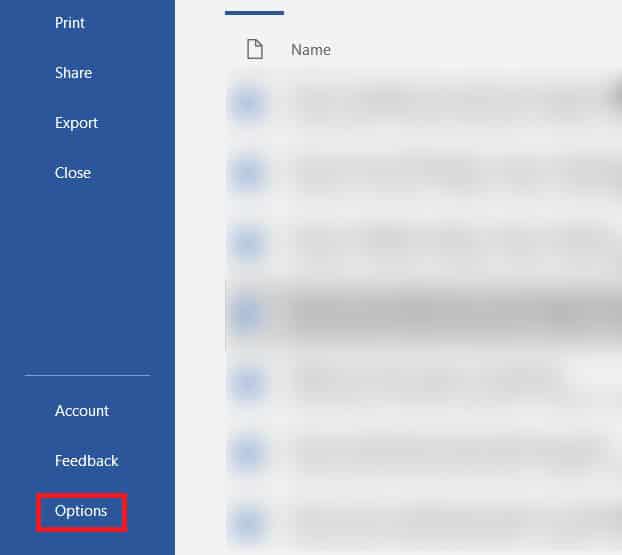
2. Now, on the bottom left corner of the screen, click on ‘Options.’
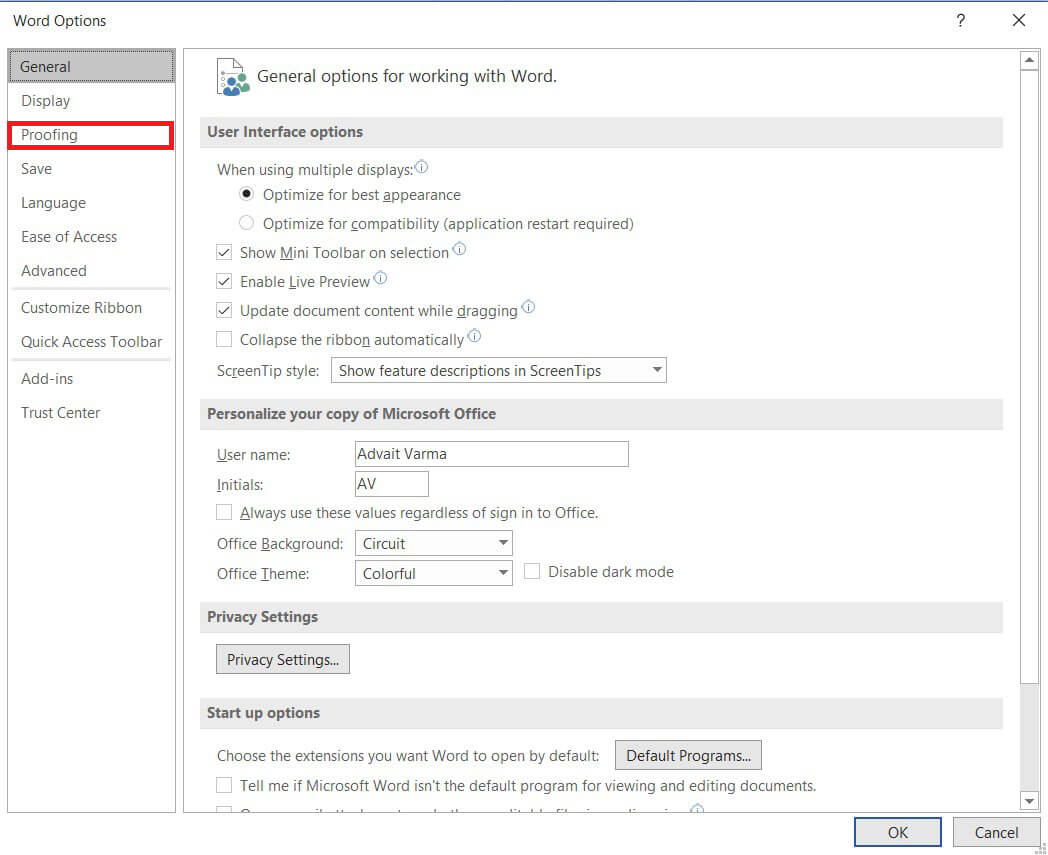
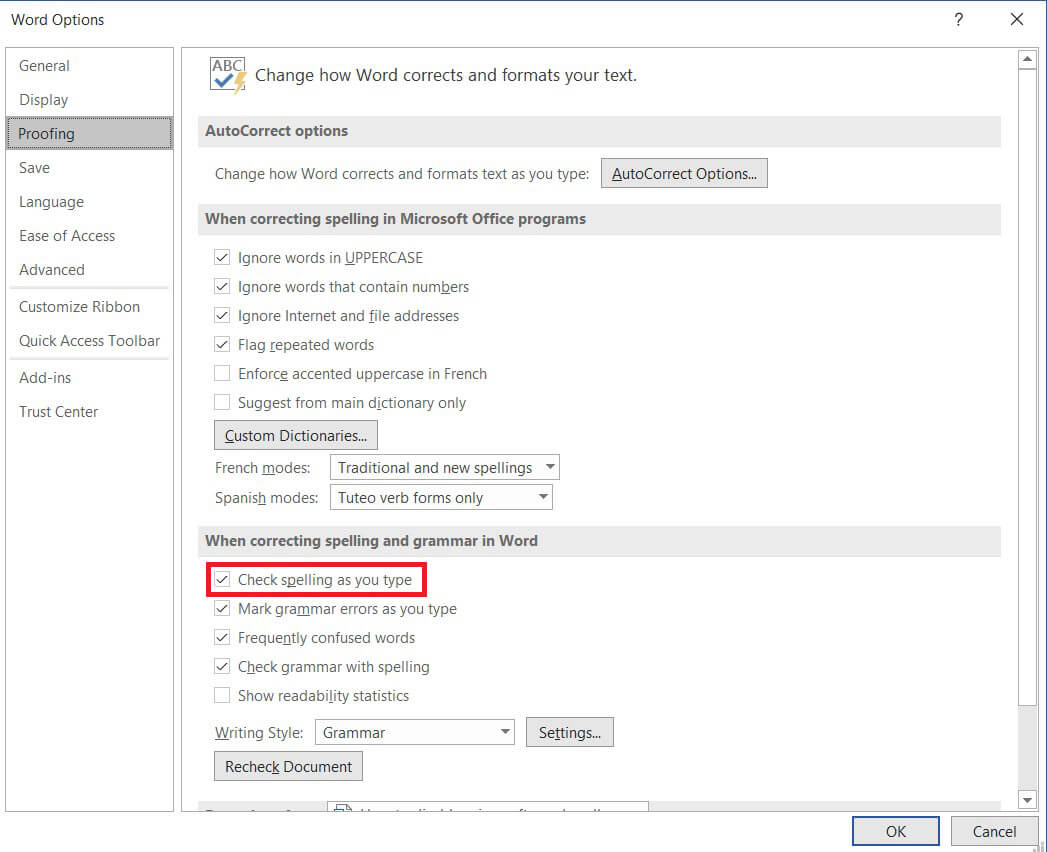
3. From the list of options, click on ‘Proofing’ to proceed.
4. Under the panel titled, ‘When correcting spelling and grammar in word’, disable the check box that reads ‘Check to spell as you type.’
5. The spell checker in Word will be disabled. You can click on the check box to re-enable the feature.
6. You can also explicitly command Microsoft Word to run a spell check even after disabling the feature by pressing the F7 key.
Also Read: How to Draw in Microsoft Word
Method 2: How to Disable Spell Check for a Specific Paragraph
If you do not want to disable spell check for the entire document, you can disable it for just a few paragraphs. Here’s how you can turn off spell check for a single paragraph:
1. On your Microsoft Word document, select the paragraph you want to disable the spell checker.
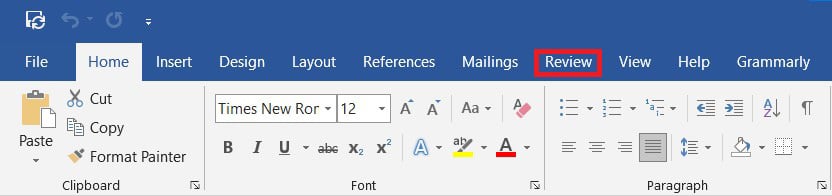
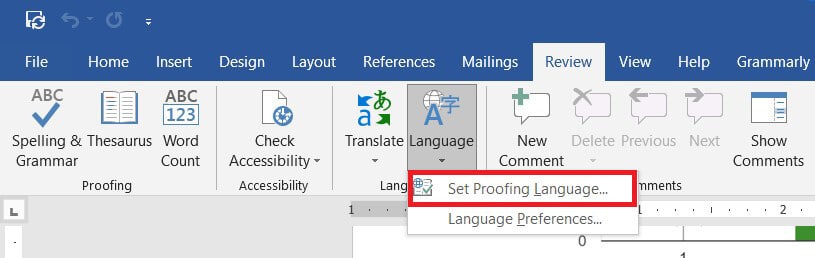
2. From the title bar of the Word doc, click on the option that reads ‘Review.’
3. Within the panel, click on the ‘Language’ option.
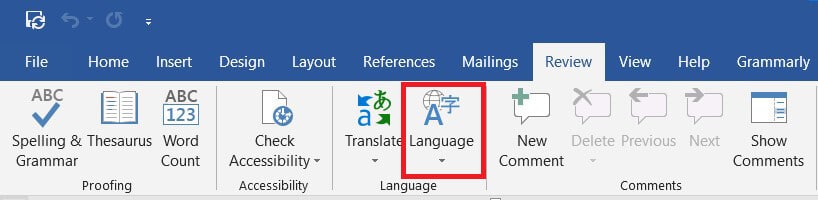
4. A drop-down list will appear with two options. Click on ‘Set proofing language’ to proceed.
5. This will open a small window displaying the languages in word. Below the list of languages, enable the check box that says ‘Do not check spelling or grammar.’
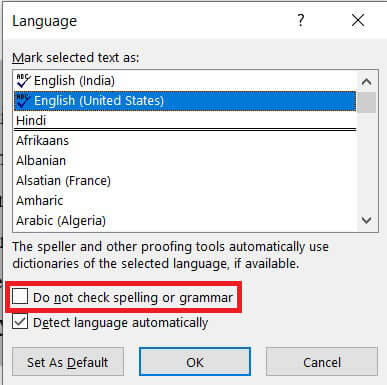
6. The spell check feature will be disabled.
Also Read: How to Download Microsoft Office Picture Manager
Method 3: Disable the Spell Checker for a Single Word
Often, there is only a single word that appears to activate the spell checker. In Microsoft word, you can help individual words escape the spell check feature. Here’s how you can disable spell check for individual words.
1. In the Word doc, right-click on the word that does not need to be spell checked.
2. From the list of options that appear, click on ‘Ignore All’ if the word is used multiple times in the document.
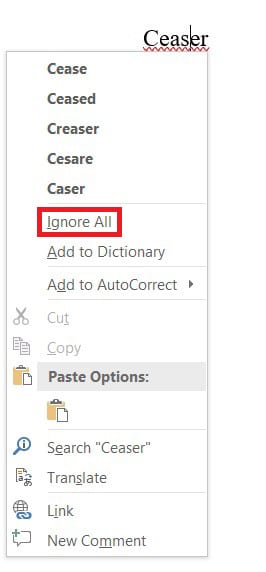
3. That word will no longer be checked and won’t have a red squiggly line below it. However, if this is not permanent, the word will be checked the next time you open the doc.
4. To permanently save a word from spell check, you can add it to the Microsoft Word dictionary. Right-click on the word and click on ‘Add to dictionary.’
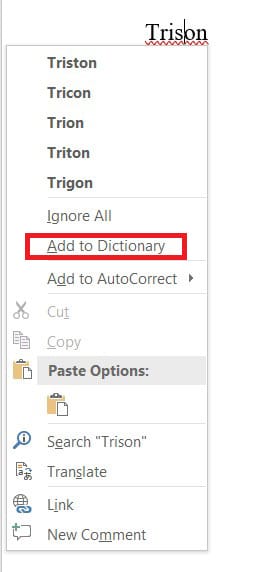
5. The word will be added to your dictionary and will no longer activate the spell check feature.
The red squiggly lines on Microsoft Word can be a nightmare for any regular user. It disrupts your flow of writing and spoils the look of your document. However, with the steps mentioned above, you can turn off the feature and get rid of the spell checker.
Recommended:
We hope that this guide was helpful and you were able to disable the Microsoft Word spell checker. If you still have any queries regarding this article, then feel free to ask them in the comments section.