How to Enable DNS over HTTPS in Chrome

The internet is a primary medium via which the majority of hacking attacks & privacy infiltration takes place. Given the fact that we are either idly connected or actively browsing through the world wide web most of the time, it is important for you to have a safe and secure internet browsing experience. The global adoption of HyperText Transfer Protocol Secure, which is commonly known as HTTPS has helped immensely in securing communication over the internet. DNS over HTTPS is another technology adopted by Google to further improve internet security. However, Chrome does not automatically switch DNS server to DoH, even if your internet service provider supports it. Thus, you need to learn how to enable DNS over HTTPS in Chrome manually.
How to Enable DNS over HTTPS in Google Chrome
DNS is an abbreviation for Domain Name System and fetches IP addresses of the domains/websites you visit on your web browser. However, DNS servers do not encrypt data and all information exchange takes place in plain text.
The new DNS over HTTPS or DoH technology uses the existing protocols of HTTPS to encrypt all user queries. It, thus, improves privacy and security. When you enter the website, DoH sends query information encrypted in HTTPS directly to the specific DNS server, while bypassing ISP-level DNS settings.
Chrome uses the approach known as same-provider DNS-over-HTTPS upgrade. In this approach, it maintains a list of DNS providers which are known to support DNS-over-HTTPS. It tries to match your current DNS service provider overlapped with the DoH service of the provider if there is one. Although, if there is unavailability of DoH service, it will fall back to the DNS service provider, by default.
To learn more about DNS, read our article on What is DNS and how does it work?.
Why use DNS over HTTPS in Chrome?
DNS over HTTPS offers several benefits, such as:
- Verifies whether the communication with the intended DNS service provider is original or fake.
- Encrypts DNS which helps to hide your activities online.
- Prevents your PC from DNS spoofing and MITM attacks
- Protects your sensitive information from third-party observers & hackers
- Centralizes your DNS traffic.
- Improves the speed & performance of your web browser.
Method 1: Enable DoH in Chrome
Google Chrome is one of the many web browsers that lets you take advantage of DoH protocols.
- Although DoH is disabled by default in Chrome version 80 and below, you can enable it manually.
- If you have updated to the latest version of Chrome, chances are, DNS over HTTPS is already enabled and protecting your PC from internet burglars.
Option 1: Update Chrome
Follow the steps given below to update Chrome in order to enable DoH:
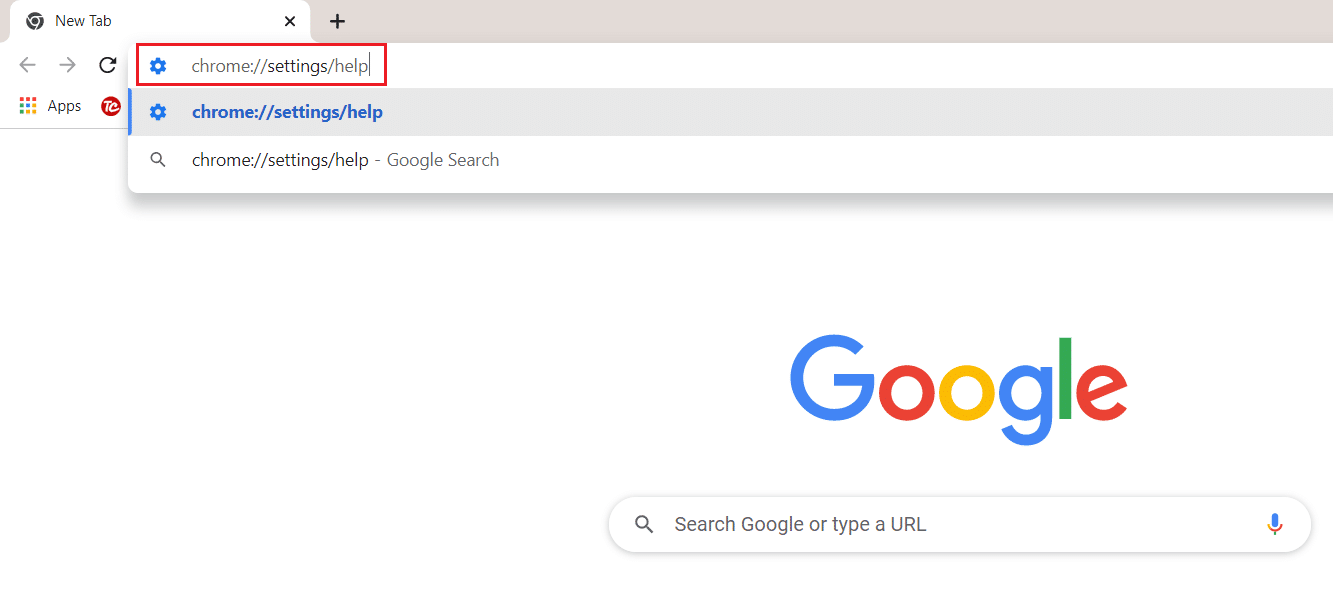
1. Launch Google Chrome browser.
2. Type chrome://settings/help in URL bar as shown.
3. The browser will start Checking for updates as depicted below.
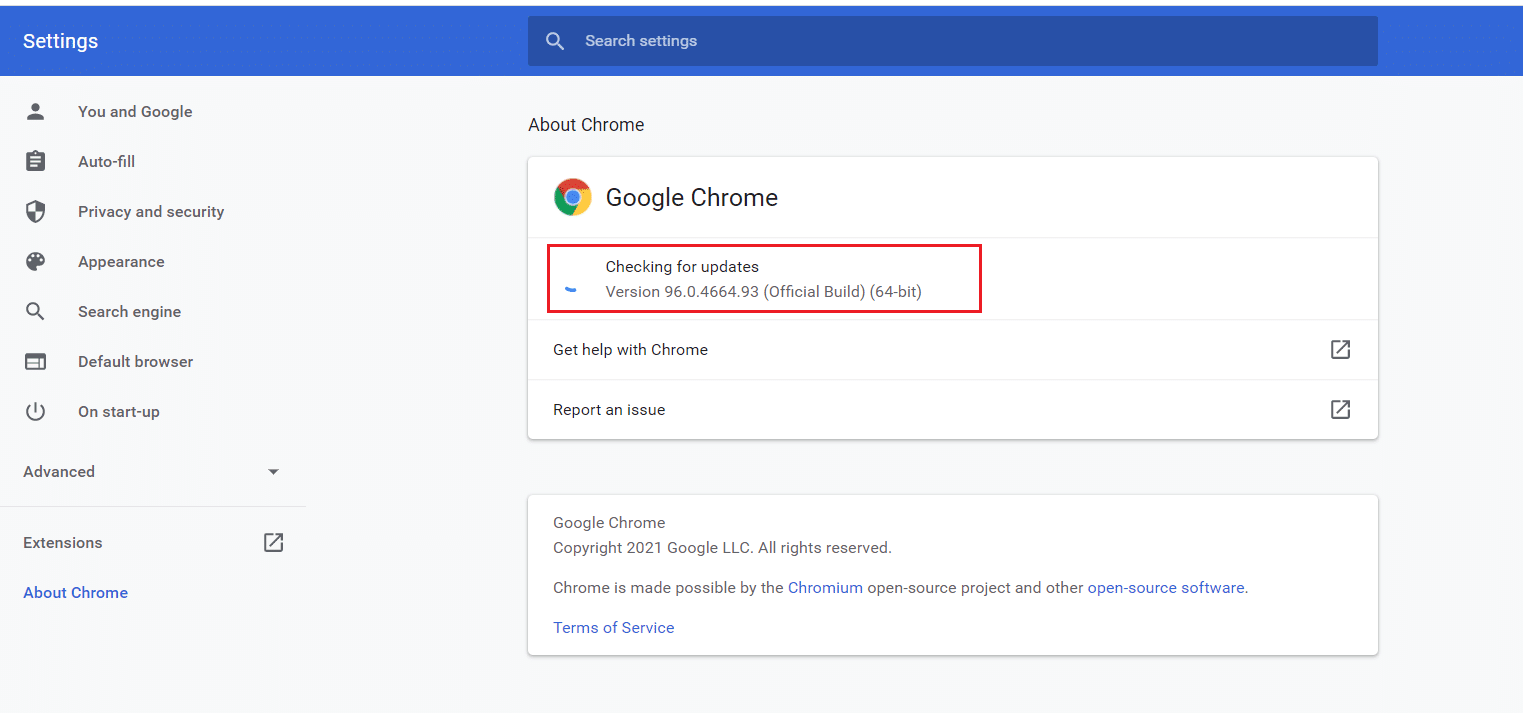
4A. If there are updates available then follow the onscreen instructions to update Chrome.
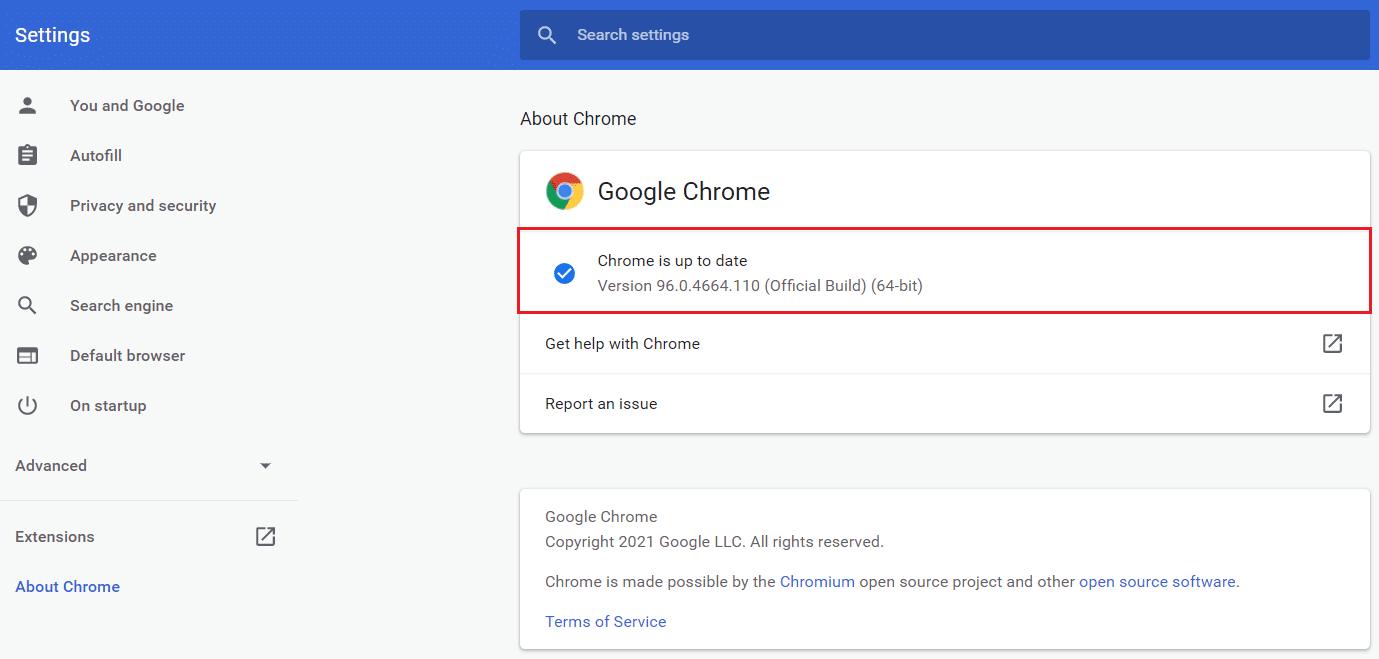
4B. If Chrome is in an updated stage, then you will get the message: Chrome is up to date.
Also Read: How to Change DNS Server on Windows 11
Option 2: Use Secure DNS like Cloudfare
Although, if you do not wish to update to the latest version, due to memory storage or other reasons, you can enable it manually, as follows:
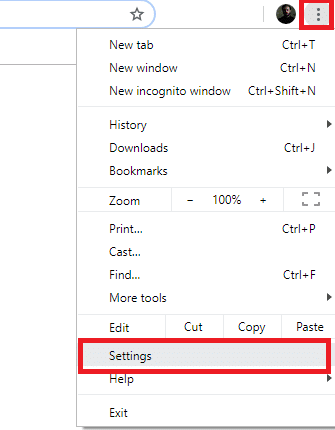
1. Open Google Chrome and click on the three vertical dots icon present at the top-right corner.
2. Choose Settings from the menu.
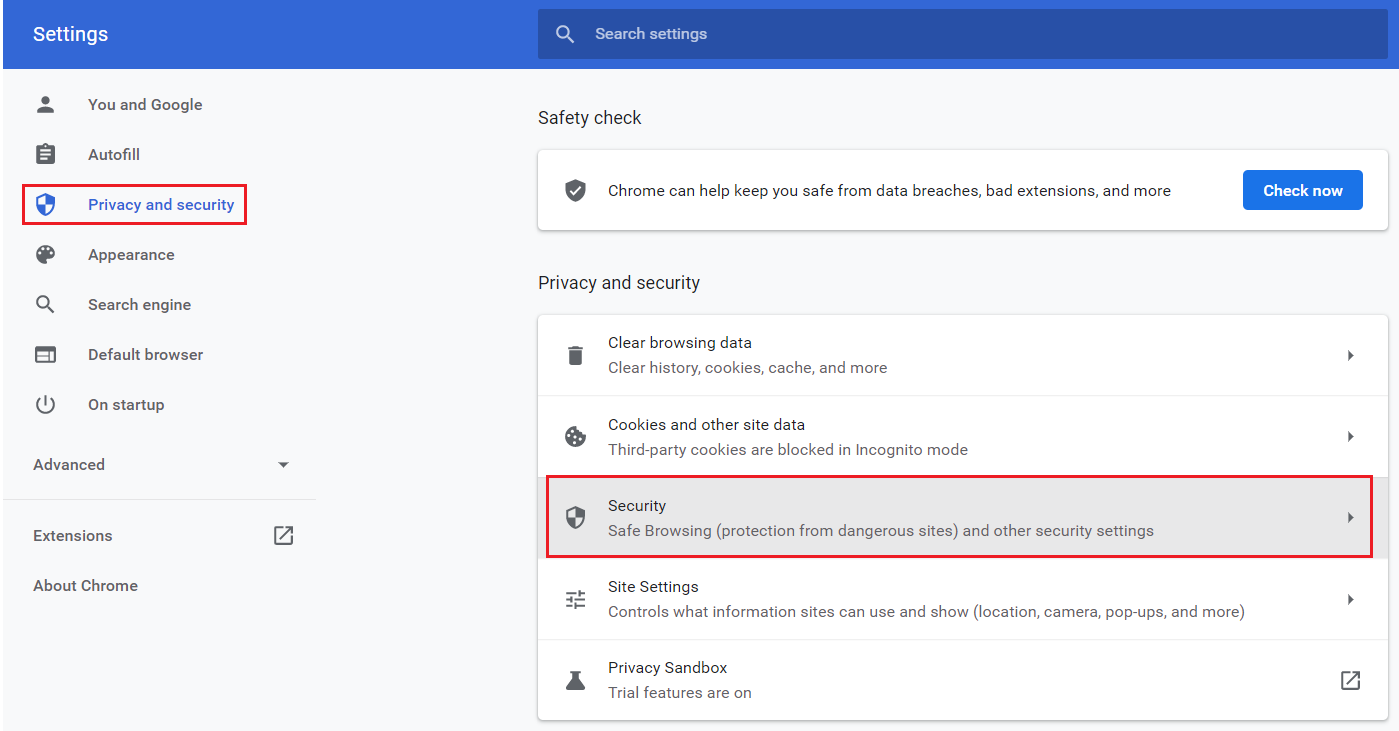
3. Navigate to Privacy and security in the left pane and click Security in the right, as shown highlighted.
4. Scroll down to the Advanced section and switch On toggle for the Use secure DNS option.
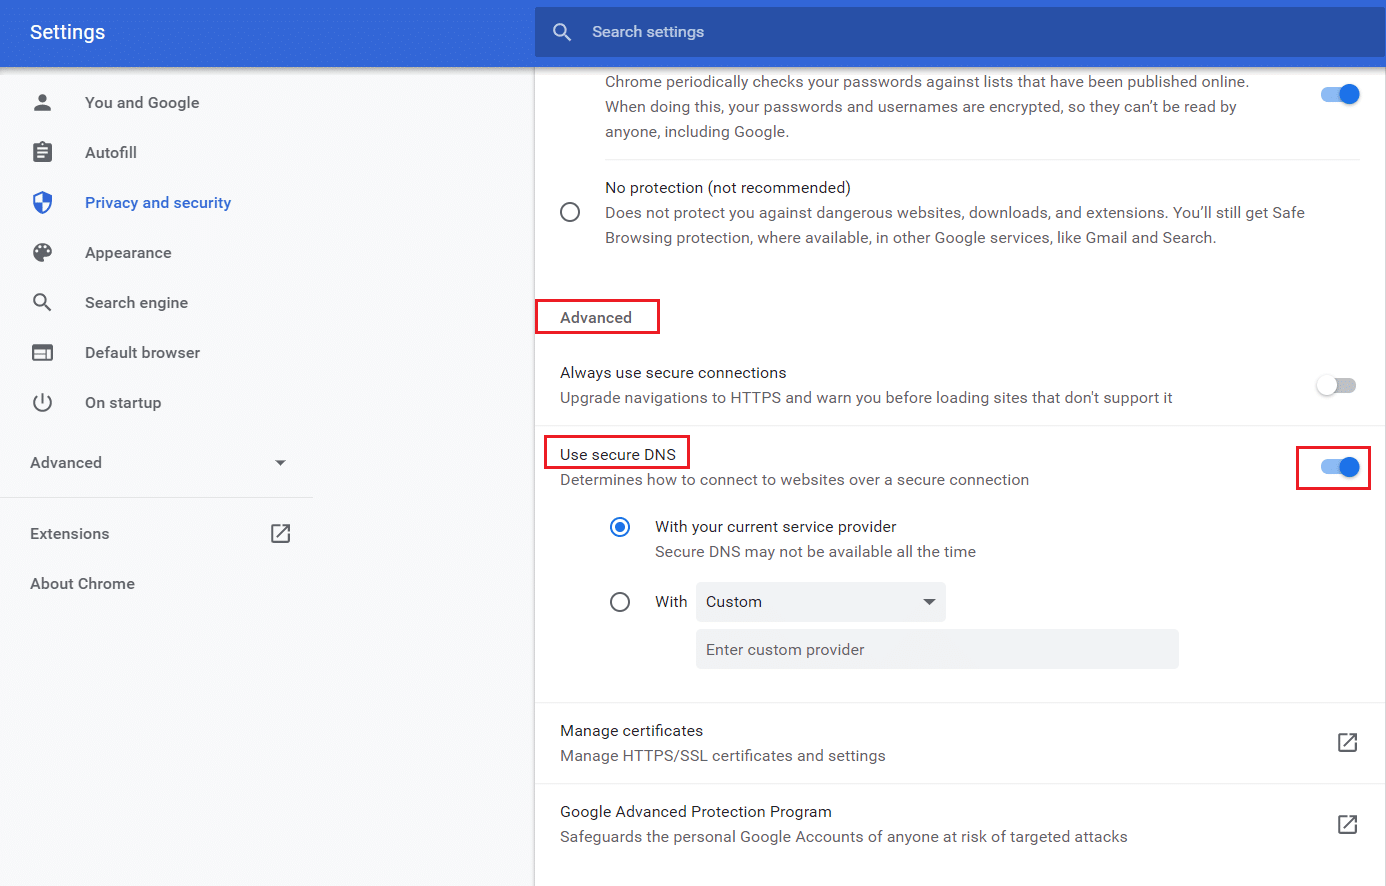
5A. Choose With your current service provider option.
Note: Secure DNS may not be available if your ISP doesn’t support it.
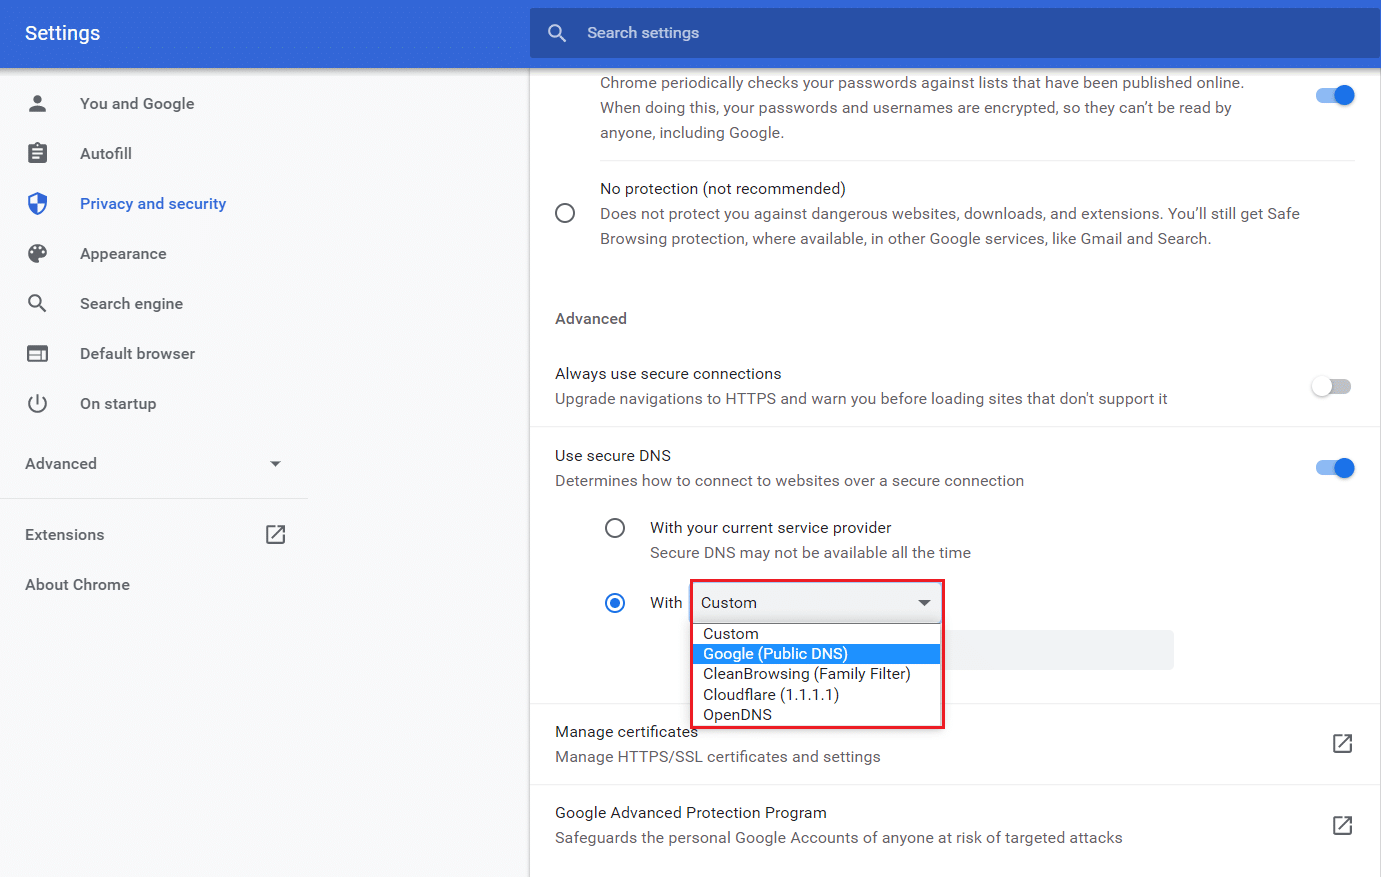
5B. Alternatively, select any one of the given options from With Customized drop-down menu:
- Cloudfare 1.1.1.1
- Open DNS
- Google (Public DNS)
- Clean Browsing (Family Filter)
5C. Moreover, you can choose to Enter custom provider in the desired field as well.
As an example, we have shown the steps for Browsing Experience Security Check for Cloudflare DoH 1.1.1.1.
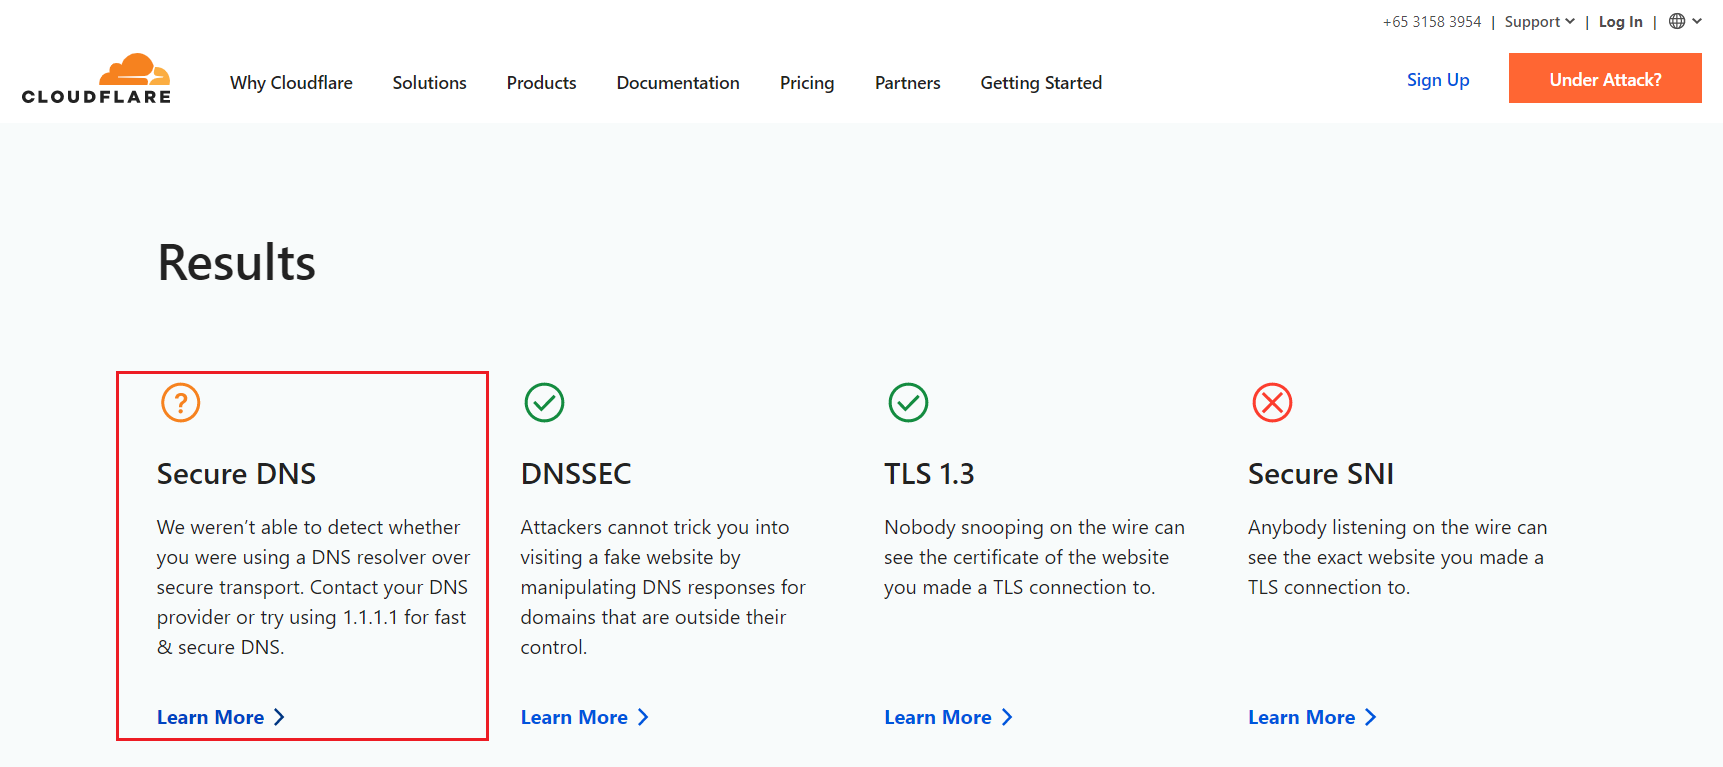
6. Go to the Cloudflare DoH Checker website.
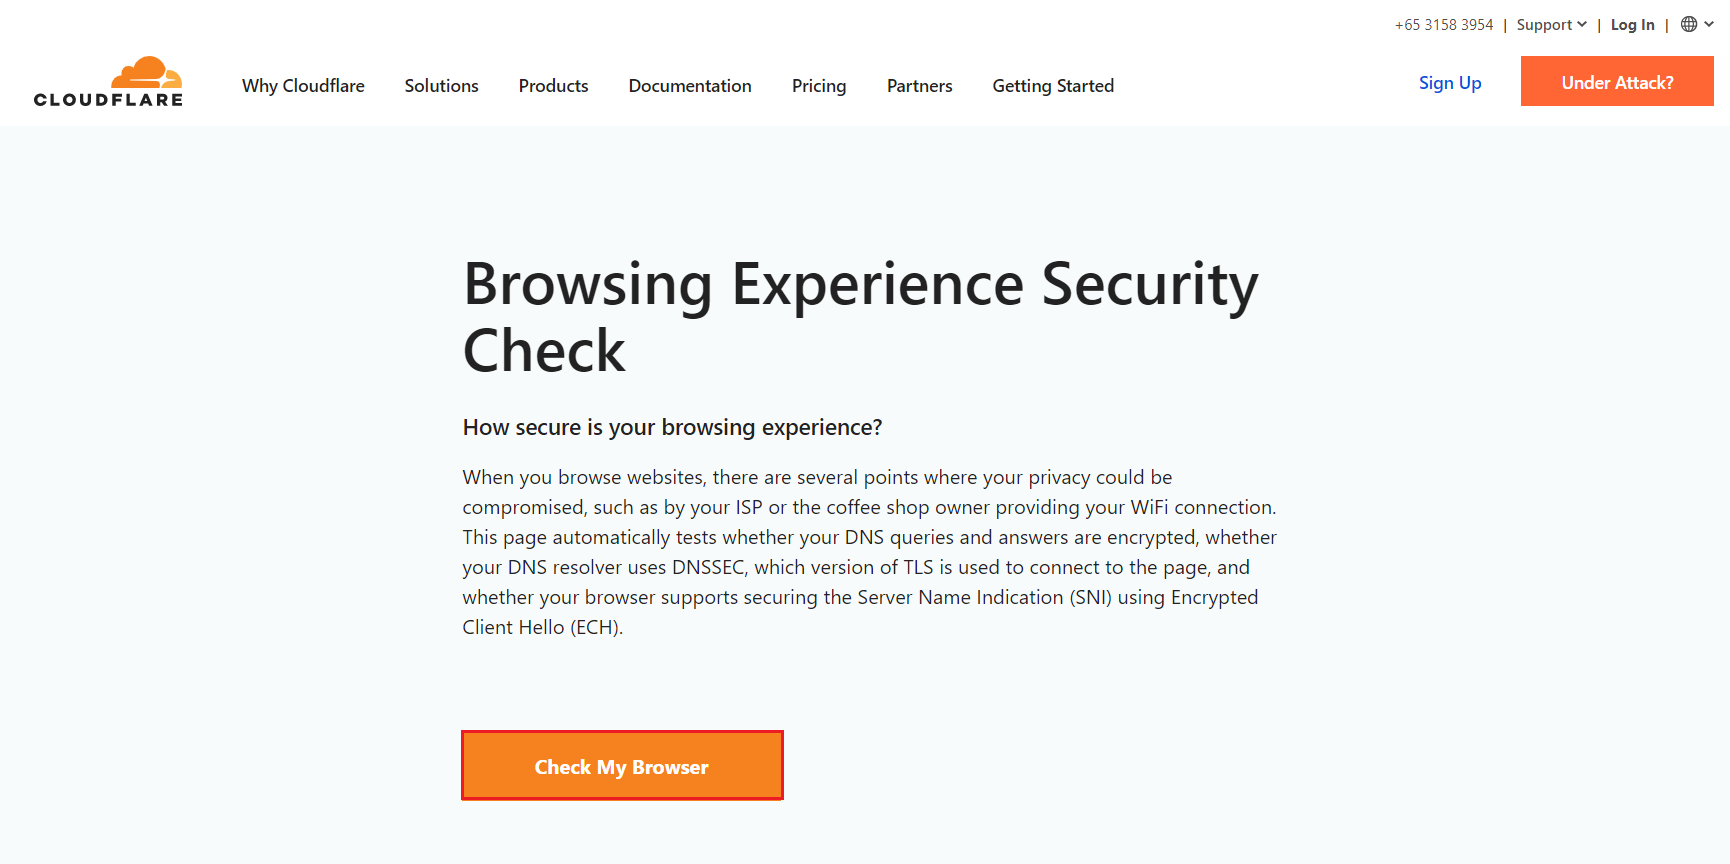
7. Here, you can view the results under Secure DNS.
Also Read: Fix Chrome Not Connecting to the Internet
Method 2: Switch DNS Server
Apart from enabling DNS over HTTPS Chrome, you will also need to switch DNS server of your PC to the one that supports DoH protocols. The best choices are:
- Public DNS by Google
- Cloudflare closely followed by
- OpenDNS,
- NextDNS,
- CleanBrowsing,
- DNS.SB, and
- Quad9.
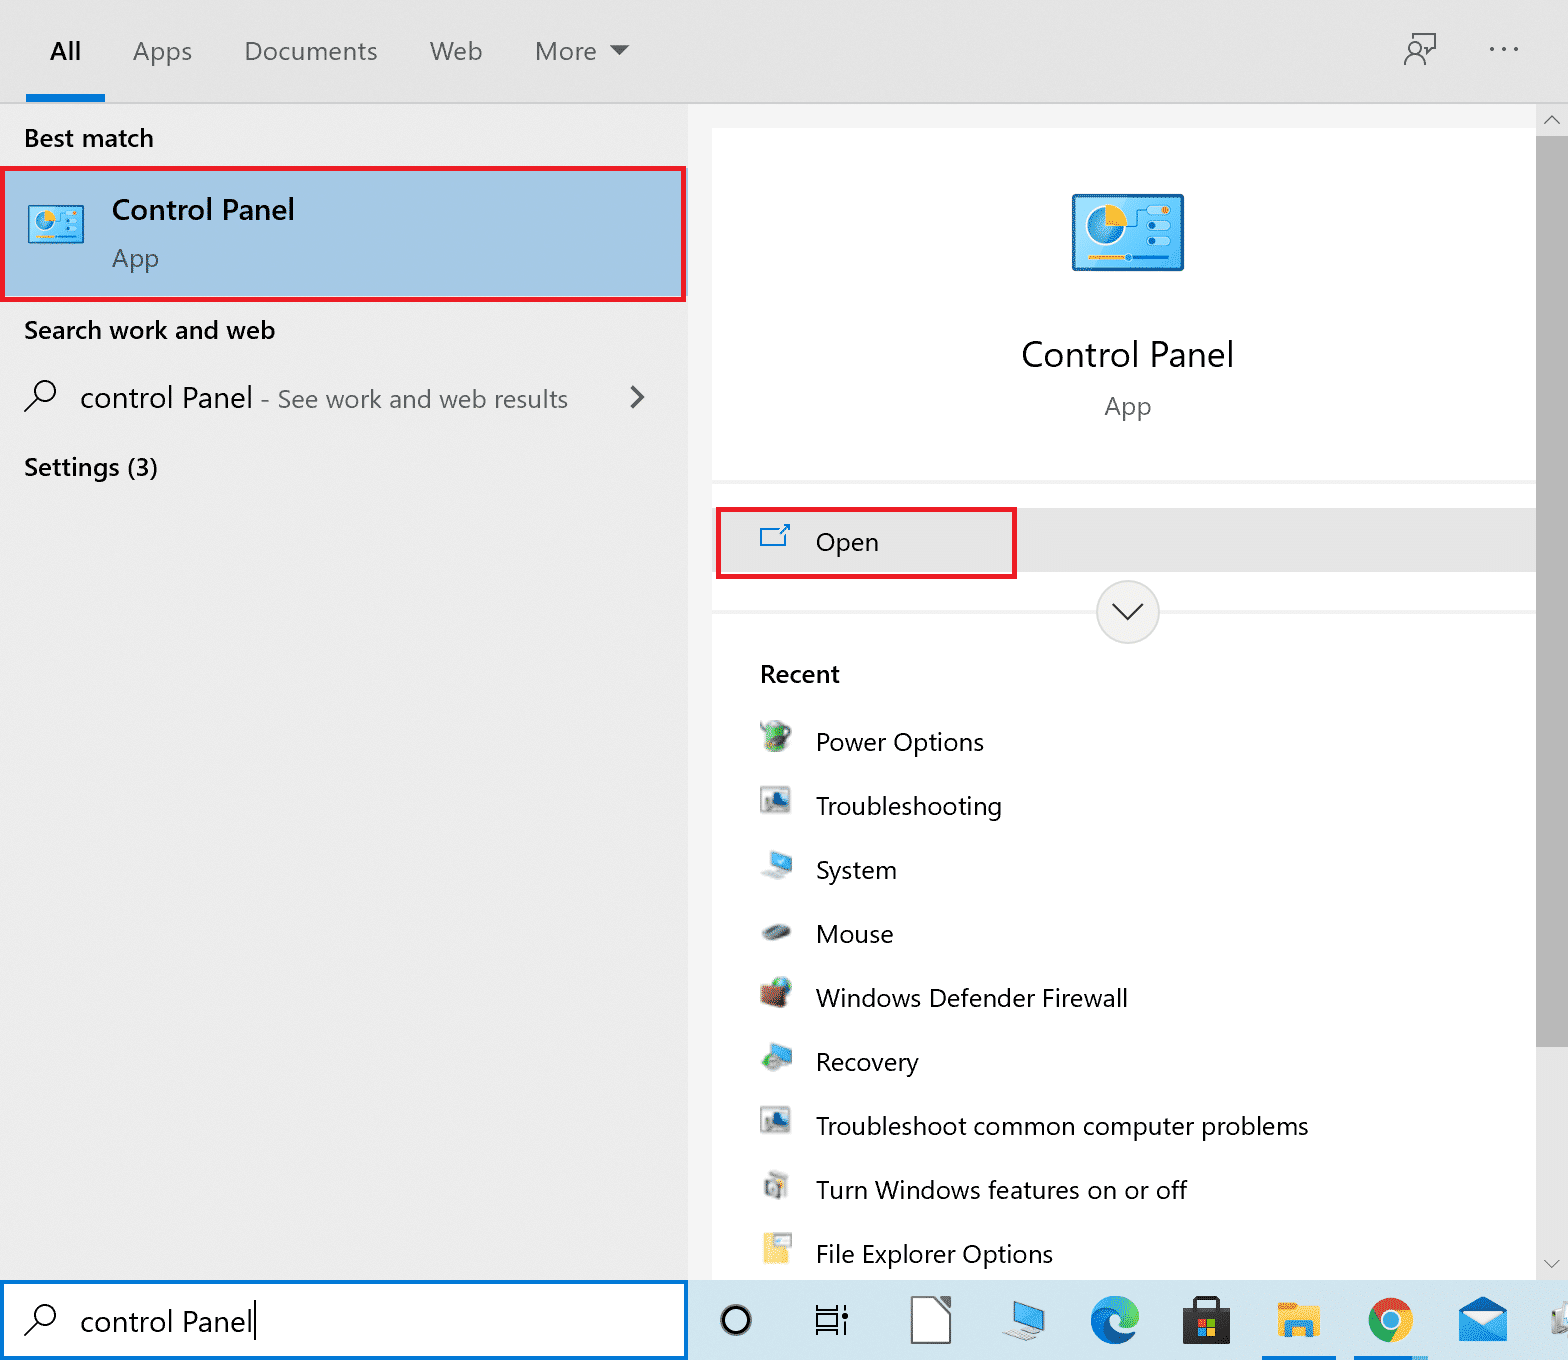
1. Press the Windows key, type Control Panel and click on Open.
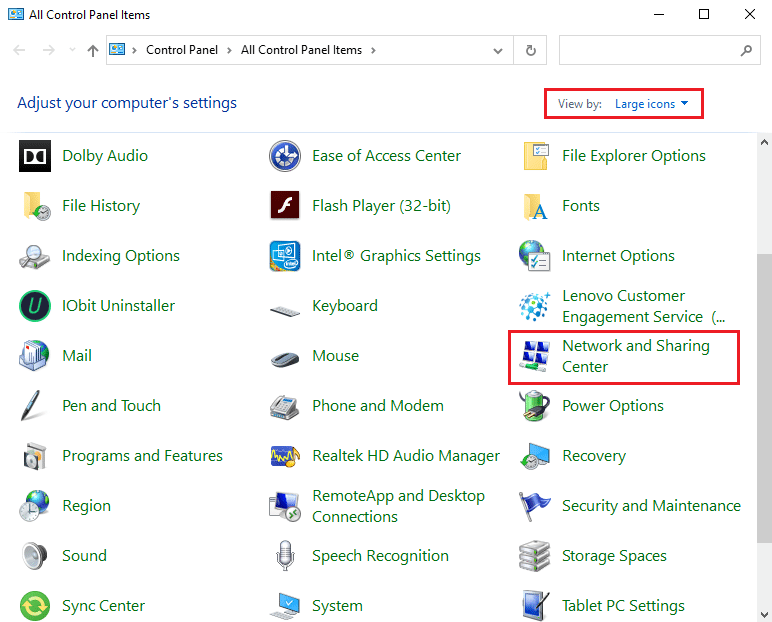
2. Set View by: > Large icons and click on the Network and Sharing Center from the list.
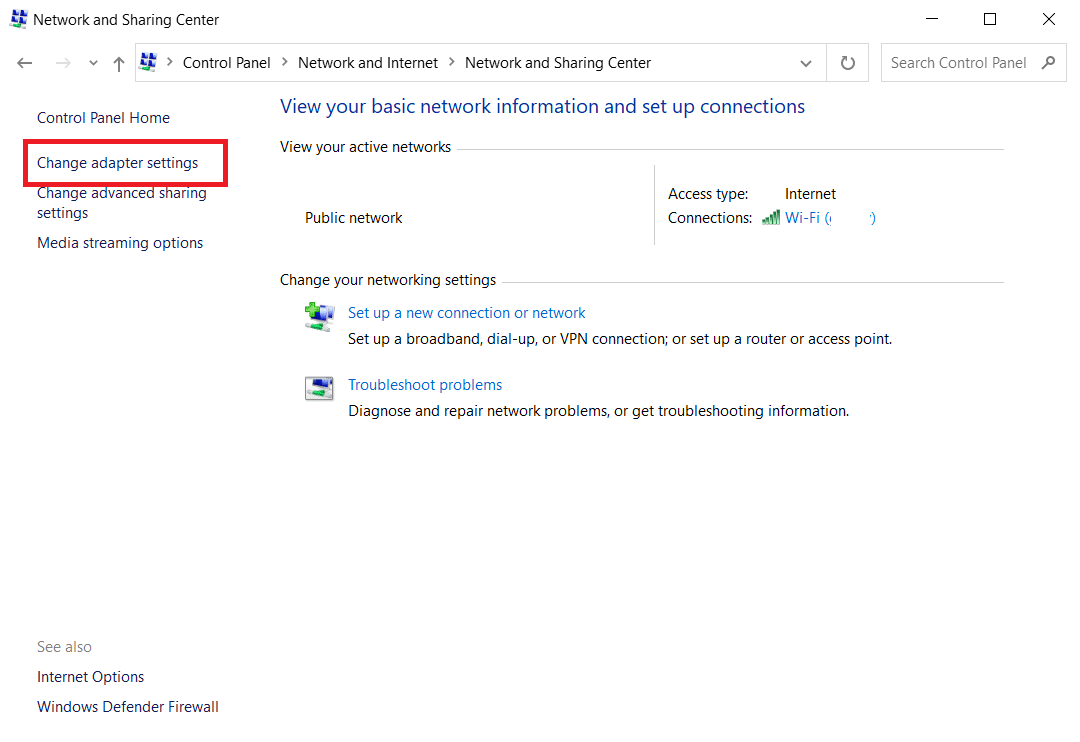
3. Next, click on the Change adapter settings hyperlink present in the left pane.
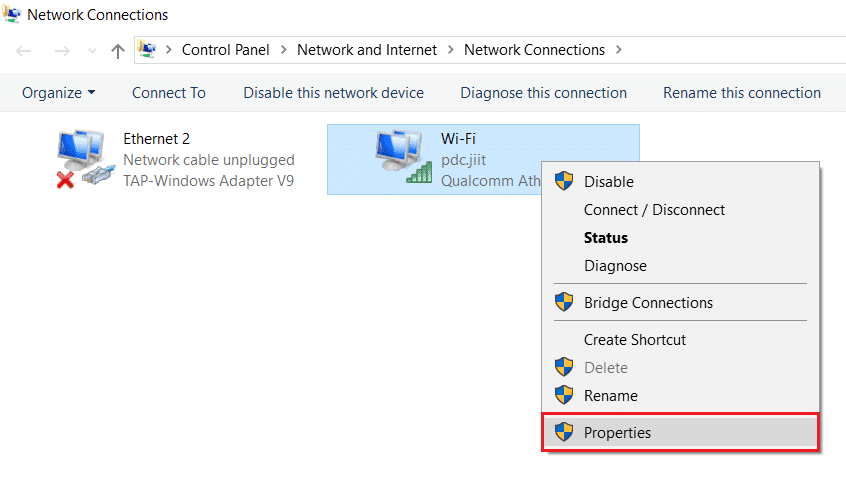
4. Right-click on your current network connection (e.g. Wi-Fi) and select Properties, as depicted.
5: Under This connection uses the following items: list, locate and click Internet Protocol Version 4 (TCP/IPv4).
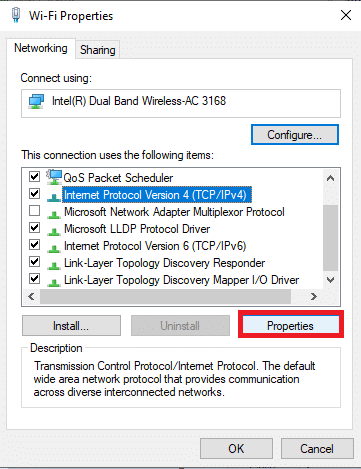
6. Click the Properties button, as highlighted above.
7. Here, select Use the following DNS server addresses: option and enter the following:
Preferred DNS server: 8.8.8.8
Alternate DNS server: 8.8.4.4

8. Click on OK to save changes.
Due to DoH, your browser will be safeguarded against malicious attacks and hackers.
Also Read: How to Fix Chrome Keeps Crashing
Pro Tip: Find Preferred & Alternate DNS Server
Enter your router IP address in the Preferred DNS server section. If you are not aware of your router IP address, you can find out using CMD.
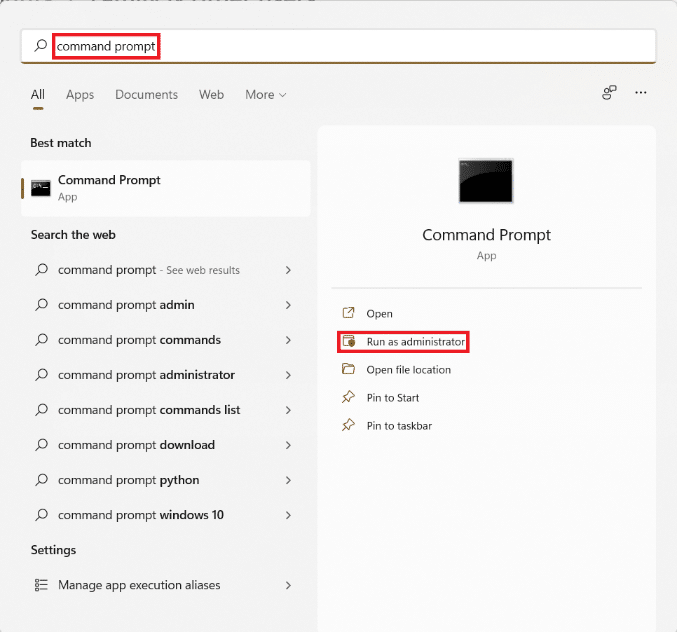
1. Open Command Prompt from Windows search bar as shown.
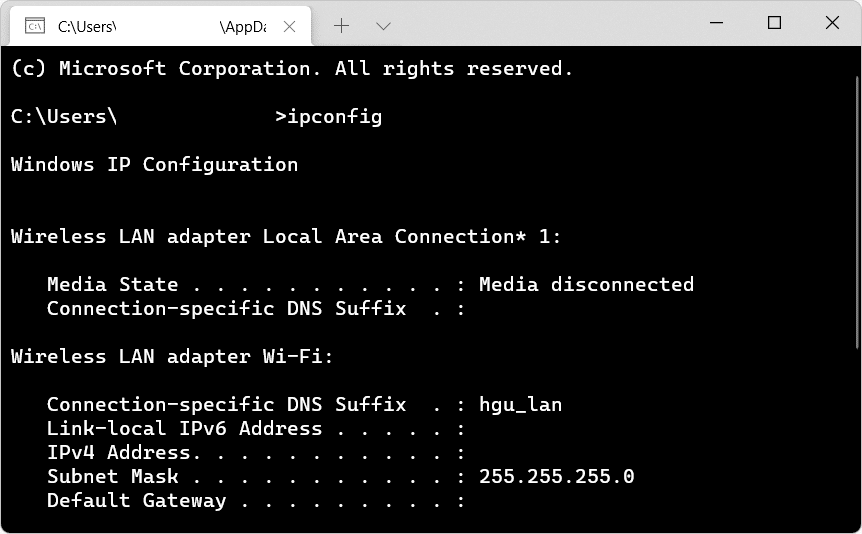
2. Execute ipconfig command by typing it & pressing Enter key.

3. The number against the Default Gateway label is the IP address of the connected router.
4. In the Alternate DNS server section, type the IP address of the DoH-compatible DNS server you would like to use. Here’s a list of a few DoH-compatible DNS servers with their corresponding addresses:
| DNS Server | Primary DNS |
| Public (Google) | 8.8.8.8 |
| Cloudflare | 1.1.1.1 |
| OpenDNS | 208.67.222.222 |
| Quad9 | 9.9.9.9 |
| CleanBrowsing | 185.228.168.9 |
| DNS.SB | 185.222.222.222 |
Frequently Asked Question (FAQs)
Q1. How do I enable encrypted SNI in Chrome?
Ans. Unfortunately, Google Chrome does not support encrypted SNI yet. You can instead try Firefox by Mozilla which supports ESNI.
Recommended:
We hope that this guide helped you to enable DNS over HTTPS Chrome. Let us know which method worked for you. Also, if you have any queries regarding this article, feel free to drop them in the comments section.