Enable or Disable Boot Log in Windows 10: A boot log contains a log of everything that is loaded into memory from the computer hard disk. The file is either named ntbtlog.txt or bootlog.txt depending upon the age of the PC and its operating system. But in Windows, the log file is called ntbtlog.txt which contains successful and unsuccessful processes launched during Windows startup. This boot log comes into use when you troubleshoot an issue related to your system.
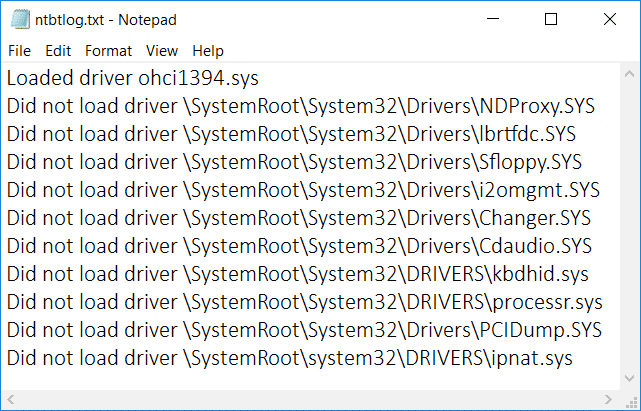
The boot log is generally saved to C:Windows in the file called ntbtlog.txt. Now there are two ways via which you can either enable or disable the boot log. So without wasting any time let’s see How to Enable or Disable Boot Log in Windows 10 with the help of the below-listed tutorial.
Enable or Disable Boot Log in Windows 10
Make sure to create a restore point just in case something goes wrong.
Method 1: Enable or Disable Boot Log Using System Configuration
1.Press Windows Key + R then type msconfig and hit Enter.

2.Switch to Boot tab in System Configuration window.
3.If you want to enable boot log then make sure to checkmark “Boot log” under Boot options.
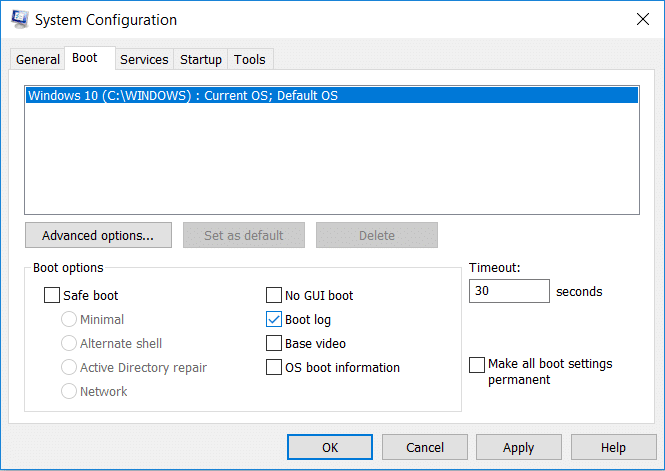
4.In case you need to disable boot log then simply uncheck “Boot log”.
5.Now you will be prompted to restart Windows 10, simply click on Restart to save changes.

Method 2: Enable or Disable Boot Log Using Bcdedit.exe
1.Press Windows Key + X then select Command Prompt (Admin).

2.Type the following command into cmd and hit Enter:
bcdedit

3.As soon as you hit Enter, the command will list all operating systems and their boot records.
4.Check description for “Windows 10” and under bootlog see if it is enabled or disabled.
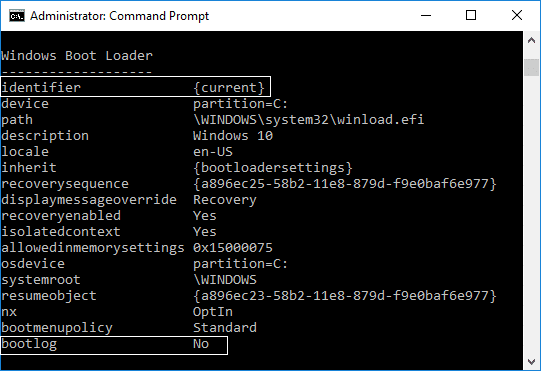
5.You need to scroll down to the identifier section then note down the identifier for Windows 10.
6.Now type the following command into cmd and hit Enter:
To Enable Boot Log: bcdedit /set {IDENTIFIER} bootlog Yes
To Disable Boot Log: bcdedit /set {IDENTIFIER} bootlog No
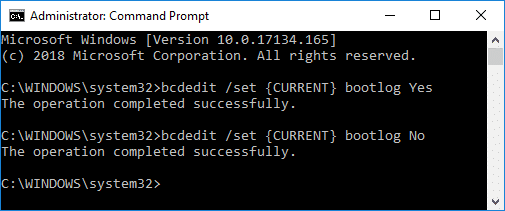
Note: Replace {IDENTIFIER} with the actual identifier you noted down in step 5. For example, to enable boot log the actual command would be: bcdedit /set {current} bootlog Yes
7.Close cmd and restart your PC to save changes.
Recommended:
That’s it, you successfully learned How to Enable or Disable Boot Log in Windows 10. Also read How to Change Windows 10 Boot Logo. If you still have any queries regarding this tutorial then feel free to ask them in the comment’s section.