- in windows 11 by Admin
How To Change or Disable the Windows 11 Startup Sound

Microsoft has changed the look and feel of Windows for the new Windows 11. Sounds are no exception. Even the Windows startup sound has changed. It’s effortless and brief, and arguably ignorable. However, some would prefer to change the Windows 11 startup sound, or disable it, and we’ll show you how.
How To Disable the Windows 11 Startup Sound With the GUI
Working from home is here to stay, so we should consider the people around us as we work. Maybe you’re an early riser and don’t want to wake anyone. Just turn off the Windows 11 startup sound.
- Select the Start menu and start typing: sound settings. The first result will be Sound settings. Select that.

- In the Sound window that opens, scroll down and select More sound settings.

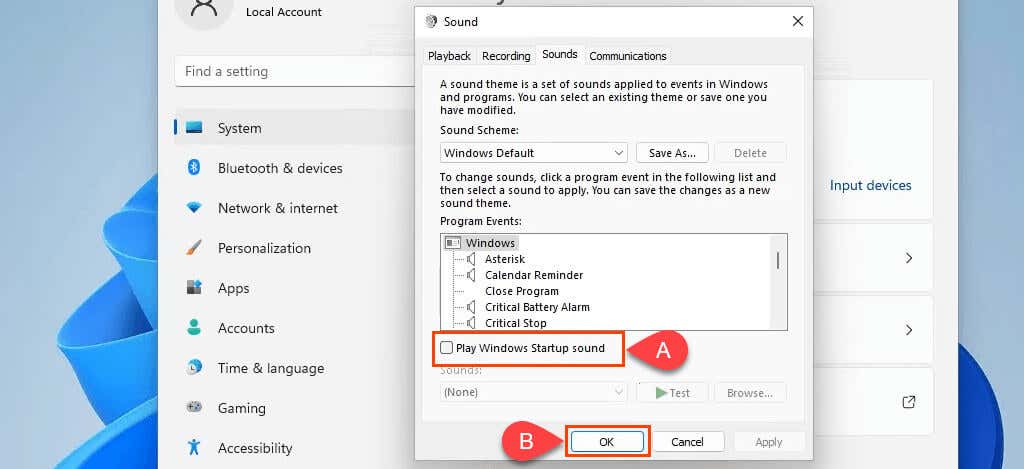
- The familiar Sound window from previous versions of Windows opens. Select the Sounds tab, then uncheck the Play Windows Startup sound box. Click OK to apply and exit the window. The other Windows sounds will still work, however starting the Windows 11 device will be silent.
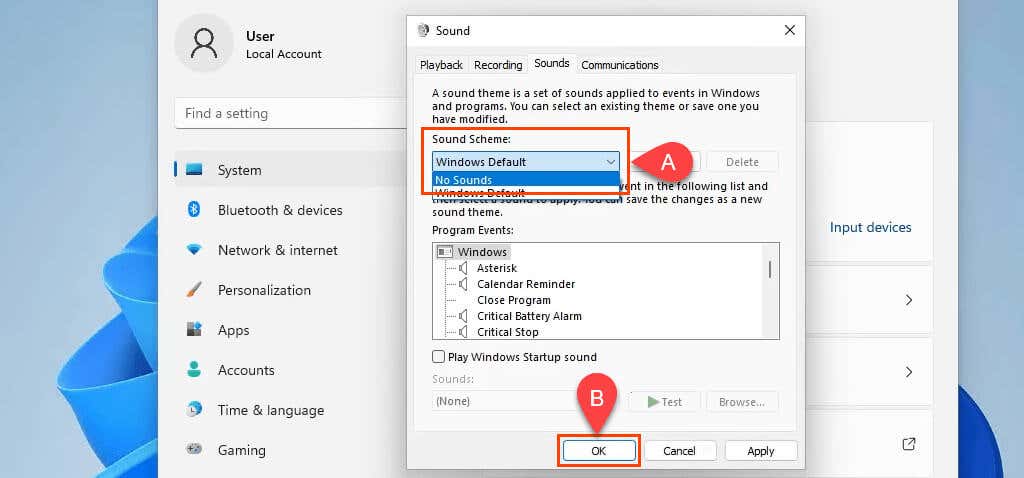
If disabling all Windows systems sounds is desired, go to the Sound Scheme dropdown and select No Sounds. Click OK to apply and exit the window.
How To Disable the Windows 11 Startup Sound With Group Policy
Perhaps you’d like to disable the Windows 11 startup sound for anyone who logs in to Windows. Setting a Group Policy is the best way to do this. This does require Administrator rights.
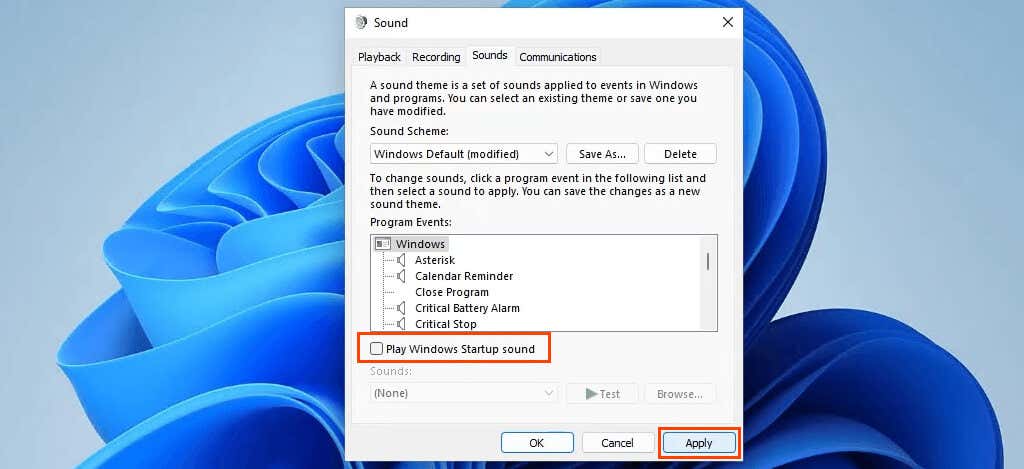
- In the Sounds window, uncheck the Play Windows Startup sound box and select Apply or OK. If the box is left checked while setting the group policy, the group policy will lock it on.
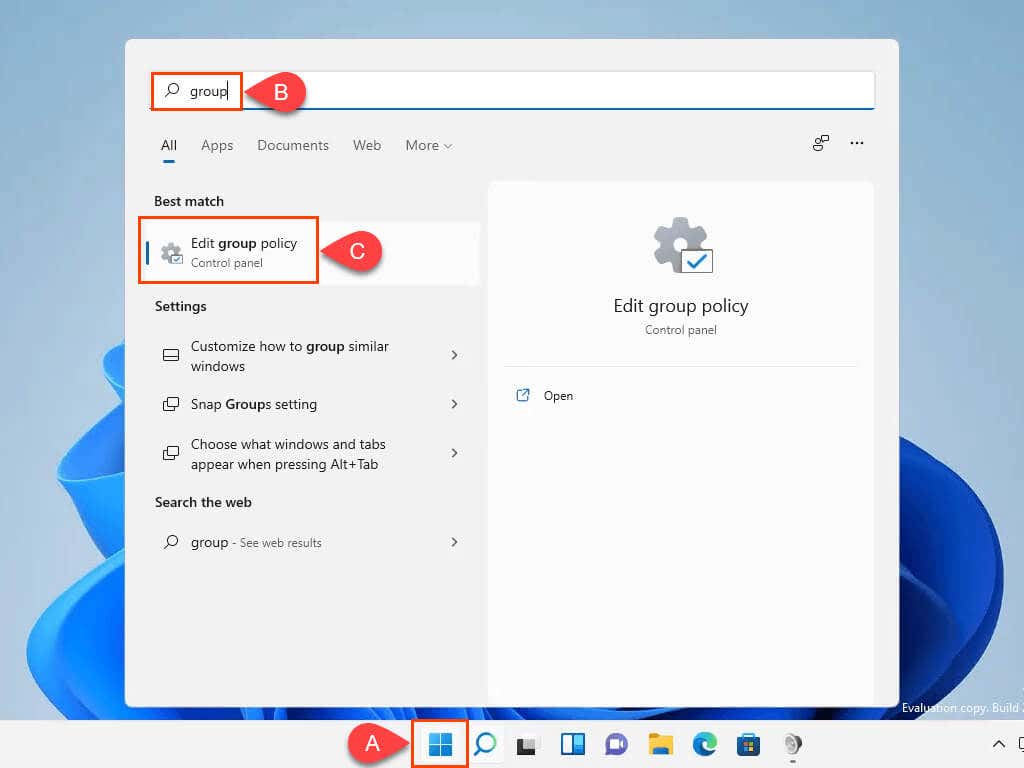
- Select the Start menu and start typing: group. The top result should be Edit group policy. Select that.
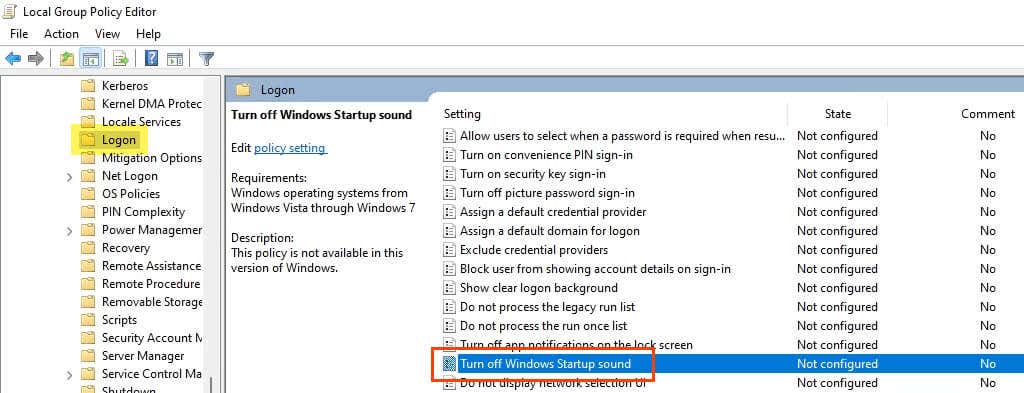
- In the Local Group Policy Editor, navigate to Computer Configuration > Administrative Templates > System > Logon. In the right-hand pane, find the setting Turn off Windows Startup sound and select it.
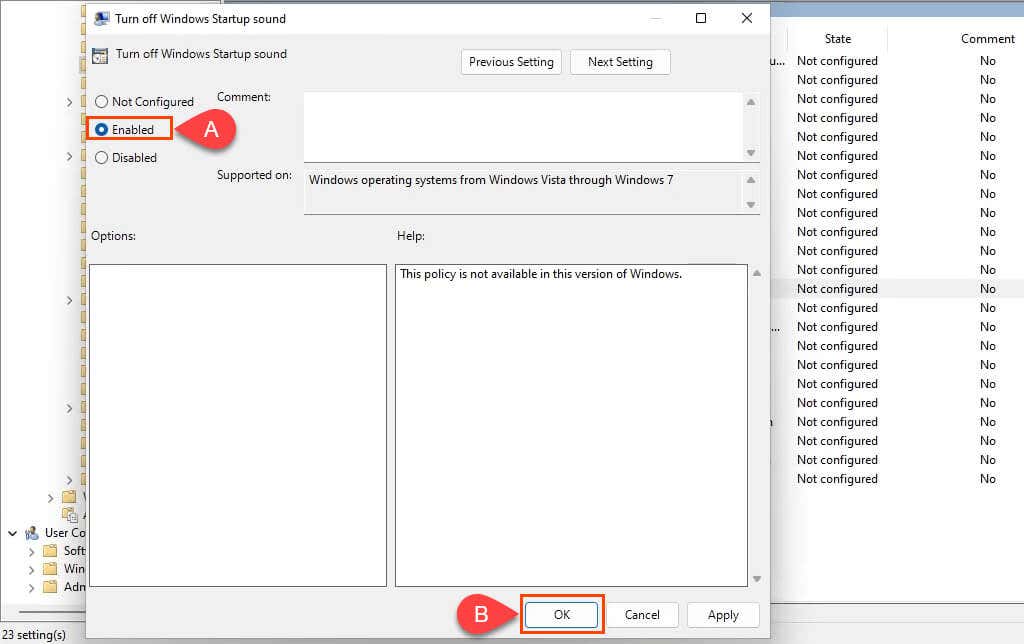
- In the Turn off Windows Startup sound setting, change it to Enabled and select OK. Note that it says, “This policy is not available in this version of Windows.” This is incorrect. Sometimes documentation in Windows doesn’t get updated.
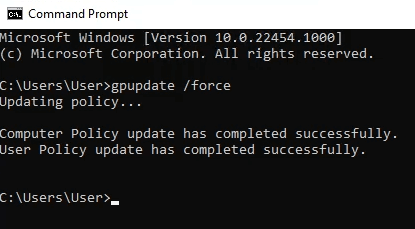
- The next time Windows starts, the setting will be applied and the Windows startup sound won’t play. To apply the setting immediately, open the Command Prompt and enter the command <pre>gpupdate /force</pre> and press Enter. The computer and user policies will be updated.
Re-open the Sound window and notice that the Play Windows Startup sound box is unchecked and also greyed out so it cannot be changed.

How To Disable the Windows 11 Startup Sound With PowerShell
If you haven’t yet, take the time to learn PowerShell. PowerShell scripting can be used to manipulate almost any part of Windows and automate repetitive tasks.
This command, or in PowerShell terms – cmdlet, edits the registry to turn off the Windows 11 Startup Sound for anyone logging on to the device. The cmdlet can be made part of a PowerShell script to run on a fresh install of Windows, or deployed across several devices.
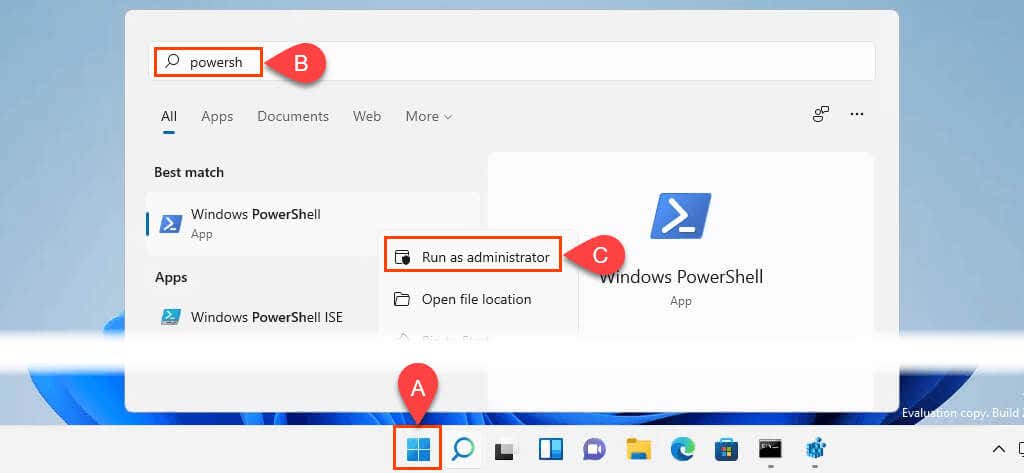
- Select the start menu and search for powershell. The first option will be Windows PowerShell. Right-click on it and choose Run as administrator.
- At the command prompt in PowerShell, enter the cmdlet: <pre>Set-ItemProperty -Path HKLM:SOFTWAREMicrosoftWindowsCurrentVersionPoliciesSystem -Name DisableStartupSound -Value 0 -Force</pre> and press Enter.

How To Change the Windows 11 Startup Sound
Maybe you just want a different start up sound. Perhaps as a reminder to do something, as a prank, or just because you can. We’ll help you with that. You can either use an existing Windows sound or use your own.
Use a Custom Sound for Windows 11 Startup Sound
This requires administrator rights. Also, ensure the file is in the .wav format. If it isn’t, you could convert the sound into the .wav format.
- In File Explorer, navigate to C:WindowsMedia

- Paste the .wav file. It will ask for administrator permission to copy to this folder. Select Continue. The file will be copied into this folder. Now it will show in the list of available sounds in the system sounds list.

Change the Windows 11 Startup Sound With the GUI
By default, Windows Logon doesn’t show in the Program Events window. Here’s how to make it show. It requires making a change in Windows Registry. Changing the Windows registry can cause serious problems for Windows. Make sure to backup Windows Registry so it can be restored if needed. Don’t do this if you don’t feel comfortable with making registry changes.
- Press Win Key + R. In the Run window, enter regedit and select OK.

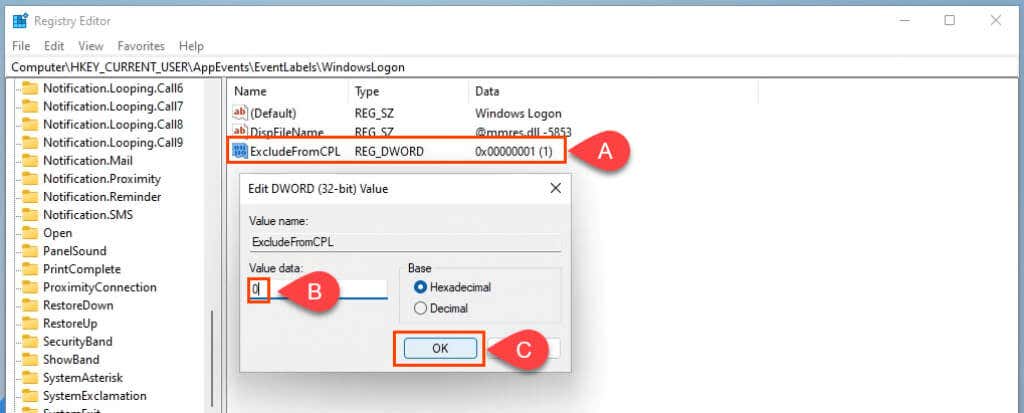
- When the Registry Editor opens, navigate to HKEY_CURRENT_USERAppEventsEventLabelsWindowsLogon.

- Double-click on the ExcludeFromCPL registry key. Change the value from 1 to 0 and select OK to apply the change. Close the Registry Editor.
- Return to the Sound window and scroll down in Program Events. Windows Logon will be there now.
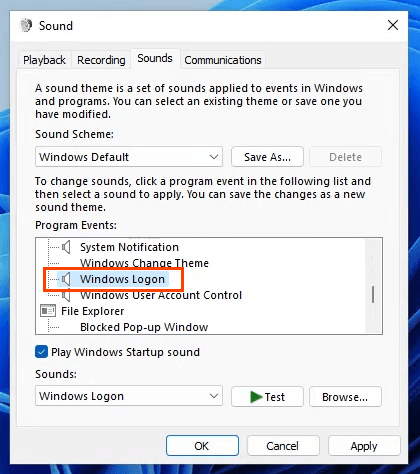
- In the Sounds select box, navigate to the desired sound and select it. Try the Test button to ensure it works. If it does, select OK to apply the change and close the Sound window. This will be the sound that plays the next time Windows 11 is started.

Sounds Good?
Now that you’ve had a good tour of how sounds are managed in Windows, through point-and-click, group policy, the registry, and PowerShell, what else will you do? Maybe add custom sounds for other Windows events? Or learn more about group policies, the registry and PowerShell? With these tools, Windows 11 is more customizable than you may have thought.