Fix Folder View Settings Not Saving in Windows 10: If your Windows doesn’t remember your Folder View settings then you are at the right place because today we are going to discuss how to fix this issue. In Windows 10 you have complete control of all your files & folder settings, you can easily change your Folder View settings. You have different View options to choose from such as Extra Large Icons, Large icons, Medium icons, Small icons, List, Details, Tiles, and Content. In this way, you could change your preferences about how you want to view the files and folder in File Explorer.
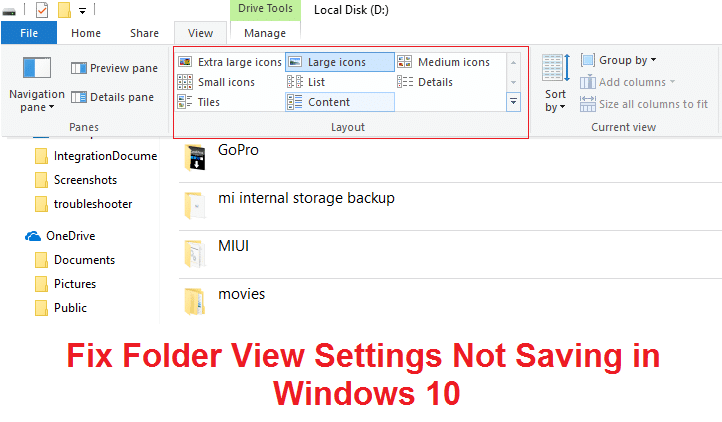
But Sometimes Windows doesn’t remember your preferences, in short, the Folder View Setting was not saved and you would again have the default setting saved. For example, you changed the folder view setting to List view and restarted your PC after some time. But after rebooting you see that Windows doesn’t remember your Settings which you have just configured i.e. the file or folders are not displayed in List view, instead, they are again set to Details view.
The main cause of this issue a Registry bug which can be easily fixed. The problem is that Folder View Settings is only saved for 5000 folder which means if you have over 5000 folders then your Folder View Settings will not be saved. So you just have to increase the registry value to 10,000 in order to Fix Folder View Settings Not Saving in Windows 10 issue. You can do so by following the below-listed troubleshooting guide.
Fix Folder View Settings Not Saving in Windows 10
Make sure to create a restore point just in case something goes wrong.
Method 1: Reset the Folder Type View Settings
1.Open Windows File Explorer by pressing Windows key + E and then click View >Options.
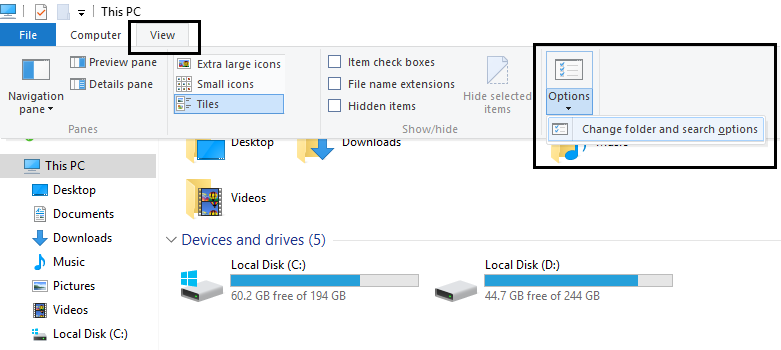
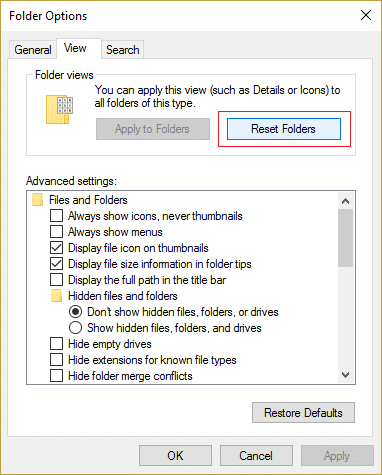
2.Switch to the View tab and click Reset Folders.
3.Reboot your PC to save changes.
4.Again try to save your preferences and see if this time Windows remembers it.
Method 2: Select Apply to Folders
1.Open File Explorer and go to the drive where you want to apply these settings.
2.At the top of Explorer select View and then in the Layout section select your desired View option.
3.Now while present inside View, click Options on the far right.
4.Switch to the View tab and then click Apply to Folders.
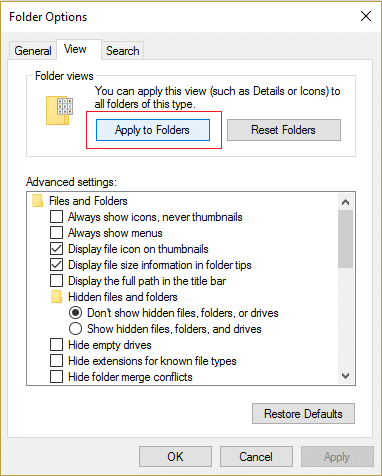
5.Reboot your PC to save settings.
Method 3: Restore your PC to an Earlier Working Time
1.Press Windows Key + R and type”sysdm.cpl” then hit enter.

2.Select System Protection tab and choose System Restore.
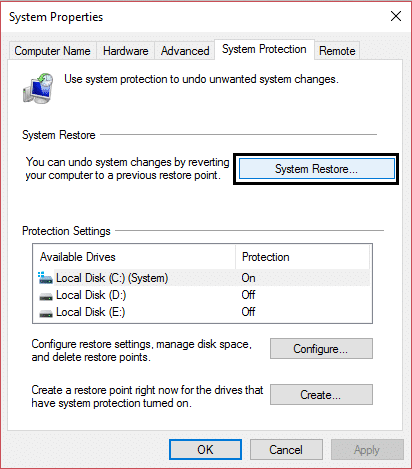
3.Click Next and choose the desired System Restore point.
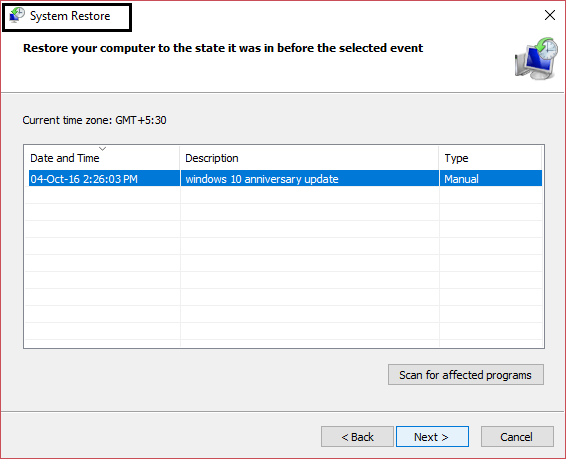
4.Follow on screen instruction to complete system restore.
5.After reboot, you may be able to Fix Folder View Settings Not Saving in Windows 10.
Method 4: Add User’s File Shortcut to Desktop
1.Right-click on the Desktop and select Personalize.

2.Now from the left-hand menu switch to Theme.
3.Click Desktop icon settings under Related Settings.
![]()
4.Check mark User’s Files and click Apply followed by OK.
![]()
5.Open User’s file from the desktop and navigate to your desired directory.
6.Now try to change the folder view option to your desired preferences.
5.Reboot your PC to save changes.
Method 5: Run commands in elevated command prompt
1.Press Windows Key + X then select Command Prompt (Admin).

2.Type the following command and hit Enter after each one:
REG ADD "HKEY_Current_Usersoftwaremicrosoftwindowscurrentversionpoliciesexplorer" /v "NoSaveSettings" /t REG_SZ /d "0" /f

REG ADD "HKEY_Local_Machinesoftwaremicrosoftwindowscurrentversionpoliciesexplorer" /v "NoSaveSettings" /t REG_SZ /d "0" /f

3.Reboot your Pc to save changes.
Method 6: Registry Fix
1.Open Notepad file and make sure to copy the below content exactly to your notepad file:
Windows Registry Editor Version 5.00

[-HKEY_CURRENT_USERSoftwareClassesLocal SettingsSoftwareMicrosoftWindowsShellBagMRU]

[-HKEY_CURRENT_USERSoftwareClassesLocal SettingsSoftwareMicrosoftWindowsShellBags]

[HKEY_CURRENT_USERSoftwareClassesLocal SettingsSoftwareMicrosoftWindowsShellBagsAll FoldersShell]
"FolderType"="NotSpecified"

[HKEY_CURRENT_USERSoftwareClassesLocal SettingsSoftwareMicrosoftWindowsShell]
"BagMRU Size"=dword:00002710
2.Then click File > Save as and make sure “All Files” from Save as type dropdown.
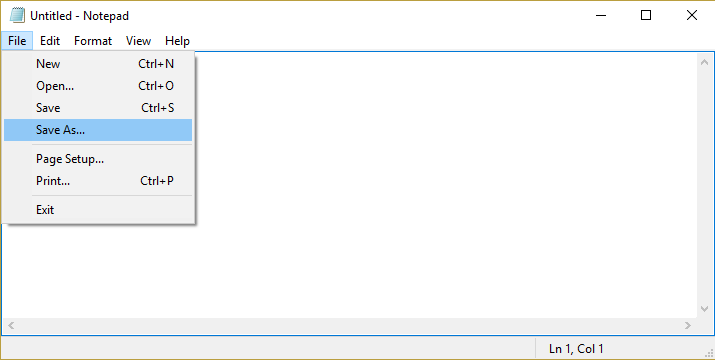
3.Browse to your desired location where you want to save the file and then name the file to Registry_Fix.reg (the extension .reg is very important) and click Save.
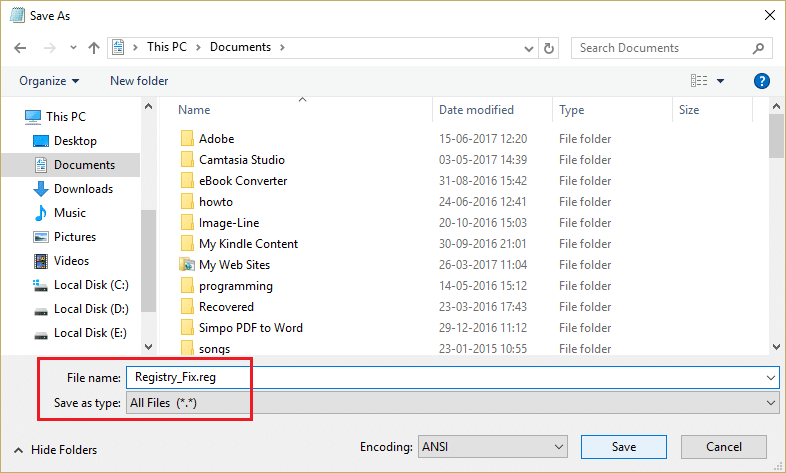
4.Reboot your PC to save changes and this would resolve Folder View Settings Not Saving problem.
Method 7: Workaround the Problem
1.Press Windows Key + R then type regedit and hit Enter to open Registry Editor.

2.Navigate to the following registry entries:
HKEY_CLASSES_ROOTWow6432NodeCLSID{42aedc87-2188-41fd-b9a3-0c966feabec1}InProcServer32
HKEY_CLASSES_ROOTCLSID{42aedc87-2188-41fd-b9a3-0c966feabec1}InProcServer32
3.Double click on (Default) string and change the value from “%SystemRoot%SysWow64shell32.dll” to “%SystemRoot%system32windows.storage.dll” in above destinations.
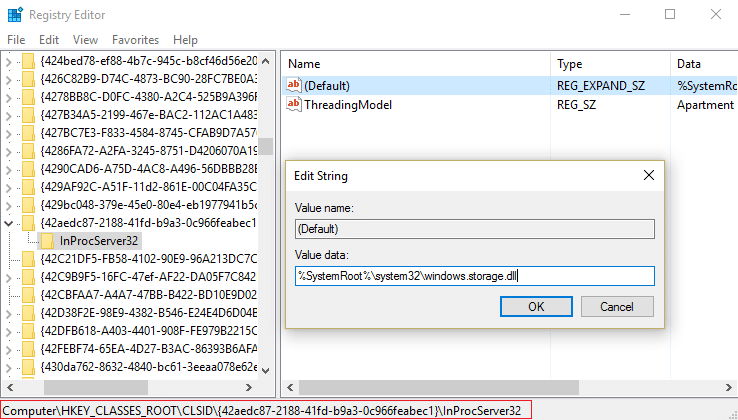
4.Reboot your PC to save changes.
Note: If you’re not able to edit these settings because of permission issues then follow this post.
Recommended for you:
That’s it you have successfully Fix Folder View Settings Not Saving in Windows 10 but if you still have any questions regarding this post then feel free to ask them in the comment’s section.