Fix Function keys not working on Windows 10

Computers may be considered useless if either of the input devices, keyboard or mouse, stop working. Similarly, any slight issues with these devices can also cause a lot of annoyance and disrupt your workflow. We have already covered multiple issues concerning external mouses & touchpads like Wireless Mouse Not Working in Windows 10, Mouse Lags or Freezes, Mouse Scroll Not Working, Laptop Touchpad Not Working, and regarding keyboards such as Laptop Keyboard Not Working Properly, Windows Keyboard Shortcuts Not Working, etc.
Another input device issue that has been plaguing users is the function keys not working properly after the windows 10 version 1903 update. While function keys are absent from most computer keyboards, they serve a very important purpose in laptops. Function keys on laptops are used to turn WiFi and airplane mode on or off, adjust the screen brightness, volume control (increase, decrease or completely mute the audio), activate sleep mode, disable/enable the touchpad, etc. These shortcuts are extremely handy and save a lot of time.
If these function keys stop working, one would have to mess around the Windows Settings application or the action center to perform the said operations. Below are all the solutions that users have implemented around the globe to resolve the Function Keys Not Working issue on Windows 10.

How to fix function keys not working on Windows 10?
The solution to your function keys issues may vary depending on the laptop manufacturer. Although, there are a couple of solutions that seem to resolve the issue for most.
The built-in troubleshooter for keyboards (or hardware and devices) should be your numero uno go-to for any hardware-related problems. Next, the keys may have stopped working due to incompatible or outdated keyboard drivers. Simply updating to the latest version or uninstalling the current ones can solve the issue. The filter keys also feature results in a function keys failure in certain laptops. Disable the feature and then try using the function keys. There are also a few unique solutions for VAIO, Dell, and Toshiba laptops.
Method 1: Run the Hardware Troubleshooter
Windows includes a troubleshooting feature for all things that can go wrong. The problems you can use the troubleshooter for include Windows Update failure, power issues, video playback & audio trouble, Bluetooth connectivity problems, keyboard issues, and many more.
We will be honest with you; the chances of solving the problem at hand using the hardware troubleshooter are very bleak. Although many have reportedly solved a number of hardware issues using it and the method is as simple as navigating to the feature in the Windows Settings and clicking on it:
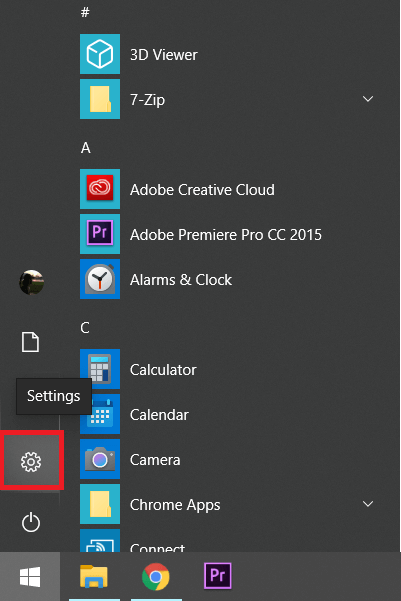
1. Launch the Windows Settings by either clicking on the settings icon after pressing the Windows key (or clicking on the start button) or using the hotkey combination Windows key + I.
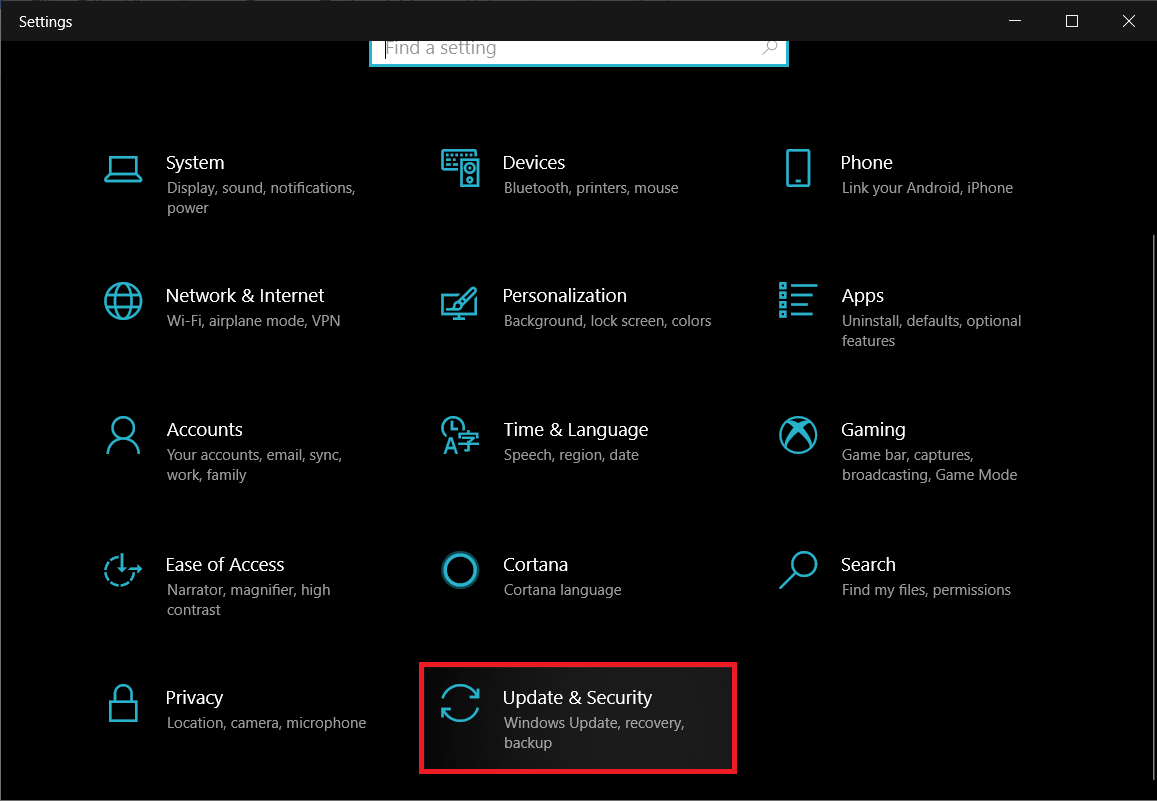
2. Open the Update & Security Settings.
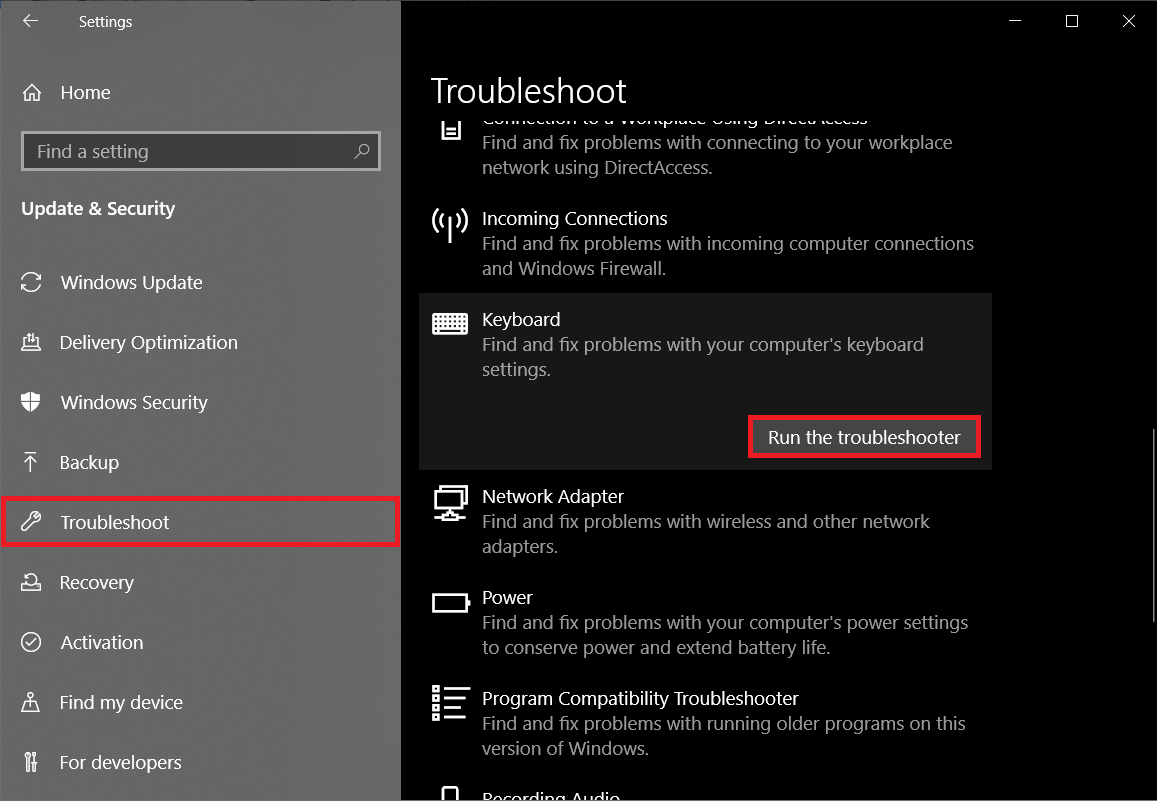
3. Switch to the Troubleshoot settings page from the left panel.
4. Now, on the right-side panel, scroll until you find Hardware and Devices or Keyboard (depending on your Windows version) and click on it to expand. Finally, click on the Run the troubleshooter button.
Method 2: Uninstall/ Update Device Drivers
All hardware related issues can be traced back to their drivers. If you aren’t already aware, drivers are software files that help the hardware devices effectively communicate with your computer OS. Having the correct drivers installed is essential for the functionality of all devices.
They may break down or be rendered incompatible after updating to a certain build of Windows. Nevertheless, simply updating the drivers will solve the function keys problem you have been facing.
To uninstall the current keyboard drivers:
1. All drivers can be updated or uninstalled manually through the Device Manager. Use one of the following methods to open the same.
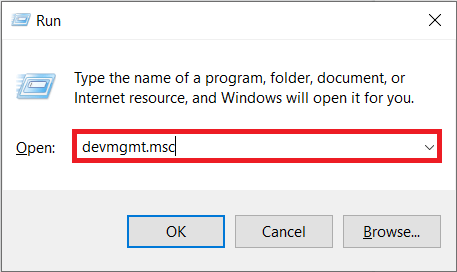
a. Type devmgmt.msc in the run command box (Windows key + R) and press enter.
b. Right-click on the start button and select Device Manager from the power user menu.
c. Search for Device Manager in the Windows Search bar (Windows key + S) and click on Open.
2. In the Device Manager window, locate the Keyboards entry and click on the arrow to its left to expand.
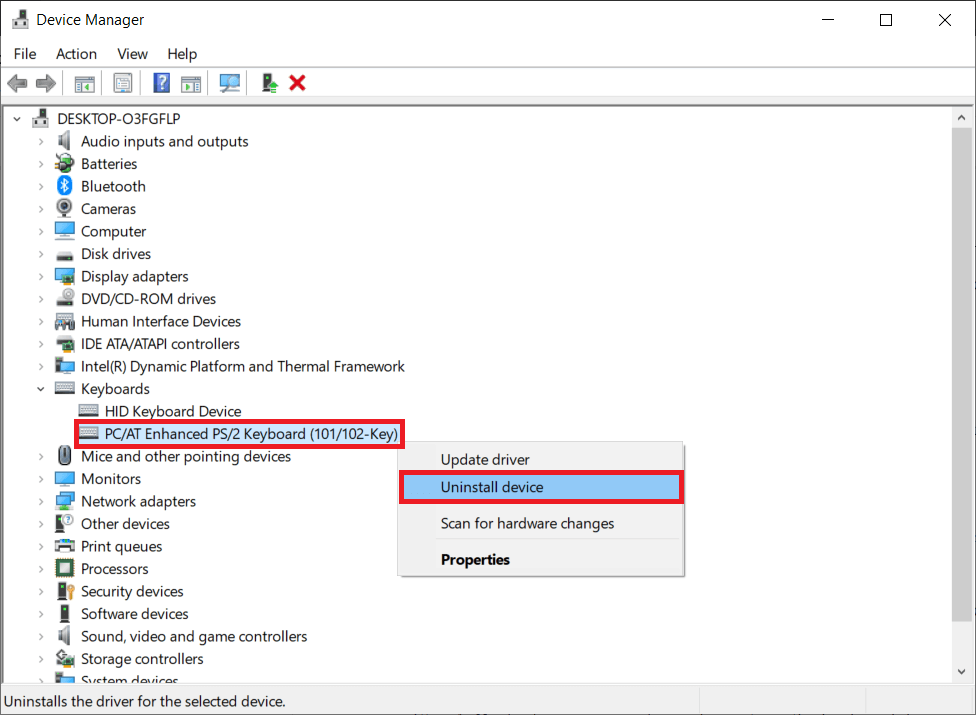
3. Right-click on your keyboard entry and select ‘uninstall device’ from the context menu.
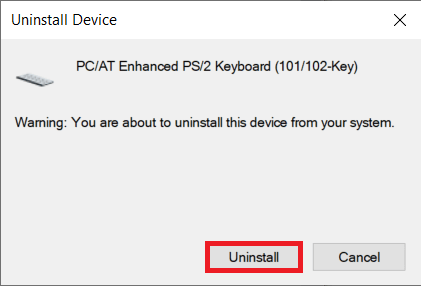
4. You will receive a pop-up warning requesting you to confirm your action, click on the Uninstall button again to confirm and delete the existing keyboard drivers.
5. Restart your computer.
Now, you can either choose to update the keyboard drivers manually or use one of the many third-party applications that are available on the internet. DriverBooster is the recommended driver updating application. Download and install DriverBooster, click on Scan (or Scan Now) after launching it, and click on the Update button next to the keyboard once the scan concludes.
To manually update keyboard drivers:
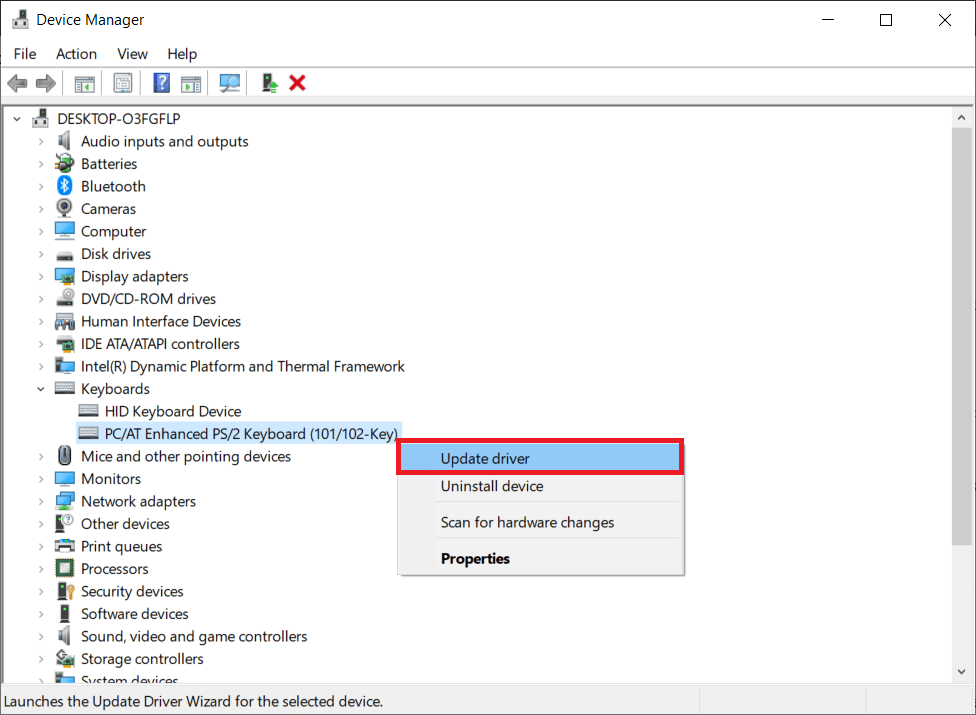
1. Head back to the Device Manager, right-click on your keyboard entry and choose Update driver.
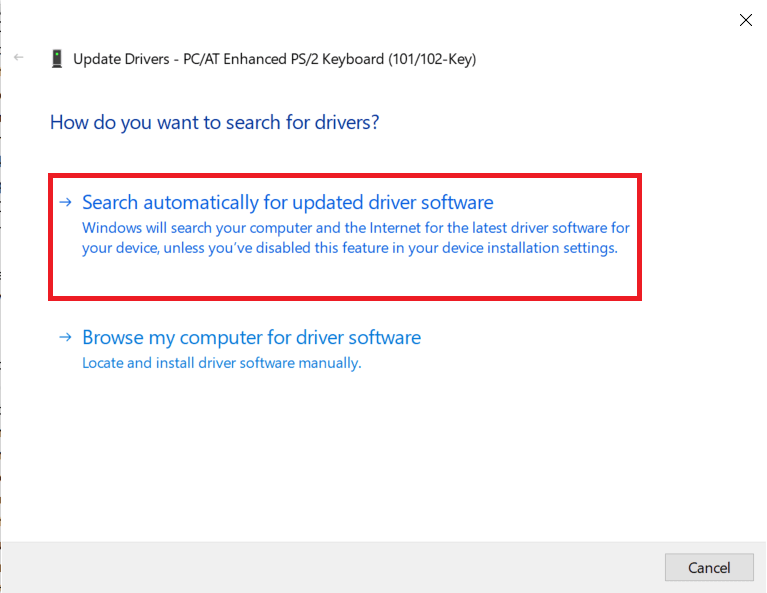
2. In the following window, select Search Automatically for updated driver software. As obvious, the latest drivers will now be automatically installed on your computer.
You can also head over to your laptop manufacturers website, download the latest keyboard drivers available for your operating system and install them like you would any other application.
Also Read: How to Update Device Drivers on Windows 10
Method 3: Disable Filter Keys
Filter Keys is one of the many accessibility features included in Windows 10. The feature helps avoid repeated keystrokes while typing. The feature is actually quite useful if you have a very sensitive keyboard or one that repeats the character when the key is held for long. Sometimes, the Filter Keys can cause issues with the function keys and render them nonfunctional. Disable the feature using the following guide and then try using the function keys.
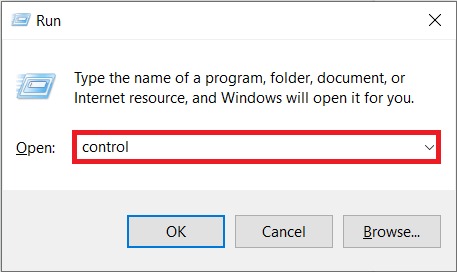
1. Type control (or control panel) in the run command box or the Windows search bar and press Enter to open the Control Panel application.
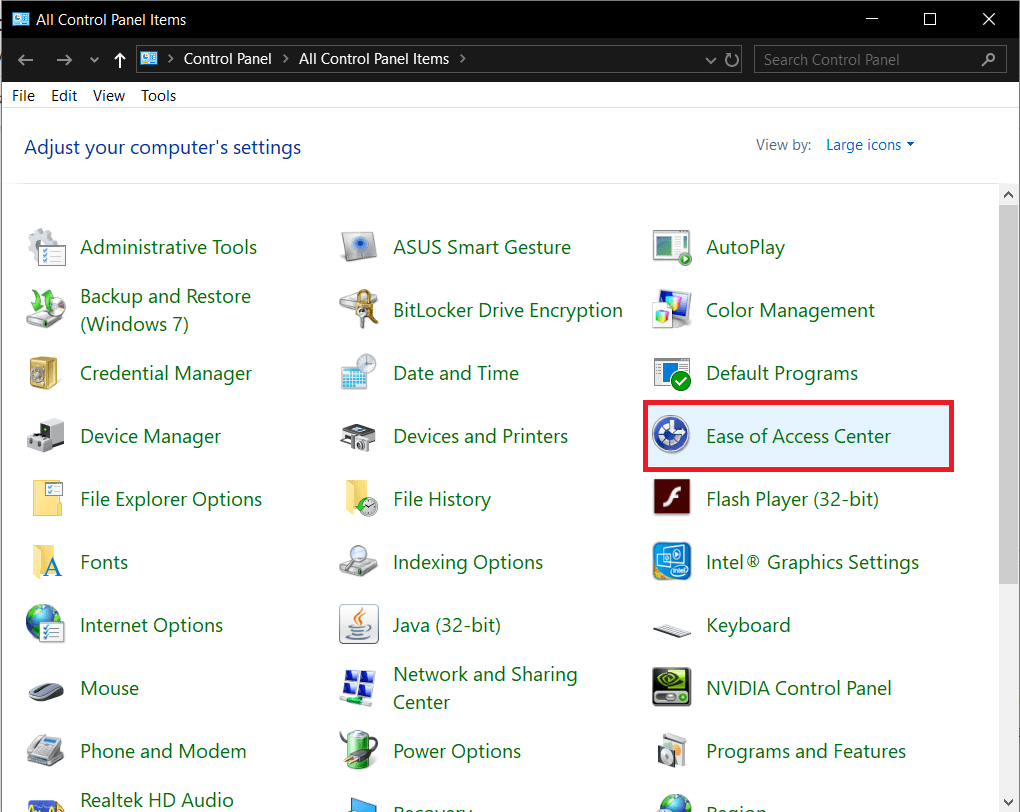
2. Launch the Ease of Access Center by clicking on the same in the Control Panel. You can change the icon size to small or large by clicking on the drop-down next to View by and make looking for the required item easier.
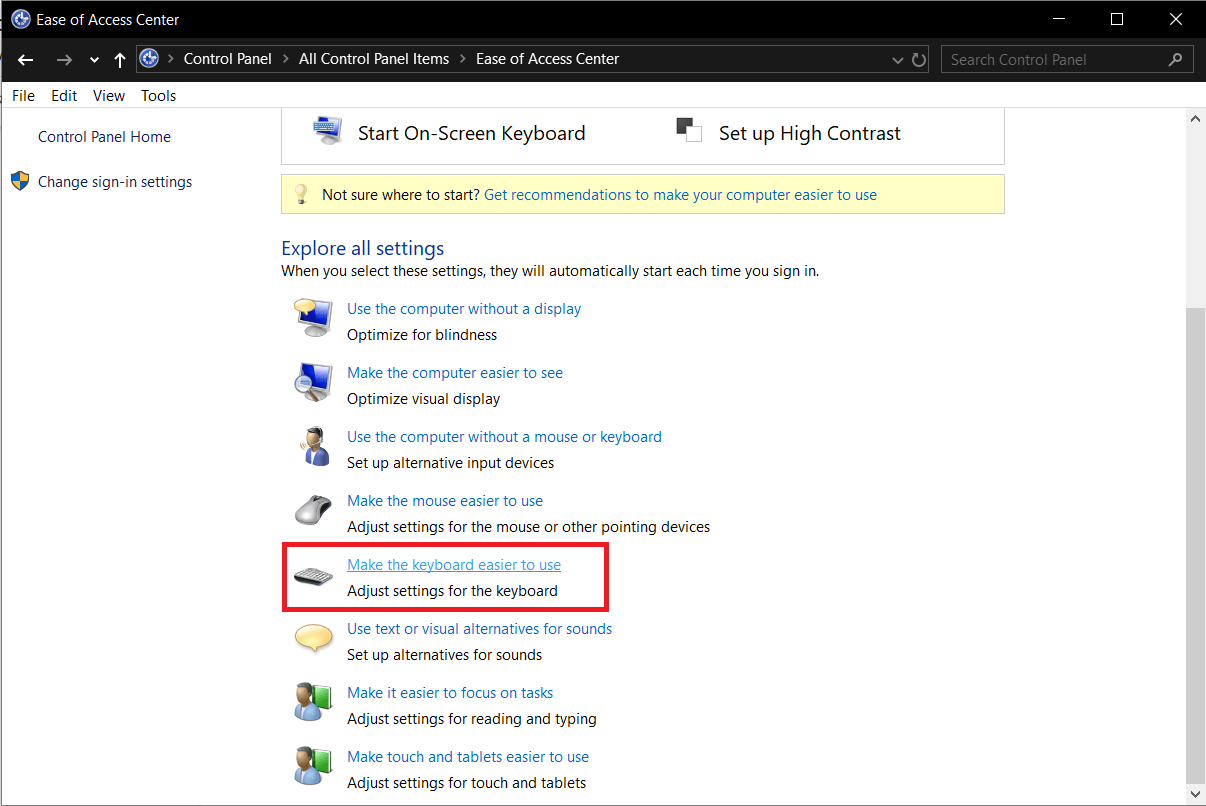
3. Under Explore, all settings on the right, click on Make the keyboard easier to use.
4. In the following window, ensure the box next to Turn on Filter Keys is unticked/unchecked. If it is checked, click on the box to disable the Filter Keys feature.
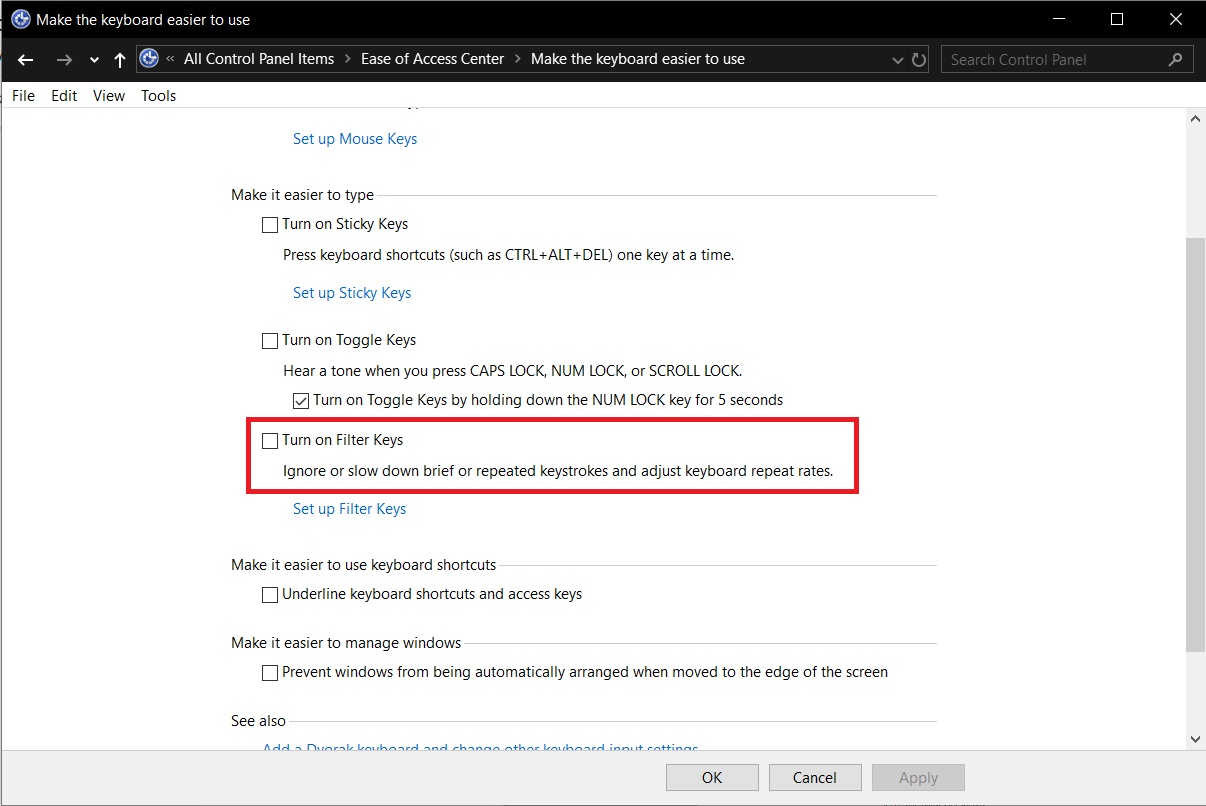
5. Click on the Apply button to save any changes you made and close the window by clicking on OK.
Method 4: Change Mobility Center Settings (For Dell Systems)
Most users might be unaware of this, but Windows includes a Mobility Center application to monitor and control basic settings like brightness, volume, battery mode (also displays battery information), etc. The Mobility Center in Dell laptops includes additional options for keyboard brightness (for backlit laptop keyboards) and function key behavior. The function keys may stop working if you accidentally switched their behavior to multimedia keys.
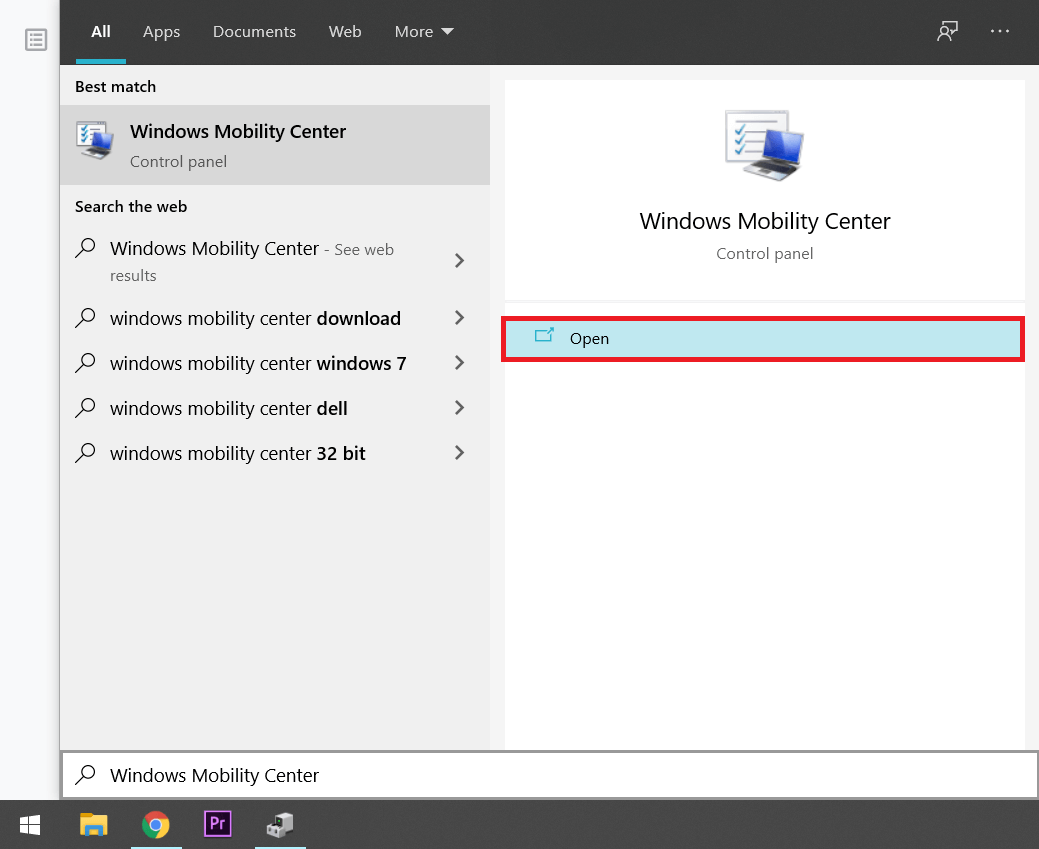
1. Press the Windows key or click on the start button, type Windows Mobility Center and click on Open. You can also access the Mobility Center through the Control Panel (check the previous method to know how to open the Control Panel)
2. Click on the drop-down arrow under the Function Key Row entry.
3. Select ‘Function key’ from the menu and click on Apply to save the changes.
Method 5: Allow VAIO Event Service to start automatically
In VAIO laptops, the function keys are managed by the VAIO event service. If, for some reason, the service stops working in the background, the function keys will also stop working. To restart/check the VAIO event service:
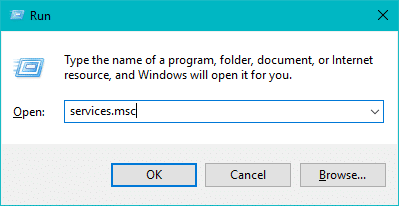
1. Open the Windows Services application by typing services.msc in the run command box and pressing enter.
2. Locate the VAIO Event Service in the following window and right-click on it.
3. Select Properties from the context menu. You can also double-click on a service to access its properties.
4. Under the General tab, expand the drop-down menu next to Startup type and select Automatic.
5. Also, ensure that the Service Status underneath reads Started. If it reads Stopped, click on the Start button to run the service.
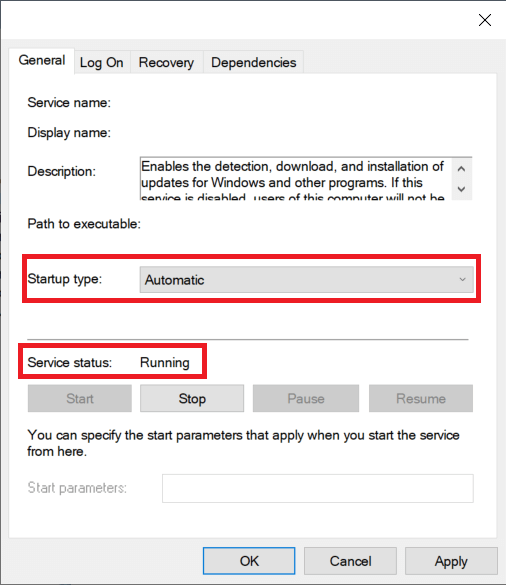
6. As always, click on Apply to save the modifications and then close the window.
Method 6: Uninstall Hotkey Drivers (For Toshiba Systems)
The function keys are also known as hotkeys and have their own drivers responsible for their functionality. These drivers are called the hotkey drivers in Toshiba systems and ATK hotkey utility drivers on other systems like Asus and Lenovo laptops. Similar to keyboard drivers, corrupt or outdated hotkey drivers can cause issues while using the function keys.
- Head back to Method 2 in this list and open Device Manager using the instructions stated.
- Locate the Toshiba hotkey driver (or ATK hotkey utility driver if your device isn’t made by Toshiba) and right-click on it.
- Select ‘Uninstall device’.
- Next, locate the HID-Compliant Keyboard and HID-Compliant Mouse drivers in the Device Manager and uninstall them too.
- If you find Synaptics Pointing Device under Mouse and other pointing devices, right-click on it and select Uninstall.
Finally, restart your computer and come back to working function keys.
Recommended:
Let us know which one of the above methods helped you to fix Function keys not working on Windows 10 issue. But if you still have any queries regarding this tutorial then feel free to ask them in the comment section.