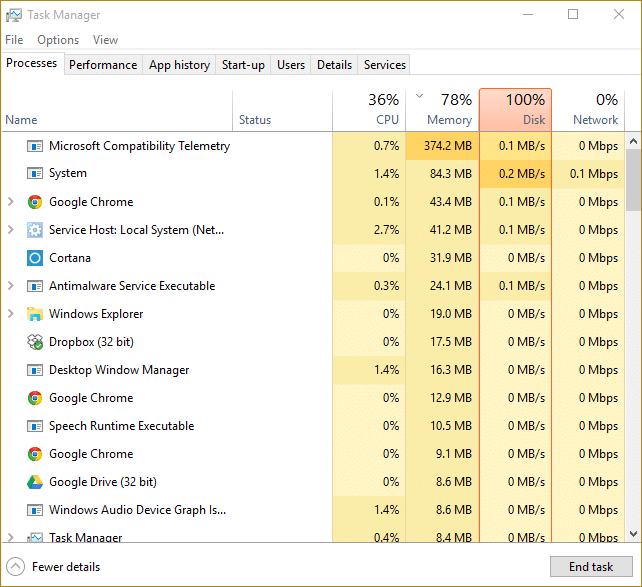
If you are facing this issue where you notice an extremely high disk usage or CPU usage by Microsoft Compatibility Telemetry process in Task Manager in Windows 10, don’t worry as today. We will see How to Fix Microsoft Compatibility Telemetry High Disk Usage in Windows 10. But first, let’s know more about what is Microsoft Compatibility Telemetry? Basically, it collects and sends data from your PC to Microsoft Server, where this data is used by the development team to improve Windows overall experience, which includes fixing bugs and improving the performance of Windows.
If you must know, it collects device driver details, collects information about your device hardware & software, multimedia files, the full transcript of your conversation with Cortana thus taking up memory etc. So it is obvious that sometimes Telemetry process could utilize exceptionally high disk or CPU usage. However, if after waiting for some time, it’s still utilizing your system resources, then there is a problem. So without wasting any time let’s see How to Fix Microsoft Compatibility Telemetry High Disk Usage in Windows 10 with the help of the below-listed tutorial.
Fix Microsoft Compatibility Telemetry High Disk Usage in Windows 10
Note: Make sure to create a restore point just in case something goes wrong.
Method 1: Disable Microsoft Compatibility Telemetry using Registry Editor
1. Press Windows Key + R then type regedit and hit Enter to open Registry Editor.

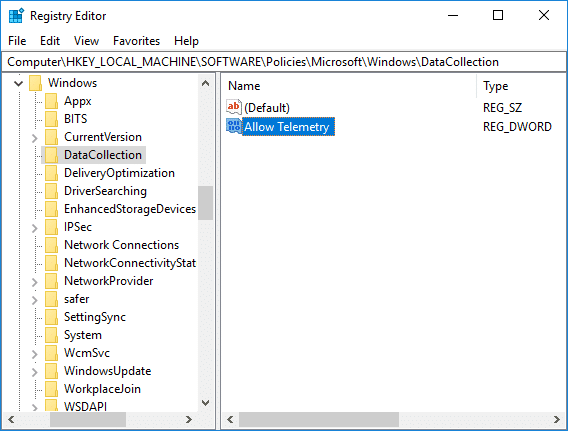
2. Now navigate to the following registry key:
HKEY_LOCAL_MACHINESOFTWAREPoliciesMicrosoftWindowsDataCollection
3. Make sure to select DataCollection then in right window pane find Allow Telemetry DWORD.
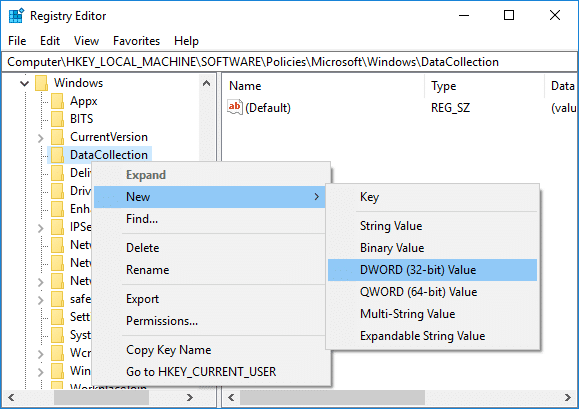
4. If you can’t find the Allow Telemetry key then right-click on DataCollection then select New > DWORD (32-bit) Value.
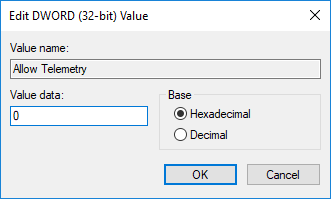
5. Name this newly created DWORD as Allow Telemetry and hit Enter.
6. Double-click on the above key and change it’s value to 0 then click OK.
7. Reboot your PC to save changes and once the system restart checks if you’re able to Fix Microsoft Compatibility Telemetry High Disk Usage in Windows 10.
Method 2: DisableTelemetry using Group Policy Editor
Note: This method will only work for Windows 10 Pro, Enterprise, and Education Edition.
1. Press Windows Key + R then type gpedit.msc and hit Enter to open Group Policy Editor.

2. Navigate to the following policy:
Computer Configuration > Administrative Templates > Windows Components > Data Collection and Preview Builds
3. Make sure to select Data Collection, and Preview Builds then in right window pane double-click on Allow Telemetry Policy.

4. Select Disabled under Allow Telemetry Policy then click Apply followed by OK.

5. Reboot your PC to save changes.
Method 3: Disable Telemetry using Command Prompt
1. Open Command Prompt. The user can perform this step by searching for ‘cmd’ and then press Enter.
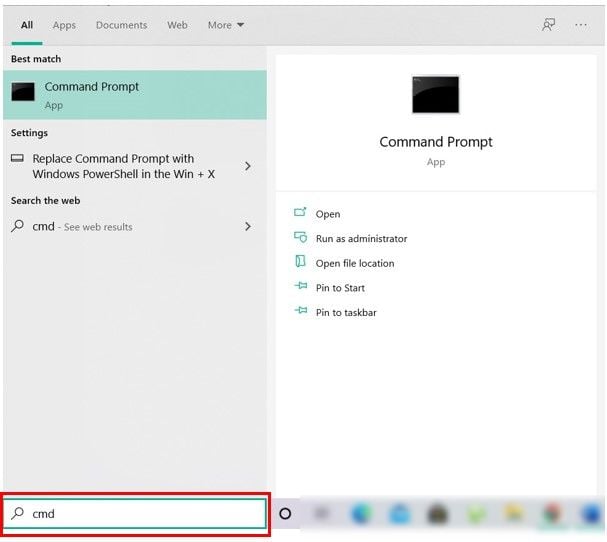
2. Type the following command (or copy & paste) into cmd and hit Enter:
sc delete DiagTrack sc delete dmwappushservice echo “” >
C:ProgramDataMicrosoftDiagnosisETLLogsAutoLoggerAutoLogger-Diagtrack-Listener.etl reg add
"HKLMSOFTWAREPoliciesMicrosoftWindowsDataCollection" /v AllowTelemetry /t REG_DWORD /d 0 /f
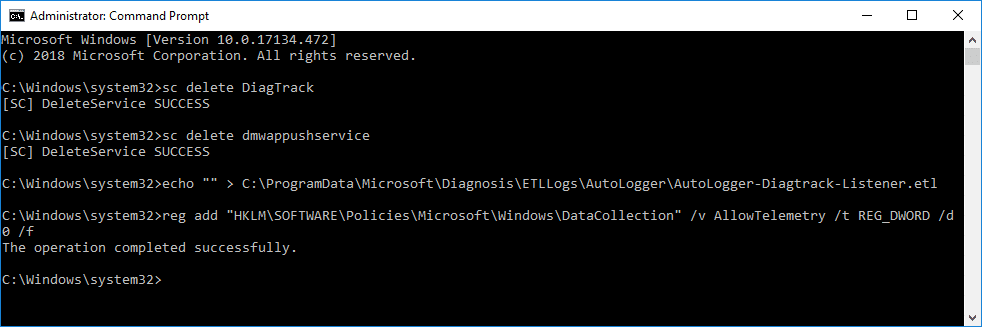
3. Once the command is finished, reboot your PC.
Method 4: Disabling CompatTelRunner.exe using Task Scheduler
1. Press Windows Key + R then type taskschd.msc and hit Enter to open Task Scheduler.

2. Navigate to the following path:
Task Scheduler Library > Microsoft > Windows > Application Experience
3. Make sure to select Application Experience in the right window pane right-click on “Microsoft Compatibility Appraiser (CompatTelRunner.exe)” and select Disable.

4. Once finished, restart your PC to save changes.
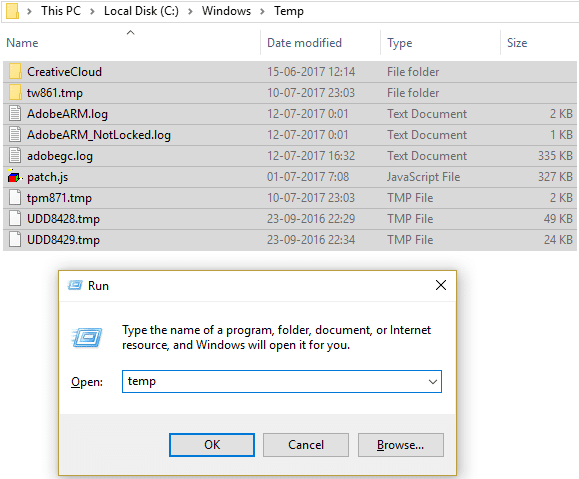
Method 5: Make sure to delete Temporary files of Windows
Note: Make sure show hidden file and folders are checked and hide system protected files are unchecked.
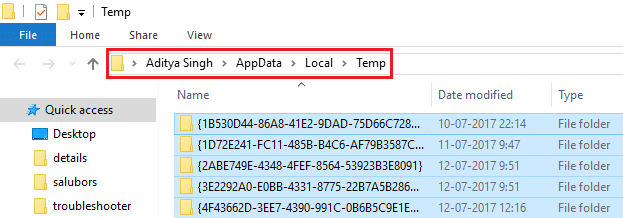
1. Press Windows Key + R then type temp and hit Enter.
2. Select all the files by pressing Ctrl + A and then press Shift + Del to delete the files permanently.
3. Again press Windows Key + R then type %temp% and click OK.
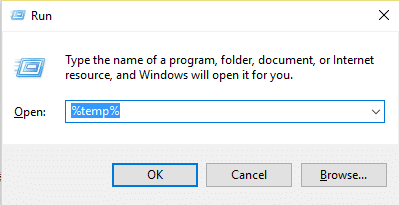
4. Now select all the files and then press Shift + Del to delete the files permanently.
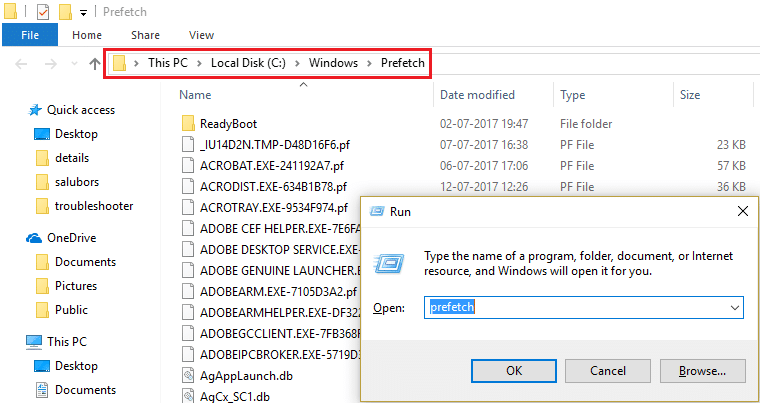
5. Press Windows Key + R then type prefetch and hit Enter.
6. Press Ctrl + A and permanently delete the files by pressing Shift + Del.
7. Reboot your PC and see if you have successfully deleted the temporary files.
Method 6: Disable Diagnostic Tracking service
1. Press Windows Key + R then type services.msc and hit Enter.

2. Find Diagnostic Tracking service in the list then double-click on it.
3. Make sure to click on Stop if the service is already running, then from the Startup type drop-down select Automatic.
![]()
4.Click Apply, followed by OK.
5. Restart to save changes.
Method 7: Make sure Windows is up to date
1. Press Windows Key + I and then select Update & Security.
![]()
2. From the left-hand side, menu clicks on Windows Update.
3. Now click on the “Check for updates” button to check for any available updates.

4. If any updates are pending, then click on Download & Install updates.

5. Once the updates are downloaded, install them, and your Windows will become up-to-date.
Recommended:
That’s it you have successfully learned How to Fix Microsoft Compatibility Telemetry High Disk Usage in Windows 10 but if you still have any queries regarding this tutorial then feel free to ask them in the comment’s section.