Is OneDrive not syncing files on Windows 10? Or are you facing OneDrive sync error (with red icon)? Don’t worry today we are going to discuss 8 different ways to fix the issue.
OneDrive is the cloud storage device of Microsoft, and it helps to back-up your files online. Once you save your files on OneDrive, you can access it from any device anytime. OneDrive also helps you to sync your work and personal records to the cloud and other devices. Files saved in the OneDrive can be shared very easily through one link. As we store data on the cloud, no physical or system space is occupied. Hence OneDrive proves to be very useful in this generation where people mostly work on data.
As this tool brings a lot of advantages for its users, so it has become quite essential for its users. If users are not able to access OneDrive, they have to look for alternatives, and it becomes quite hectic. Although there are many issues that users have to face while working on OneDrive, syncing turns out to be the most common one. The syncing issues which are most likely to affect your work are due to account issues, out-dated client, incorrect configuration and software conflicts.
Fix OneDrive Sync Problems on Windows 10
We have figured out different ways using which you can fix syncing problems on OneDrive. These methods are listed below:
Method 1: Restart the OneDrive App
First of all, before doing any advanced troubleshooting to fix the OneDrive syncing problem, try to restart OneDrive. To restart the OneDrive app follow the below steps:
1.Click on the OneDrive Button on the bottom right corner of the screen of your desktop or PC.

2.Click on the More button in the bottom right corner of the screen, as shown below.
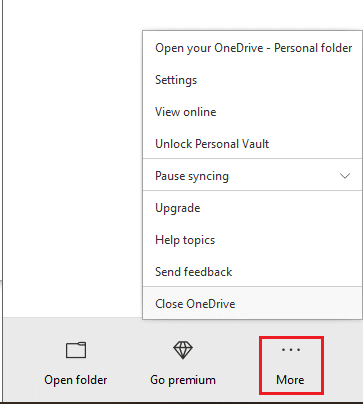
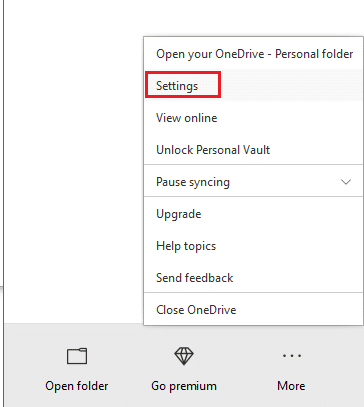
3.Click on Close OneDrive option from the list before you.
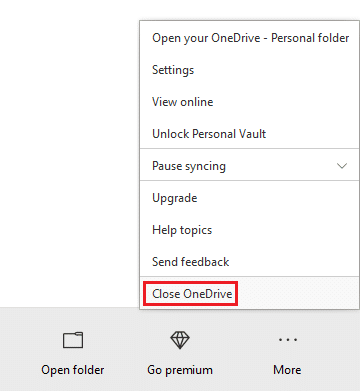
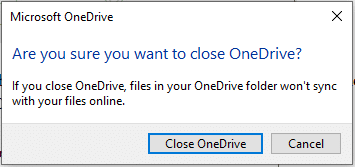
4.A pop-up box appears before you asking you whether or not you want to close OneDrive. Click on Close OneDrive to continue.
5.Now, open the OneDrive app again using the Windows search.
6.Once the OneDrive window opens, you can Sign-in into your account.
After following all the steps, OneDrive should start syncing the content again, and if you are still facing issues in syncing your files, you should continue with the below-mentioned methods.
Method 2: Check the File Size
If you are using OneDrive free account then there is limited storage available. So, before syncing the files, you need to check the size of the file you are uploading and the available free space on your OneDrive. If the file is large enough then it will not sync and will create syncing problems. To upload such files, zip your file and then make sure its size should be less than or equal to space available.
Also Read: How to Unlink Nintendo Account from Switch
Method 3: Reconnect OneDrive Account
Sometimes OneDrive syncing problem may arise due to the account connection. So, by reconnecting the OneDrive account, your issue may be resolved.
1.Click on the OneDrive Button on the bottom right corner of the screen of your desktop or PC.
2.Click on the More option on the bottom right corner of the screen.
3.A menu pops up. Click on the Settings option from the menu that opens up.
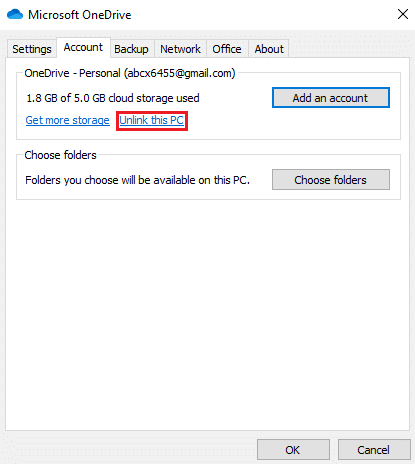
4.Under Settings, switch to the Account tab.
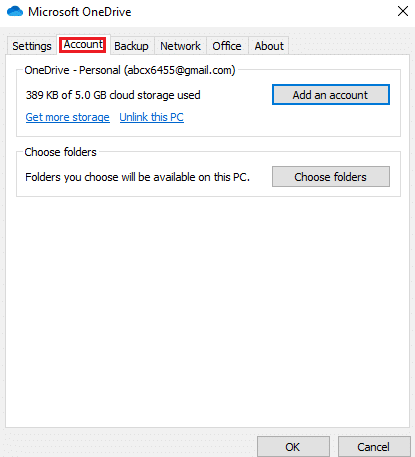
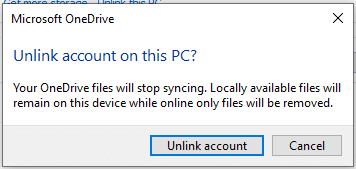
5.Click on Unlink this PC option.
6.A confirmation box will appear, asking you to unlink your account from the PC. Click on the Unlink account to continue.
7.Now, open the OneDrive app again by searching for it using the search bar.
8.Enter your email again in the email wizard.
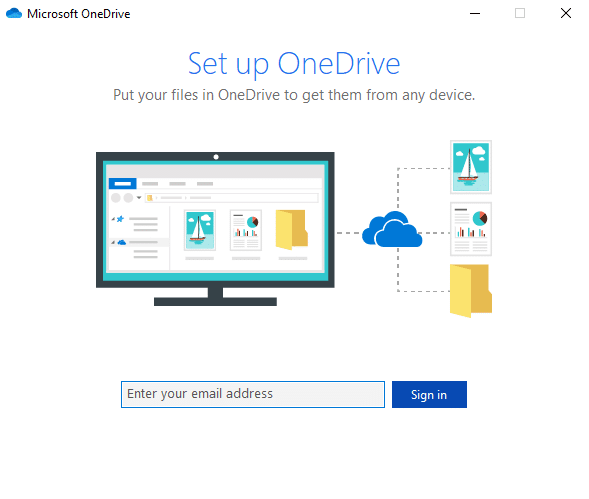
9.Click on the Sign-in option after entering your email address.
10.Enter the account password and again click on the Sign-in button to continue. Click on Next to continue.
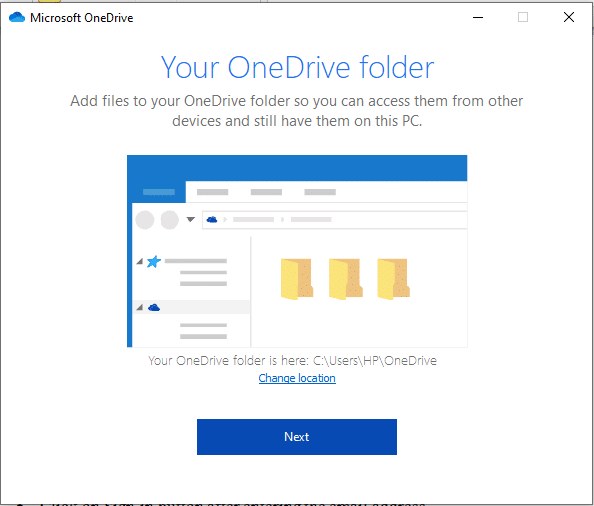
11.Follow the on-screen instructions to continue.
Also Read: How to Use OneDrive: Getting Started with Microsoft OneDrive
After completing all the steps, your account will be linked again, and all the files may start syncing on your computer again.
Method 4: Reset OneDrive using Command Prompt
Sometimes corrupt settings can cause the OneDrive syncing problem in Windows 10. So, by resetting the OneDrive, your problem may be resolved. You can reset OneDrive easily using the command prompt, follow the steps as mentioned below:
1.Open Command prompt by searching for it using the search bar.
2.Right-click on the result that appears on the top of your search list and select Run as Administrator.
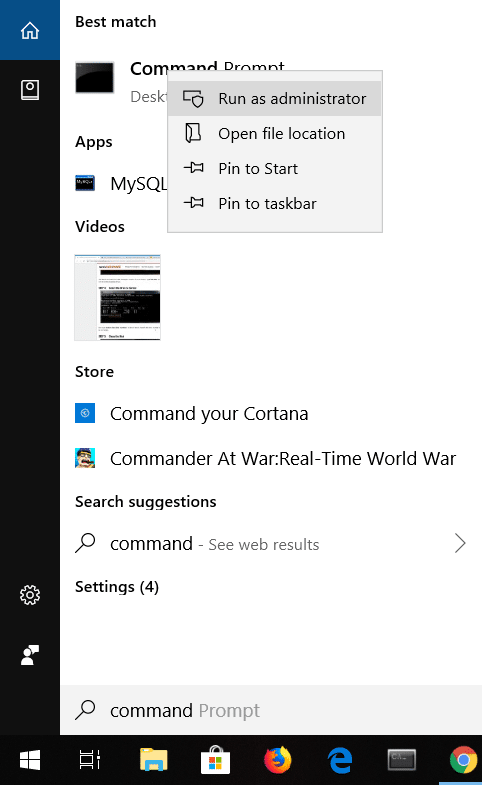
3.Click on Yes when asked for confirmation. The administrator Command prompt will open up.
4.Type the command mentioned below in the command prompt and hit enter:
%localappdata%MicrosoftOneDriveonedrive.exe /reset
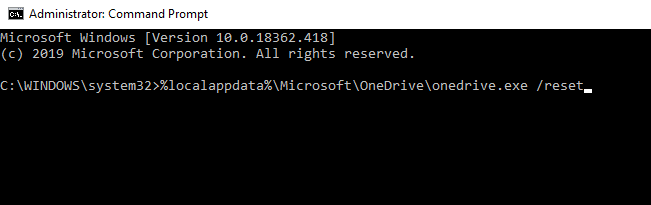
5.OneDrive icon will disappear from the notification tray and will reappear after some time.
Note: The OneDrive sign may take some time to reappear again.
After completing all the steps mentioned above, once the OneDrive icon reappears, all the OneDrive settings will be restored to default, and now all the files may sync appropriately without causing any problem.
Method 5: Changing Sync folders Settings
Some files or folders may not sync because you have made some changes in the Sync folder settings or restricting some folders from syncing. By changing these settings, your problem may be resolved. To change Sync folders settings follow these steps:
1.Click on the OneDrive Button available at the bottom right corner of the screen of your desktop or PC.
2.Click on the More option on the bottom right corner of the screen.
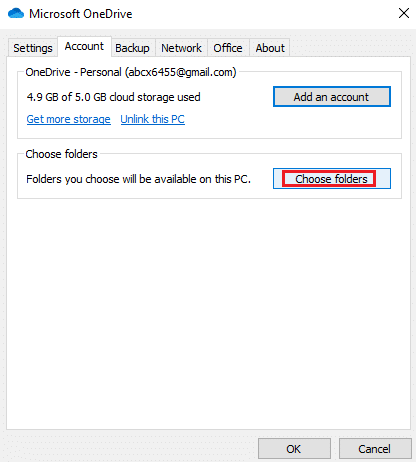
3.Click on the Settings option from the menu that opens up.
4.Under Settings, switch to the Account tab from the top menu.
5.Under Account, click on the Choose folders button.
6.Check the checkbox next to Make all files available if not checked.
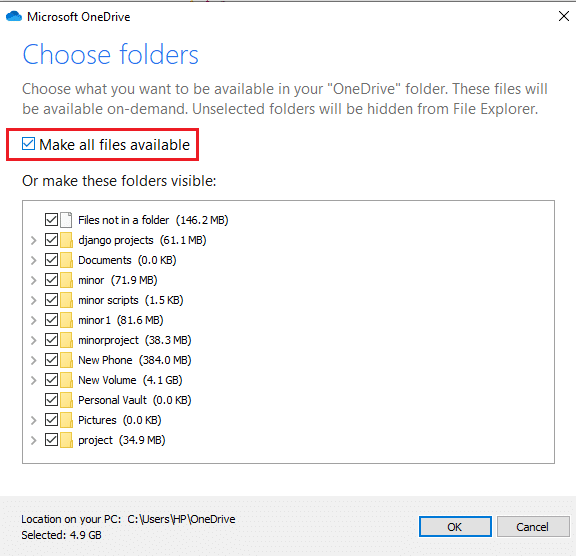
7.Click the OK button on the bottom of the dialog box.
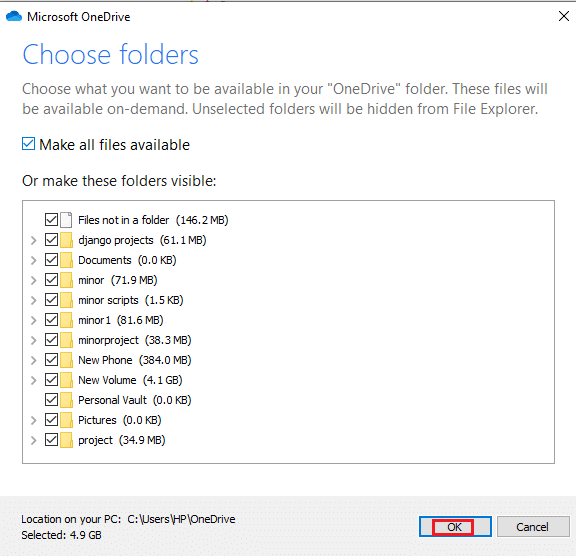
After completing the steps mentioned above, you should now be able to sync all the files and folders using File Explorer.
Method 6: Check Available Storage
Another reason for your files not being able to sync with OneDrive maybe because there is not enough space available in your OneDrive. To check the storage or space available in your OneDrive, follow these steps:
1.Click on the OneDrive Button on the bottom right corner of the screen of your desktop or PC.
2.Click on the More option at the bottom right corner of the screen.
3.Click on the Settings option from the menu that opens.
4.Under Settings, switch to the Account tab from the top menu.
5.Under Account, look for the space available in your OneDrive account.
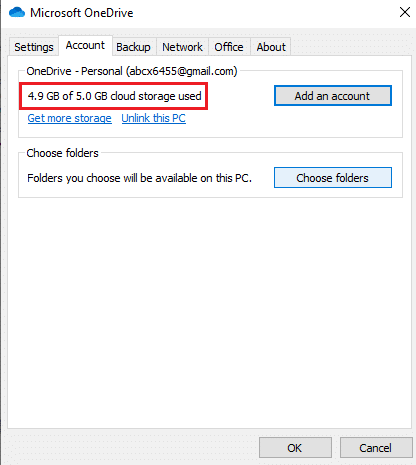
After completing the steps mentioned, if you find out that the OneDrive account space is reaching close to the storage limit, you have to clean some space or upgrade your account to get more storage to sync more files.
To clean up or free some space, follow these steps:
1.Press Windows Key + I to open Settings then click on System.
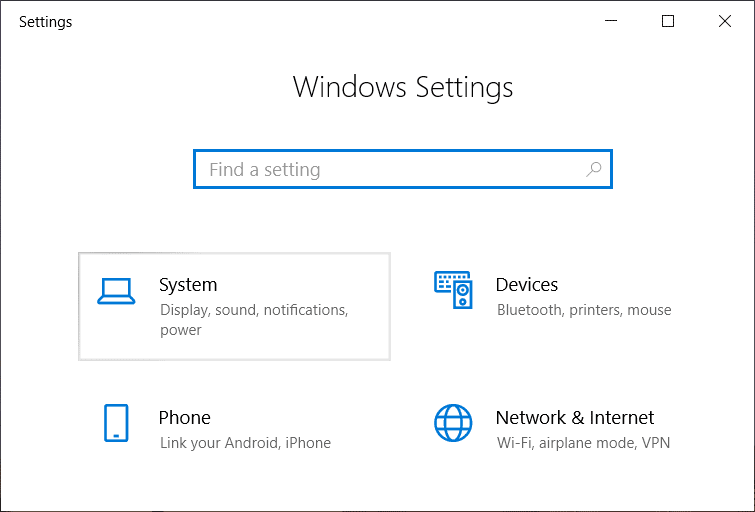
2.Click on the Storage option from the menu available at the left panel.
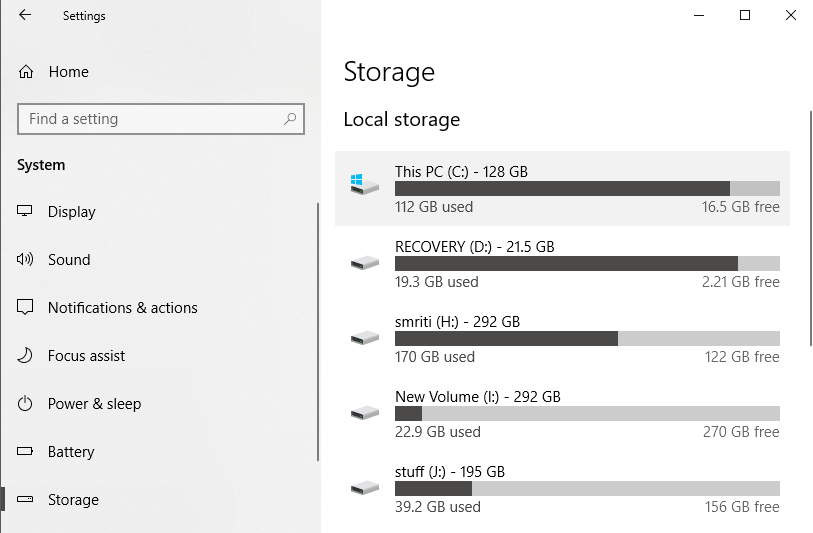
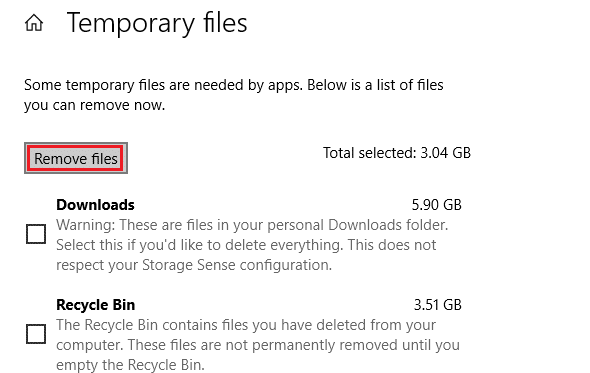
3.On the right side, under Windows (C), click on the Temporary files option.

4.Under Temporary files, check all the checkboxes next to the content you want to delete to clear up space in your OneDrive.
5.After selecting the files, click on Remove Files option.
After completing all the steps, the files you have selected will be deleted, and you will have some free space on your OneDrive.
To get more storage for your OneDrive, follow the below steps:
1.Click on the OneDrive Button on the bottom right corner of the screen of your desktop or PC.
2.Click on the More option then click on the Settings option from the menu that opens.
3.Under Settings, switch to the Account tab.
4.Under Account, click on the Get more storage link.
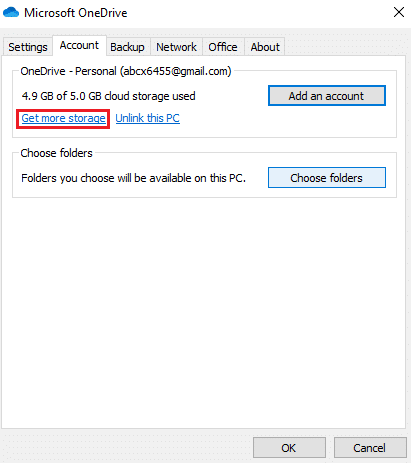
5.On the next screen, you will see different options. According to your needs and budget, choose a plan, and your OneDrive storage will upgrade.
Method 7: Change Setting to Limit the Upload & Download Bandwidth
Many times the files may not sync because of the limit you may have set to download and upload files on OneDrive. By removing that limit, your problem may be resolved.
1.Click on the OneDrive Button available at the bottom right corner of the screen on your desktop or PC.
2.Click on the More option then click on the Settings option from the menu that opens.
3.Under Settings, switch to the Network tab.
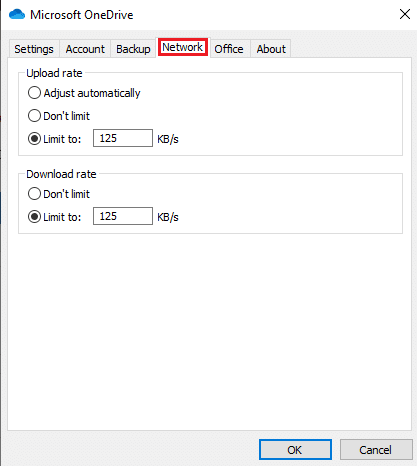
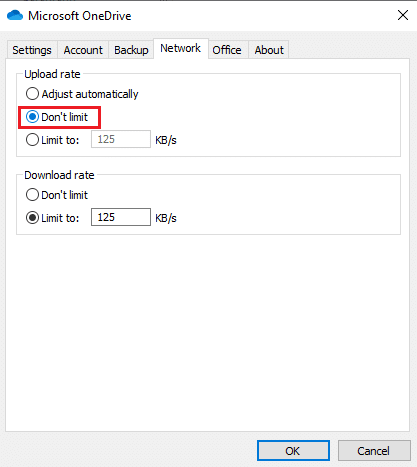
4.Under the Upload rate section, select Don’t limit option.
5.Under the Download rate section, select Don’t limit option.
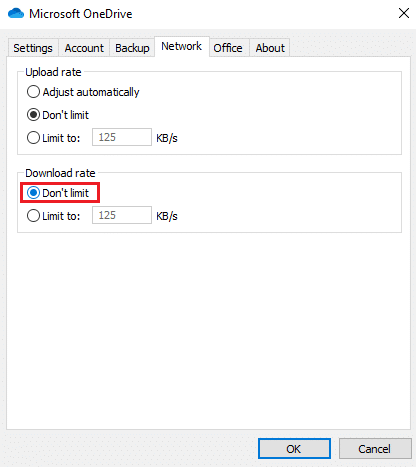
6.Click the OK button to save changes.
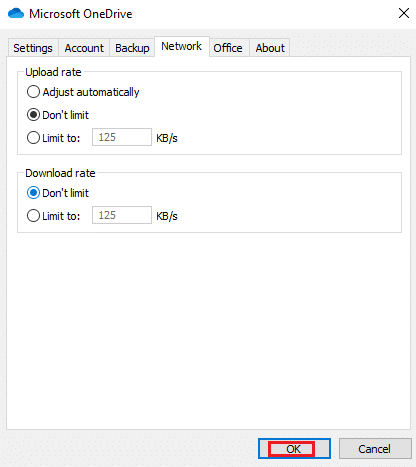
After completing these steps, all the limits will be removed and now all the files will sync properly.
Method 8: Disable Computer Security
Sometimes, computer security software like Windows Defender Antivirus, Firewall, proxy, etc. may prevent OneDrive from syncing files. It may not happen usually, but if you think that your files are not syncing due to this error, then by temporarily disabling security features, you can resolve the issue.
Disable Windows Defender Antivirus
To disable Windows Defender Antivirus follow these steps:
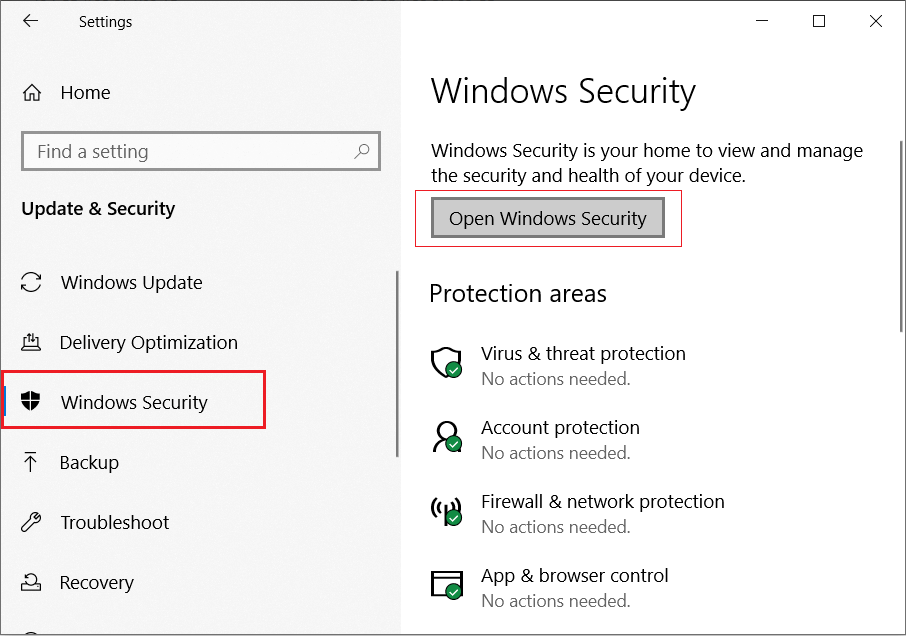
1.Press Windows Key + I to open Settings then click on Update & Security.
![]()
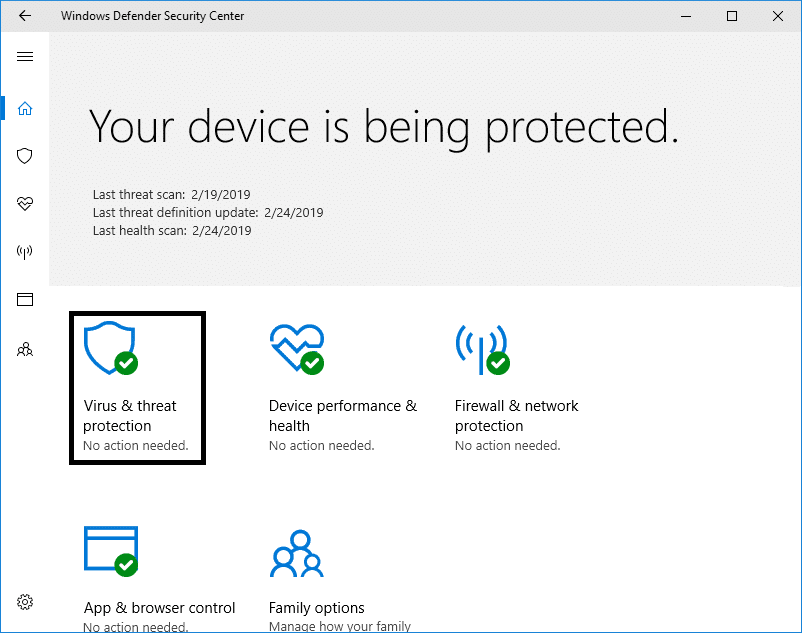
2.Click on the Windows Security option from the left panel then click on the “Open Windows Security” or “Open Windows Defender Security Center” button.
3.Click on the Virus & threat protection settings in the new window.
4.Now turn off the toggle under the Real-time protection.
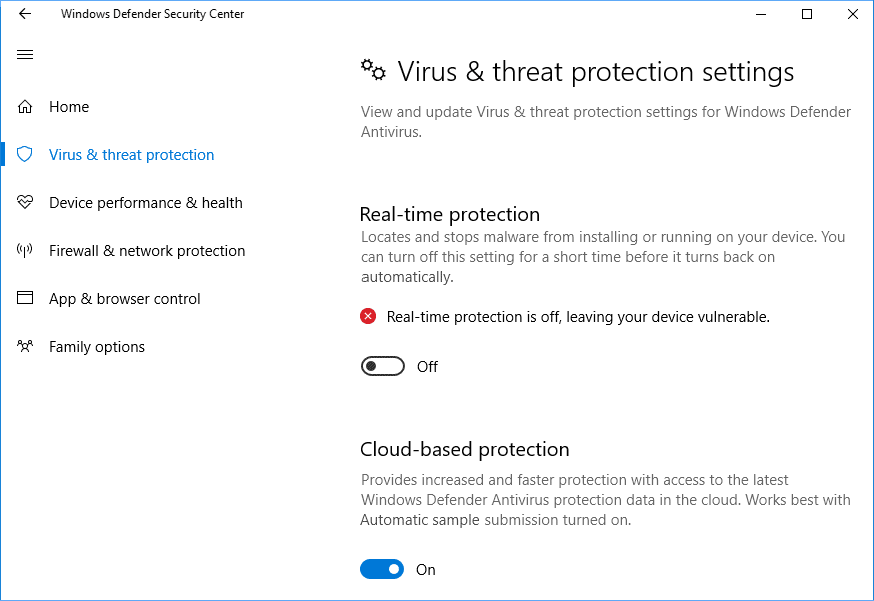
5.Restart your computer to save changes.
After completing the above steps, check if you’re able to fix OneDrive sync problems on Windows 10. Once you find out the issue, do not forget to again turn on the toggle for Real-time protection.
Disable Windows Defender Firewall
To disable Windows Defender Firewall follow these steps:
1.Press Windows Key + I to open Settings then click on Update & Security.
![]()
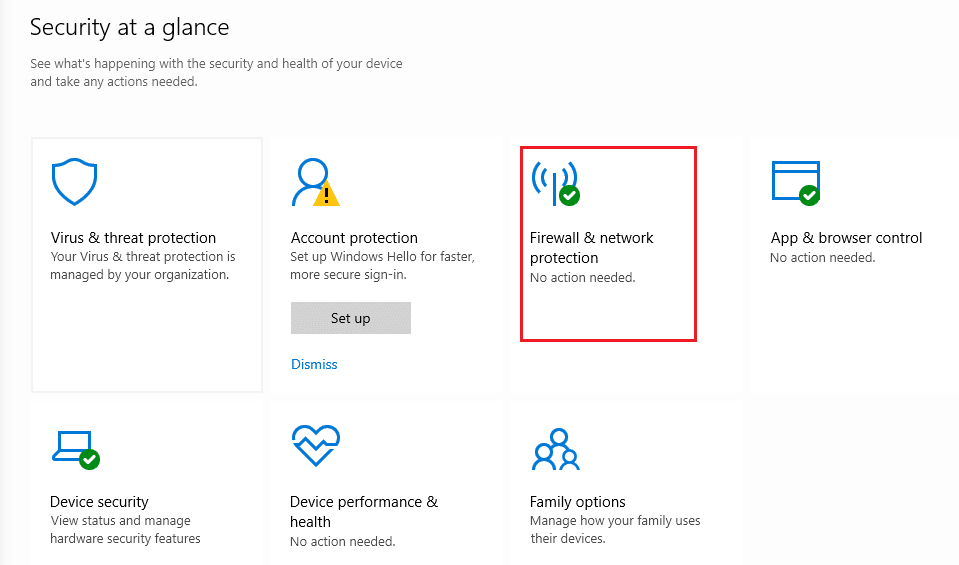
2.Click on the Windows Security option from the left panel then click on the “Open Windows Security” or “Open Windows Defender Security Center” button.
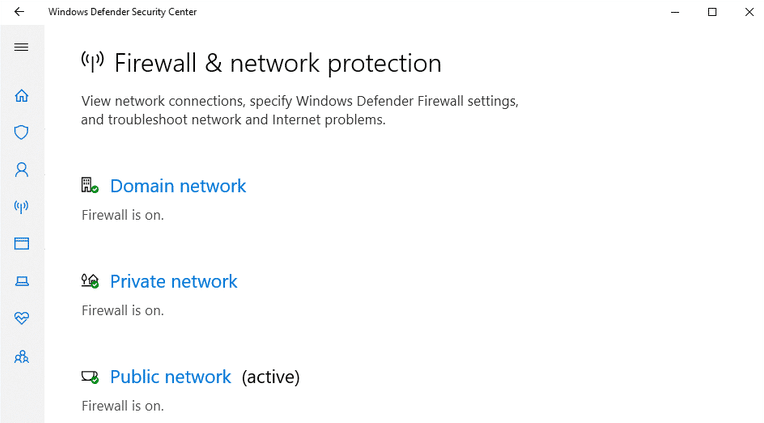
3.Click on Firewall & Network protection.
4.Click on the Private network option under Firewall & network protection.
5.Turn off the Windows Defender Firewall toggle switch.
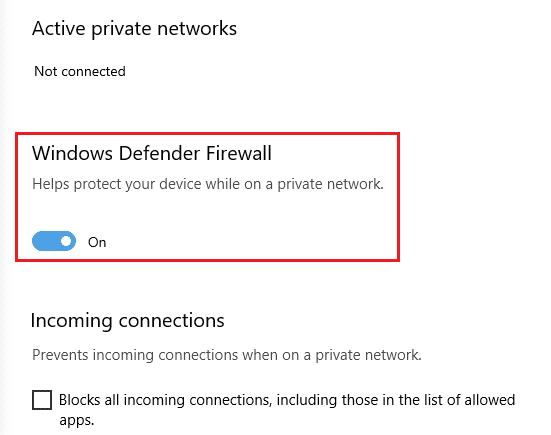
5.Click on Yes when prompted for confirmation.
After completing the mentioned steps, check if your fix OneDrive sync problems on Windows 10. Once you find out the problem, do not forget to again turn on the toggle to enable the Windows Defender Firewall.
Disable Proxy Settings
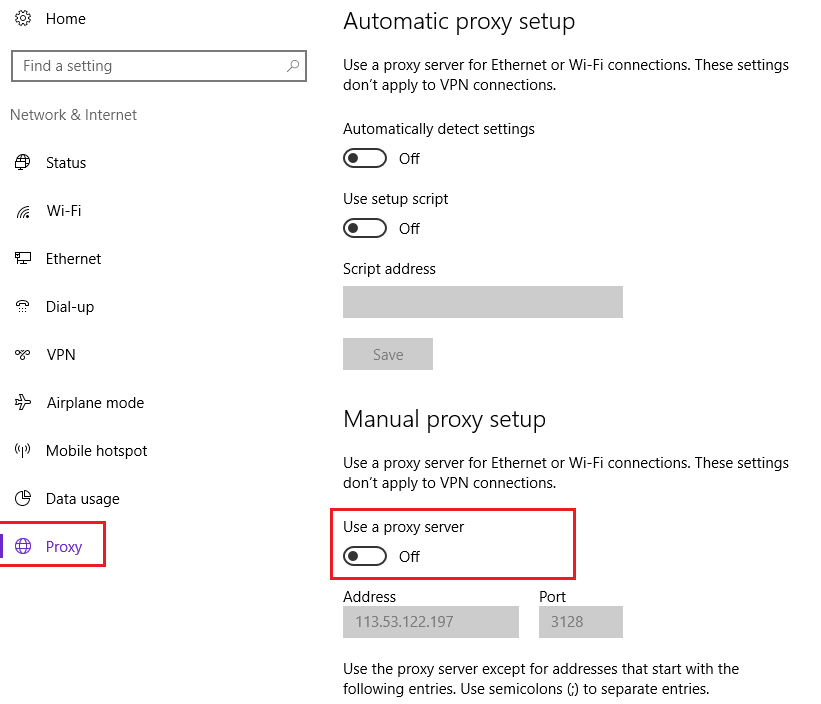
To disable Proxy settings, follow these steps:
1.Press Windows Key + I to open Settings then click on Network & Internet.

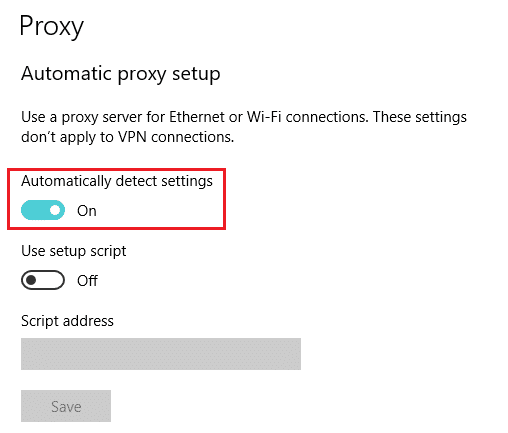
2.From the left-hand menu select Proxy then under Automatic proxy setup, toggle ON the switch next to Automatically detect settings.
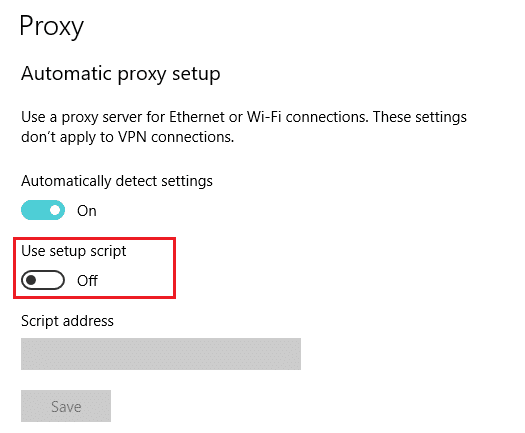
3.Turn off the toggle switch next to Use setup script.
4.Under Manual proxy setup, turn off the toggle switch next to Use a proxy server.
After completing all the steps, check now if the OneDrive starts syncing files or not.
Recommended:
Hopefully, using the above methods, you will be able to fix OneDrive sync problems on Windows 10. But if you still any questions then feel free to ask them in the comment section.