SoftThinks Agent Service is incorporated in multiple Dell desktops and laptops by Dell Inc. The primary function of this back utility is to store all the files and programs periodically. It is held up with Dell DataSafe Local Backup bundle or Dell Back and Recovery for their exclusive backup services. This service has proved to be one of the best promising backup services for many previous versions of Windows and has helped the users restore their system when anything goes wrong. Yet, few users complain that SoftThinks Agent Service caused their system to slow down and consume a lot of CPU resources unnecessarily. If you are also facing the same issue, you are at the right place! We bring a perfect guide to help you fix high disk and CPU usage by SoftThinks Agent Service.

How to Fix SoftThinks Agent Service High CPU Usage in Windows 10
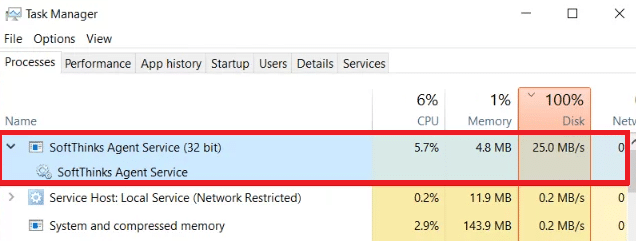
Plenty of your disk space is ruined due to the backup files created, and thus, the performance of your system becomes poor due to complications from SoftThinks Agent Service. Even if you end tasks, it automatically restarts due to the default timer or trigger withheld in it. Thus, sometimes you may face 100% disk usage, which annoys most of the users. And this article will indeed help you fix the issue for you with various detailed methods. But before that, let us look at what is SoftThinks Agent Service?
What is SoftThinks Agent Service?
You can find SoftThinks Agent Service in the Task Manager as the process is called SftService.exe. It is simply like creating a system restore point where all the files and programs will be backed up for future use. Hence if anything goes wrong, you may bring your system back to the last working status at the time of the crash. Here are a few points regarding the said issue.
- The Dell backup utility services copy all the files and programs of your system whenever your computer wakes up from the Sleep or Hibernation mode.
- Your system does not need any physical window for this backup utility; hence it runs in the process of SftService.exe.
- Sometimes, if your system is outdated or if the current version of OS is incompatible with the process, you may face 100% disk usage by SoftThinks Agent Service.
- At a stretch, you will at least face 80% disk usage by SoftThinks Agent Service under these circumstances.
- You may not find this file in the startup programs since this is a service. You may find this under system services.
Many users complain that their system freezes for around 10 minutes to 3 hours due to high CPU and disk usage caused by SoftThinks Agent Service. It drains your battery very fast and makes your system incompatible for usage. This problem may vanish for a while, but you may face this again when you restart your system from Sleep or Hibernation mode.
Now, you have a clear idea and answer about what is SoftThinks Agent Service? In the next section, you will get to know how to disable SoftThinks Agent Service. Keep reading to know more!
How to Disable SoftThinks Agent Service
Yes, you can safely disable it from your system without affecting the functionality of your computer. This is not an essential program for your system, and it increases the CPU and disk resources all the time. As discussed, you will face system freezing and battery draining issues.
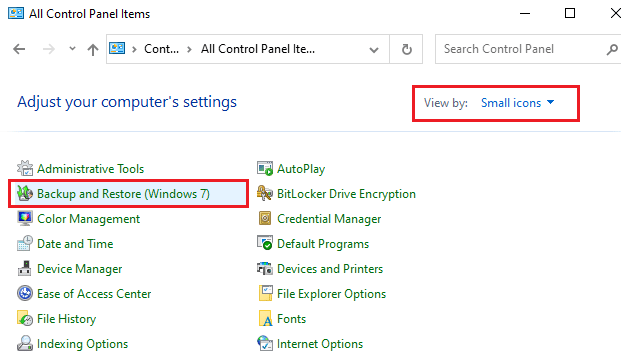
Although Dell has released several updates to fix the problem, many users feel this backup utility is a service to be disabled ever. Hence, you may not require SftService.exe as a mandatory process in your system. You may use the Backup and Restore setting from the Control Panel in place of this backup utility. Here is how to do it.
1. Launch Control Panel by typing it in the search menu and set the View by option to Small icons.
2. Now, click on Backup and Restore (version) and follow the on-screen instructions to restore your system whenever needed.
Still, if you want to continue with the Dell backup utility, then try downloading the updated version of the Dell Backup and Recovery (DBAR) Application. On the other hand, if you have decided to remove the utility from your system, follow the upcoming methods discussed in this article.
This section has compiled a list of methods to disable the SoftThinks Agent Service from your system safely. Read and implement them to find the best results. Before getting into more complex methods, don’t forget to restart the system, as sometimes it fixes the issues without having to perform risky and long methods.
Method 1: Disable SoftThinks Agent Service
You can stop the SoftThinks Agent Service startup process by disabling it from the Services window. Of course, your files will not be altered, but still, you will be able to stop its services to prevent high CPU and disk usage. Here is how to do it.
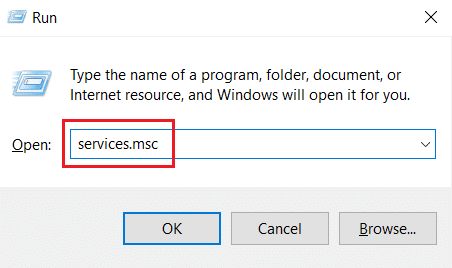
1. Press Windows + R keys together to launch the Run dialog box.
2. Type services.msc as follows and click OK to open the Services app.
3. Now, in the Services window, scroll down and right-click the SoftThinks Agent Service option and click Properties, as depicted in the below picture.

4. Now, set the Startup type to Disabled.
Note: If the Service status is Running, Stop it to kill the SoftThinks Agent Service processes.
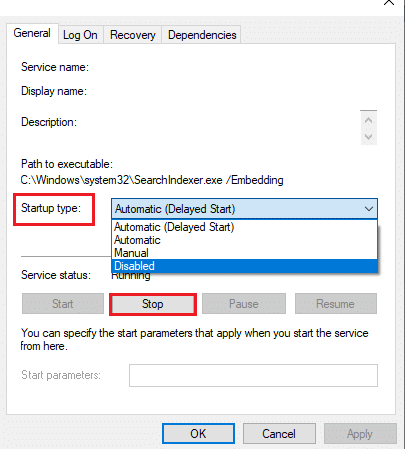
6. Finally, click on Apply > OK to save the changes.
Also Read: Fix Steam Client Bootstrapper High CPU on Windows 10
Method 2: Use Advanced SystemCare PRO Tool
You may face high CPU usage due to the continuous running of SftService.exe processes in the Task Manager. In this case, you can perform a real-time scan for the processes by using Advanced SystemCare. With the help of this tool, you may automatically turn off the high CPU resource-consuming processes like SftService.exe. Here is how to do it.
1. Visit the IObit Advanced SystemCare PRO website and click the Download a Free Scan option to start the download process.

2. Now, navigate to My downloads and follow the on-screen instructions to install the executable file.
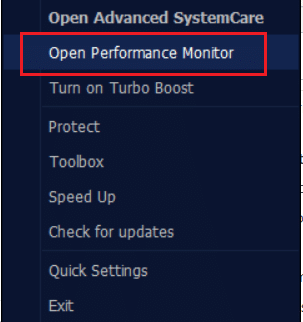
3. Here, right-click on the Program icon at the bottom right corner of the screen and select the Open Performance Monitor option as depicted below.
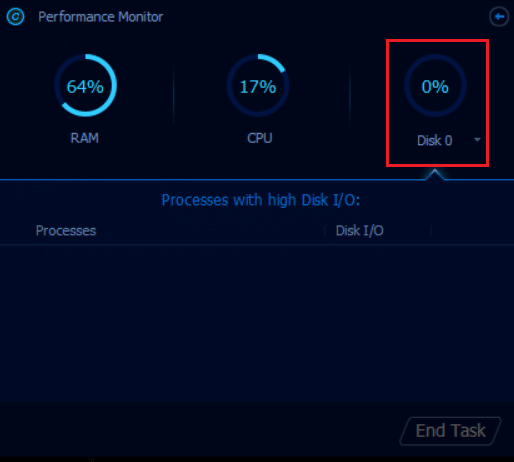
4. Now, click the right-arrow button on the Performance Monitor.
![]()
5. Now, switch to the Disk tab and click on the Speed up icon at the bottom left corner of the window. Here, processes with high CPU usage like SoftThinks Agent Service will be killed by speeding up the process.
Now, SoftThinks Agent Service that consumes enormous CPU resources will be stopped automatically by the Advanced SystemCare tool.
Thus, you have entirely uninstalled this service from your system. In the next section, you will learn how to tackle the high CPU usage issue in your Windows 10 system.
Also Read: Fix .NET Runtime Optimization Service High CPU Usage
Method 3: Disable SuperFetch (SysMain)
The startup time for applications and Windows is improved by a built-in feature called SysMain (formerly SuperFetch). But programs of the system are not benefited from this feature. Instead, the background activities are increased, and the performing speed of your system will be reduced relatively. These Windows services will eat your CPU resources, and it is often recommended to disable SuperFetch in your system.
1. Open the Run dialog box and type services.msc and hit the Enter key to open the Services window.
2. Now, scroll down and right-click on SysMain, and click the Properties option.
3. Here, in the General tab, set the Startup type to Disabled from the drop-down menu as depicted below.
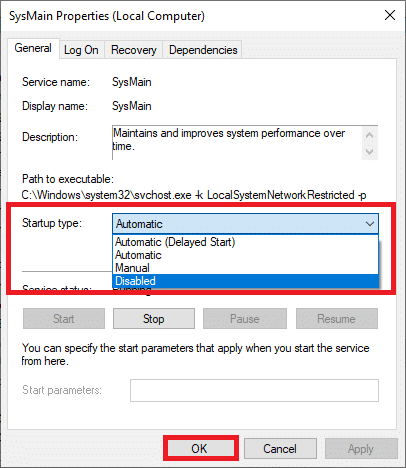
5. Finally, click OK to save the changes.
There will be a massive decrease in CPU usage, and you have a fixed high CPU usage problem.
Method 4: Disable Background Intelligent Transfer Service
1. Follow steps 1 and 2 from Method 1 to launch the Run dialog box and open the Services window.
2. Now, scroll down the screen, right-click on Background Intelligent Transfer Service, and click the Properties option.
3. Here, in the General tab, set the Startup type to Disabled from the drop-down menu, as shown below.
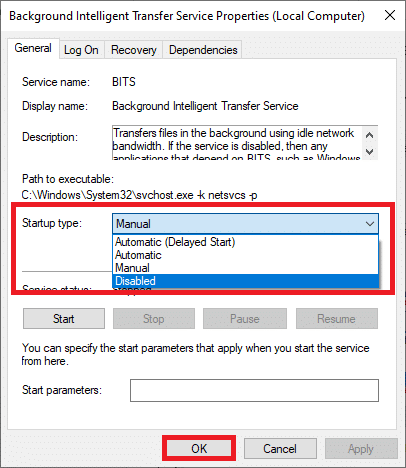
4. Finally, click OK to save the changes.
Now check if SoftThinks Agent Service high CPU Usage issue is fixed or not.
Also Read: How to Fix The Audio Service is Not Running Windows 10
Method 5: Disable Windows Search Service
1. Launch the Services window from the Run dialog box.
2. Now, scroll down the screen and right-click on Windows Search Service, and click on Properties.
3. Here, in the General tab, set the Startup type to Disabled from the drop-down menu, as highlighted below.
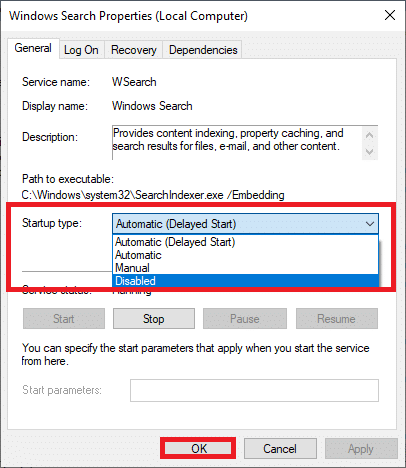
5. Finally, click OK to save the changes.
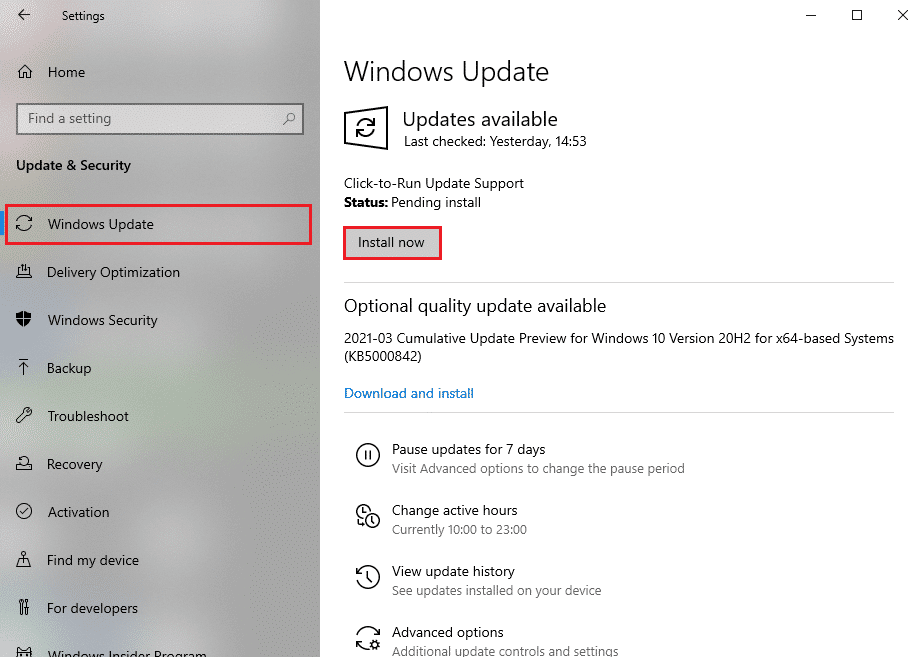
Method 6: Update Windows
If you did not obtain any fix by the above methods, then there are few chances that you might have bugs in your system. Installing new updates will help you to fix the bugs in your system. Hence, always ensure that you use your system in its updated version. Otherwise, the files in the system will not be compatible with the SftService.exe leading to high CPU usage. Read our guide on How to Download and Install Windows 10 Latest Update to update your system.
Also Read: Fix DISM Host Servicing Process High CPU Usage
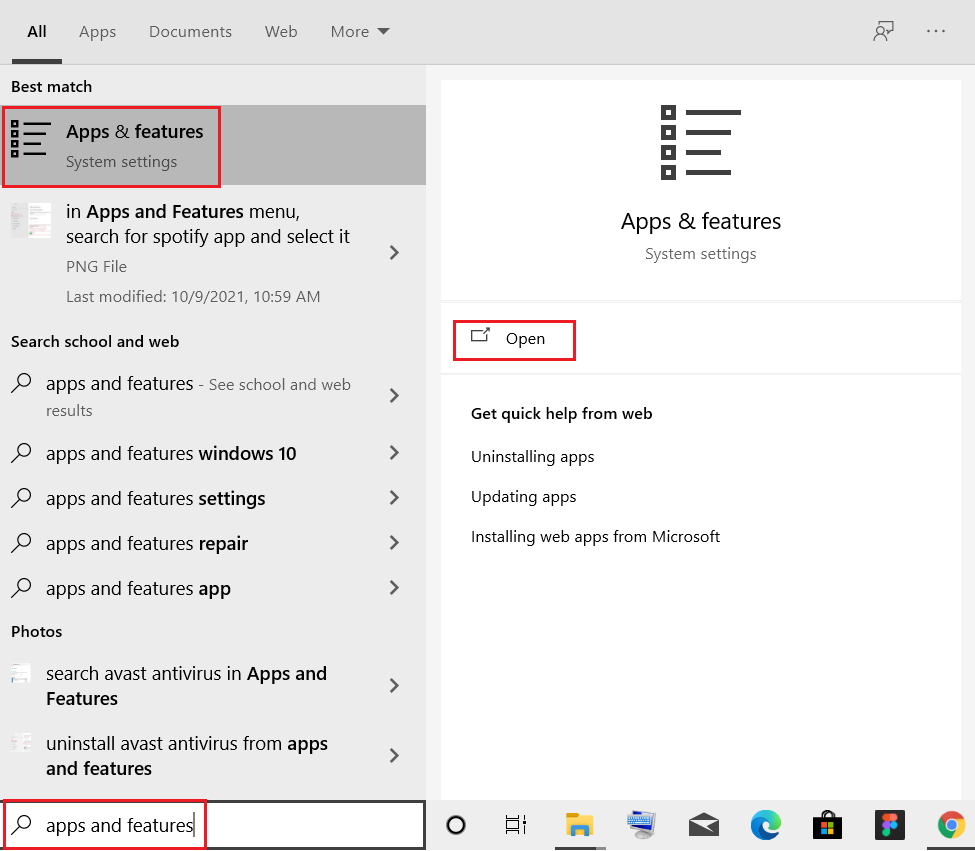
Method 7: Uninstall Dell Backup Utility
If you do not need this Dell backup utility, you can uninstall it using the below-mentioned steps.
1. Press the Windows key, type apps and features, and click on Open.
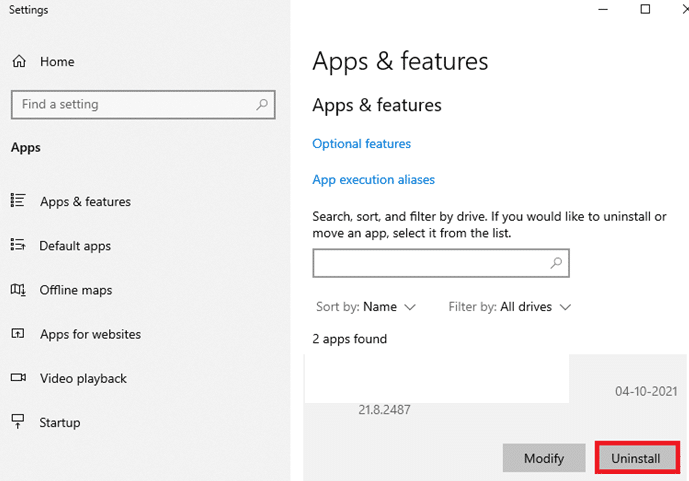
3. Type and search Dell Backup and Recovery or Dell DataSafe Local Backup or AlienRespawn in the list and select it.
4. Finally, click on Uninstall.
5. If the programs have been deleted from the system, you can confirm by searching it again. You will receive a message: We couldn’t find anything to show here. Double check your search criteria.
6. Restart your system and check if you have completely uninstalled the backup utility from the system.
Method 8: Run Malware Scan
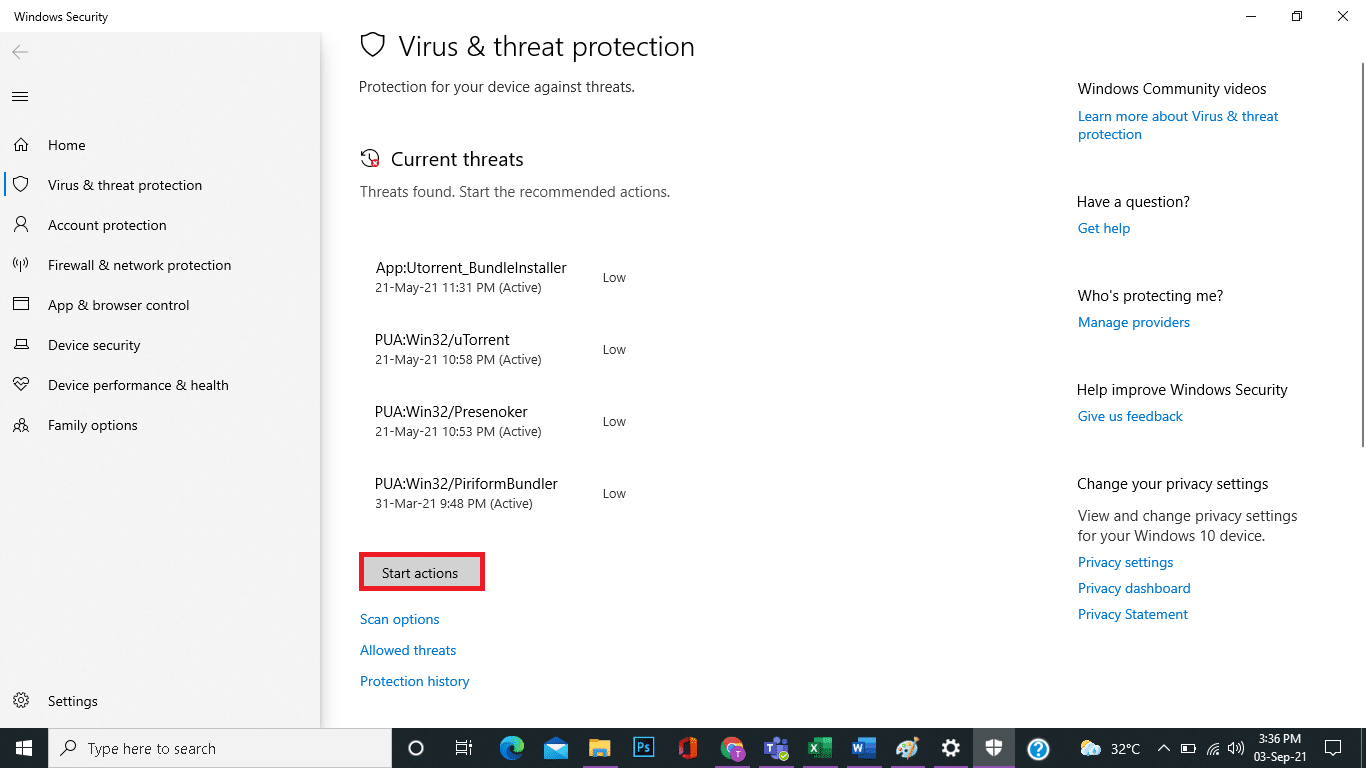
You can run a malware or Virus scan to fix high disk and CPU usage issues. Few programs will help you overcome this malicious software. And, these anti-malware programs will routinely scan your system and safeguard your system. Therefore, to avoid your high CPU usage issue, run any virus scan in your system and check if the problem is solved. Read our guide on How do I Run a Virus Scan on my Computer? The Windows Defender will remove all the virus and malware programs once the scanning process is complete.
Also Read: How to Fix hkcmd High CPU Usage
Method 9: Perform System Restore
More often, you could face SoftThinks agent service high CPU and disk usage after a Windows update. If you encounter this issue, then you could restore the system to its previous version.
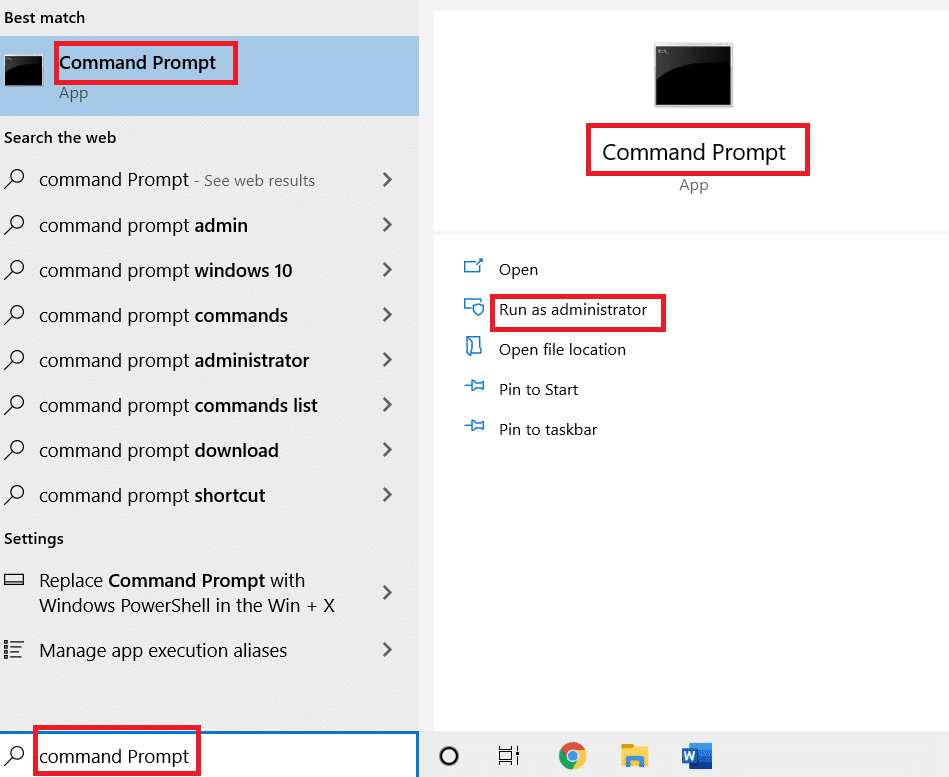
Note: Before you follow the below-mentioned steps, boot your system in safe mode. Sometimes due to system errors and faulty drivers, you cannot run the system restore usually. In such cases, boot your system in safe mode and then perform a system restore. Read how to boot to safe mode in Windows 10.
1. Type cmd in the Windows search bar and click the Run as administrator option, as shown below.
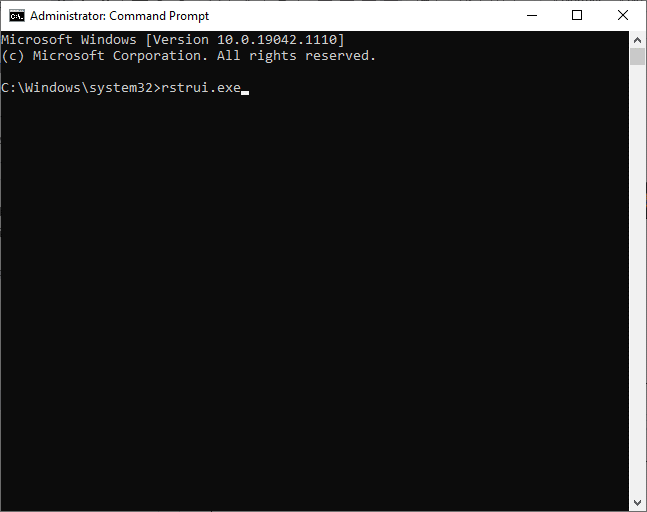
2. Type the rstrui.exe command and hit Enter key.
3. Now, the System Restore window will pop up on the screen. Here, click on Next, as depicted in the below picture.
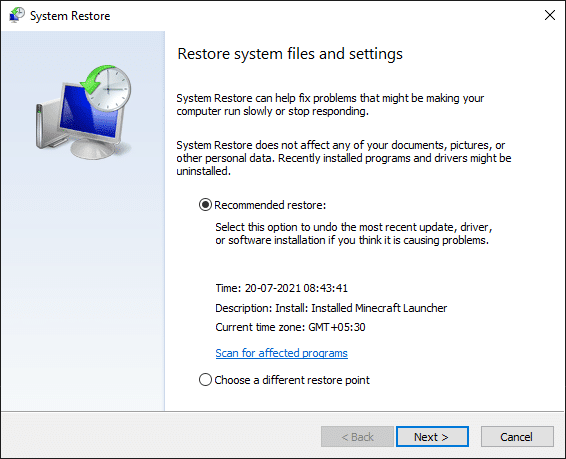
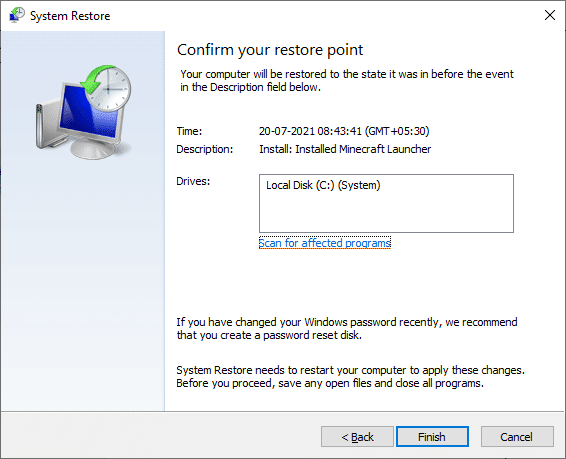
4. Finally, confirm the restore point by clicking on the Finish button.
The system will be restored to the previous state, and now check if the issue is resolved.
Recommended:
We hope that this guide was helpful and you could fix SoftThinks Agent Service high CPU usage on Windows 10. Let us know which method worked for you the best. Also, if you have any queries/suggestions regarding this article, then feel free to drop them in the comments section.