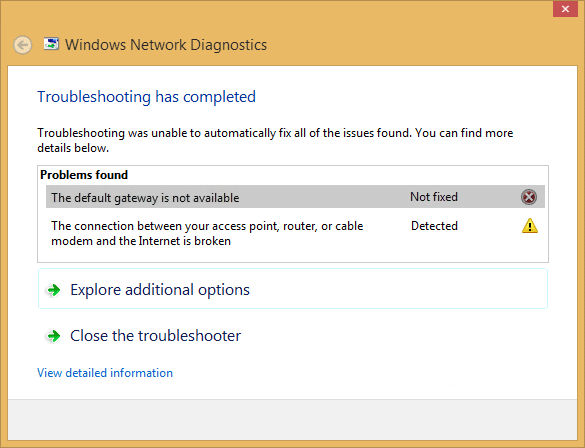
You might be experiencing WiFi Limited Access connectivity issue. When you run Network Troubleshooter, it shows you the error “The default gateway is not available”, and the issue is not resolved. You will see a yellow exclamation mark on your WiFi icon in the system tray, and you won’t be able to access the Internet until the issue is fixed.
The main cause of this error seems to be corrupted or incompatible Network Adapter Drivers. This error might also be caused because of malware or virus in some cases, so we need to troubleshoot the issue completely. So without wasting any time let’s see how to actually Fix The default gateway is not available in Windows 10 with the below-listed guide.
Fix The default gateway is not available
Make sure to create a restore point just in case something goes wrong.
Method 1: Temporarily Disable Antivirus
1. Right-click on the Antivirus Program icon from the system tray and select Disable.

2. Next, select the time frame for which the Antivirus will remain disabled.

Note: Choose the smallest amount of time possible, for example, 15 minutes or 30 minutes.
3. If the issue is resolved after disabling the antivirus, then uninstall it completely.
In many cases, the cause of The default gateway is not the available problem is with McAfee security program. If you have McAfee security programs installed on your computer, it is suggested that you uninstall them completely.
Method 2: Uninstall Network Adapters Driver
1. Press Windows Key + R then type devmgmt.msc and hit Enter to open Device Manager.

2. Expand Network Adapters and find your network adapter name.
3. Make sure you note down the adapter name just in case something goes wrong.
4. Right-click on your network adapter and uninstall it.

5. If ask for confirmation, select Yes.
6. Restart your PC and try to reconnect to your network.
7. If you’re not able to connect to your network, then it means the driver software isn’t automatically installed.
8. Now you need to visit your manufacturer’s website and download the driver from there.

9. Install the driver and reboot your PC.
By reinstalling the network adapter, you should definitely Fix The default gateway is not available error.
Method 3: Update Network Adapters Driver
1. Press Windows key + R and type devmgmt.msc in Run dialogue box to open device manager.
2. Expand Network adapters, then right-click on your Wi-Fi controller (for example Broadcom or Intel) and select Update Driver Software.

3. In the Update Driver Software Windows, select “Browse my computer for driver software.“

4. Now select “Let me pick from a list of device drivers on my computer.“

5. Now uncheck Show compatible hardware option.
6. From the list, select Broadcom from the left-hand menu and then in the right window pane select Broadcom 802.11a Network Adapter. Click Next to continue.
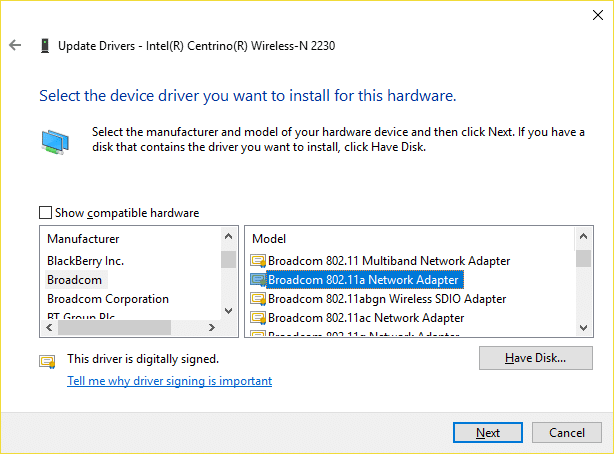
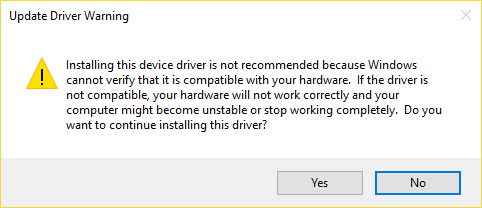
7. Finally, click Yes if it asks for confirmation.
8. This should Fix The default gateway is not available in Windows 10, if not then continue.
Method 4: Change Power Management Settings for your Network Adapter
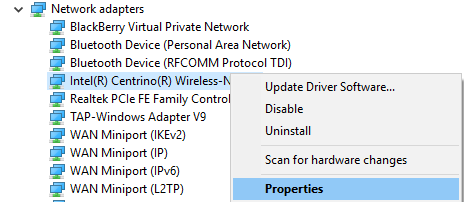
1. Press Windows Key + R then type devmgmt.msc and hit Enter.
2. Expand Network adapters then right-click on your installed network adapter and select Properties.
3. Switch to Power Management Tab and make sure to uncheck “Allow the computer to turn off this device to save power.“
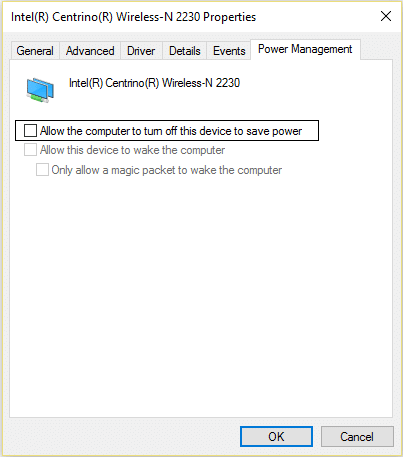
4. Click Ok and close the Device Manager.
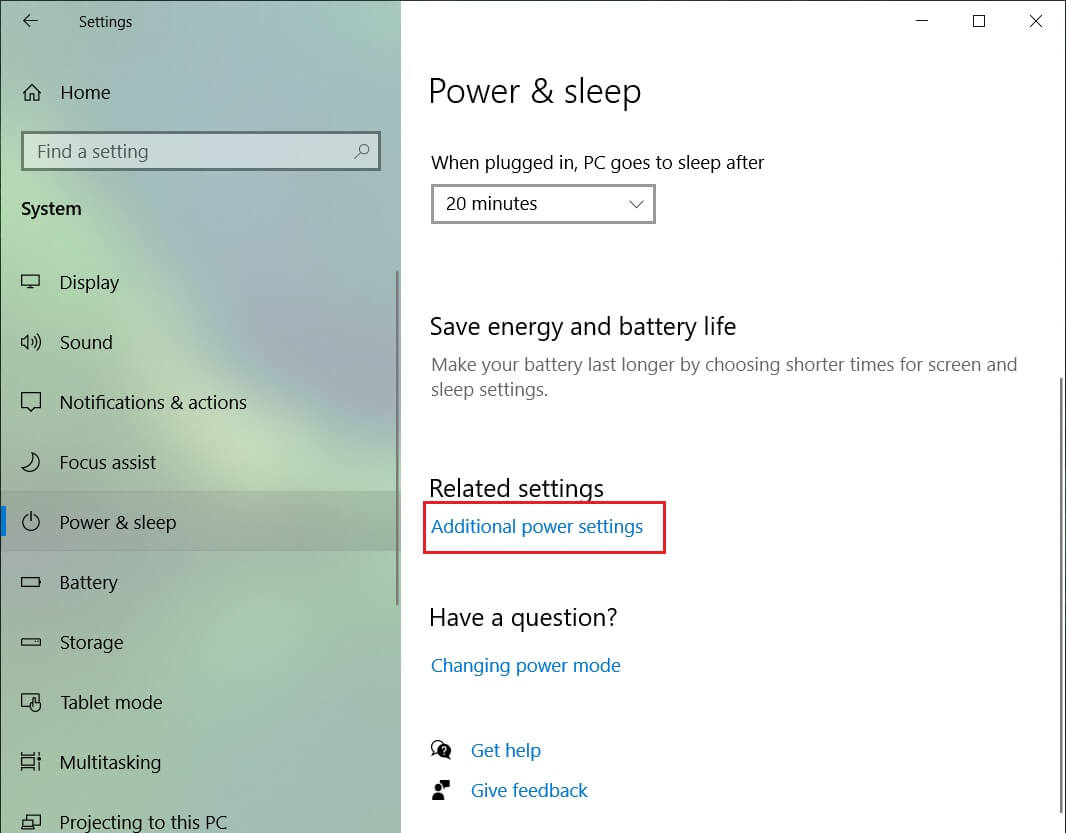
5. Now press Windows Key + I to open Settings then Click System > Power & Sleep.

6. On the bottom click, Additional power settings.
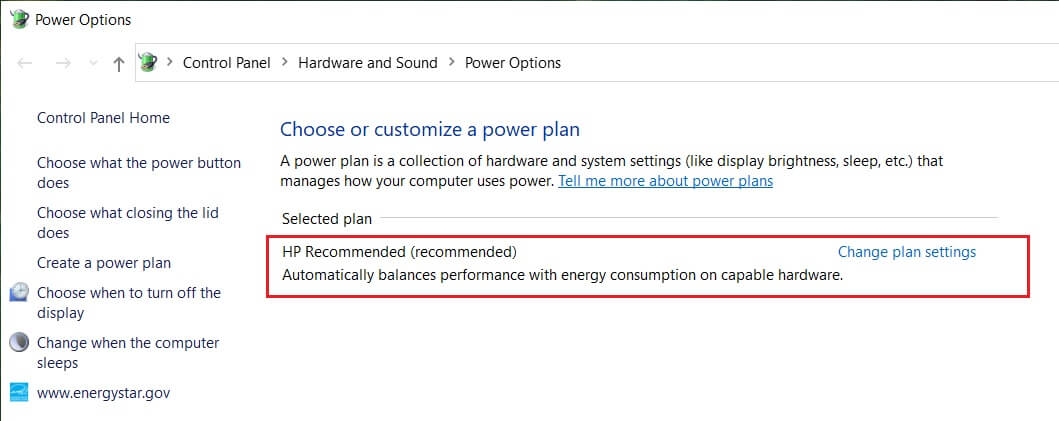
7. Now click “Change plan settings” next to the power plan which you use.
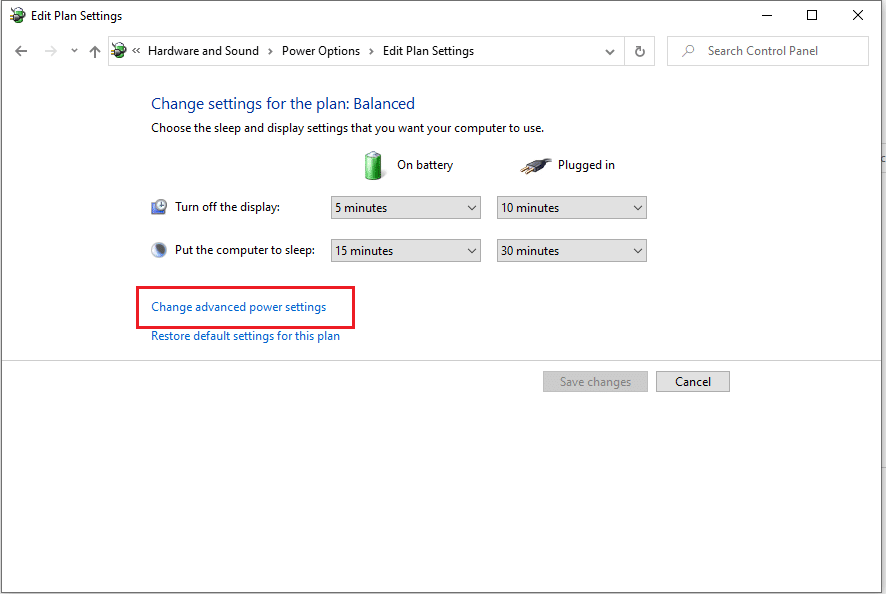
8. At the bottom click on “Change advanced power settings.“
9. Expand Wireless Adapter Settings, then again expand Power Saving Mode.
10. Next, you will see two modes, ‘On battery’ and ‘Plugged in.’ Change both of them to Maximum Performance.
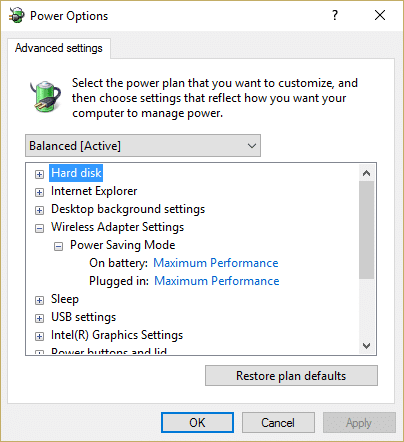
11. Click Apply, followed by Ok. Reboot your PC to save changes.
Method 5: Manually assign the default gateway and the IP address
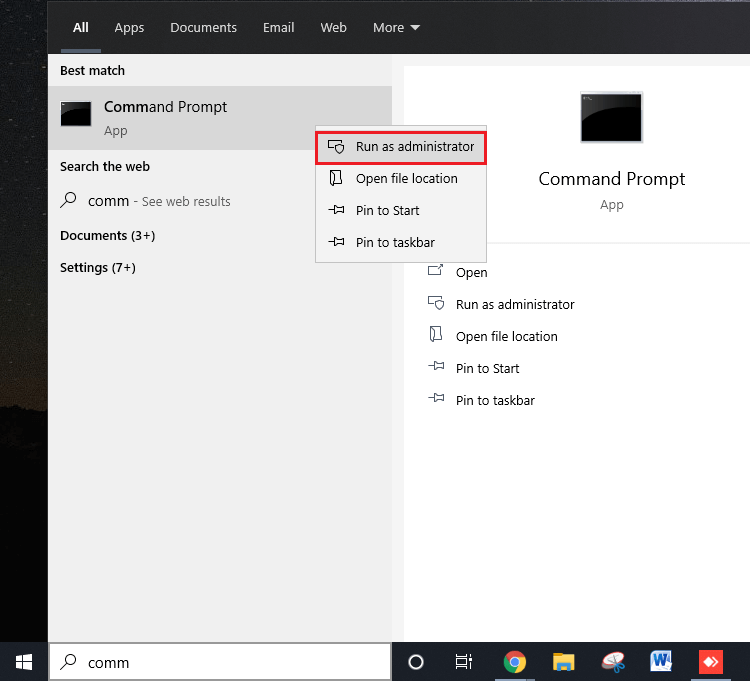
1. Search Command Prompt, right-click and select Run As Administrator.
2. Type ipconfig into cmd and press Enter.
3. Note down the IP address, Subnet mask, and default gateway listed under WiFi then close cmd.
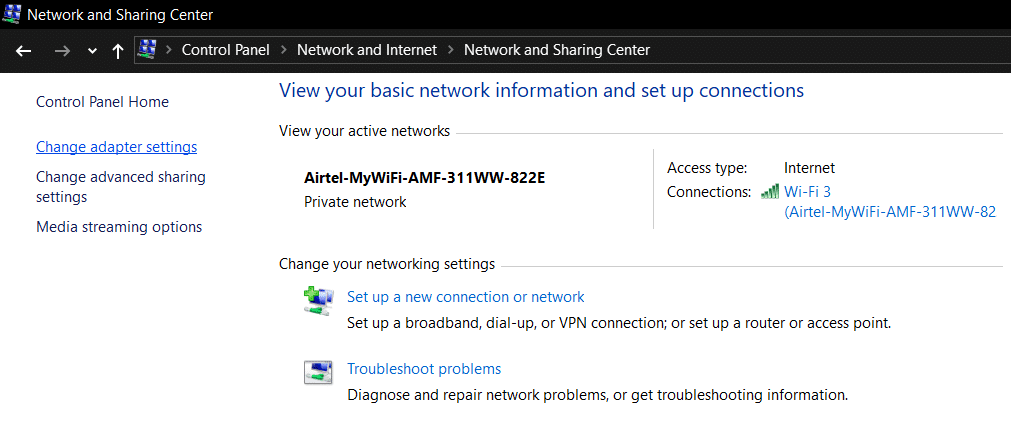
4. Now right-click on Wireless Icon on the system tray and select “Open Network and Sharing Center.“
![]()
5. Click Change adapter settings from the left-hand side menu.
6. Right-click on your Wireless Adapter Connection which is showing this error and select Properties.
7. Select Internet Protocol Version 4 (TCP/IPv4) and click Properties.
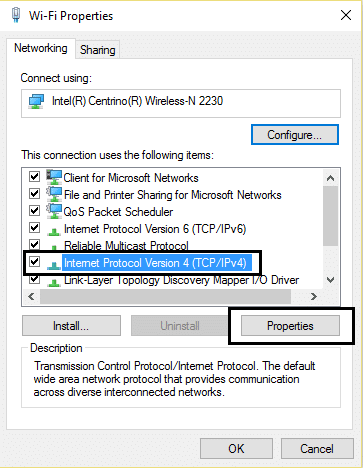
8. Checkmark “Use the following IP address” and enter the IP address, Subnet mask and Default gateway noted down in Step 3.
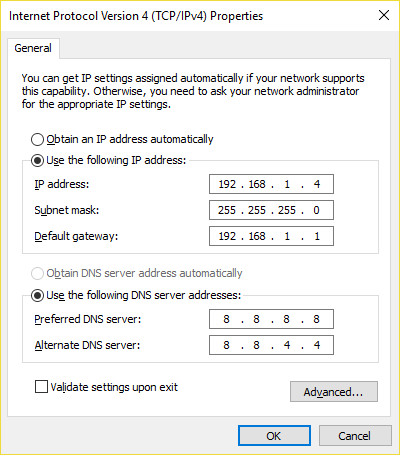
9. Click Apply, followed by OK to save changes.
10. Reboot your PC and see if you can Fix The default gateway is not available in Windows 10.
Recommended:
That’s it you have successfully Fix The default gateway is a not available error but if you still have any questions regarding this post then feel free to ask them in the comment’s section.