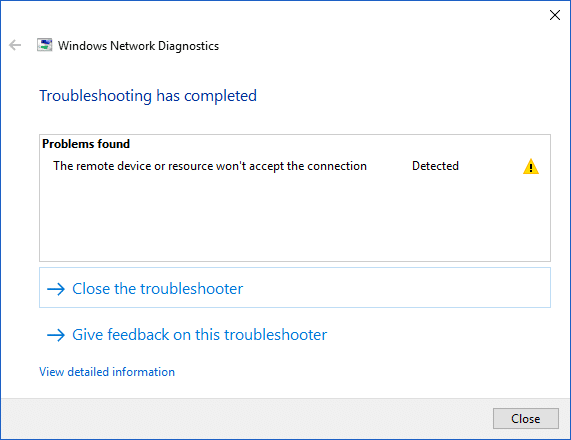
You are not able to access the Internet on your PC? Does it show limited connectivity? Whatever the reason may be, the first thing you do is simply run Network diagnostic which in this case will show you the error message “The remote device or resource won’t accept the connection“.
Why this error occurs on your PC?
This error occurs particularly when there is an incorrect network configuration or somehow network settings have changed on your computer. When I say network settings, it means things like the proxy gate might be enabled in your browser settings or is wrongly configured. This issue can also be caused due to virus or malware which may automatically change the LAN settings. But don’t panic as there are some easy workarounds to solve this issue. So without wasting any time let’s see how to fix The remote device or resource won’t accept the connection error with the help of the below-listed troubleshooting guide.
Fix The remote device or resource won’t accept the connection error
Make sure to create a restore point just in case something goes wrong.
Method 1: Disable Proxy
This issue will arise if your proxy setting in Internet Explorer has changed. These steps will fix the issue for both IE and Chrome browser. Steps you need to follow are –
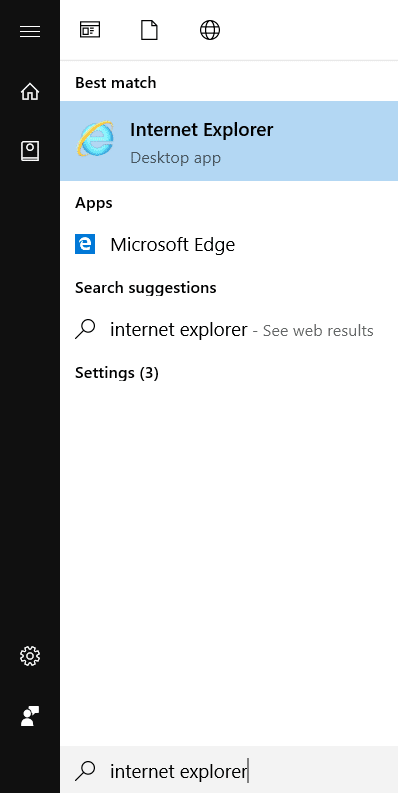
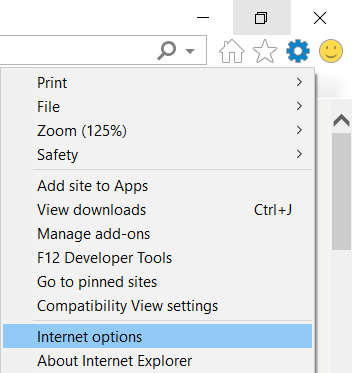
1.Open Internet Explorer on your system by searching for it from the Windows search bar.
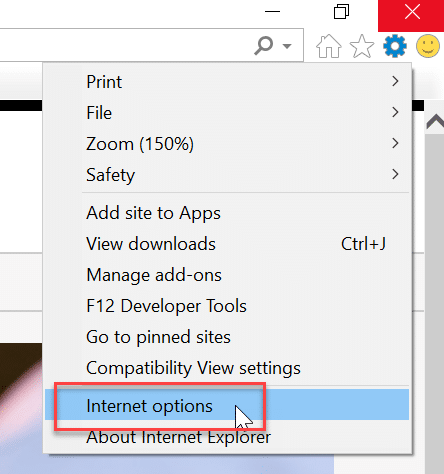
2.Click the gear icon from the top right corner of your browser and then choose “Internet options”.
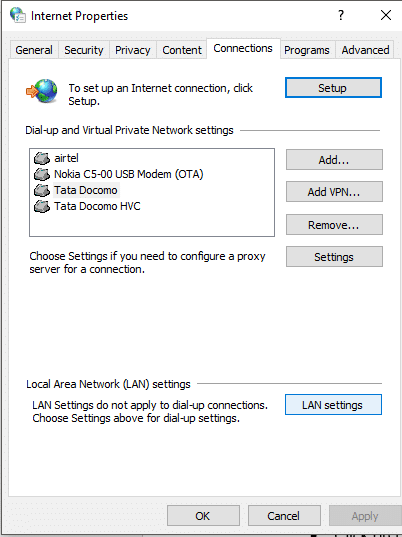
3.A small window will pop-up. You need to switch to the Connections tab then click on the “LAN Settings” button.
4.Uncheck the checkbox that says “Use a proxy server for your LAN”.
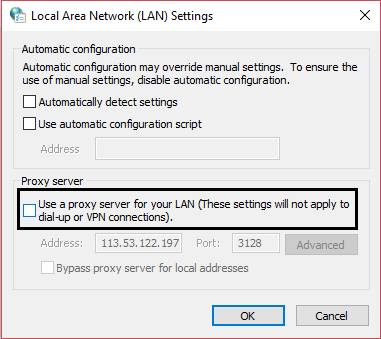
5.From the “Automatic configuration” section, checkmark “Automatically detect settings”.
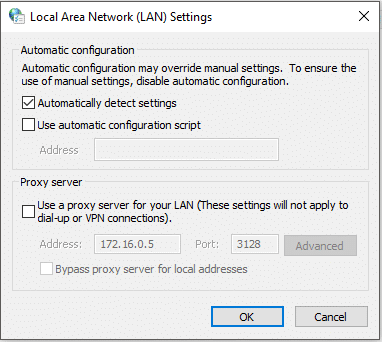
6.Then click OK to save changes.
You can essentially follow the same thing by using Google Chrome. Open Chrome then open Settings and scroll down to find “Open Proxy Settings“.
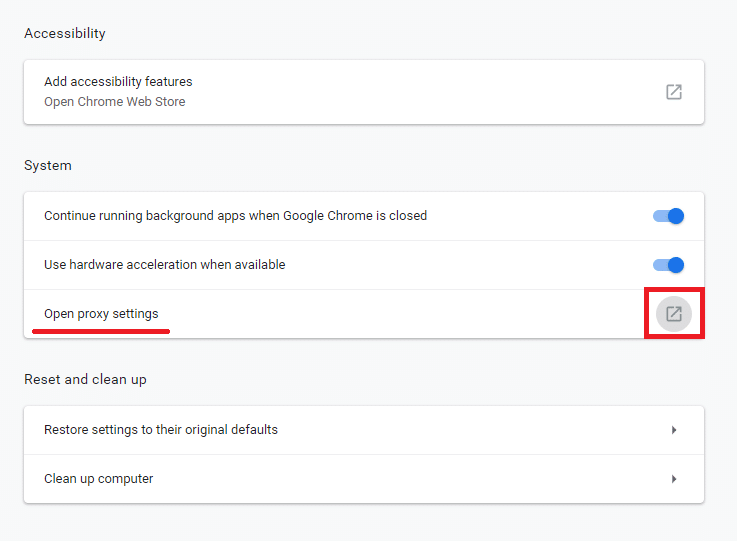
Repeat all the steps that are same as before (from Step 3 onwards).
Method 2: Reset Internet Explorer Settings
Sometimes the issue may be due to incorrect configuration of Internet Explorer settings and the best solution for this issue is to reset Internet Explorer. The steps to do this are:
1.Launch Internet Explorer by clicking on the Start button present in the bottom left corner of the screen and type Internet Explorer.
2.Now from the Internet Explorer menu click on Tools (or press Alt + X key together).
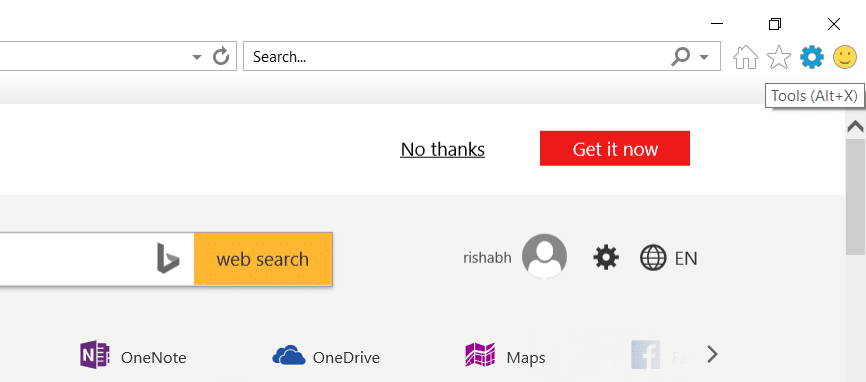
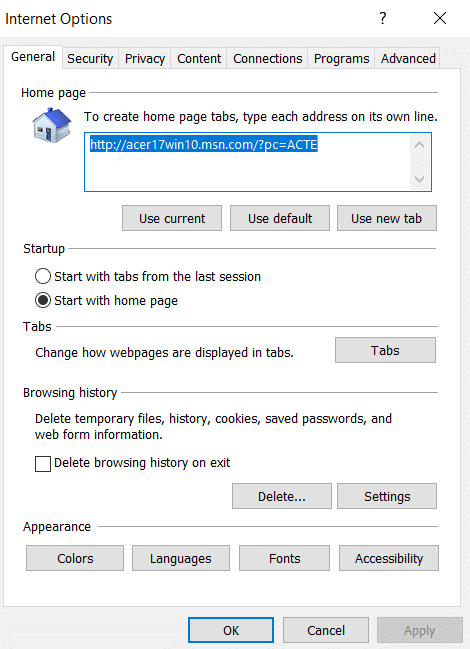
3.Select Internet Options from the Tools menu.
4.A new window of Internet Options will appear, switch to the Advanced tab.
5.Under Advanced tab click on the Reset button.
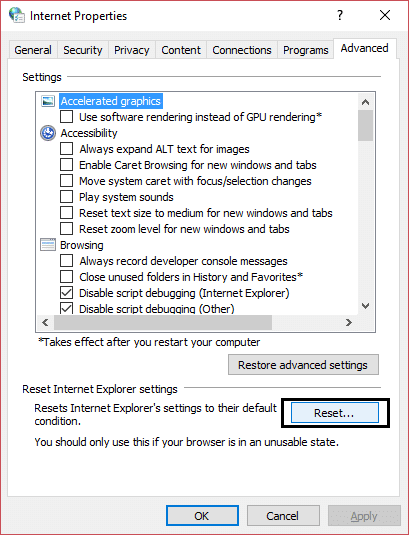
6.In the next window that comes up make sure to select the option “Delete personal settings option.“
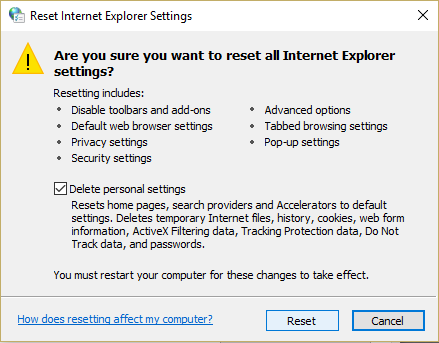
7.Click on Reset button present in the bottom of the window.
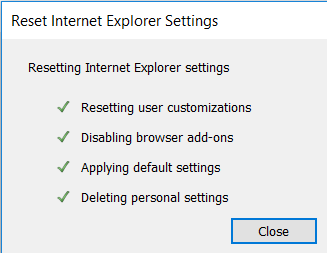
Now re-launch IE and see if you’re able to fix The remote device or resource won’t accept the connection error.
Method 3: Disable Firewall and Antivirus Software
Firewall can be conflicting with your Internet and temporary disabling it might get rid of this issue. The reason behind this is as Windows Firewall supervise your incoming as well as outgoing data packets when you’re connected to the Internet. The firewall also blocks many applications from accessing the Internet. And same is the case with Antivirus, they can also conflict with the Internet and temporary disabling it might be able to fix the issue. So to temporary disabling the Firewall and Antivirus, the steps are –
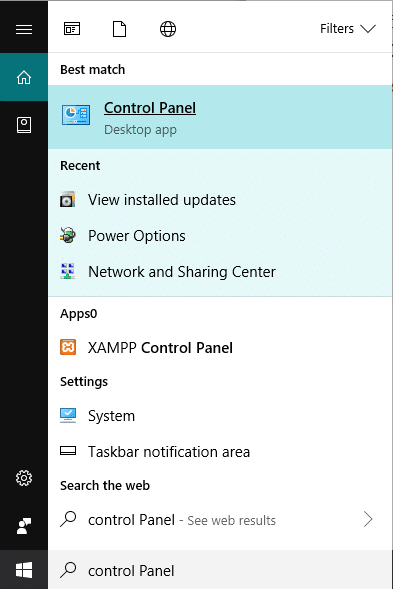
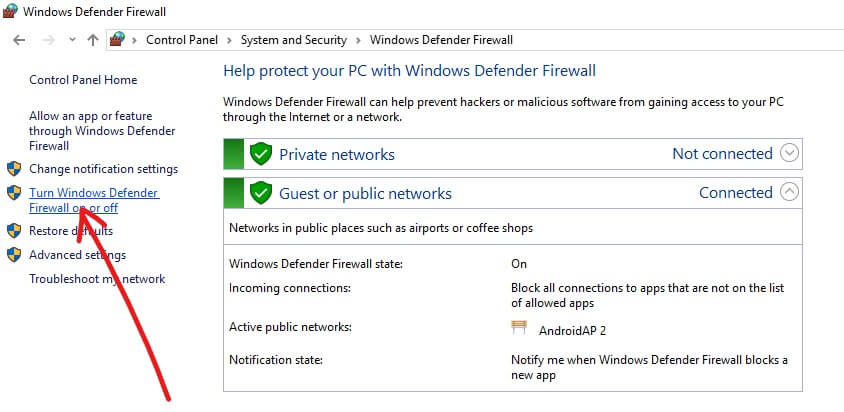
1.Type Control Panel in the Windows Search bar then click on the first result to open Control Panel.
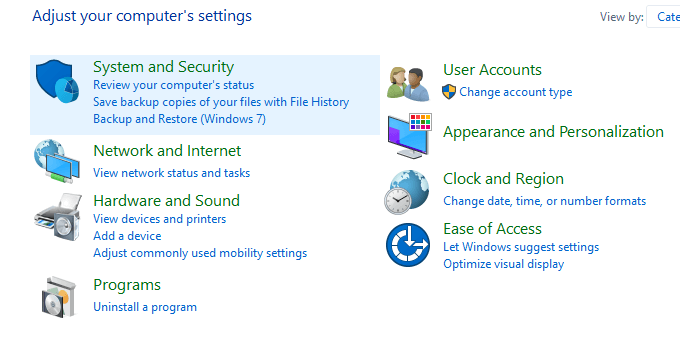
2. Click on System and Security tab under Control Panel.
3.Under System and Security, click on Windows Defender Firewall.
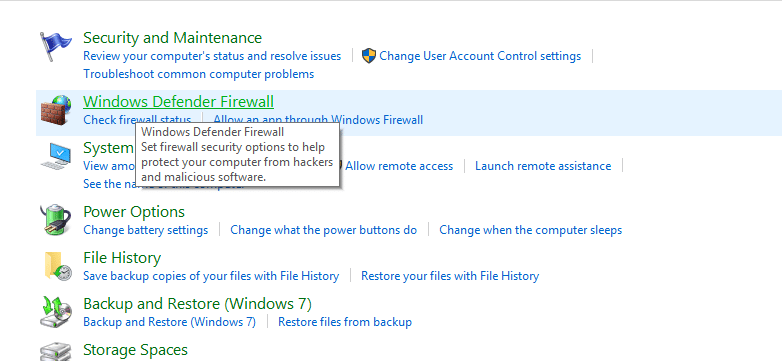
4.From the left window pane, click on Turn Windows Defender Firewall on or off.
5.To turn off Windows Defender Firewall for Private network settings, click on the Radio button to checkmark it next to Turn off Windows Defender Firewall (not recommended) under Private network settings.
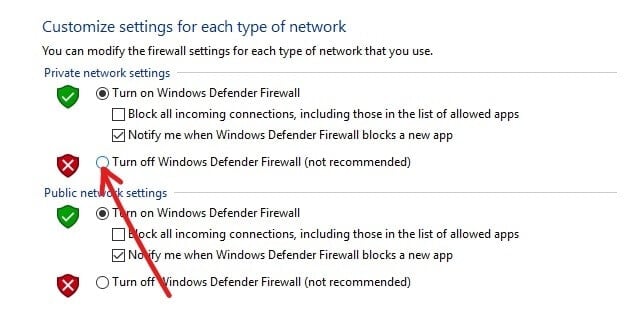
6.To turn off Windows Defender Firewall for Public network settings, checkmark “Turn off Windows Defender Firewall (not recommended)” under Public network settings.

7.Once you have made your choices, click on the OK button to save the changes.
8.Finally, your Windows 10 Firewall is disabled.
If you’re able to fix The remote device or resource won’t accept the connection error then again enable Windows 10 Firewall by using this guide.
Temporarily Disable Antivirus
1.Right-click on the Antivirus Program icon from the system tray and select Disable.

2.Next, select the time frame for which the Antivirus will remain disabled.

Note: Choose the smallest amount of time possible for example 15 minutes or 30 minutes.
3.Once done, again try to check if the error resolves or not.
Method 4: Force a Remote Group Policy Refresh
You will face this error if you’re trying to access a server in a domain. To fix this you need to force update the Group Policy refresh, to do this follow the below steps:
1.Press Windows Key + X then select Command Prompt (Admin).

2.In the command prompt, type the following command and hit Enter:
GPUPDATE /FORCE
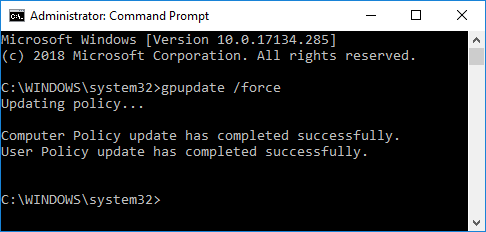
3.Once the command finish processing, again check if you’re able to fix the issue or not.
Recommended:
I hope the above steps were able to help you Fix The remote device or resource won’t accept the connection error but if you still have any questions regarding this guide or the error “Err_Internet_Disconnected” then feel free to ask them in the comment’s section.