The correct brightness level of your computer is an essential element in your PC, especially when you play games, watch movies, and work. The brightness of your PC is responsible for adjusting the lighting of the computer in accordance with the environmental brightness. Yet, few users report a common problem, Windows 10 brightness not working issue after upgrading your PC or after updating it. Other users reported that the brightness control is always set to a maximum level even after adjusting it. If you can’t change brightness Windows 10, the performance of your PC might be affected since heavy brightness will lower the battery performance. However, several troubleshooting methods fix Windows 10 brightness not working. Read and follow this guide to fix the issue.
How to Fix Windows 10 Brightness Not Working
If you can’t change the brightness of Windows 10 on your PC, laptop, or monitor, it could be due to several reasons. They can be either software-related or hardware-related, and it is necessary to distinguish the root cause to rectify the same. In most cases, you can fix the issue by yourself, and in some cases, you must seek professional help for repair or replacement. Therefore, it is worth analyzing the root cause of the problem before taking advanced action.
- If there is a problem with your display when your PC has suffered physical damage, aging factors, etc., you might have a problem adjusting brightness control.
- If your software is outdated or the graphics drivers are not updated, you can’t change the brightness of Windows 10. Update your device and drivers to resolve the issue.
- If you use keyboard commands to control brightness, keyboard issues might cause Windows 10 brightness not to work.
In this section, we have compiled a list of methods to fix Windows 10 brightness not working problem. The methods are arranged according to the severity of the problem and the efficiency of their troubleshooting tactics. Follow them in the same order to attain the best results.
Method 1: Run Windows Troubleshooter
Running the Power Troubleshooter will resolve any glitches in your PC, and this method is applicable not only for Windows 10 but also for Windows 7 & 8.
1. Press Windows + R keys simultaneously to open the Run dialog box.
2. Type ms-settings:troubleshoot and hit Enter key.
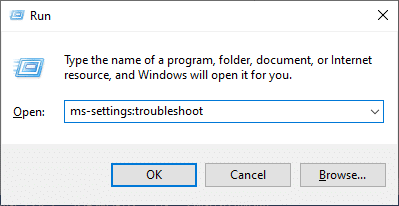
Note: For Windows versions earlier to OS 10, type the command control.exe /name Microsoft.Troubleshooting instead of ms-settings:troubleshoot and hit Enter.
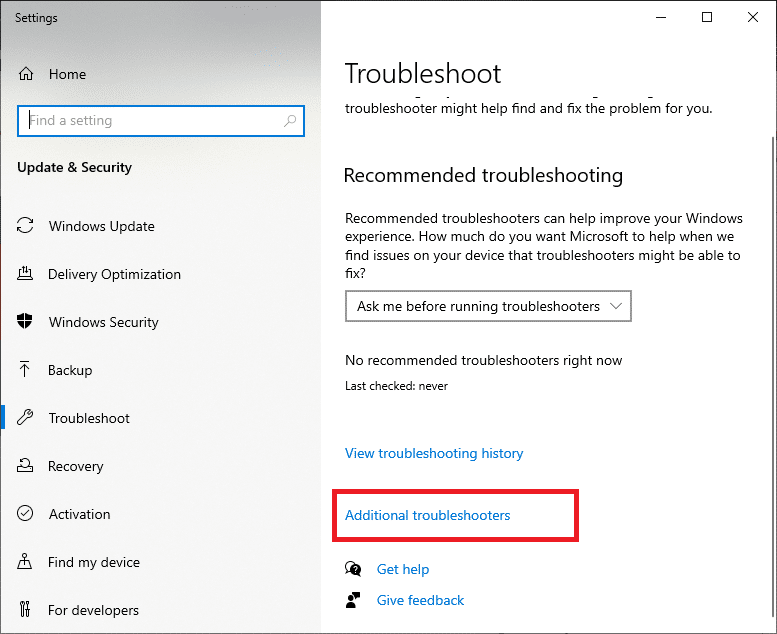
3. Click Additional troubleshooters.
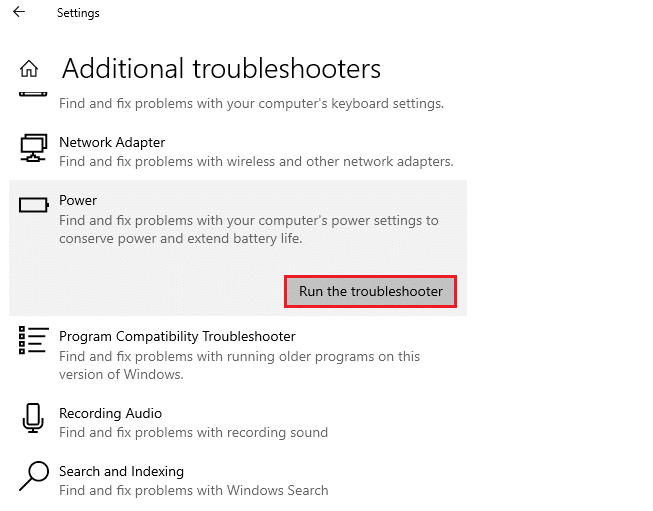
4. Select Power and Run the troubleshooter.
5. Wait for the process to be completed, and if any issue is found in your system, click on Apply this fix and follow the instructions given in the successive prompts.
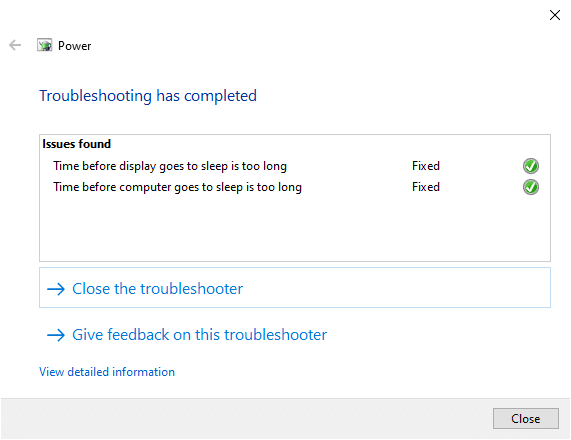
6. Finally, restart your PC.
Note: If you did not attain any fix by this troubleshooting method, then, follow the additional troubleshooting steps.
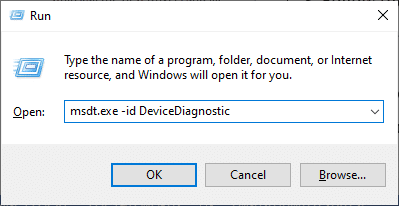
1. Press Windows + R keys together to launch the Run dialog box.
2. Type msdt.exe -id DeviceDiagnostic and hit Enter key.
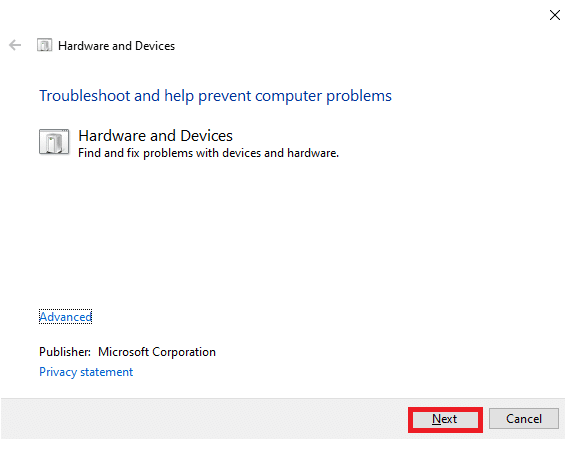
2. Click on Next.
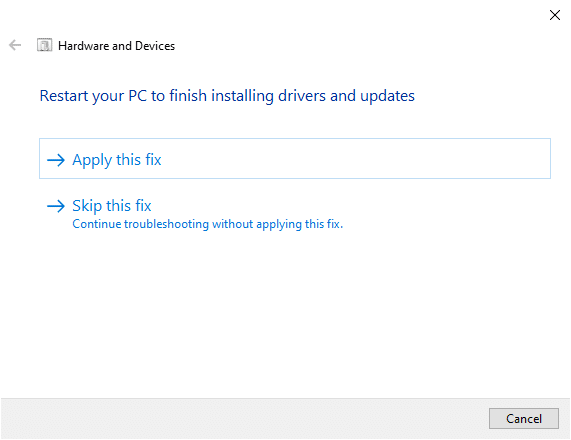
3. Sometimes, if your device is not set up with latest drivers, you will receive the following prompt. You may finish installing drivers and updates if you want to do so. Follow the on-screen instructions, and then Restart your device.
The troubleshooting process will often fix Windows 10 brightness not working issue.
4A. This process lets you know if it could identify and fix the problem.
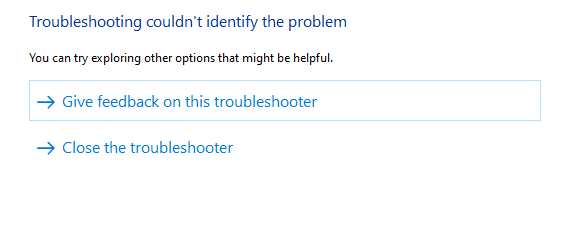
4B. However, the following screen will appear if it could not identify the issue.
Method 2: Update or Reinstall Display Adapter Drivers
Follow these steps to update or reinstall display adapter drivers.
Option I: Update Display Adapter Drivers
Try updating the drivers to the latest version to fix Windows 10 brightness not working. You can also uninstall your graphics card driver and reinstall it again rather than updating the driver using the below-mentioned steps. In both cases, the net result will be the same.
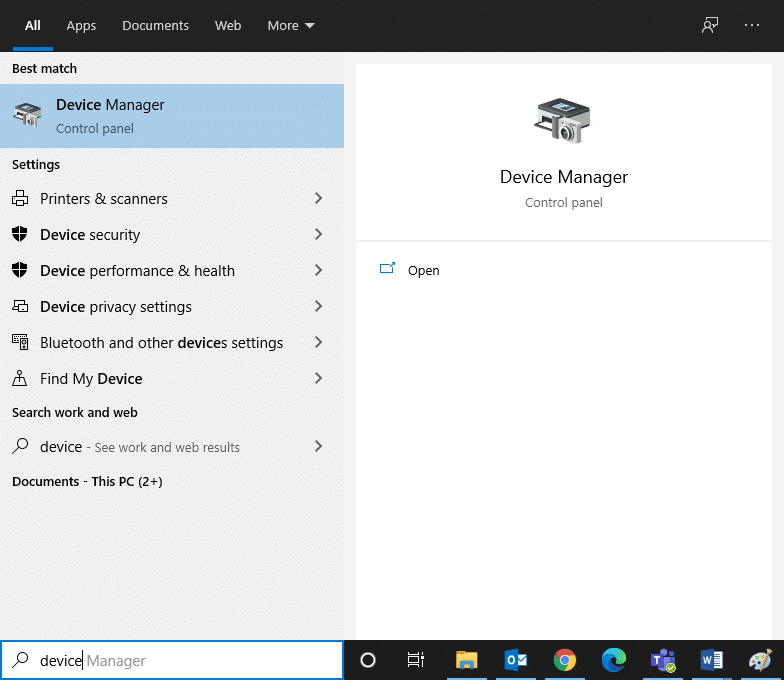
1. Type Device Manager in the Windows 10 search menu.
2. Double click on Display adapters to expand it.
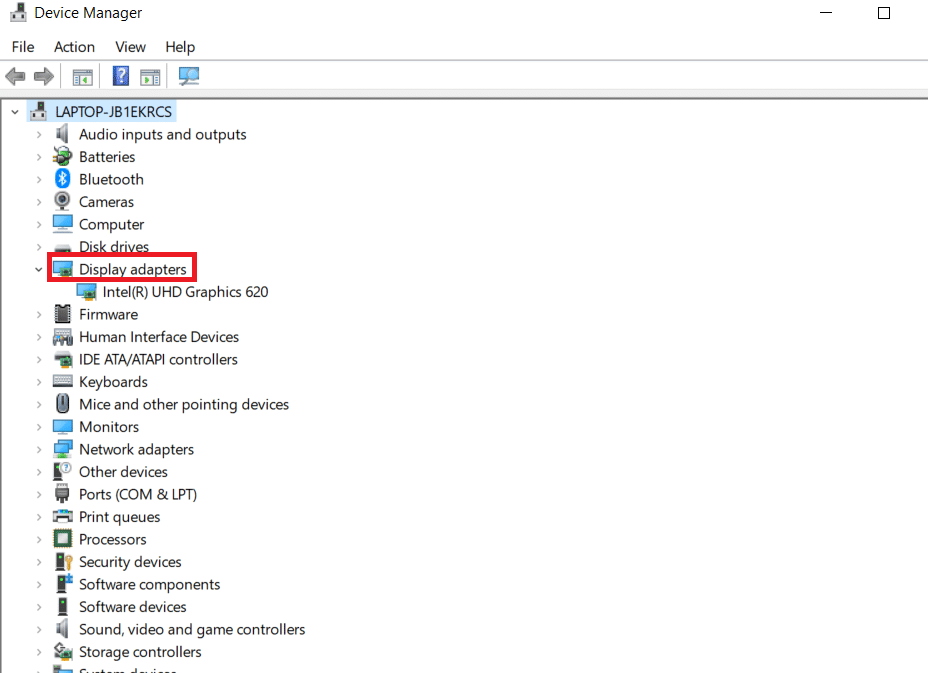
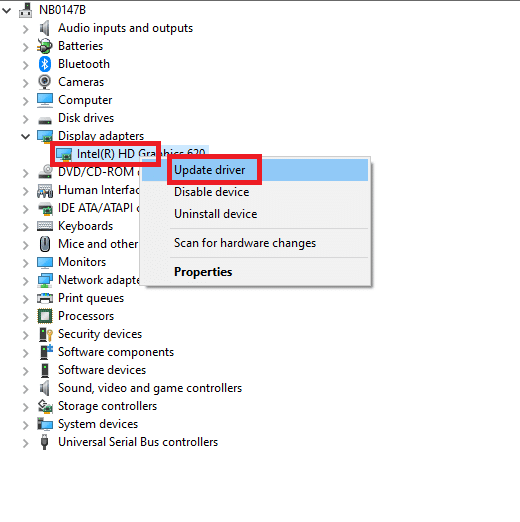
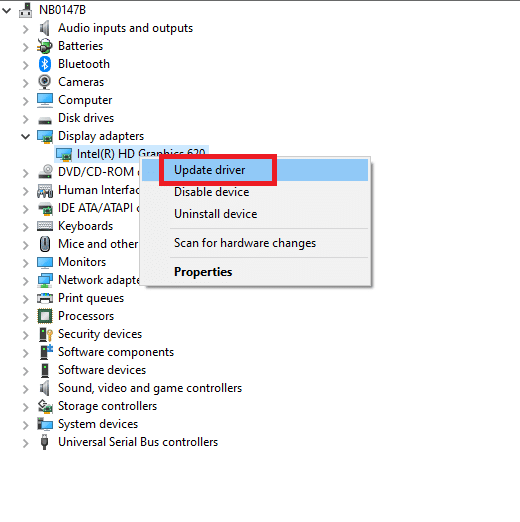
3. Right-click on your video card driver (e.g. Intel(R) HD Graphics 620) and click on Update driver.
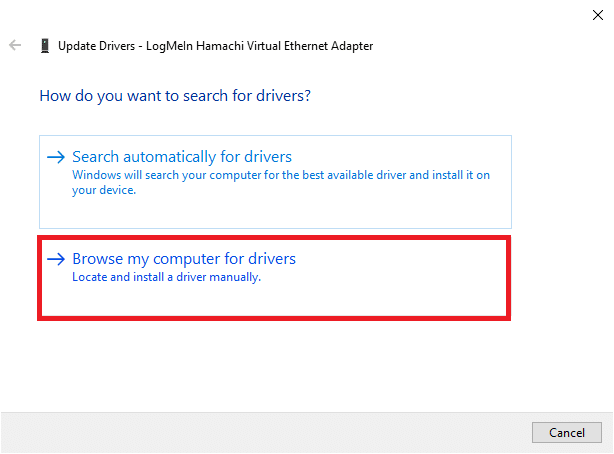
4. Click on Browse my computer for drivers to locate and install a driver manually.

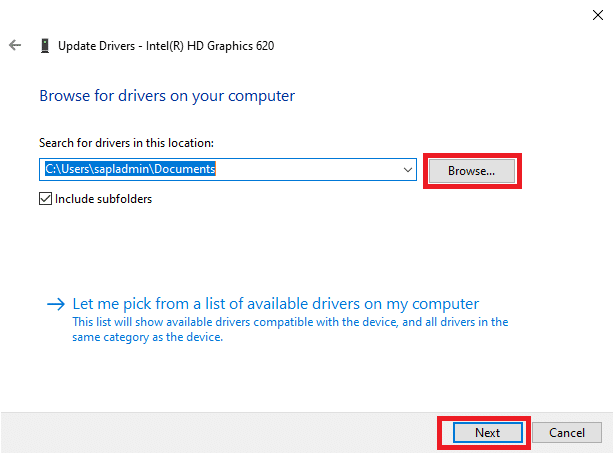
5. Click on the Browse.. button to choose any directory. Click on Next.
6. Finally, click on the Close button to exit the window.

7. Restart the computer, and check if you have fixed Windows 10 brightness not working in your system.
Option II: Reinstall Display Adapter Drivers
If updating drivers does not give you a fix, you can uninstall the display adapter drivers and install them again. Follow the below-mentioned steps to implement the same.
1. Launch the Device Manager using the steps mentioned in 2A and expand Display adapters by double-clicking on it.

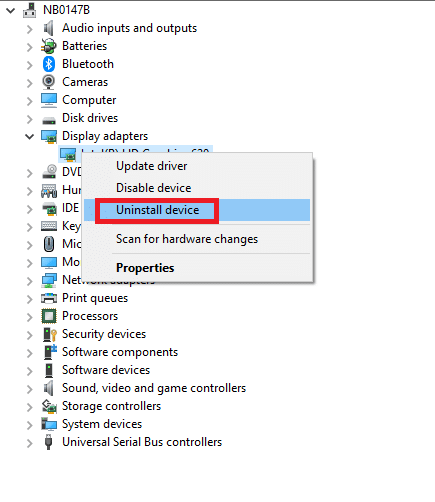
2. Right-click on the driver and select Uninstall device.
3. A warning prompt will be displayed on the screen. Check the box “Delete the driver software for this device” and confirm the prompt by clicking Uninstall.

4. Download and install the drivers on your device either by a manual update or automatic update.
5. Visit the manufacturer’s website.

2. Find and Download the drivers corresponding to the Windows version on your PC.
3. Once downloaded, double click on the downloaded file and follow the given instructions to install it.
4. Follow the same steps for all device drivers such as audio, video, network, etc.
Check if you have fixed Windows 10 brightness not working issue in your system.
Also Read: Fix Computer Won’t Go to Sleep Mode in Windows 10
Method 3: Use of Microsoft Basic Display Adapter
If the Display adapter driver is unavailable or not installed on your PC, you can use an inbuilt Windows driver software. You can use this driver to resolve Windows 10 brightness not working issue. Here are a few steps demonstrating how to use the Microsoft Basic Display adapter on your PC.
1. Open Device manager as shown in Method 2A and click on Update driver under Display adapter.
2. Click on Browse my computer for drivers to locate and install a driver manually.
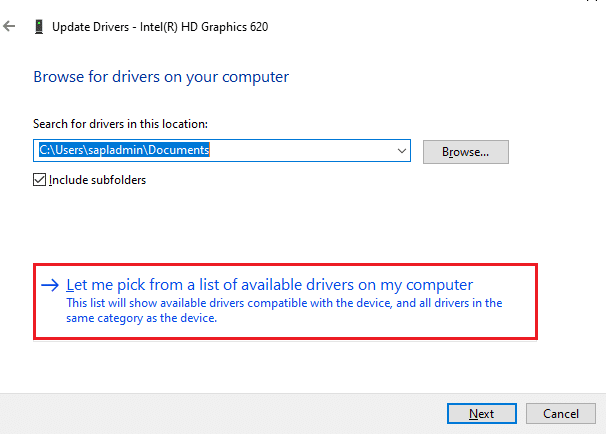
3. Click on Let me pick from a list of available drivers on my computer.
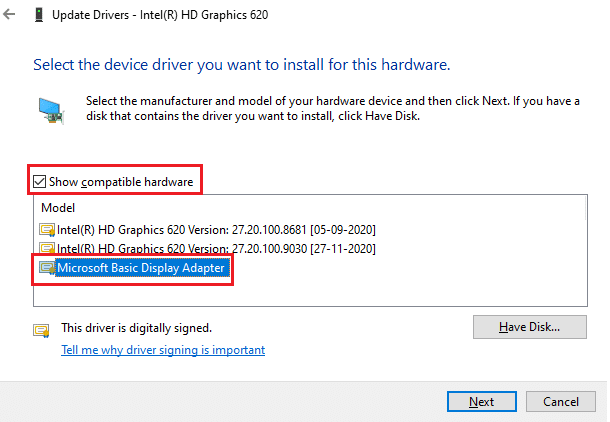
4. Select the box, Show compatible hardware. Click on Microsoft Basic Display Adapter and click on Next.
5. A prompt, Windows has successfully updated your drivers will be displayed.
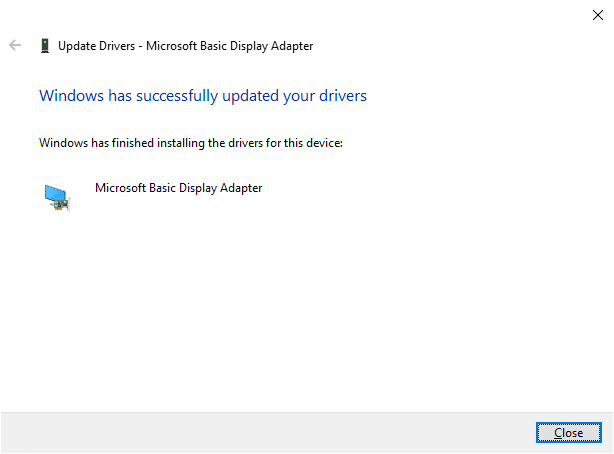
6. Finally, restart your PC and check if you have fixed the issue.
Method 4: Tweak Power Option Settings
If you can’t change the brightness of Windows 10, you can fix it by disabling the Turn off display after power option, as discussed below.
Note: You can also type edit power plan in the search bar to open the Edit Plan Settings window (Skip Steps 1 & 2).
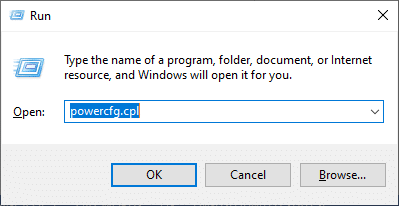
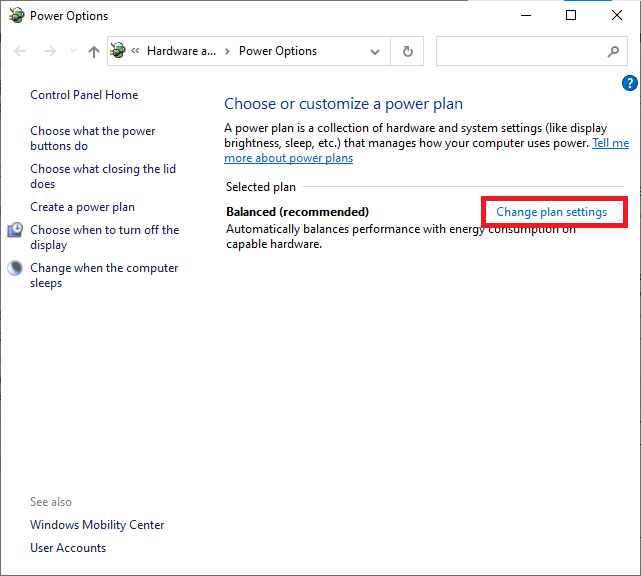
1. Press Windows + R key and type powercfg.cpl and hit Enter key.
2. Select the Change plan settings option.
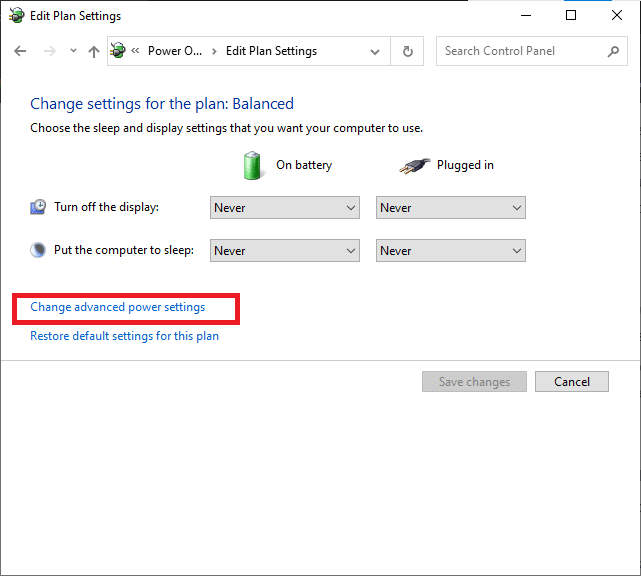
Note: If you have multiple power plans active in your system, repeat the same procedure for all the multiple active plans.
3. Click on Change advanced power settings.
4. Here, in the Advanced settings menu, expand the Display option by clicking on the + icon.
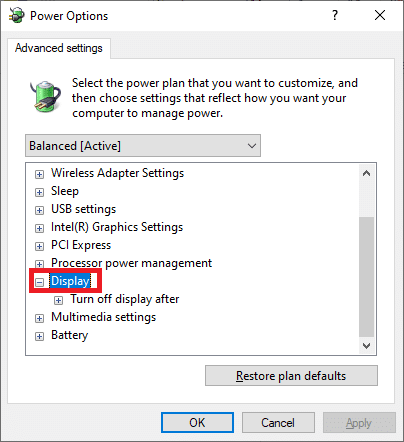
5. Expand the Turn off display after option by clicking on the + icon.
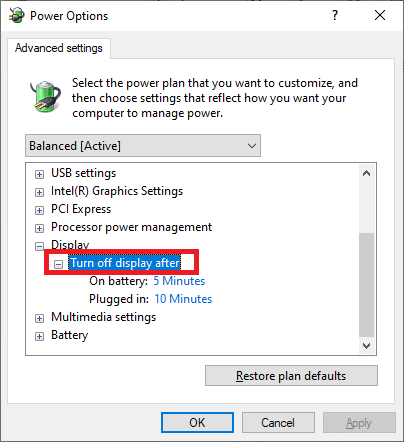
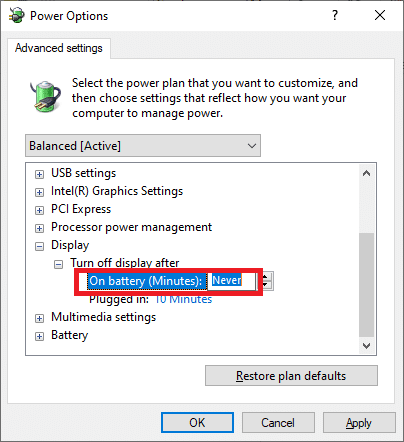
6. Click on On battery and change the setting to Never from the drop-down list.
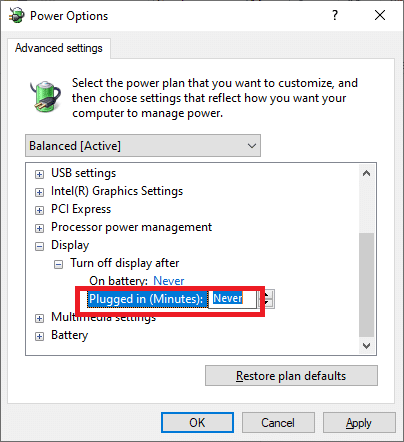
7. Click on Plugged in and change the setting to Never.
8. Click on Apply and OK to save the changes.
9. Restart your system and check if the issue is solved now.
Note: If you find the Adaptive Brightness option under Display, follow the same procedure and set the On battery and Plugged in values to OFF.
Also Read: Fix PC Turns On But No Display
Method 5: Re-enable Plug and Play Monitor (for PnP monitors)
If you use a Plug and Play ( PnP) monitor and if you can’t change brightness Windows 10, this method is for you. Any updates or the driver itself disables it, causing Windows 10 brightness not working issue. It is a good choice to make sure if the PnP monitor is disabled on your device.
Option I: Enable PnP monitors
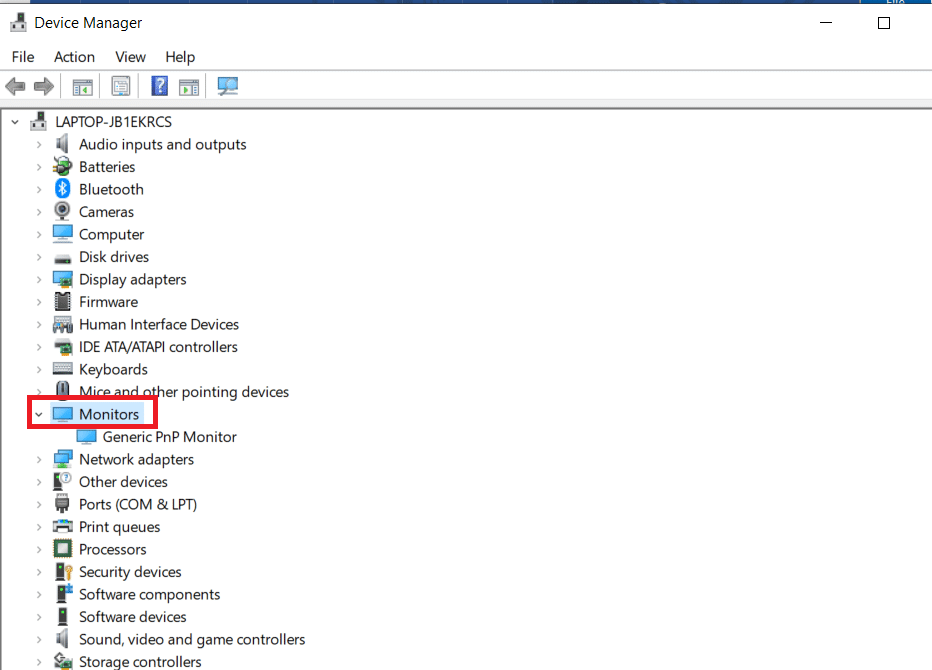
1. Launch Device manager as shown in Method 2A and navigate to the Monitors section.
2. Double-click on Monitors to expand it.
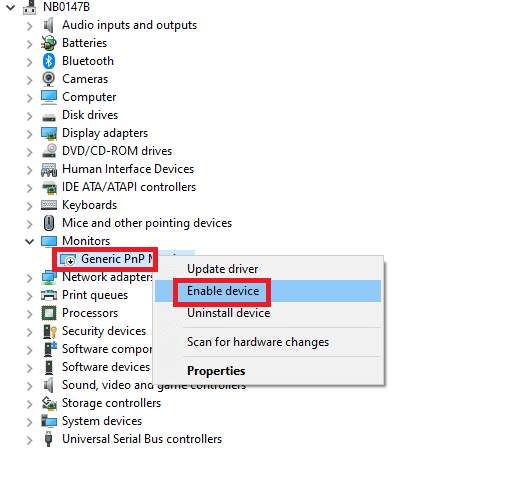
3. Right-click on Generic PnP Monitor and select Enable device.
Note: If you do not see Enable device option, your PC does not have a disabled Generic PnP Monitor. In this case, you can directly skip to the next method.
4. Finally, restart your PC and check if you have fixed the issue.
Option II: Uninstall hidden devices under PnP Monitors.
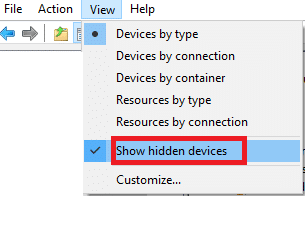
1. Open the Device Manager as shown in Method 2A and navigate to the View tab to select Show hidden devices .
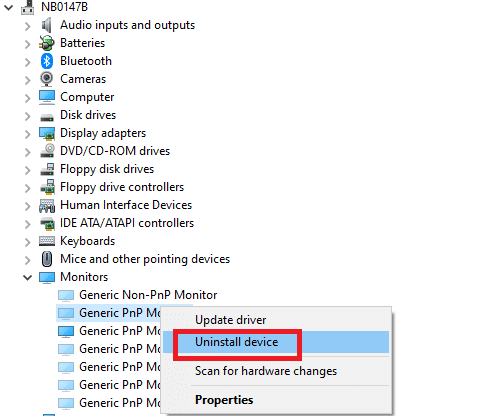
6. Expand the Monitors section, and a list of hidden monitors will be displayed.
Note: Hidden monitors will appear translucent than the real ones.
7. Right-click on all the translucent monitors and select Uninstall device option. Repeat this step until you delete all the hidden PnP monitors.
Also Read: How to Change Screen Brightness in Windows 10
Method 6: Tweak Registry Editor Settings
If you are an ATI user and if you have Catalyst installed on your device, you can’t change the brightness Windows 10 due to a bug in Catalyst version 15.7.1. To resolve the problem, follow the below-mentioned steps.
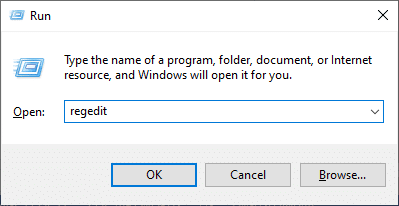
1. Open the Run dialog box by pressing Windows + R key together.
2. Type regedit and hit Enter key.
3. Navigate to the following path in your registry editor.
HKEY_LOCAL_MACHINESYSTEMControlSet001ControlClass{4d36e968-e325-11ce-bfc1-08002be10318}�000
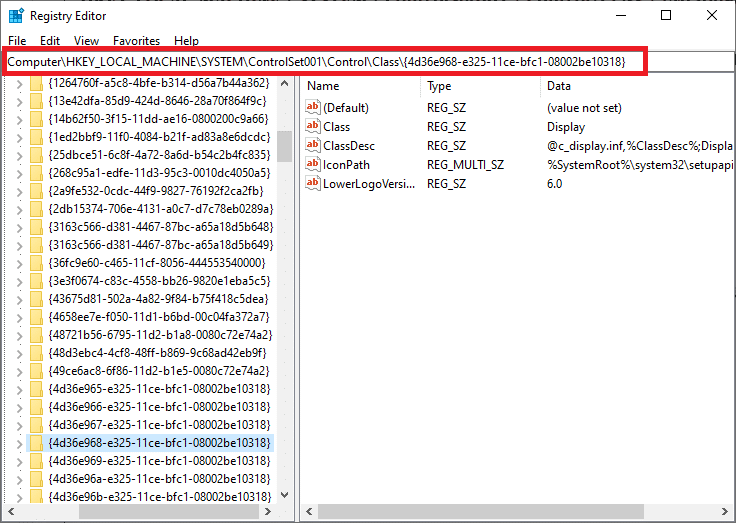
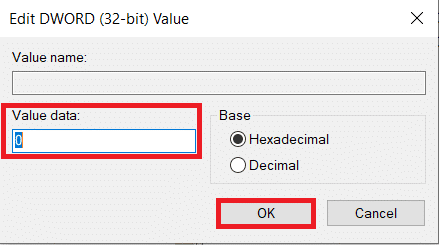
3. Double-click on these following keys (if any) and set their value to 0 then click OK:
- MD_EnableBrightnesslf2
- KMD_EnableBrightnessInterface2
4. Again, navigate to the following key folder path:
HKEY_LOCAL_MACHINESYSTEMCurrentControlSetControlClass{4d36e968-e325-11ce-bfc1-08002be10318}�001
5. Double-click on these following keys (if any) and set their value to 0 then click OK:
- MD_EnableBrightnesslf2
- KMD_EnableBrightnessInterface2
Recommended:
We hope that this guide was helpful and you could fix Windows 10 brightness not working. Let us know which method worked for you the best. Also, if you have any queries/suggestions regarding this article, then feel free to drop them in the comments section.