Like a hungry animal, everything on your personal computer always wants to hog/eat up as many resources as possible. The hoggers on a Windows PC are the various applications, processes, and services that constantly run in the background without the user ever knowing about them, and the resources being hogged upon are the CPU and temporary memory, i.e, RAM.
High CPU usage is a pretty common problem in Windows and occurs when an unwanted application or process siphons more power out of the processor than it is originally meant to. The high CPU usage problem becomes even more infuriating when your personal computer is nearing its end days or you are performing an action that requires a lot of processing power (For example: Editing a video on Premiere Pro or working with multiple layers in Photoshop, and don’t even get us started on games). High CPU usage can also eventually lead to permanent processor damage.
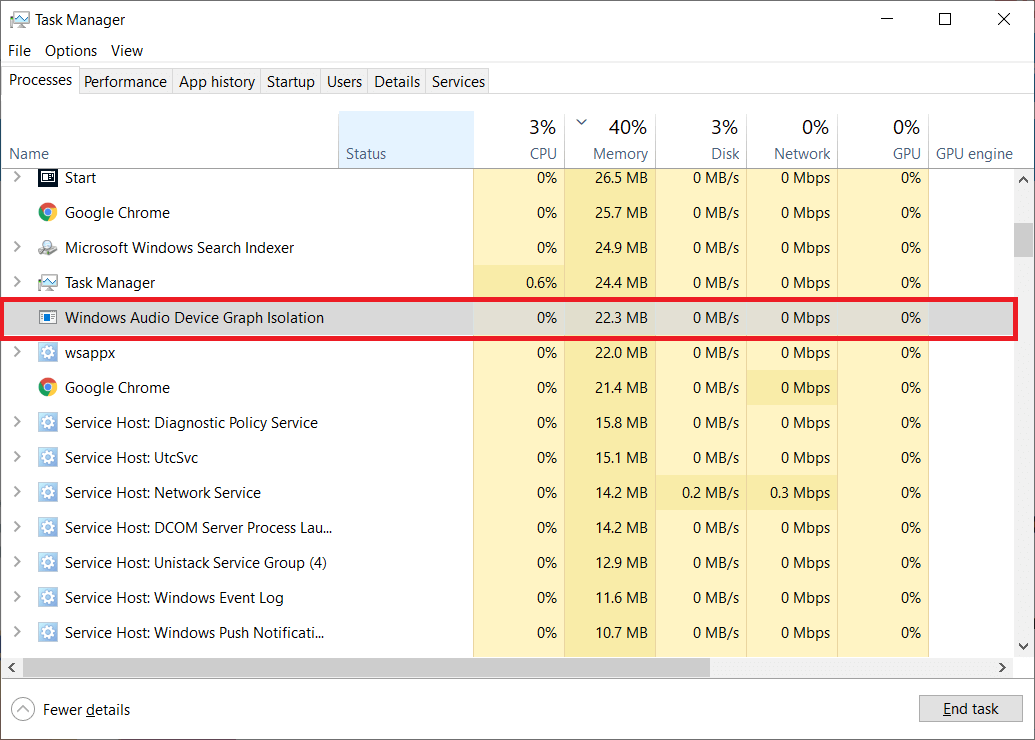
The Windows Audio Device Graph Isolation is one of the many processes infamous for prompting high CPU usage. It is one of Windows’ many background processes and is an essential process for audio processing and output.
Fix Windows Audio Device Graph Isolation high CPU usage
In this article, we will be addressing why the Audio Device Graph Isolation process causes high CPU usage and how to reduce its CPU consumption to gain back some much-needed processing power.
What is the Windows Audio Device Graph Isolation process & why it causes high CPU usage?
To start off, Audio Device Graph Isolation process is an official and legitimate Windows process and not a virus or malware. The process serves as the primary audio engine in Windows and is responsible for handling digital signal processing. In simpler words, it allows third-party applications to run sound on your computer. The process also controls the sound enhancements provided by Windows.
The process is, however, separate from the Windows Audio service and this allows third-party sound card/audio hardware manufacturers to include their own enhancement services without tinkering with the Windows Audio service.
So if it is a legitimate service, why does it cause high CPU usage?
Normally, the Audio Device Graph Isolation process’ CPU usage is negligible, and when audio effects are being applied, the usage will increase slightly before falling back to zero. The possible reasons for high CPU usage are corrupt/poorly installed audio enhancement drivers and the enabled sound effects.
Another explanation for the high CPU usage is some malware or a virus may have disguised itself as the process and found its way on your computer. To check if the Audio Device Graph Isolation process running on your computer is a virus or not, follow the below steps-
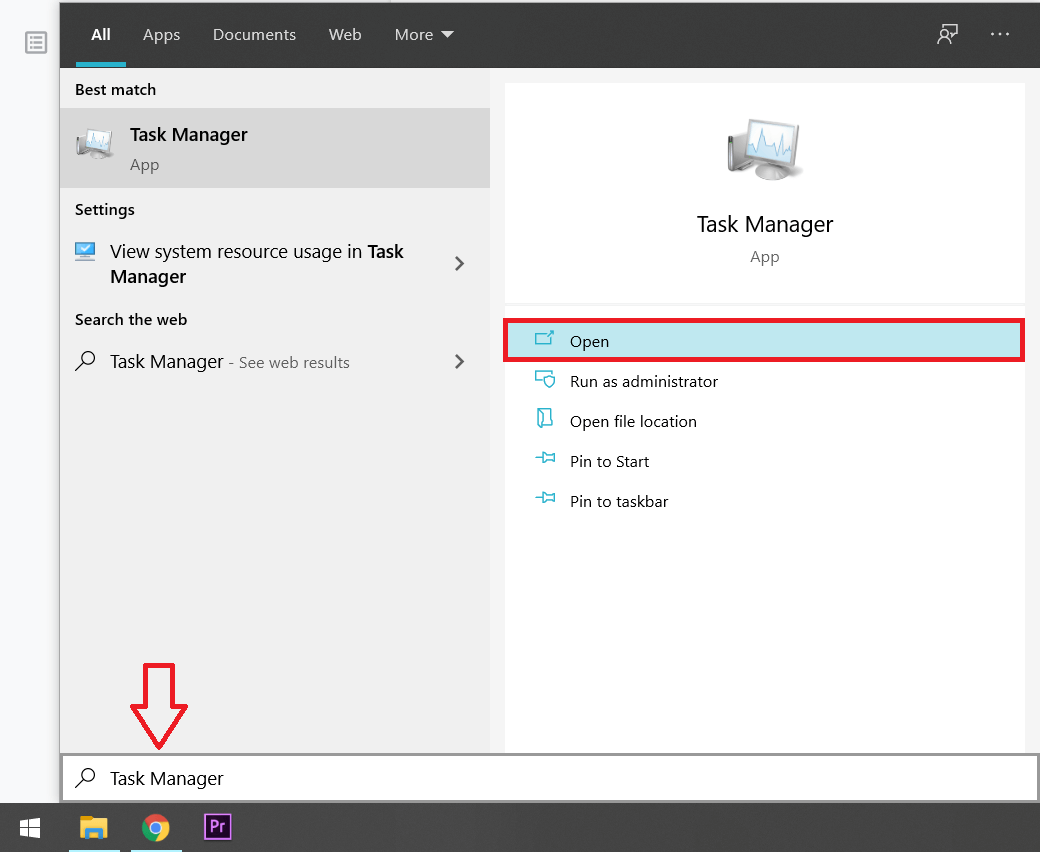
1. We start by launching the Task Manager. Use any of the below methods as per your convenience to open it.
a. Type Task Manager in the Windows search bar (Windows key + S) and click on Open when the search returns.
b. Right-click on the Taskbar and select Task Manager.
c. Right-click on the start button (or press Windows key + X) and select Task Manager from the power user/start menu.
d. Launch Task Manager directly by pressing the key combination Ctrl + Shift + ESC.
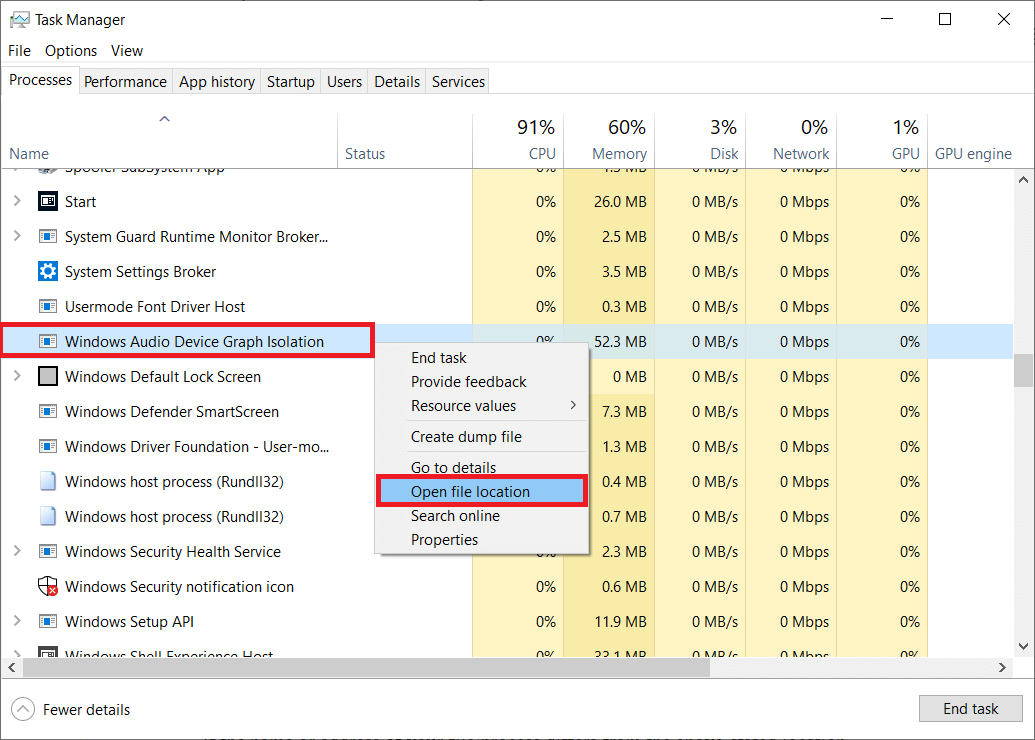
2. Under the Processes tab, locate the Windows Audio Device Graph Isolation process and right-click on it.
3. From the ensuing options/context menu, select Open file location.
4. By default, the process originates from the C:WindowsSystem32 folder, and the application file is called Windows Audio Device Graph Isolation. Although, in some systems, the application may be named audiodg.
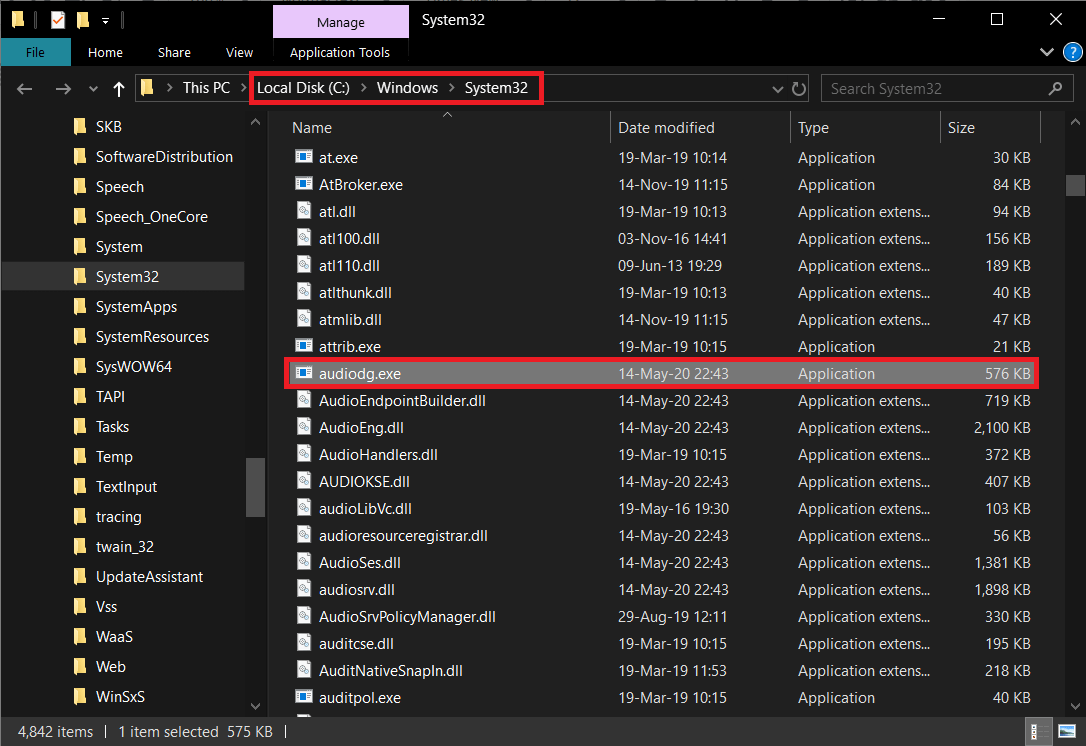
If the name or address of your application file/process differs from the above-stated location (C:WindowsSystem32), the Audio Device Graph Isolation process running on your personal computer is likely a virus/malware application. In this case, you will need to run an antivirus scan and get rid of the virus. You can either choose to use some specialized third-party antivirus software or the built-in Windows defender.
Nevertheless, the process file can be present at its default location and still cause high CPU usage. Unfortunately, we can’t just disable or end the process as it is essential for audio output, and disabling it will make your computer go completely silent. We will instead have to solve the problem from its root.
How to fix Audio Device Graph Isolation high CPU usage?
Fixing Audio Device Graph Isolation’s high CPU usage is no rocket science and requires you to perform one of the below actions. First up, if the process running on your computer is a virus, run an antivirus scan to remove it. If it isn’t, try disabling all the sound effects and uninstalling the problematic audio drivers. The problem has also been known to resolve by reinstalling Skype and sometimes by disabling the ‘Hey Cortana’ feature.
Run an Antivirus Scan using Windows Defender
If the process is indeed a virus, follow the below steps to run an antivirus scan using the Windows Defender (you may also run a virus scan from any third-party application you might have installed on your computer). Although if it isn’t a virus, you can directly skip to the next method.
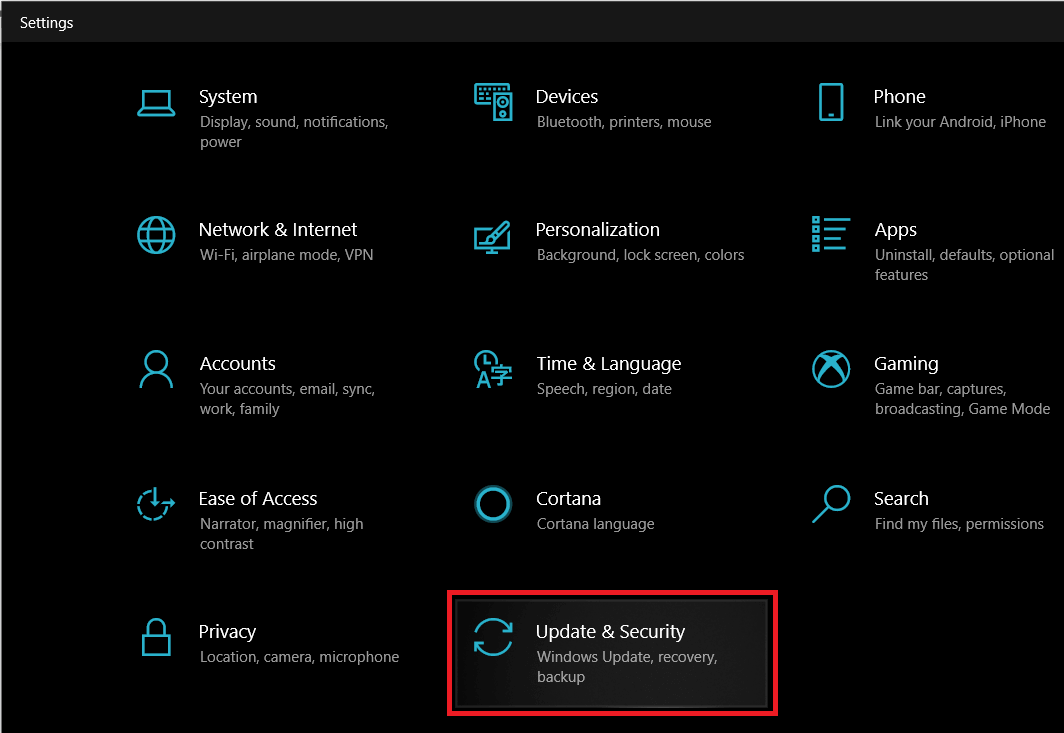
1. Open Windows Settings and click on Update & Security.
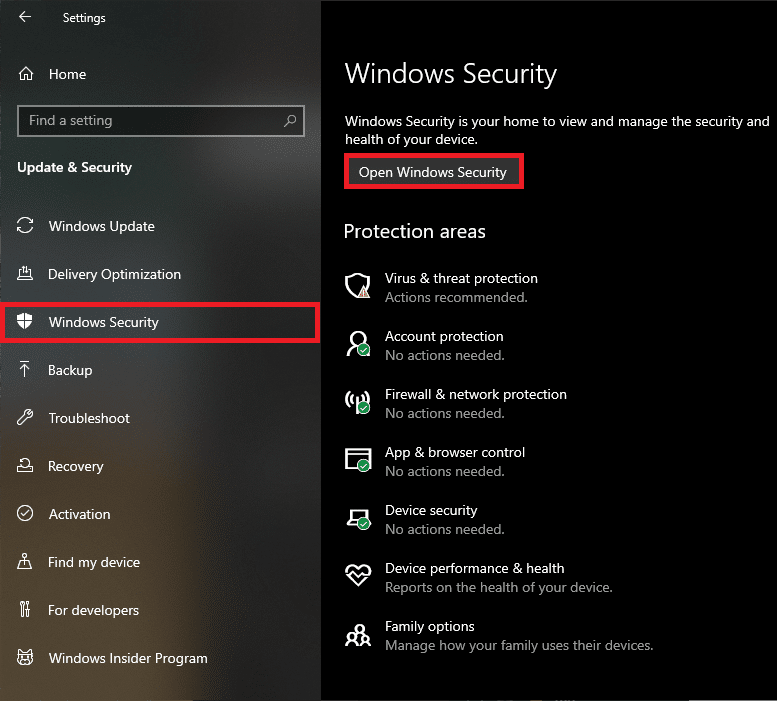
2. Switch to the Windows Security (or Windows Defender) settings page from the left panel.
3. Now, click on the Open Windows Security button.
4. Click on Virus and Threat Protection (shield icon) and then perform a Quick Scan.
![]()
Method 1: Disable all kinds of sound effects
Since the Audio Device Graph Isolation is primarily concerned with audio effects, disabling all of them could help you resolve the process’s high CPU usage. To disable audio effects-
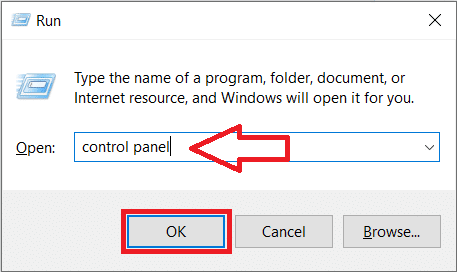
1. Press the Windows key + R on your keyboard to launch the Run command box. Type control or control panel in the textbox and click on OK.
(Alternatively, click on the start button, type control panel, and click on Open)
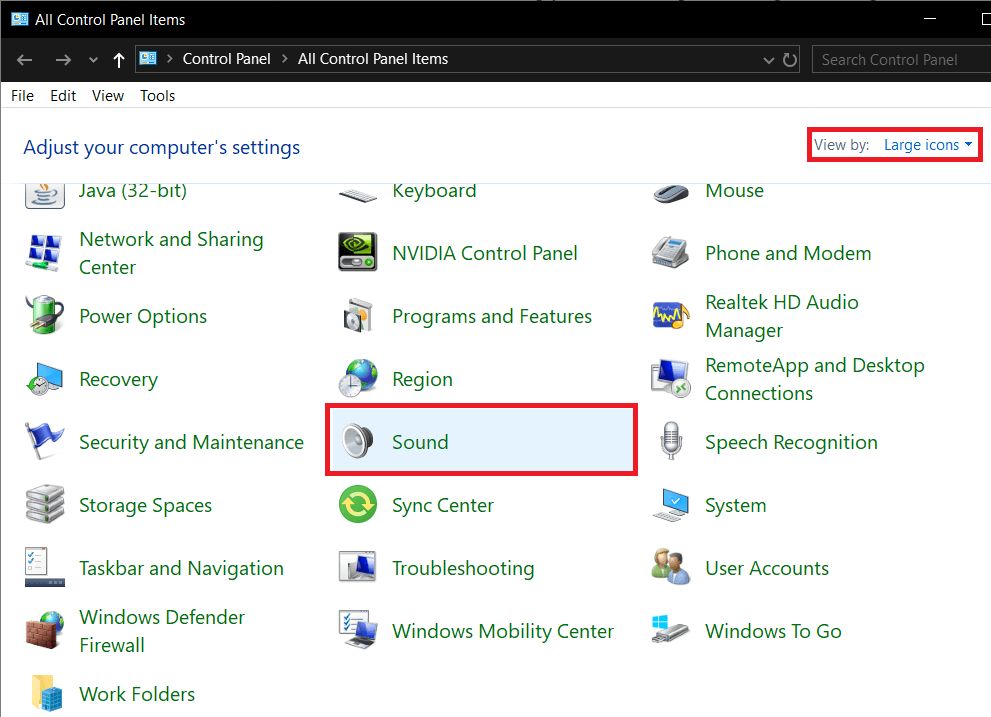
2. From the list of Control Panel items, click on Sound.
To make looking for the Sound computer settings easier, change icon size to large or small by clicking on the drop-down menu next to the View by label.
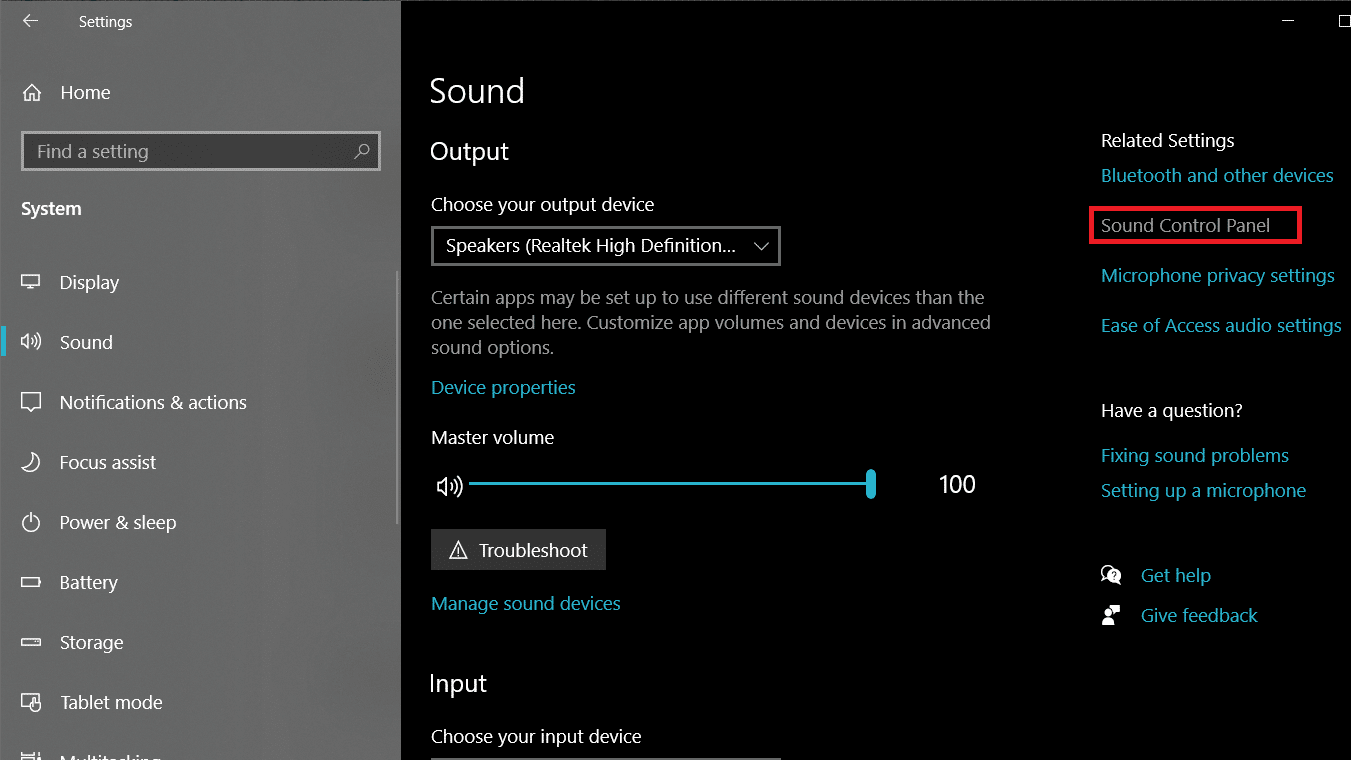
(You can also access Sound settings by right-clicking on the Speakers icon on your taskbar, selecting Open sound settings, and then clicking on the Sound Control Panel in the next window. Certain Windows versions will directly have the option to open Playback devices when the user right-clicks on the speaker icon.)
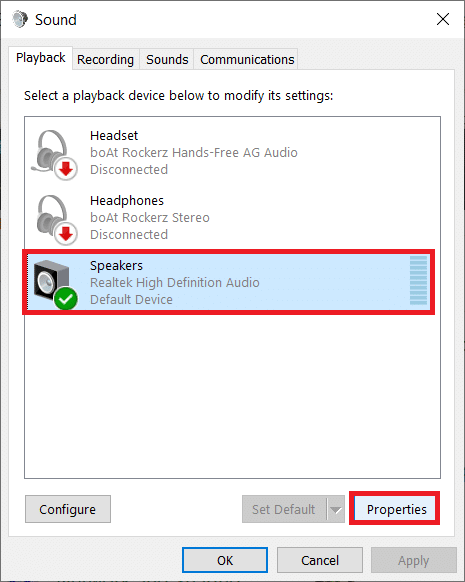
3. Select your primary (default) playback device and click on the Properties button at the bottom-right of the window.
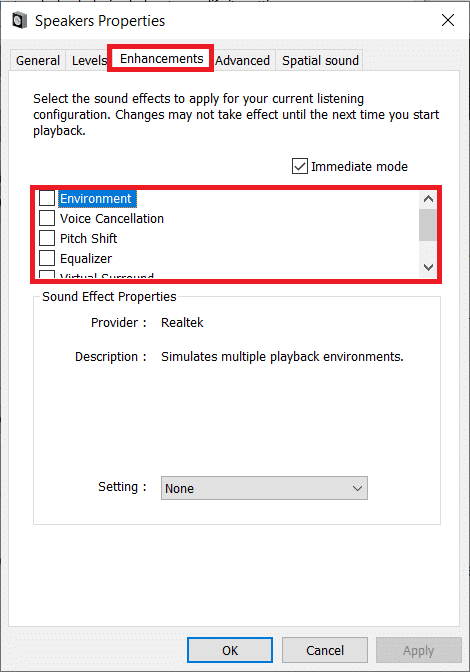
4. Switch to the Enhancements tab of the Speaker Properties window.
5. Here, you will find a list of sound effects that are being applied to the sound emanating from your playback device. The list of available Windows sound effects includes Environment, Voice Cancellation, Pitch Shift, Equalizer, Virtual Surround, Loudness Equalization.
6. Check/tick the box next to Disable all sound effects by clicking on it.
7. If you do not find the option to Disable all sound effects (like in the below picture), one by one, uncheck the boxes next to individual sound effects until all of them have been disabled.
8. Once you have disabled all sound effects, click on the Apply button to save your changes.
9. Repeat steps 3 to 6 for every other Playback device you have and restart your personal computer once done.
Also Read: Fix WMI Provider Host High CPU Usage [Windows 10]
Method 2: Uninstall corrupt Audio drivers/update Audio drivers
If you aren’t already aware, drivers are software files that help applications communicate effectively with the hardware components. Regularly updating your drivers is important for a seamless experience and corrupt or outdated drivers can cause a number of problems.
If the previous method didn’t decrease Audio Device Graph Isolation’s CPU usage, try uninstalling your current audio drivers and updating them to the latest version. You can either choose to update the audio drivers manually or use a third-party application to do it for you. To update audio drivers manually-
1. Open Device Manager using either of the below-explained methods.
a. Open run command box (Windows key + R), type devmgmt.msc and click on OK.
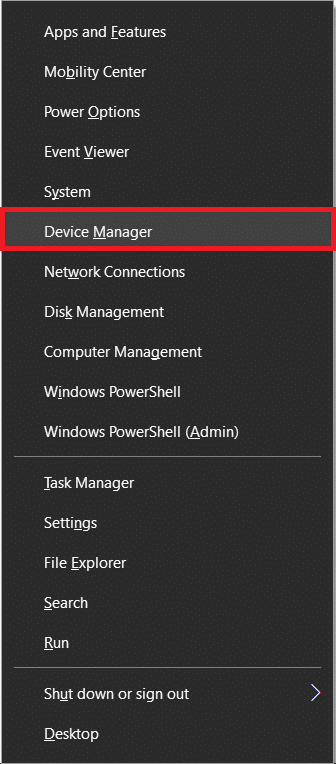
b. Press the Windows key + X (or right-click on the start button) to open the start/power user menu. Select Device Manager.
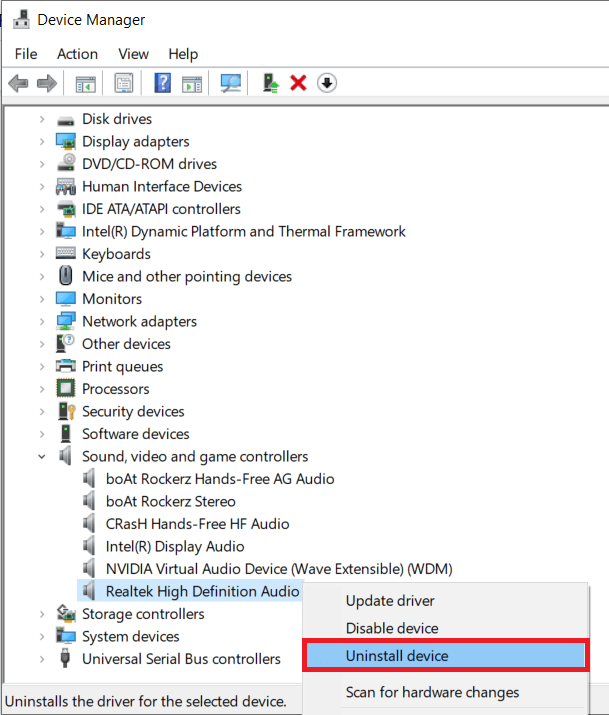
2. Expand Sound, video and game controllers by clicking on the arrow to its left or by double-clicking on the label itself.
3. Right-click on your primary Audio device and select Uninstall device from the ensuing context menu.
4. A pop-up box requesting confirmation for your action will arrive. Check the box next to Delete the driver software for this device and click on the Uninstall button.
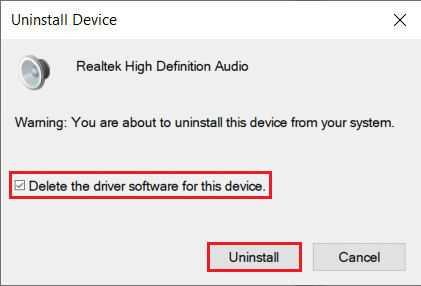
This will uninstall any corrupt or outdated drivers your audio device might be currently using and therefore, causing high CPU usage.
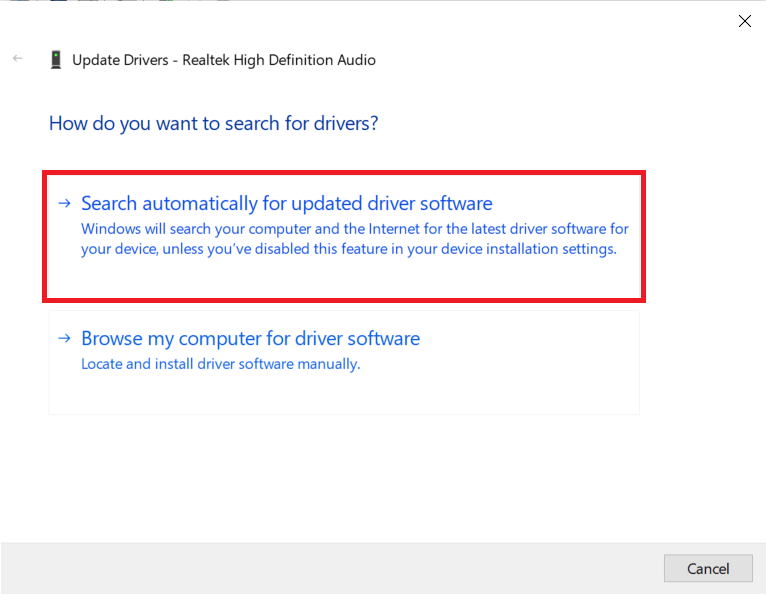
5. Once the drivers have been uninstalled, right-click on your Audio device once again and this time select Update driver.

6. From the following screen, click on Search automatically for updated driver software.
The computer will start looking for the most up-to-date drivers available on the internet for your Audio hardware and install them automatically. Ensure your internet connection is working properly.
Method 3: Disable ‘Hey Cortana’
‘Hey Cortana’ is an always-on feature that constantly checks if the user is trying to use Cortana. While it makes launching applications and performing other tasks easier, it might also be the reason for the Audio Device Graph Isolation process’s high CPU usage. Disable the ‘Hey Cortana’ and check if the CPU usage falls back to normal.
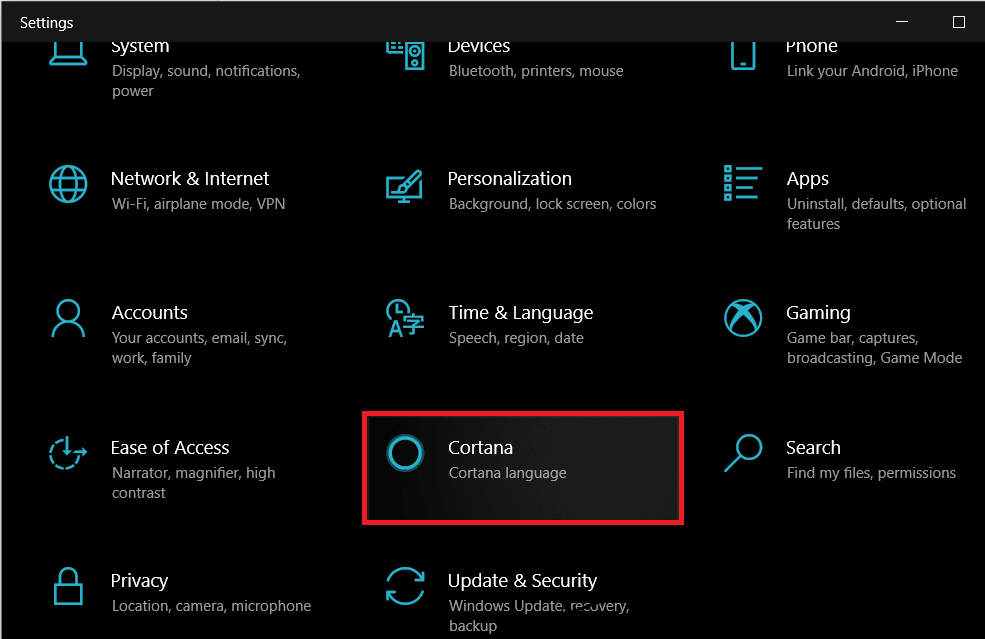
1. Open Windows Settings by pressing the Windows key + I or press the Windows button to launch start and then click on the gear icon.
2. Click on Cortana.
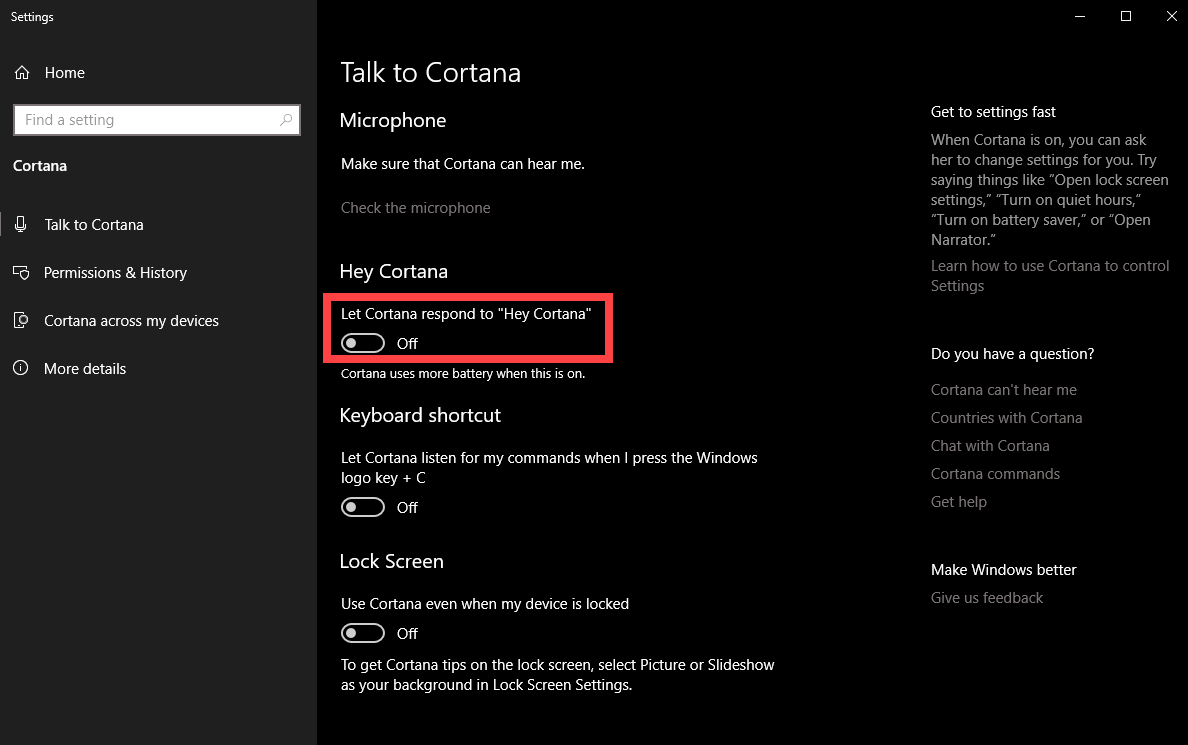
3. By default, you should be on the Talk to Cortana settings page but if you are not, click on it and switch to the Talk to Cortana page.
4. On the right-hand panel, you will find an option labeled “Let Cortana respond to ‘Hey Cortana’” under Hey Cortana. Click on the toggle switch and turn off the feature.
Method 4: Reinstall Skype
Some users have reported the CPU usage of the Audio Device Graph Isolation process goes through the roof when making a Skype call. If you are also facing the issue when using Skype, consider re-installing the application or using an alternative video calling software.
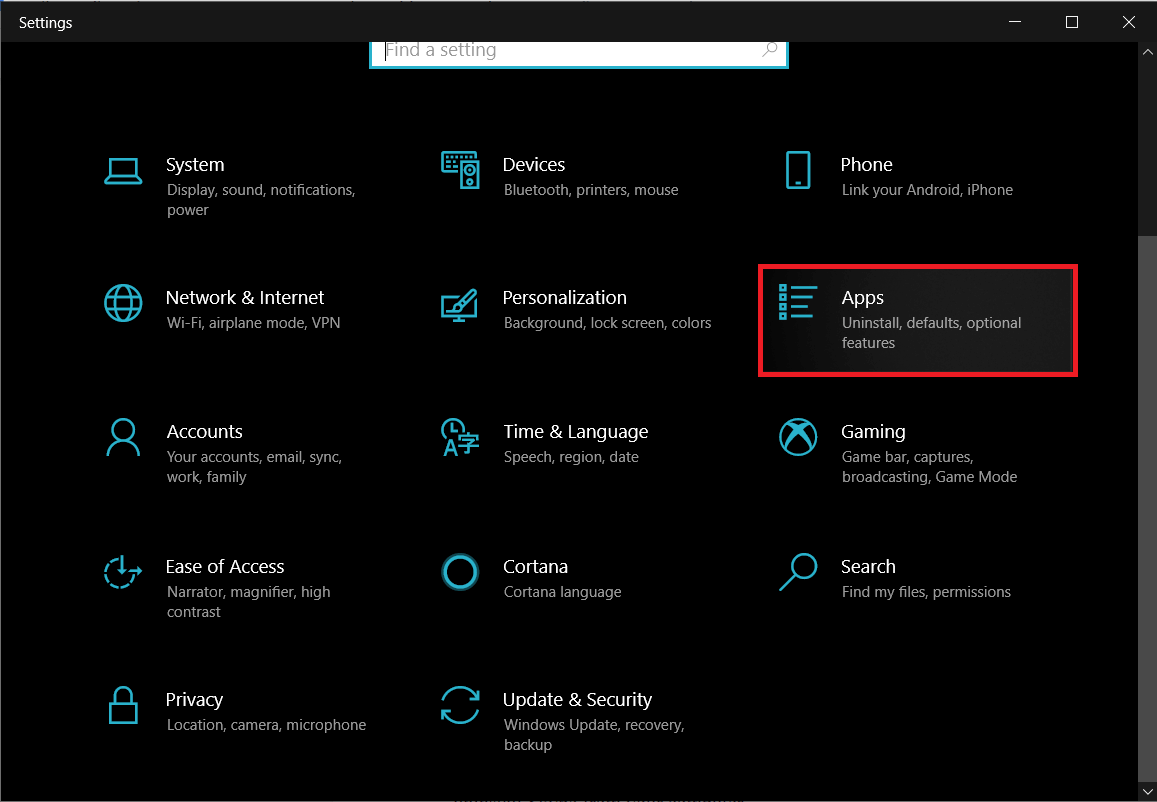
1. Open Windows settings using the method mentioned earlier and click on Apps.
2. On the Apps & features settings page, scroll down on the right-panel until you find skype and click on it to expand.
3. Click on the Uninstall button under Skype and confirm it in the following pop-ups.
(You can also uninstall Skype or any other application from Control Panel > Programs and Features)
4. To reinstall Skype, visit Download Skype | Free calls | Chat app, and download the installation file for the latest version of the application.
5. Open the installation file and follow the on-screen instructions to install Skype back on your computer.
Recommended:
Let us know which one of the above methods fixed Audio Device Graph Isolation’s high CPU usage on your personal computer.