Hide Items from Control Panel in Windows 10: Control Panel is one of the most important components of Windows, which gives the ability to the user to change System Settings. But with the introduction of Windows 10, Settings app is created to replace the classic Control Panel in Windows. Although Control Panel is still present in the system with a lot of a number of options which still isn’t available in the Settings app, but if you share your PC with your friends or use your PC in public then you might want to hide specific applets in Control Panel.
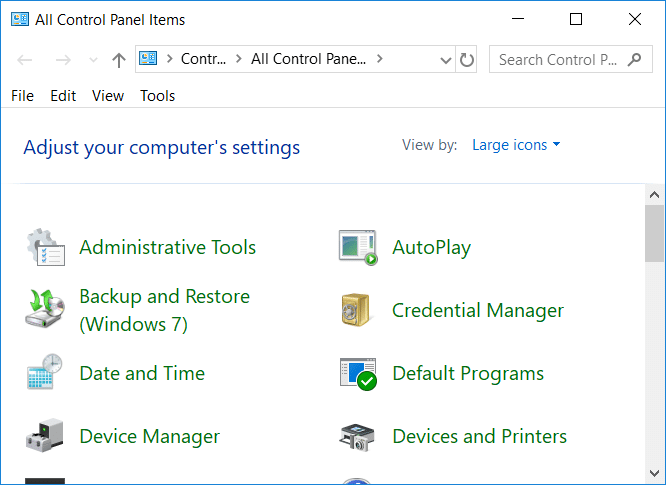
The Classic Control Panel is still used by many users over the Settings app and have options like Administrative tools, system backups, system security and maintenance etc which are not present in the Settings app. So without wasting any time let’s see How to Hide Items from Control Panel in Windows 10 with the help of the below-listed tutorial.
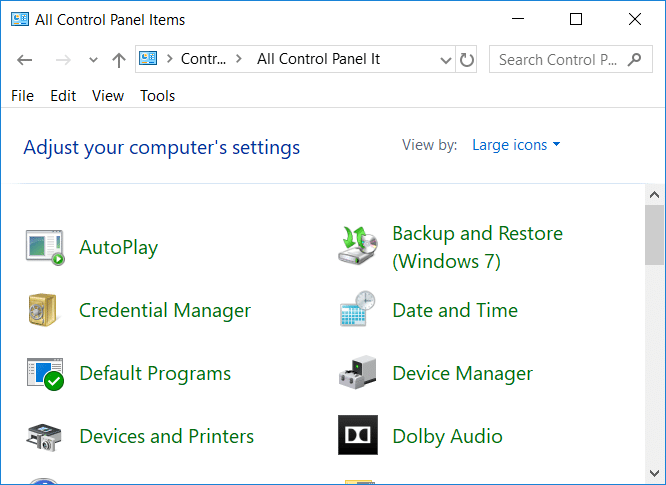
Hide Items from Control Panel in Windows 10
Make sure to create a restore point just in case something goes wrong.
Method 1: Hide Items from Control Panel in Windows 10 Using Registry Editor
Registry Editor is a powerful tool and any accidental click can damage your system or even make it inoperable. As long as you follow the below-listed steps carefully, you shouldn’t have any problem. But before doing that make sure to create a backup of your registry just in case, something goes wrong.
Note: If you have Windows Pro or Enterprise Edition then you can simply skip this method and follow the next one.
1.Press Windows Key + R then type regedit and hit Enter.

2.Navigate to the following Registry Key:
HKEY_CURRENT_USERSOFTWAREMicrosoftWindowsCurrentVersionPoliciesExplorer
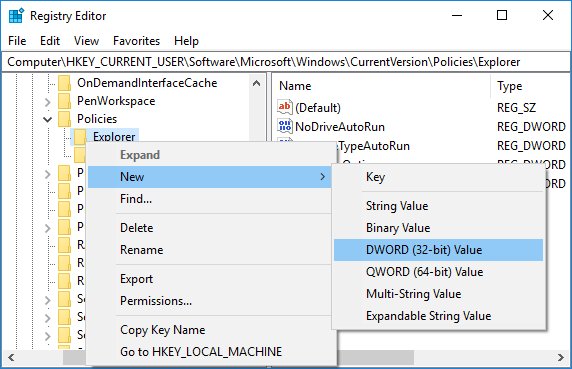
3.Now if you see Explorer then you’re good to go but if you don’t then you need to create it. Right-click on Policies then click New > Key and name this key as Explorer.
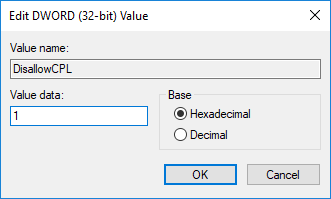
4.Again right-click on Explorer then select New > DWORD (32-bit) Value. Name this newly created DWORD as DisallowCPL.
5.Double-click on DisallowCPL DWORD and change it’s value to 1 then click OK.
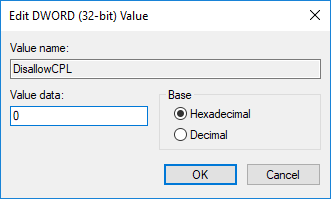
Note: To Turn off hiding the Control Panel items simply change the value of DisallowCPL DWORD to 0 again.
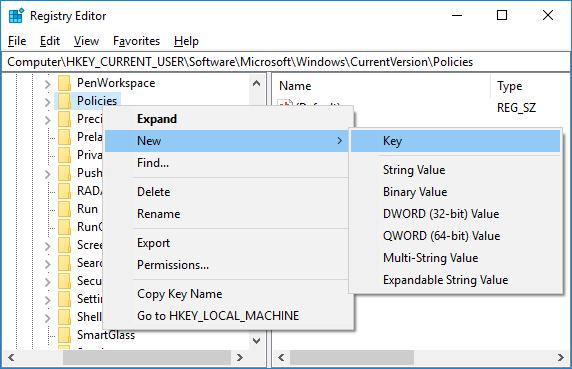
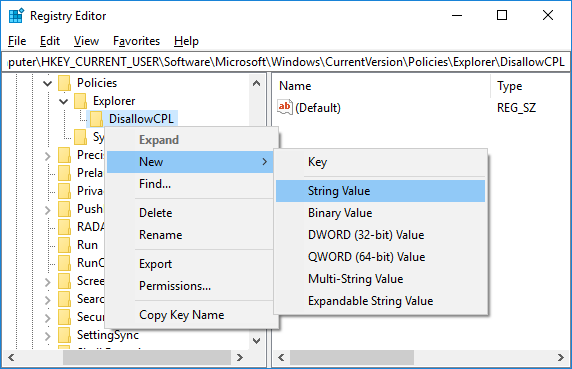
6.Similarly, right-click on Explorer then select New > Key. Name this new key as DisallowCPL.

7.Next, make sure you are under the following location:
KEY_CURRENT_USERSoftwareMicrosoftWindowsCurrentVersionPoliciesExplorerDisallowCPL
8.Select DisallowCPL key then right-click on it and select New > String Value.
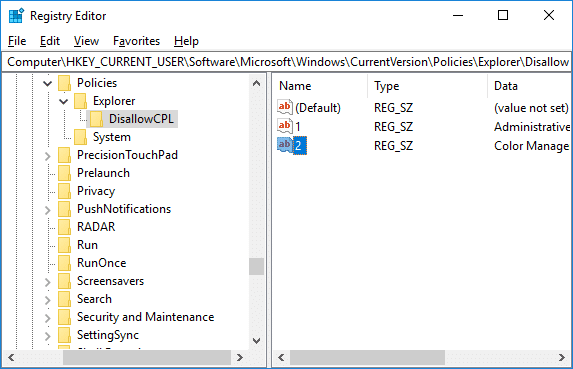
9.Name this String as 1 and hit Enter. Double-click on this string and under Value data field change it’s value to the name of the specific item you want to hide in Control Panel.

For example: Under the value data field, you can use any one of the following: NVIDIA Control Panel, Syn Center, Action Center, Administrative Tools. Make sure you enter the same name as its icon in the Control Panel (icons view).
10.Repeat the steps 8 and 9 above for any other Control Panel items you want to hide. Just make sure that every time you add a new string in step 9, you increase the number you use as the value’s name e.g. 1,2,3,4, etc.
11.Close Registry Editor and reboot your PC to save changes.
12.After the restart, you would be successfully able to Hide Items from Control Panel in Windows 10.
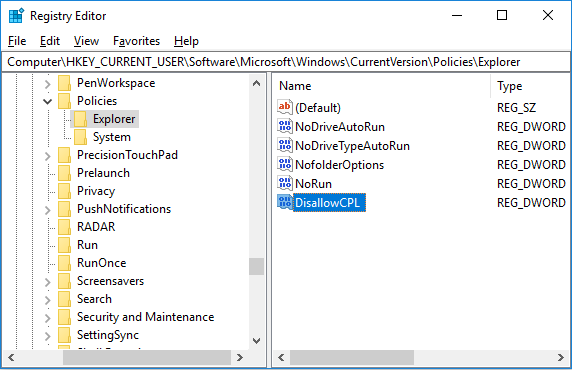
Note: Administrative Tools and Color Management is hidden in Control Panel.
Method 2: Hide Items from Control Panel in Windows 10 Using Group Policy Editor
Note: This method will only work for Windows 10 Pro and Enterprise Edition users, but be careful as it gpedit.msc is a very powerful tool.
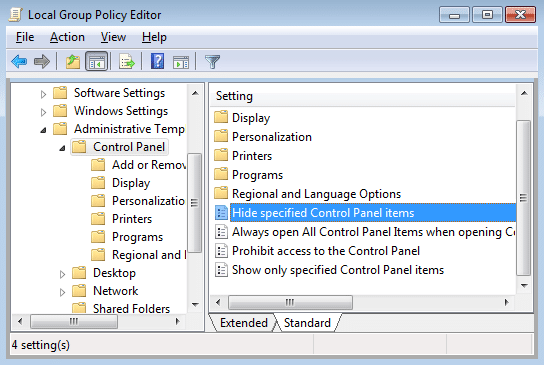
1.Press Windows Key + R then type gpedit.msc and hit Enter.

2.Navigate to the following location:
User Configuration > Administrative Templates > Control Panel
3.Make sure to select Control Panel then in right window pane double-click on “Hide specified Control Panel items” policy.
4.Select Enabled and then click on Show button under Options.
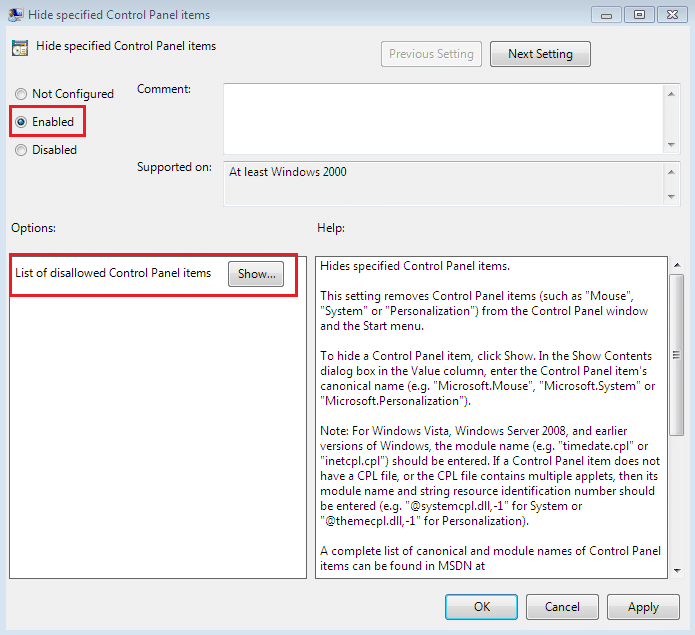
Note: If you want to turn off hiding items in Control Panel then simply set the above settings to Not Configured or Disabled then click OK.
5.Now under Value, enter the name of any Control Panel items you want to hide. Just make sure to enter one item per line you want to hide.
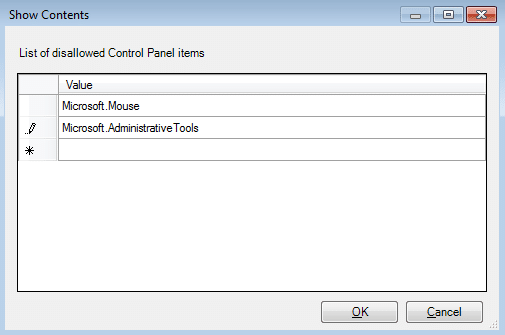
Note: Enter the same name as its icon in the Control Panel (icons view).
6.Click OK then click Apply followed by OK.
7.When finished close gpedit.msc window and reboot your PC to save changes.
Recommended:
That’s it you have successfully learned How to Hide Items from Control Panel in Windows 10 but if you still have any queries regarding this tutorial then feel free to ask them in the comment’s section.