Bidding on a rare Pokemon card or maybe a pair of limited edition sneakers? Perhaps, you are keeping a check on your favorite team’s score, the stock market, or some breaking news. There are many situations where we find ourselves constantly refreshing a web page to stay up-to-date. No web browser natively provides an auto-refresh feature. But many developers have risen to the occasion and created browser extensions that can auto-refresh a webpage. In this article, we will show you how to auto refresh Google Chrome.
How to Auto Refresh Google Chrome
While you can easily refresh a page on Chrome by pressing Ctrl + R keys together or the circular arrow icon it would be much more convenient if web browsers auto-refreshed certain specified pages for us. Surprisingly, there are several auto-refresh extensions available for Google Chrome each more promising and feature-rich than the other. We will walk you through the setup of one such extension but you can use this procedure to install and set up other extensions as the installation process is the same for almost all extensions.
Step I: Install Extension
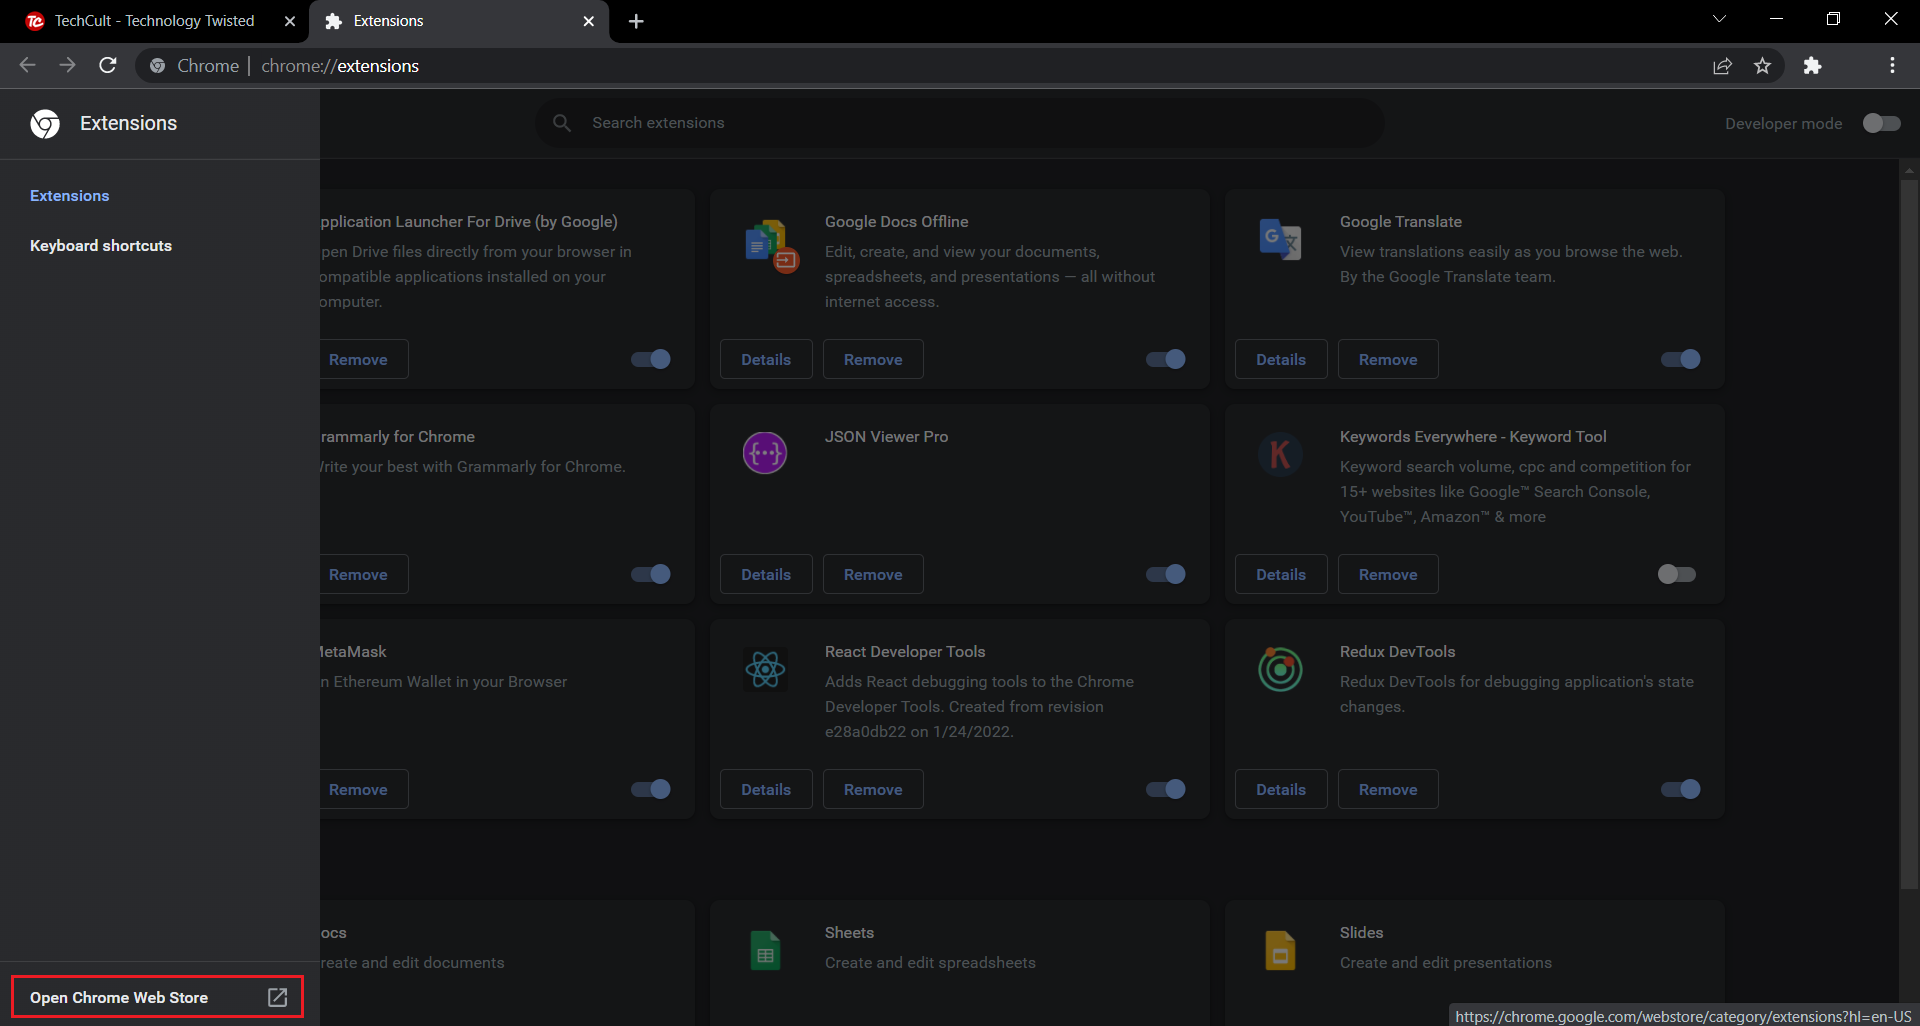
1. In the Google Chrome browser click on the three dots icon, then select More tools > Extensions from the menu.
![]()
2. Click on the hamburger icon to open the menu, if it is hidden.
![]()
3. Click on Open Chrome Web Store in the menu on the left side.
Note: Alternatively, you can directly open Chrome Web Store from this link.
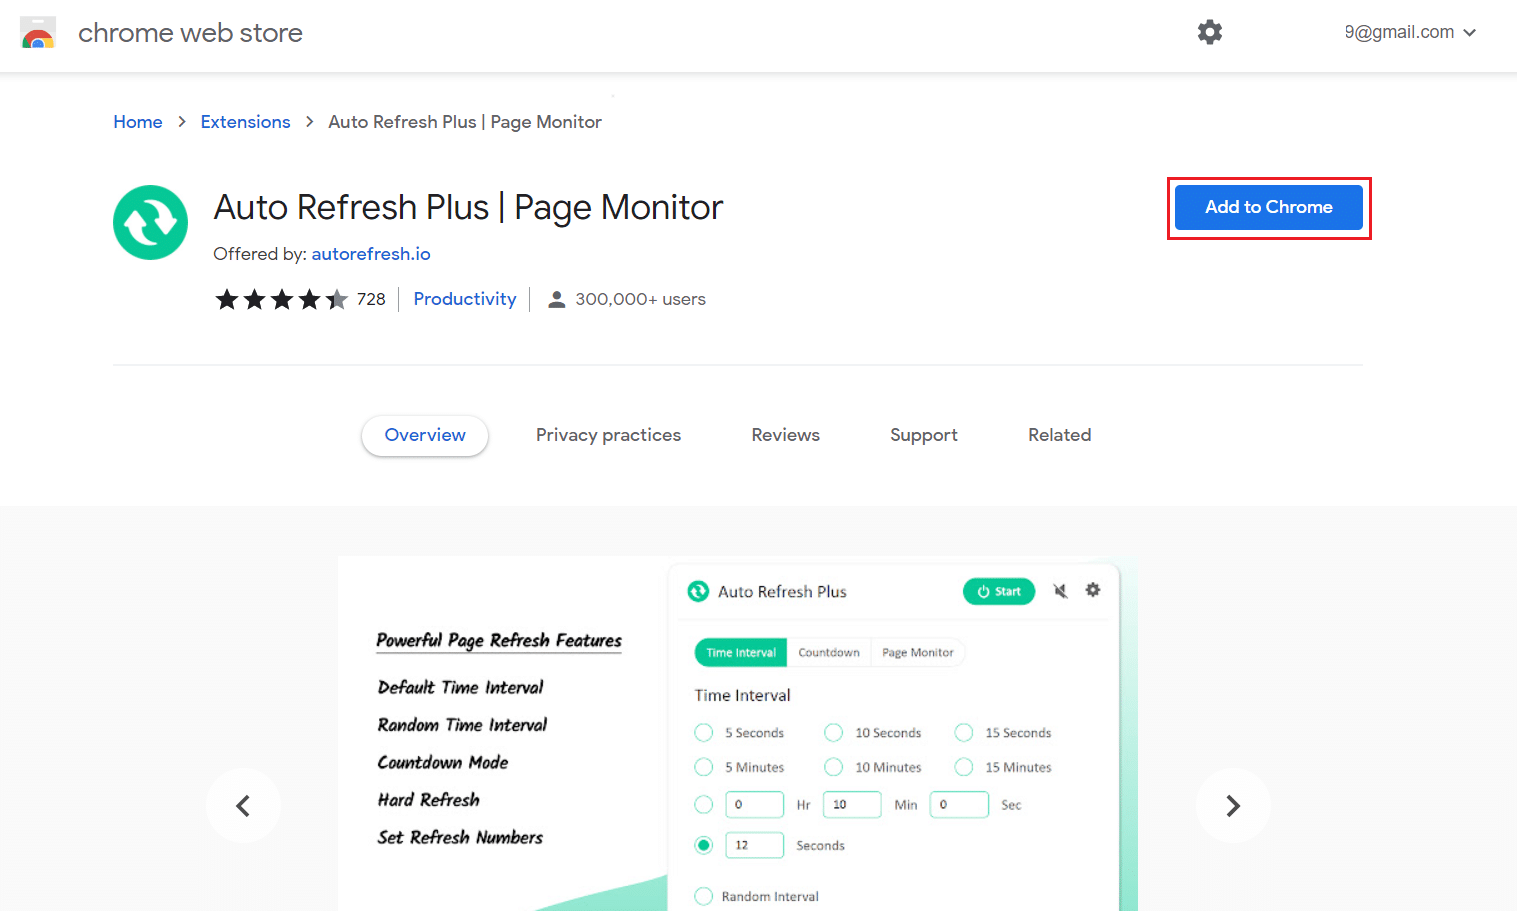
4. Type auto refresh plus in the search box and hit Enter key. You will be presented with an extensive list of auto-refresh extensions. Go through the list, compare the ratings and click on anyone that seems promising to you.
Note: For the purpose of this tutorial, we will be installing the Auto Refresh Plus Page Monitor extension by autorefresh.io.

5. After selecting the extension, click on Add to Chrome button to install the extension.
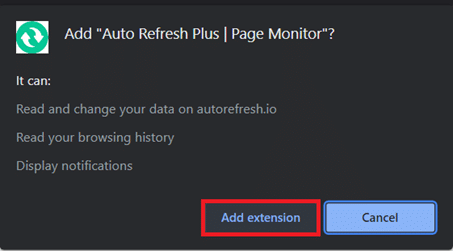
6. Click on Add extension to continue.
Once the extension is installed, its home/settings page will automatically open up in a new tab, you can close it.
Also Read: What is Google Chrome Elevation Service
Step II: Configure the Extension
You will need to configure the extension before enabling it. To do that follow these steps:
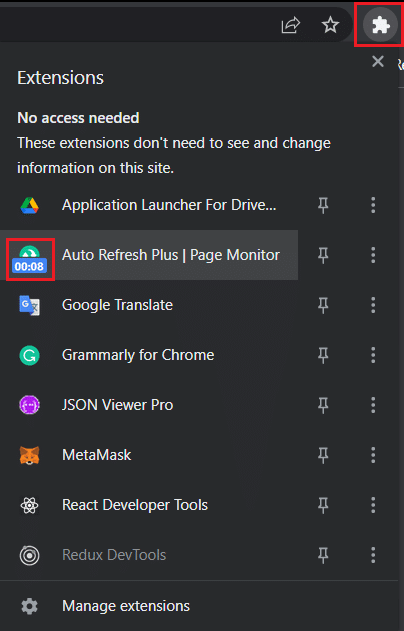
1. Click on the Extensions icon that looks like a jigsaw puzzle piece.
2. Here, select the Auto Refresh Plus Page Monitor extension.
![]()
3. Select any one of the predefined auto-refresh time intervals or manually set one. You can also instruct the extension to randomly refresh a web page within a specified timeframe.
4. You can configure the extension to perform hard or soft refreshes and place a limit on the number of times a webpage will be refreshed if you are on a limited data plan. This is enough for most users but feel free to further explore the Countdown and Page Monitor tabs.
Note: For hard refreshes all the pictures will be reloaded instead of being fetched from the cached data.
5. Once you are happy with the settings, click on the Start button to activate the extension

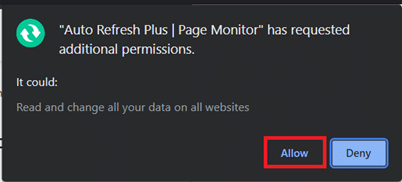
6. If you are enabling the extension for the first time, a pop-up message requesting permission to read and change data on all websites will appear at the top of the application window. Click on Allow to start the extension.
As soon as you activate the extension, a countdown timer will be displayed below its icon indicating the time left until the next page refresh.
Note: If you wish to stop auto-refreshes at any point, select the Auto Refresh Plus Page Monitor extension icon in the toolbar and click on the Stop button.

The two well-known and trustworthy alternatives to Auto Refresh Plus are:
Auto-refresh extensions are not limited to Google Chrome. Following are the other extensions available for other browsers
Note: On Internet Explorer, the option to auto-refresh web pages can be found deep inside security settings as Allow Meta Refresh although users cannot specify the refresh intervals.
Recommended:
We hope this guide helped you to auto refresh Google Chrome. Let us know if you would like to read similar articles covering other useful extensions to improve your overall web browsing experience. If you have any queries or suggestions, feel free to leave them below in the comment section.