Windows provide the users with various options of system power settings for customization according to specific tasks. Users then can utilize the system power at a pace they want to use. Sometimes it is best to plan out the system power utilization with the change power plan feature provided by Windows. It makes your tasks more meaningful and productive rather than just dragging. Read on further to explore this element made available by Windows to edit power plan and make your system experience more personalized.

How to Change Power Plan on Windows 10
You might want to utilise different power plans to perform different tasks on your Windows 10 computer:
- Power saver mode when you are not performing heavy tasks and want to save system power for an elongated time.
- While gaming, you need to have the Windows power options high performance set to play the games at a smooth and lag-free speed.
- And then the balanced mode when you want decent speed with less power consumption during moderate tasks on the system.
You can opt for any of the mentioned power plans with customized inputs and the name of the plan. In this article, we have drafted the change power plan method with the steps to use and customize it. Follow the upcoming steps of this method to reimagine your system experience to get the best out of it.
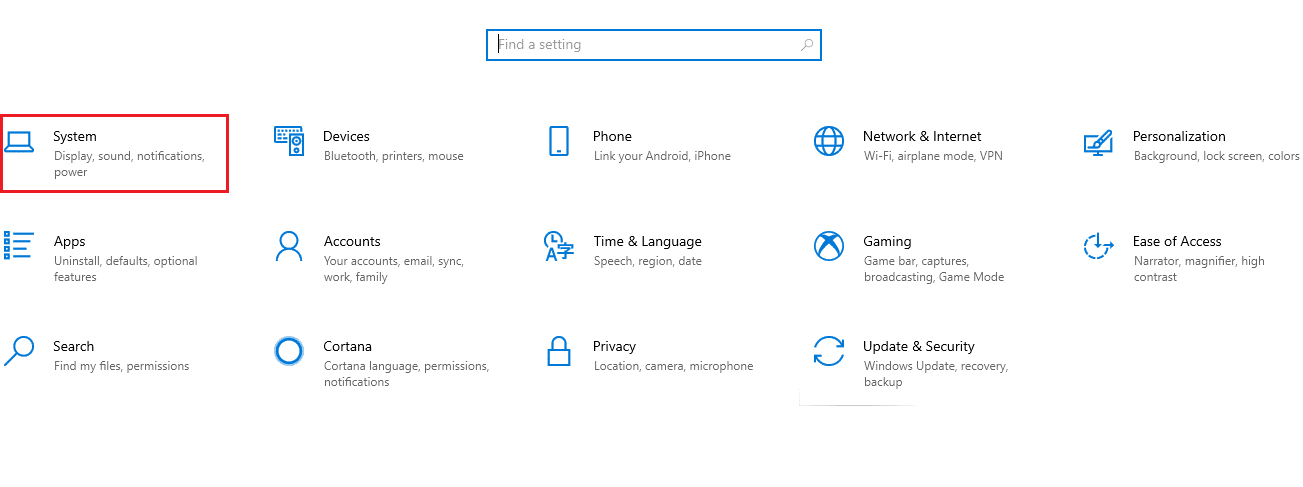
1. Hit the Windows key and click the gear icon to open Settings.
![]()
2. Locate and select the System option as highlighted on the Settings window.
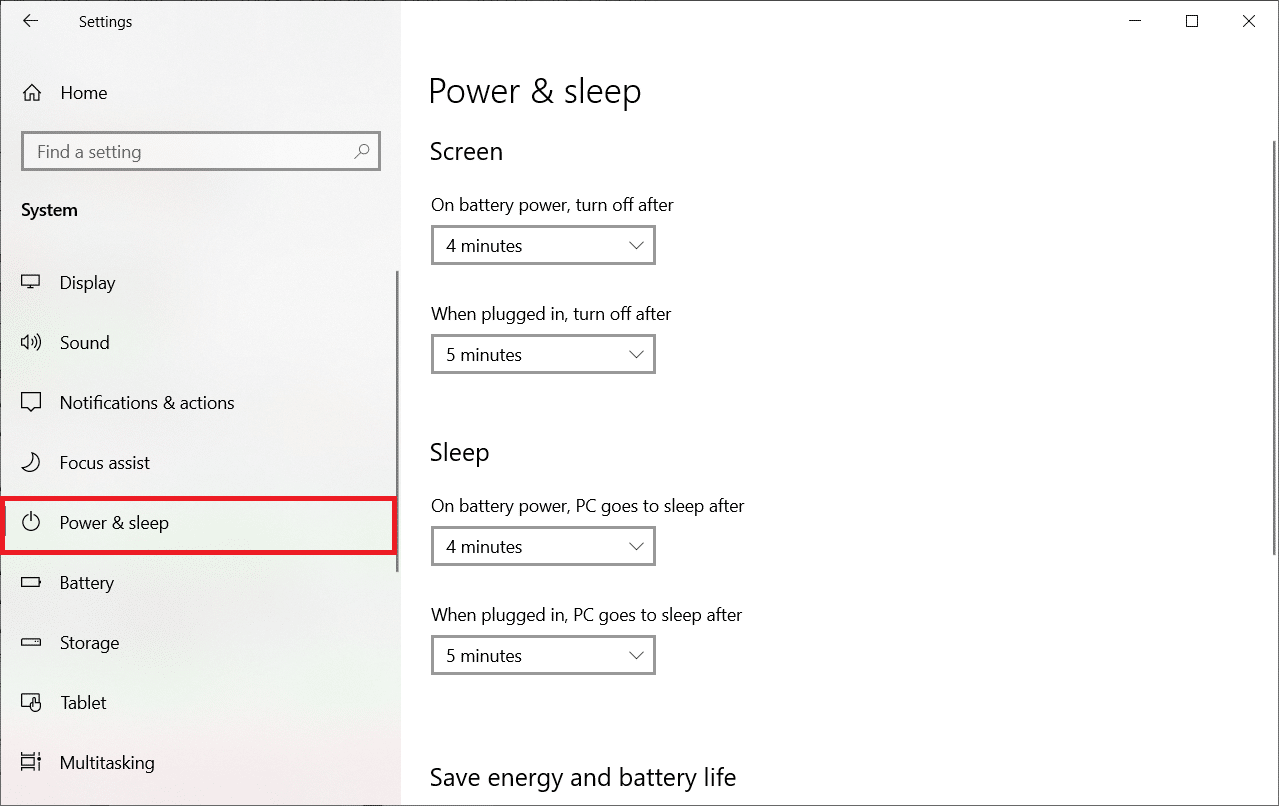
3. Select the Power & Sleep option in the left pane.
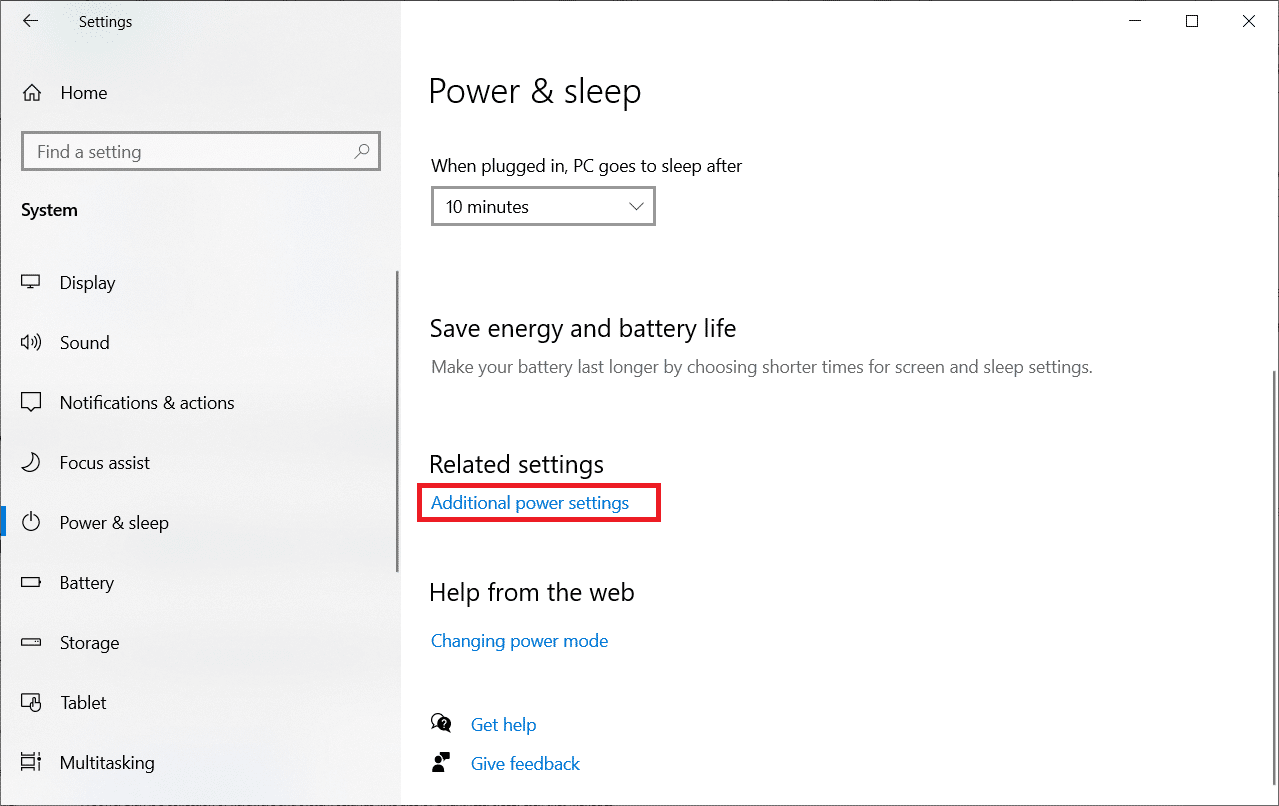
4. To change power plan, click on the Additional power settings as shown under Related settings.
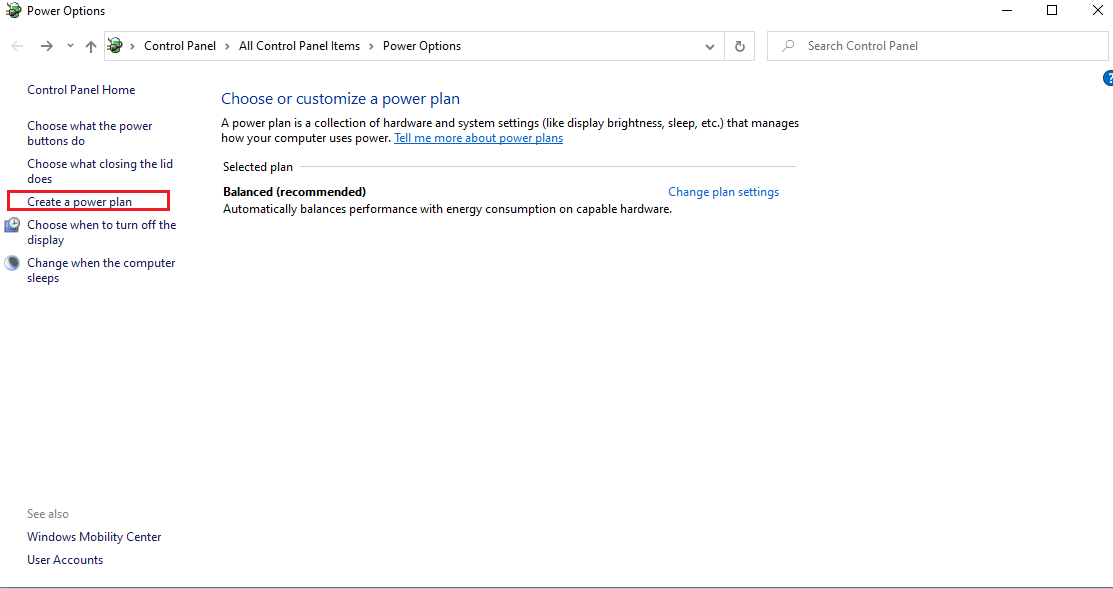
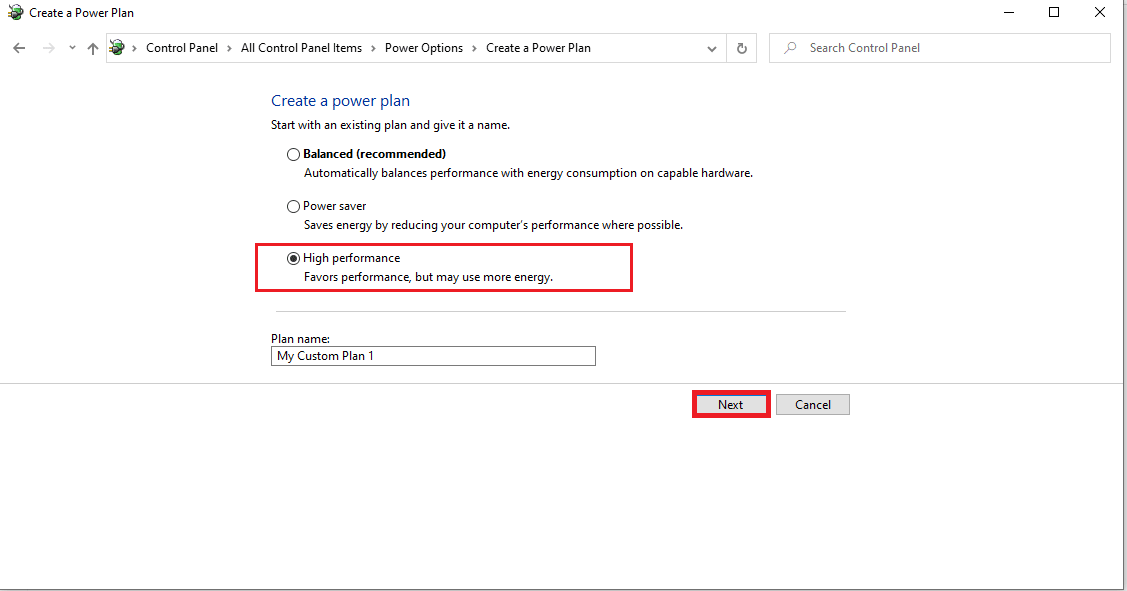
5. Then, select Create a power plan option as illustrated on the Power Options window.
6. Now, select the High performance option on the Create a power plan page and click Next to proceed further.
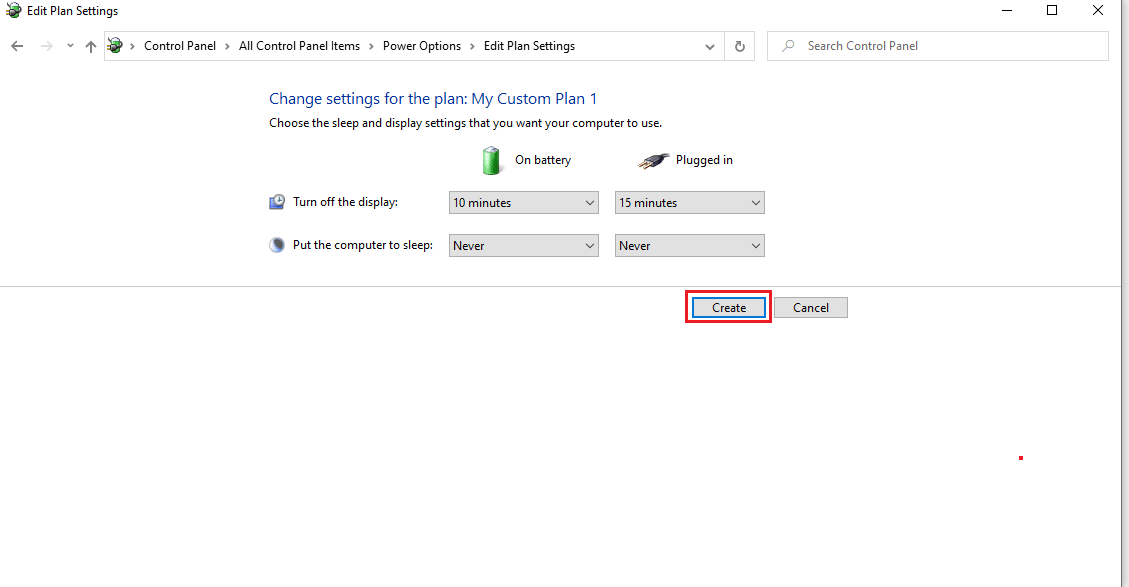
7. Choose the required options on the Edit Plan Settings screen and click the Create button to complete the changes to boost the performance.
After following these steps, you have learned to change power plan along with how to edit power plan as per your preferences. Now you can continue to enjoy any tasks on your system with utmost efficiency.
Frequently Asked Questions (FAQs)
Q1. What is the difference between high performance, power saver, and balanced power plans?
Ans. You may use the power saver plan when saving system power is the priority over performance. On the contrary, choose high performance when you need to have the smoothest of the performance. You can opt for the balanced power plan when both the other mentioned plans are not suited.
Q2. Can there be any harm to the device with the change power plan feature use?
Ans. There is no harm to your device if you use this feature. It is recommended to use the device in the apt power plan mode for better results. And this feature is available for optimizing the device performance according to the task being performed on the system itself.
Recommended:
So this was the method to learn how to change Power plan on Windows 10. We hope you found this article useful and were able to change and edit power plan as you wanted. Please let us know if this method worked the best for you. And leave any questions or comments in the space below for us.