The user-agent string is a little-known line of information with a very big impact on how browsers see the web. We recently discussed the benefits of a user-agent switcher and how it can enhance your browsing experience.
However,
switching your browser’s user agent no longer requires that you install
third-party software, such as extensions. Over the past few years, mainstream
browsers have all started including such functionality as a part of their
developer console or within standard menus.

Although
uncommon, there is a chance for browser extensions to become hijacked for
malicious purposes, which could be a risk to your security. They can also add
unnecessary bloat to the browser and eventually cause it to slow down.
In
this article, let’s go over how you can change your user agent in today’s most
popular browsers without an extension.
How To Change Your User Agent In Google Chrome
- First, you’ll need to open
Chrome’s developer console. To do so, press the Ctrl + Shift + I keys. A panel should open up on the right side of
your Chrome window. - Click on the icon of the three vertical dots
(top-right corner). - In this menu, hover over More tools and then select Network conditions.
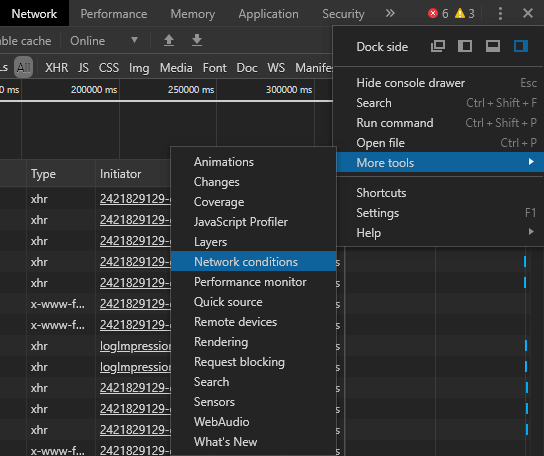
- A new panel should open at
the bottom of the current one. If you look or scroll down towards the bottom of
this panel, you should see a User agent
label, which includes a respective set of options.
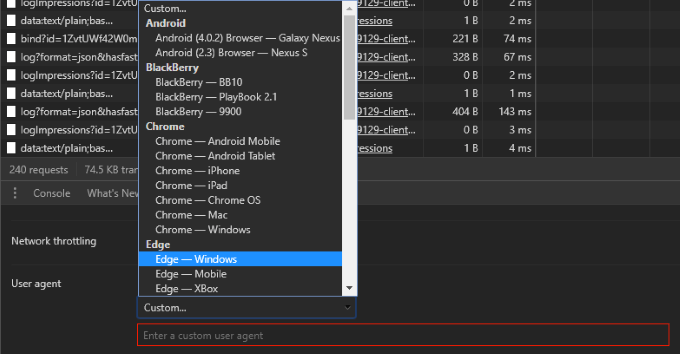
Here, you can select from a set of defined user agents or even enter your own custom user agent string. It’s that simple.
How To Change Your User Agent In Mozilla Firefox Or
Opera
Without
using a browser add-on, changing Firefox’s user agent is a tricky task that
requires you to delve deep into the browser’s configuration. For Opera users,
you can follow these same instructions – the process is identical.
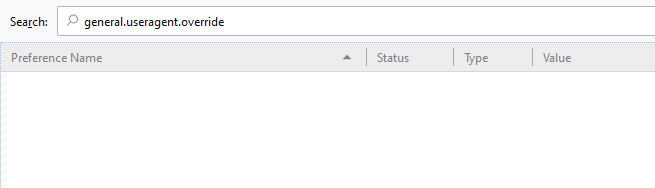
- The first step is to type about:config in the address bar and hit
Enter. If it’s your first time doing
so, you should see a disclaimer stating that you’re entering risky territory
that’s for advanced users only. Proceed past this warning. - Next, in the Search field at the top of this screen,
type in general.useragent.override.
You’ll likely be met with a blank screen. If your search finds a preference
though, skip further down this page to where we’re modifying the value of it.
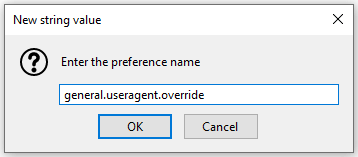
- If the preference isn’t there, right-click on a blank area of the page, hover New, and select the String option. Here, enter the same string that we searched for: general.useragent.override.
- After hitting Enter, the next prompt will ask for the new string’s value. The value has to be the exact name of the user-agent string you wish to use. You can use something completely custom or find millions of valid user-agent strings from WhatIsMyBrowser.com.
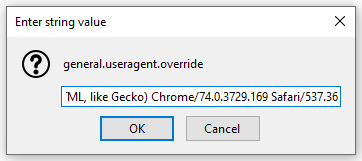
- Once you’ve input a
user-agent string, hit Enter, and
that’s it. This setting will remain persistent each time you restart your
browser. If you’d ever like to reset this setting to its default value, just
right-click on the preference name and select Reset.
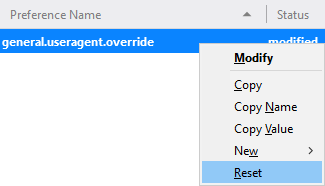
The
string will remain in your settings, but setting it to a blank value has the
same effect as deleting it.
How To Change Your User Agent In Microsoft Edge
Edge
is the new browser that Microsoft has been trying to shine a spotlight on
lately, but if you still prefer Internet Explorer, the process to change your
user agent is the same.
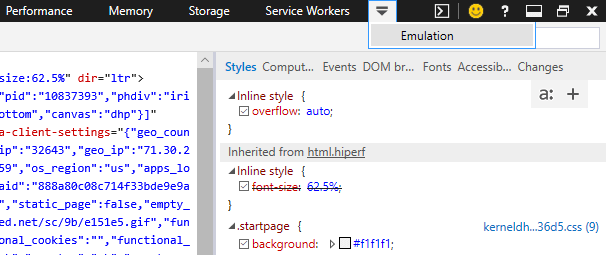
- First, open Edge and press
the F12 key on your keyboard. - In the right-side panel that
opens, look for Emulation across the
top. Depending on your resolution size, you may not be able to find it at
first, but if you click on the arrow
pointing downwards with the More
tools tooltip, you’ll find it.
Edge’s
emulation options are quite robust, allowing you to change your device, display
orientation/resolution, geolocation, and user-agent string.
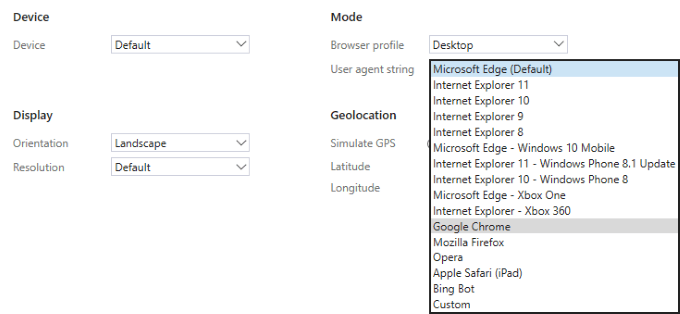
Like many other browsers, Edge supports custom user-agent strings.
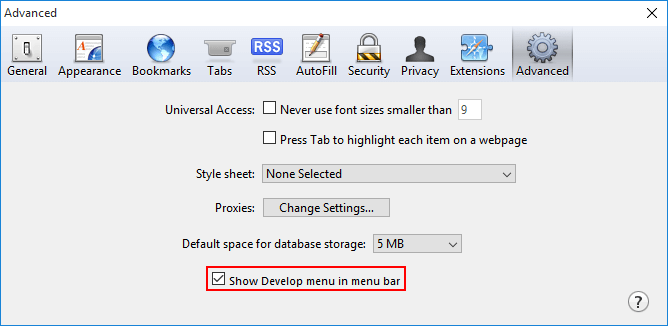
How To Change Your User Agent In Safari
Safari
allows you to change your user agent from the menu bar, but you’ll first need
to enable the developer menu.
- To do so, go into the Preferences… menu (either by clicking
on Safari or the far-right cog icon, depending on your version). - On the window that pops up,
click on the Advanced tab and then
tick the checkbox of the bottommost option, Show Develop menu in menu bar.
- Close this window and look
for the Develop menu across your top
menu bar, in the same place you see the File,
Edit, View, and other menu options. - If you don’t see this row of
options, you may need to click again on either the Safari menu option or cog
icon and click on Show Menu Bar. - Next, click on the Develop menu option, hover User Agent, and you’ll see a list of
user agents you can switch to.

- While the preset list isn’t very extensive, clicking on Other… will give you the option to enter your own custom user-agent string.
If
you’re not afraid to go under the hood, changing the user-agent string via the
preferences or developer console of your browser is a great way to skip out on
one extra browser extension. There are millions of valid user-agent strings out
there, so keep in mind that using a custom string is usually an option in the
case that the presets don’t offer what you’re looking for.
Also,
remember to clear or undo all changes made to your user-agent string if you
want to browse the internet as intended. Many websites will alter the way
content is delivered to you based on your user agent, so forgetting this can
cause you to view websites in a suboptimal way.