Snapchat is a great platform where users can communicate with each other using snaps or normal text messages. There is more to Snapchat than just the messaging, calling, or snap features. The users get fancy features like creating geo-fenced stories that allow users to create stories that are visible to other Snapchat users within the geographical location set. Geo-fenced stories are great if you want to create awareness or target events in a location.
However, there is a difference between a geo-fenced story and a Geofence filter. A Geofence filter is like a normal Snapchat filter that you can overlay on your snap, but it is available only when you are within the set geographical location. Therefore, to help you out, we have a guide that explains how to create a geo-fenced story on Snapchat.
How to Create a Geo fenced Story on Snapchat
Reasons to Create a Geo-fenced Story or a Geofence filter
Geo-fenced story and filter can be beneficial if you want to target users in a location. Suppose, if you have a business and you want to promote it, then in this situation, you can create a geofence filter to promote your business. On the other hand, you can create a geo-fenced story, which will be visible to users in the set geographical location.
This geo-fenced story feature is available in limited countries like UK, France, Netherlands, Sweden, Norway, Germany, Denmark, Australia, Brazil, Saudi Arabia, Denmark, Finland, Mexico, Lebanon, Mexico, Qatar, Kuwait, and Canada. If you want to use this feature in your country, then you can use VPN software to spoof your location.
You can follow these steps if you don’t know how to create a geo-fenced story on Snapchat using your Android phone:
1. Open the Snapchat app on your Android device.
2. Log in to your account.
3. Tap on the Ghost icon or your story icon from the top-left corner of the screen.
4. Tap on ‘Create a new story.’
5. You will see three options, where you have to select the geo story.
6. Now, you have the option of selecting who can view and add to the geo story. You can select friends or friends of friends to share your geo story.
7. After selecting your option, you have to tap on ‘Create story.’
8. Give your geo story the name of your choice and tap on Save.
9. Finally, Snapchat will create a geo story, where you and your friends can add snaps.
That’s it; you can easily create a geo-fenced story and select the users who can view or add the snaps on the geo-fenced story.
How to Create a Geofence in Snapchat
Snapchat allows users to create geofence filters that they can overlay on their snaps. You can easily follow the below method to create geofence filters on Snapchat.
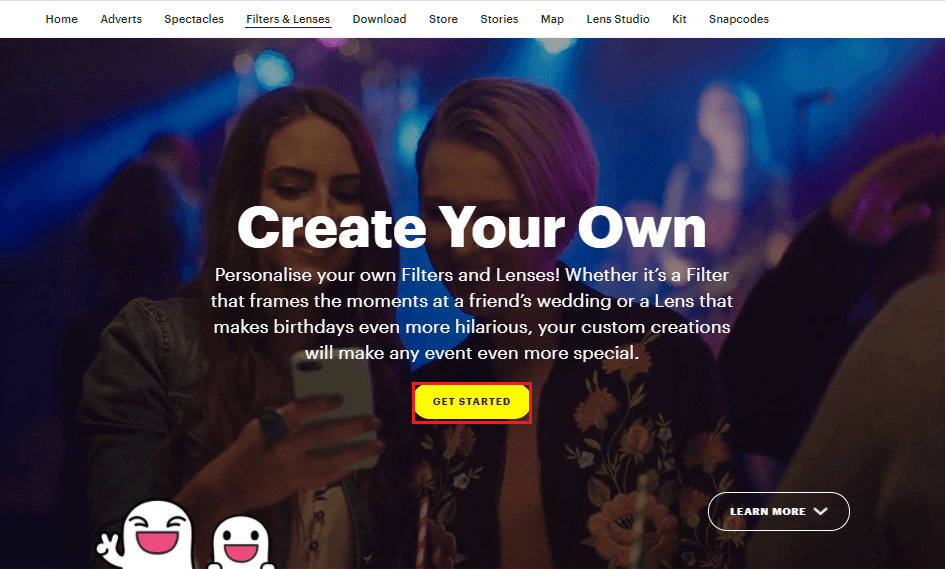
1. Open a web browser on your desktop and head to Snapchat. Click on GET STARTED.
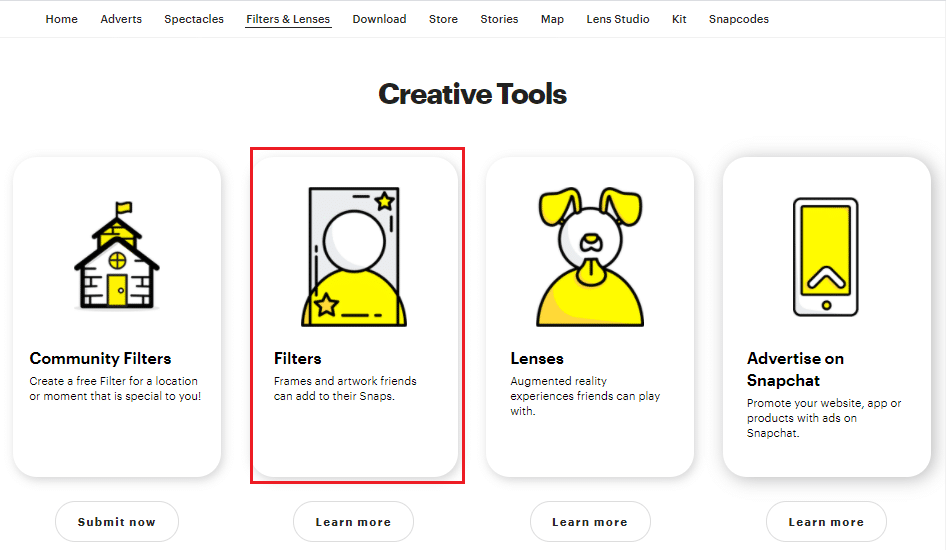
2. Click on Filters.
3. Now, upload your filter or create a filter using the pre-made designs.

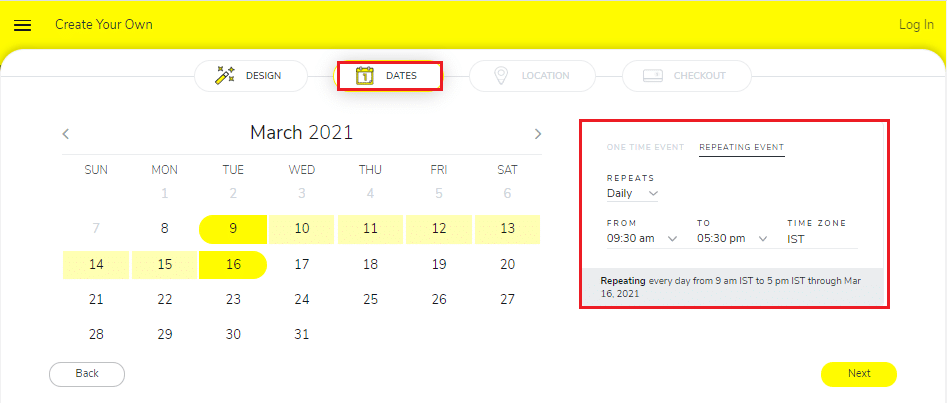
4. Click on Next to select the Dates for your geofence filter. You can select if you are creating a geofence filter for a one-time event or repeating event.
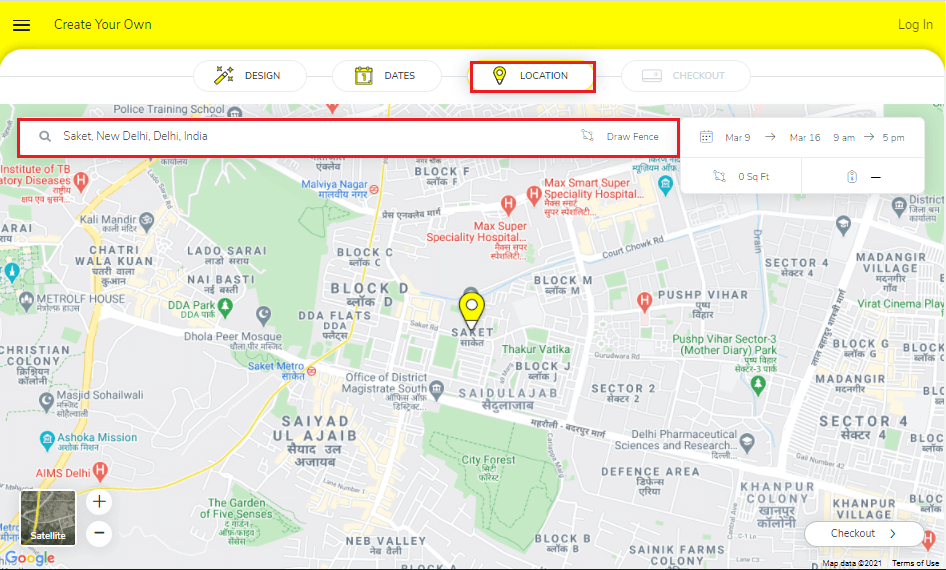
5. After setting the dates, click on Next and select the location. To select the location, type an address in the location bar and select one from the drop-down menu.
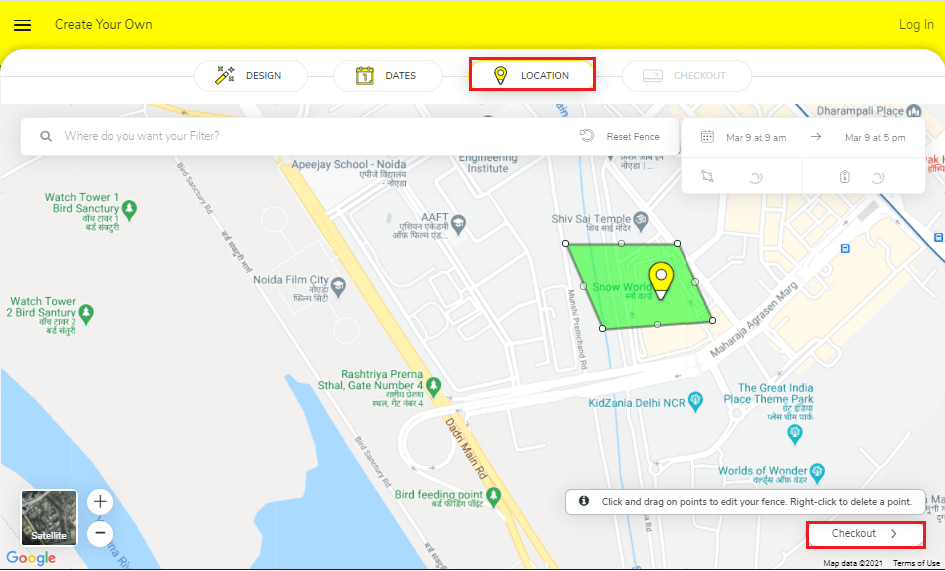
6. Start creating a fence by dragging the endpoints of the fence around your set location. After creating a geofence around your preferred location, click on Checkout.
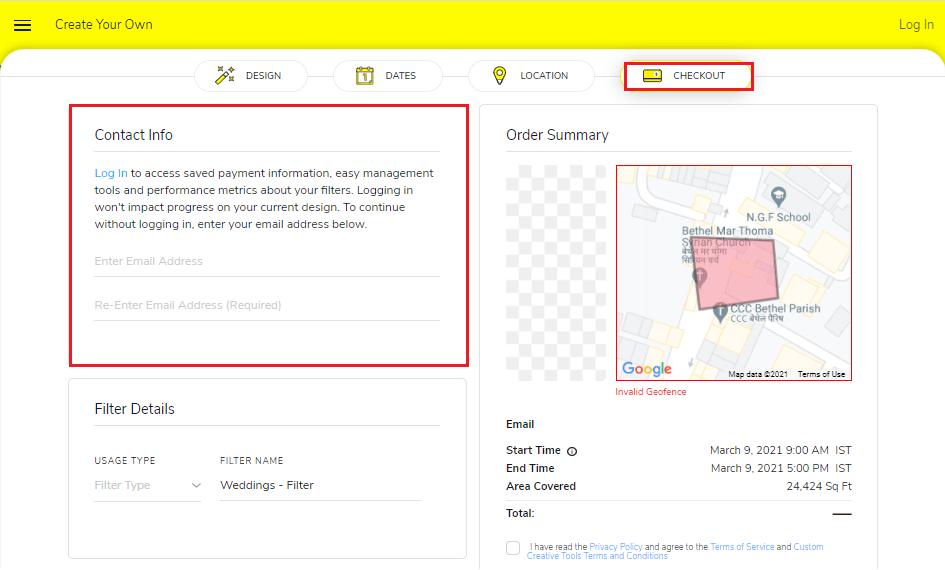
7. Finally, enter your email address and make the payment to purchase your geofence filter.
With the help of a geofence filter, you can easily grow your business or reach out to more users for an event.
How do you add a geo story on Snapchat?
To create a geo story on Snapchat, you have to ensure whether this Snapchat feature is available in your country or not. If it is not available, you can use VPN software to spoof your location. To create a geo story, open Snapchat and tap on your bitmoji icon. Tap on Create story > Geo story > select who can add and view the geo story > name your geo story.
Recommended:
We hope our guide on how to create a geo-fenced story and geofence filter on Snapchat pics from cameraroll was helpful, and you were easily able to create one for your business or other events. If you liked the article, let us know in the comments below.