How to Disable Windows 10 Firewall: In today’s world, people are too much dependent on technology and they try to perform every task online. You need a device to access the internet such as PCs, phones, tablets, etc. But when you use PC to access the internet you connect to so many networks which might be harmful as some attackers make free WiFi connections and wait for people like you to connect to these networks in order to access the internet. Also, if you are working on some project with other people then you may be on a shared or common network which may be unsafe as anyone with access to this network can introduce malware or virus on your PC. But if that is the case then how should one protect their PC from these networks?
Don’t worry we will answer this question in this tutorial. Windows comes with built-in software or program which keeps the laptop or PC secure and safe from external traffic and also protect your PC from external attacks. This built-in program is called Windows Firewall which is a very important part of Windows since Windows XP.
What is the Windows Firewall?
Firewall: A Firewall is a Network Security system that monitors & controls the incoming and outgoing network traffic based on predetermined security rules. A firewall basically acts as a barrier between the incoming network and your computer network that allows only those networks to pass through which according to predetermined rules are considered to be trusted networks and block untrusted networks. The Windows Firewall also helps in keeping unauthorized users away from accessing resources or files of your computer by blocking them. So a Firewall is a very important feature for your computer and it is absolutely necessary if you want your PC to be safe & secure.
Windows Firewall is enabled by default, so you don’t need to do any changes on your PC. But sometimes Windows Firewall causes some issues with internet connectivity or blocks certain programs from running. And if you have any 3rd party Antivirus program installed then it will also enable the third party firewall, in which case you will need to disable your in-built Windows Firewall. So without wasting any time let’s see How to disable Windows 10 Firewall with the help of the below-listed guide.
How to Enable or Disable Windows 10 Firewall
Make sure to create a restore point just in case something goes wrong.
Method 1 – Enable Firewall in Windows 10 Settings
To check if the firewall is enabled or disabled, follow the below steps:
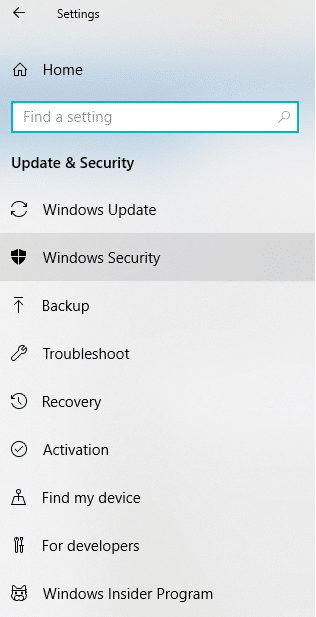
1.Press Windows Key + I to open Settings then click on Update & Security.
![]()
2.Click on Windows Security from the left window panel.
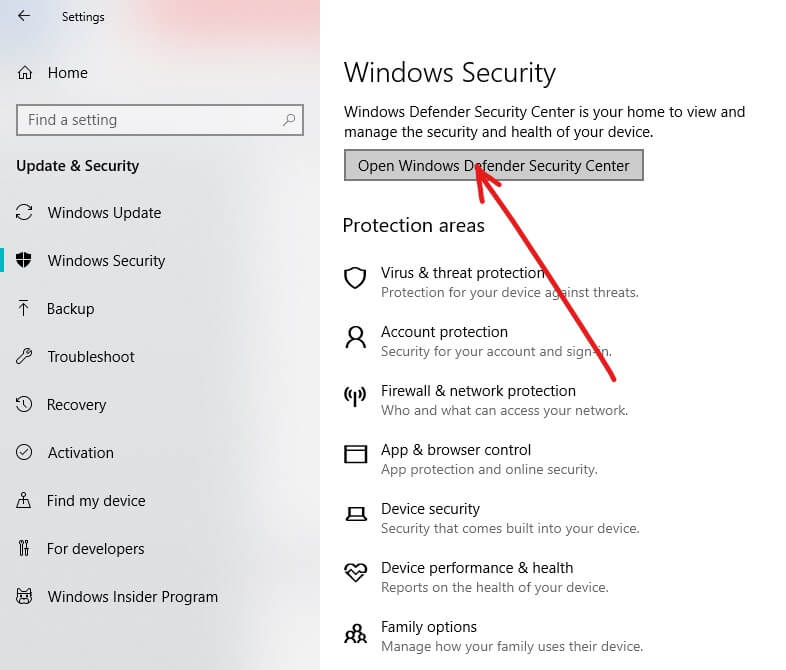
3.Click on Open Windows Defender Security Center.
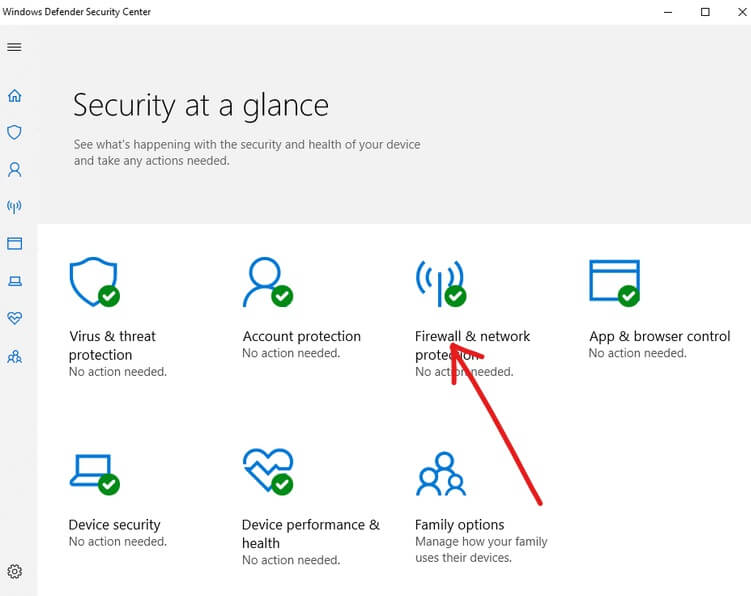
4.Below Windows Defender Security Center will open up.
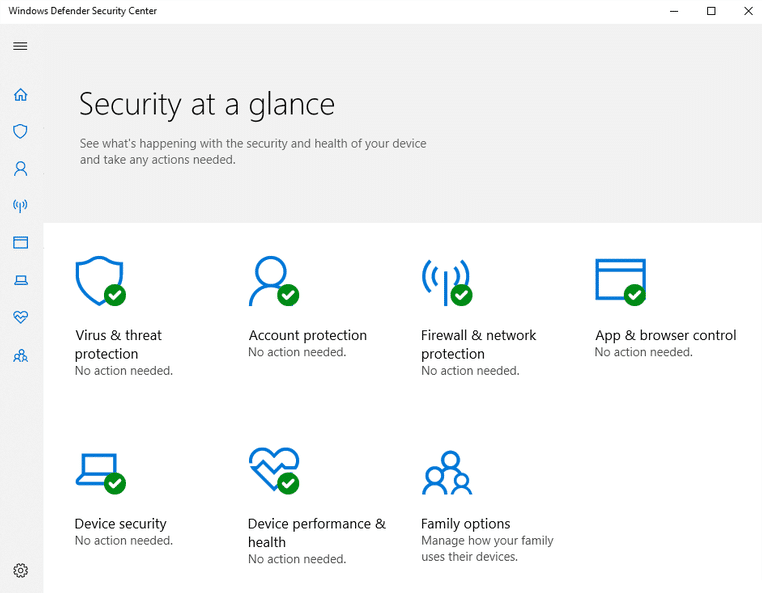
5.Here you will see all the security settings which users have access to. Under Security at a glance, to check the status of the firewall, click on Firewall & network protection.
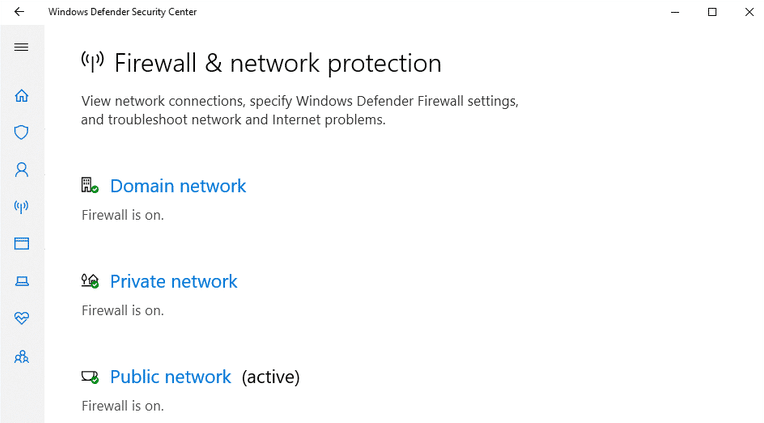
6.You will see three types of network there.
- Domain network
- Private network
- Public network
If your firewall is enabled, all the three network option would be enabled:
7.If the Firewall is disabled then click on the Private (discoverable) network or Public (non-discoverable) network to disable the firewall for the selected type of network.
8.On the next page, Enable the option Windows Firewall.
This is how you enable Windows 10 Firewall but if you need to disable it then you need to follow the below methods. Basically, there are two ways via which you can disable Firewall, one is using Control Panel and other is using Command Prompt.
Method 2 – Disable Windows Firewall using Control Panel
To disable the Windows Firewall using Control Panel follow the below steps:
1.Open Control Panel by searching it under Windows search.
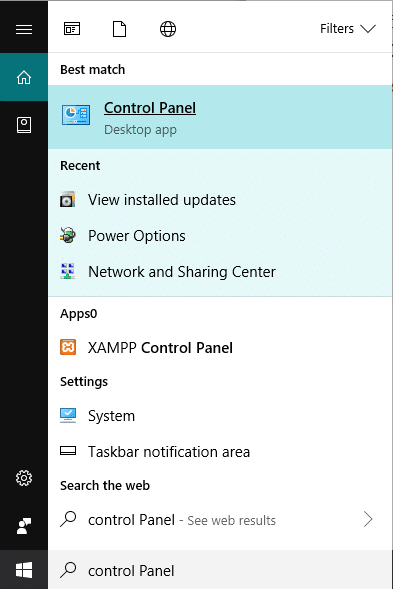
Note: Press Windows Key + R then type control and hit Enter to open Control Panel.
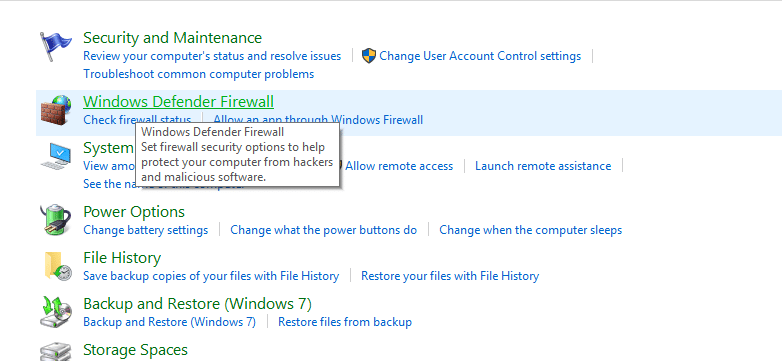
2. Click on System and Security tab under Control Panel.
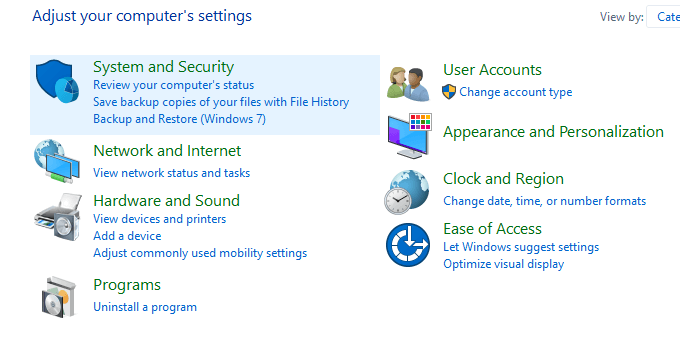
3.Under System and Security, click on Windows Defender Firewall.
4.From the left-window pane click on Turn Windows Defender Firewall on or off.
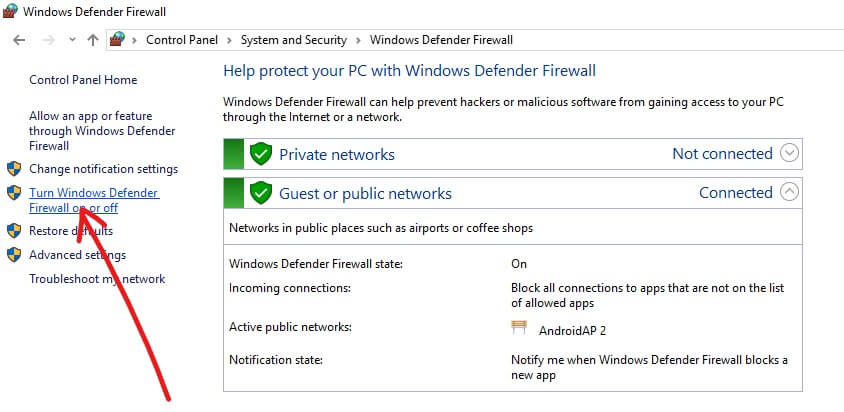
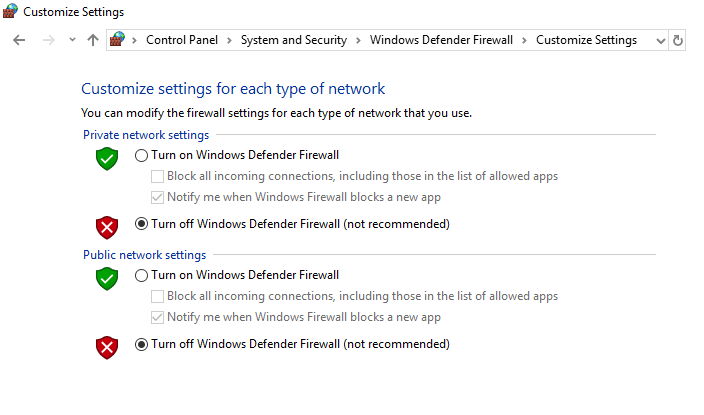
5.Below screen will open up which shows different radio buttons to either enable or disable Windows Defender Firewall for Private and Public network settings.
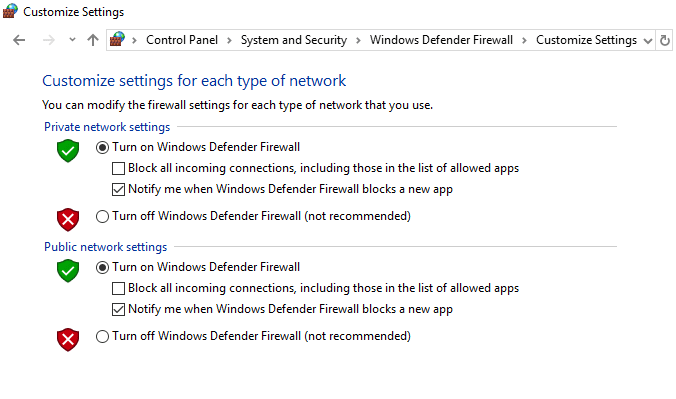
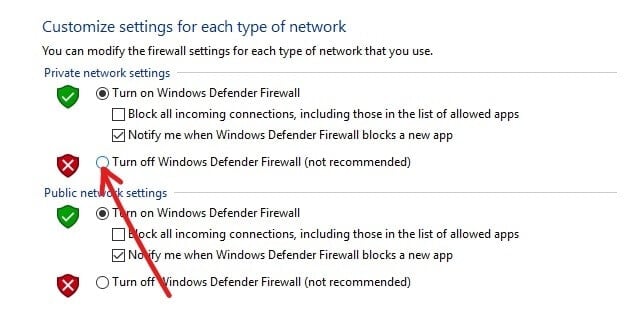
6.To turn off Windows Defender Firewall for Private network settings, click on the Radio button to checkmark it next to Turn off Windows Defender Firewall (not recommended) under Private network settings.
7.To turn off Windows Defender Firewall for Public network settings, checkmark “Turn off Windows Defender Firewall (not recommended)” under Public network settings.

Note: If you want to turn off Windows Defender Firewall for both Private and Public network settings, checkmark the radio button next to Turn off Windows Defender Firewall (not recommended) under both Private & Public network settings.
8.Once you have made your choices, click on the OK button to save the changes.
9.Finally, your Windows 10 Firewall will be disabled.
If in future, you need to enable it again then again follow the same step then checkmark “Turn on Windows Defender Firewall” under both Private & Public network settings.
Method 3 – Disable Windows 10 Firewall using Command Prompt
To disable the Windows Firewall using Command prompt follow the below steps:
1.Press Windows Key + X then select Command Prompt (Admin).

2.You can use the following commands to disable Windows 10 Firewall:
Disable Windows Firewall for all network types (profiles): netsh advfirewall set allprofiles state off
Disable Windows Firewall for the active profile only: netsh advfirewall set currentprofile state off
Disable Windows Firewall for the domain profile: netsh advfirewall set domainprofile state off
Disable Windows Firewall for the private profile: netsh advfirewall set privateprofile state off
Disable Windows Firewall for the public profile: netsh advfirewall set publicprofile state off
Note: To revert any of the above commands and re-enable Windows Firewall: netsh advfirewall set allprofiles state off
3.Alternatively, type the below command in the command prompt:
control firewall.cpl
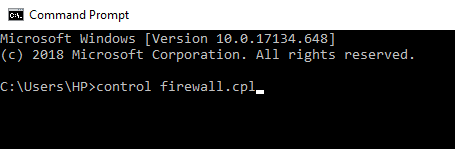
4.Hit the enter button and below screen will open up.

5.Click on Turn Windows Defender Firewall on or off available under the left window pane.
6.To turn off Windows Defender Firewall for Private network settings, checkmark the Radio button next to Turn off Windows Defender Firewall (not recommended) under Private network settings.
7.To turn off Windows Defender Firewall for Public network settings, checkmark the Radio button next to Turn off Windows Defender Firewall (not recommended) under Public network settings.
Note: If you want to turn off Windows Defender Firewall for both Private and Public network settings, checkmark the radio button next to Turn off Windows Defender Firewall (not recommended) under both Private & Public network settings.
8.Once you have made your choices, click on the OK button to save the changes.
9.After completing the above steps, your Windows 10 Firewall is disabled.
You can enable Windows Firewall again anytime whenever you want, by simply clicking on the radio button next to “Turn on Windows Defender Firewall” for both Private and Public network settings and click on the Ok button to save the changes.
Recommended:
I hope this article was helpful and you can now easily Disable Windows 10 Firewall, but if you still have any questions regarding this tutorial then feel free to ask them in the comment’s section.