Imagine you get an important work call that you need to get a document finished by the end of the day but you don’t have access to your work computer. Fortunately, if you are a Windows 11 Pro user, you can use the Remote desktop feature to connect to your work computer from anywhere as long it is connected to the internet. Chrome Remote Desktop is a utility from Google which can help you to connect your other computer that is out of reach at the moment. You can even use it to provide or receive help remotely. In this article, we are going to see how to enable, set up, and use Chrome Remote Desktop on Windows 11.
How to Set up, Enable & Use Chrome Remote Desktop on Windows 11
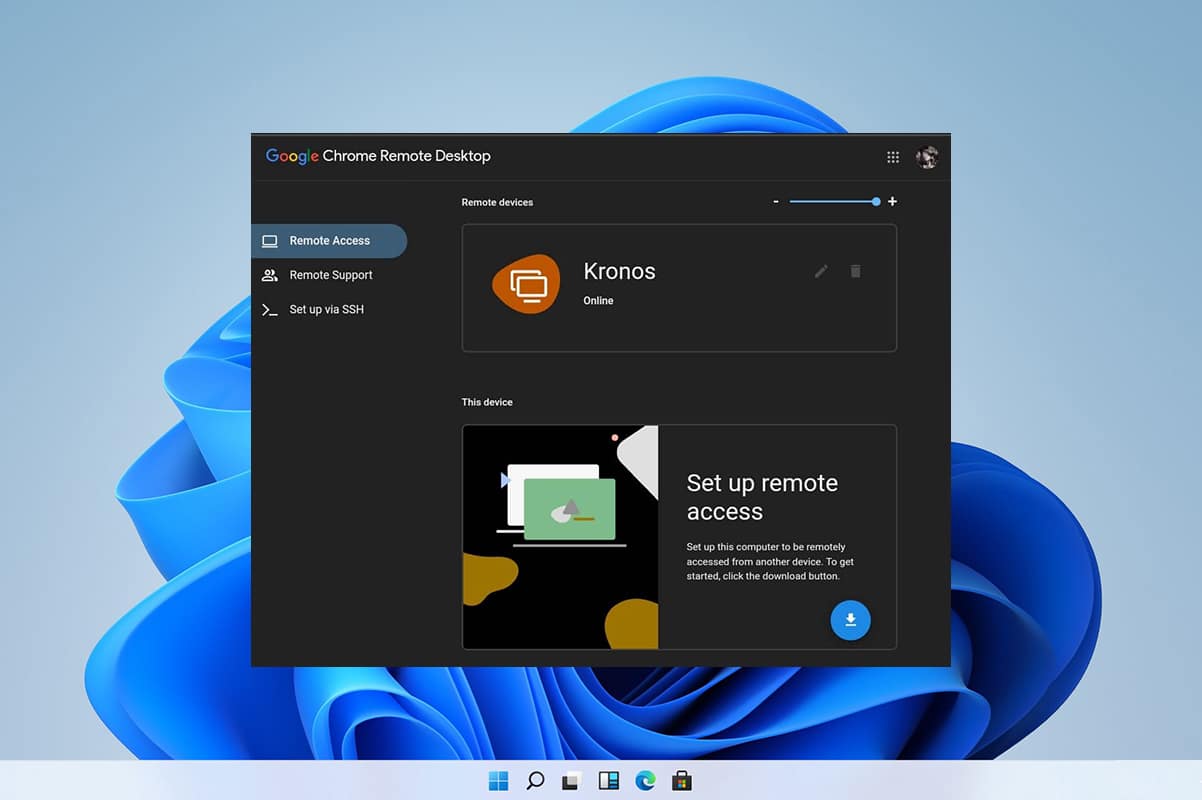
Chrome Remote Desktop is a tool made by Google which allows you to remotely control a desktop with features like file transferring and access to applications installed on the host desktop. Once set up, you can access the host desktop over the web from anywhere. This amazing utility can be used on your smartphone as well. Pretty cool, isn’t it?
Step I: Download and Set Up Google Remote Access
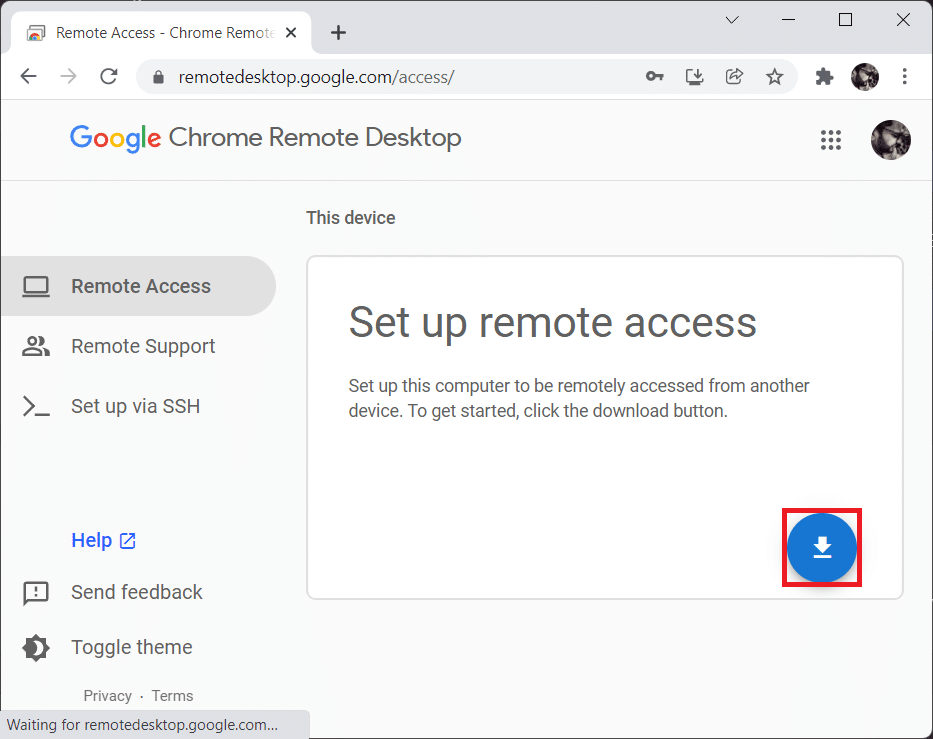
Firstly you will need to download and set up Google Remote Access, as follows:
1. Go to the Google Remote Desktop webpage and log in with your Google account.
2. Click the Download icon for Set up remote access, shown highlighted.
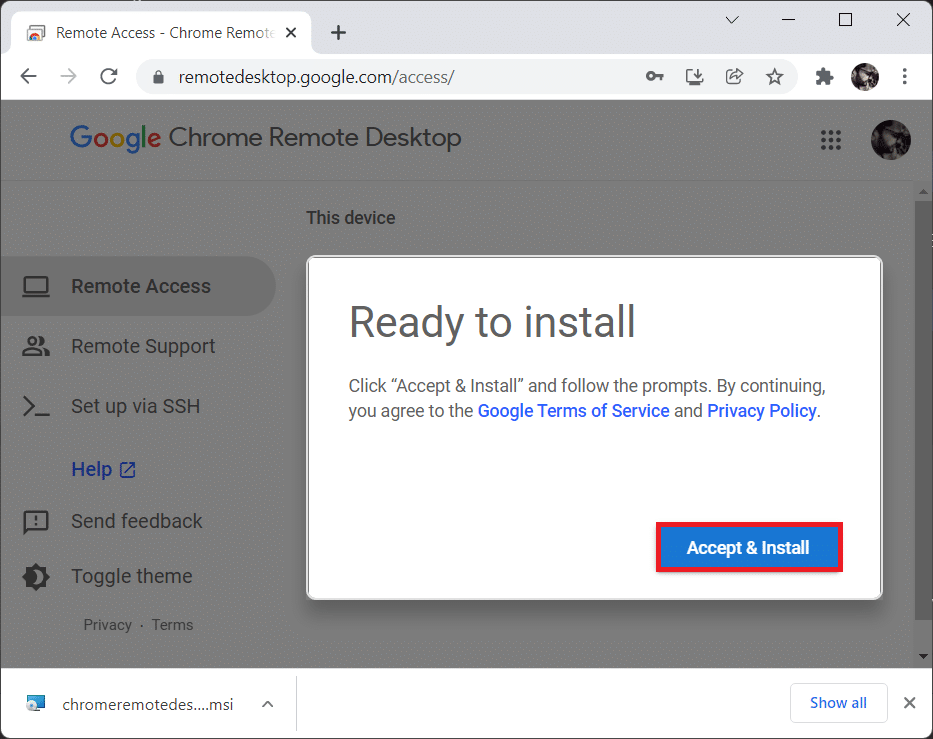
3. Click on Accept & Install button on the Ready to Install pop-up, as shown.
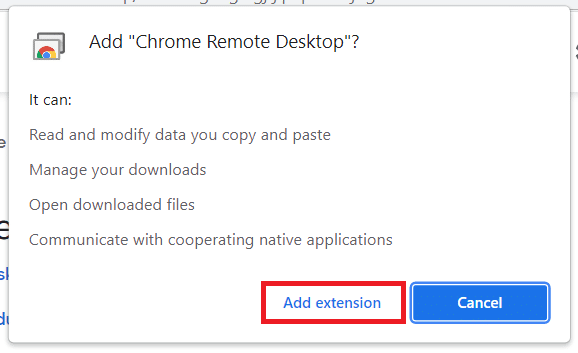
4. Click on Add to Chrome in the elevated Google Chrome tab.
5. Then, click on Add extension, as shown.
Also Read: How to Disable Google Software Reporter Tool
Step II: Enable Google Remote Access
Once the required extension has been added, you will need to install & enable it as follows:
1. Switch to the Google Remote Access tab and click on Accept & Install button.
2. Click on Yes in the small confirmation prompt asking to open the downloaded chrome remote desktop executable file.
3. Click on Yes in the User Account Control confirmation pop-up as well.
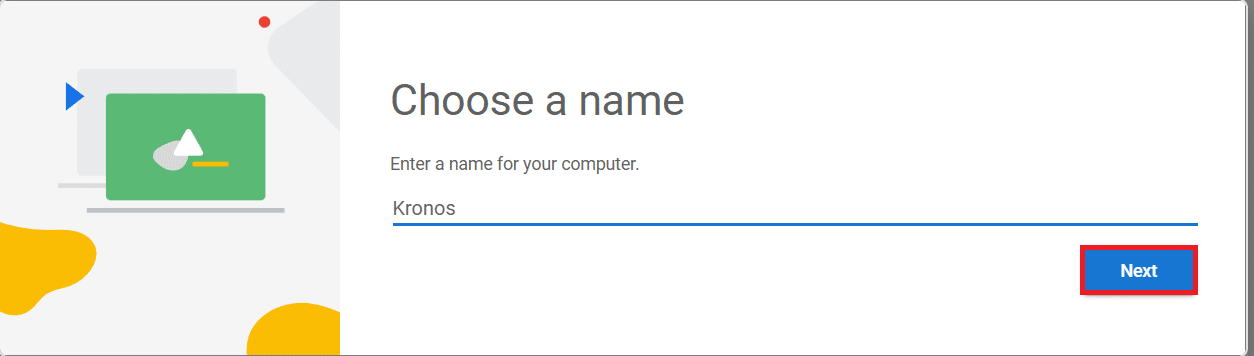
4. Enter the name of your choice for your computer in the Choose a name screen and click Next, as depicted below.
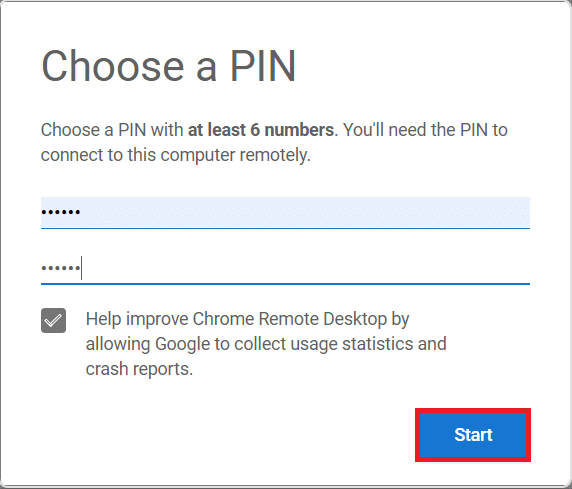
5. Choose a PIN to act as a password to access your computer remotely on the next screen. Re-enter PIN and click on Start.
6. Click on Yes in the User Account Control prompt once again.
Now, your system is ready to connect remotely.
Also Read: How to Enable Windows 11 UI Style in Chrome
Step III: Connect Remotely to Other PC
Follow the steps listed below to connect remotely to another PC:
1. Visit Google Remote Access webpage and Log in again with the same Google account as used in Step I.
2. Click on Remote Access tab in the left pane.
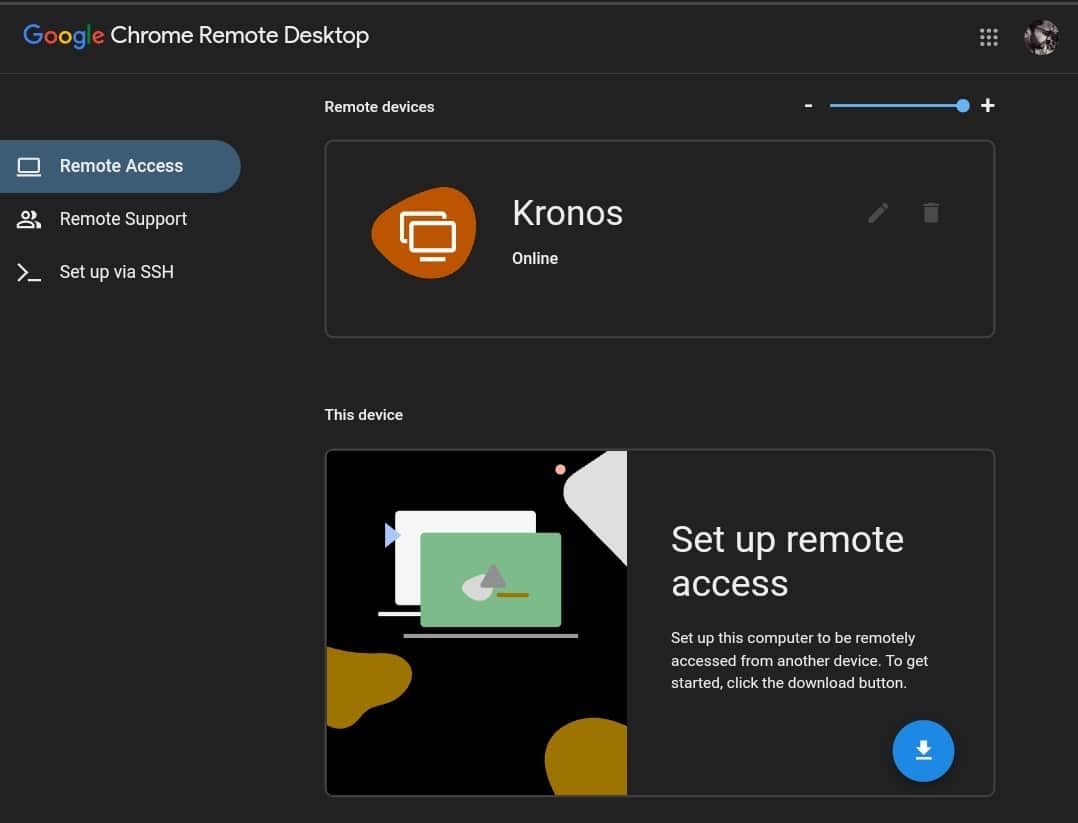
3. Then, click on the device name that you set up in Step II.
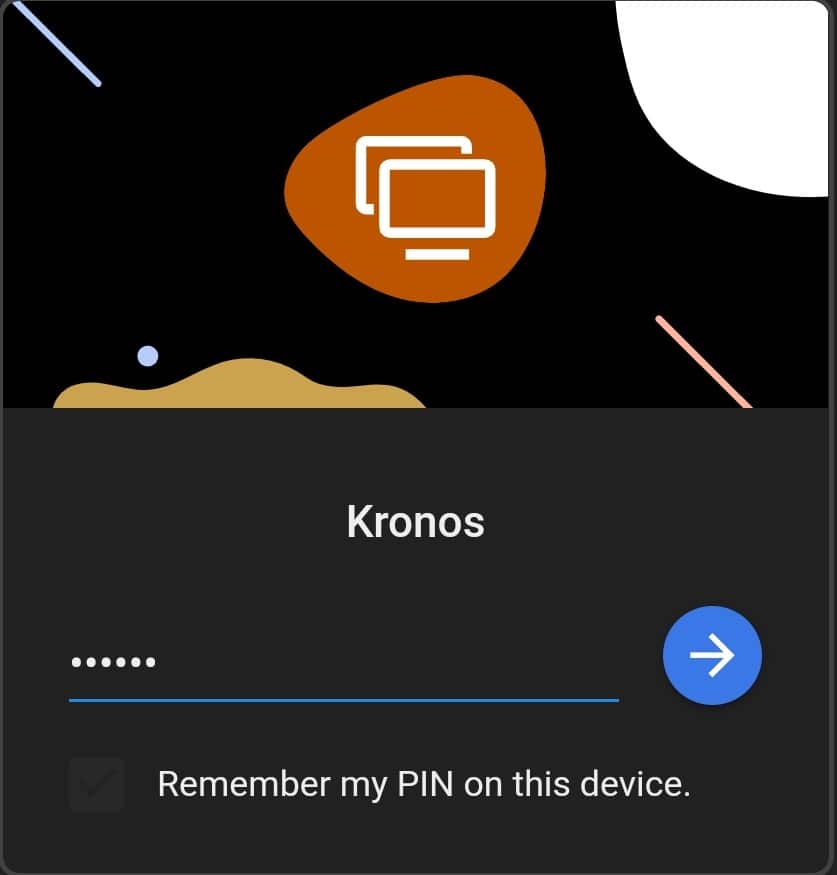
4. Enter the PIN for the device and click on the blue arrow icon, as depicted below.
Also Read: How to Remove Duplicate Files in Google Drive
Step IV: Change Session Options & Settings to Fit Your Needs
Follow the given steps below to change session settings for Chrome Remote Desktop on Windows 11 to fit your requirements:
1. In the Remote Desktop tab, click on the left-pointing arrow icon on the right-hand side.
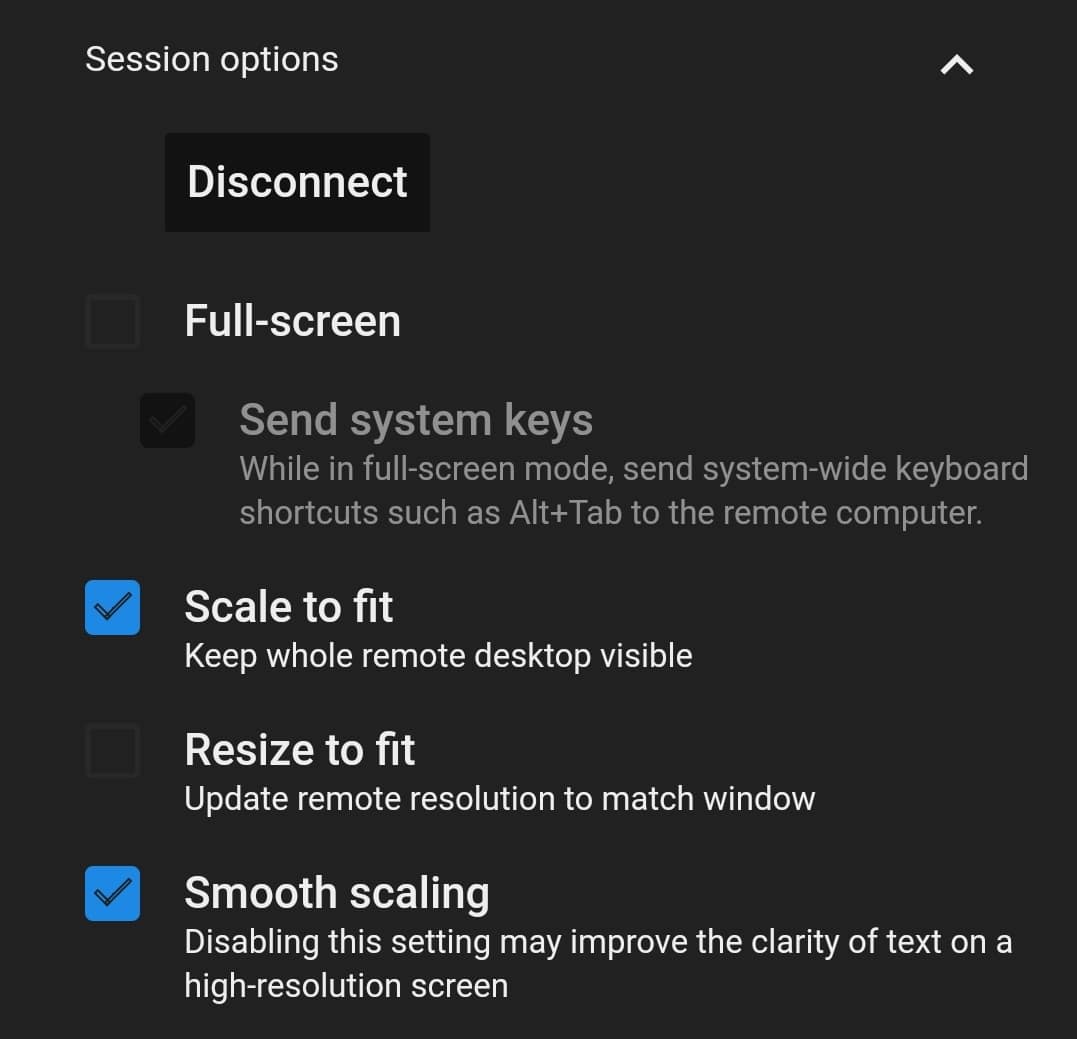
2. Under Session Options, modify the given options as needed:
- Full-screen
- Scale to fit
- Resize to fit
- Smooth scaling
3A. Click on Configure keyboard shortcuts under Input Control to view and change keyboard shortcuts.
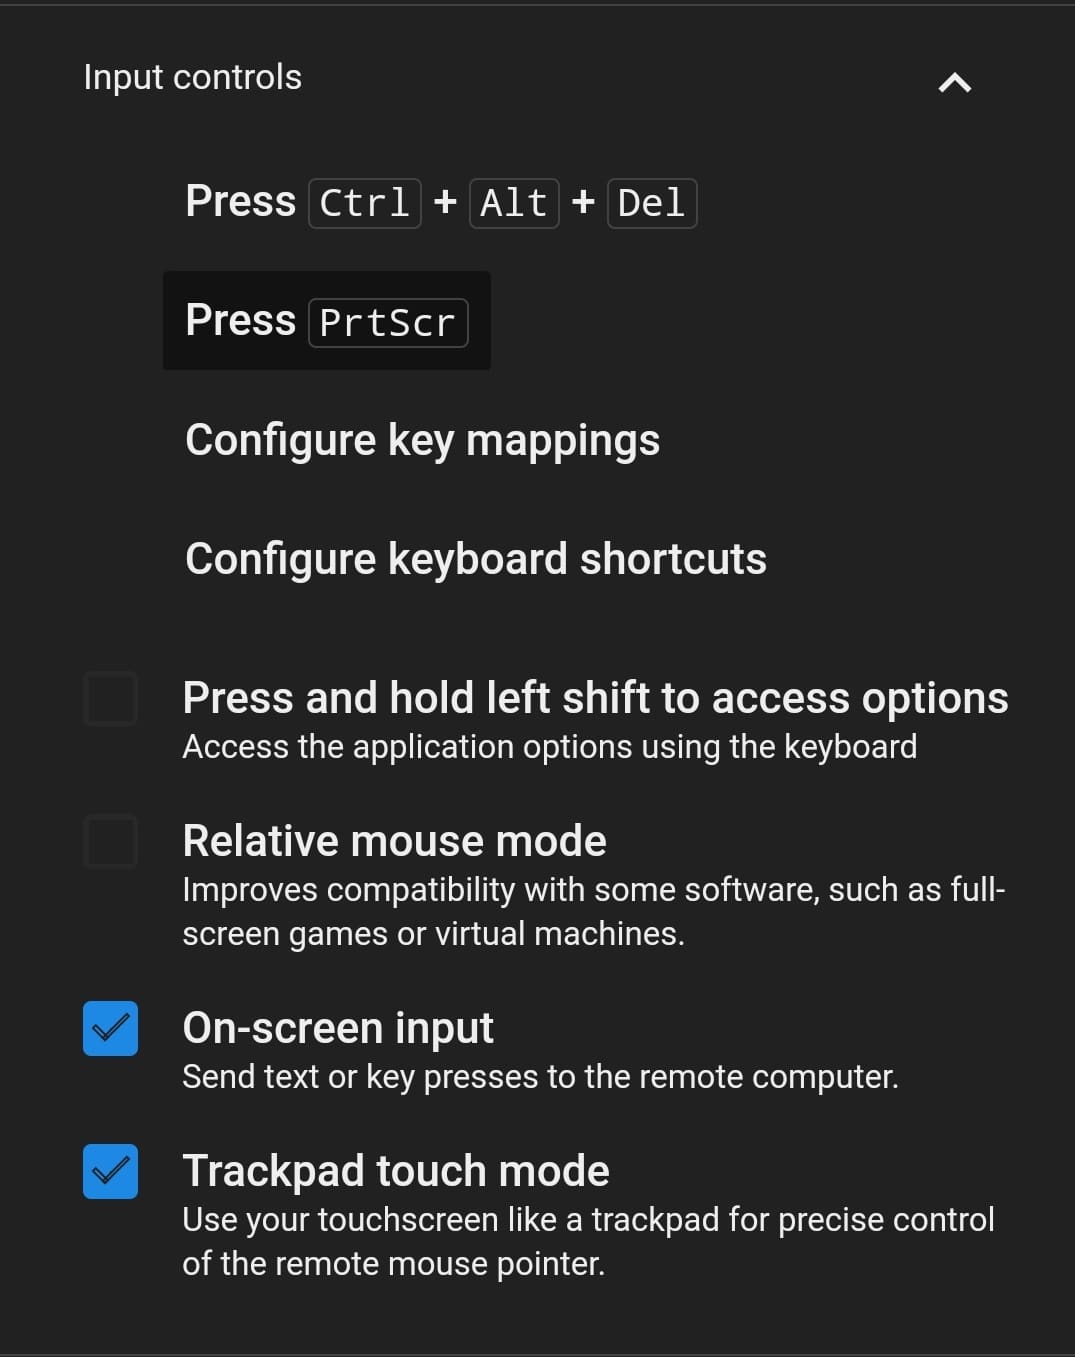
3B. Click on Change to change the Modifier key. This key which when pressed together with the keys allotted to the shortcuts will not send the keyboard shortcut keystrokes to the remote desktop.
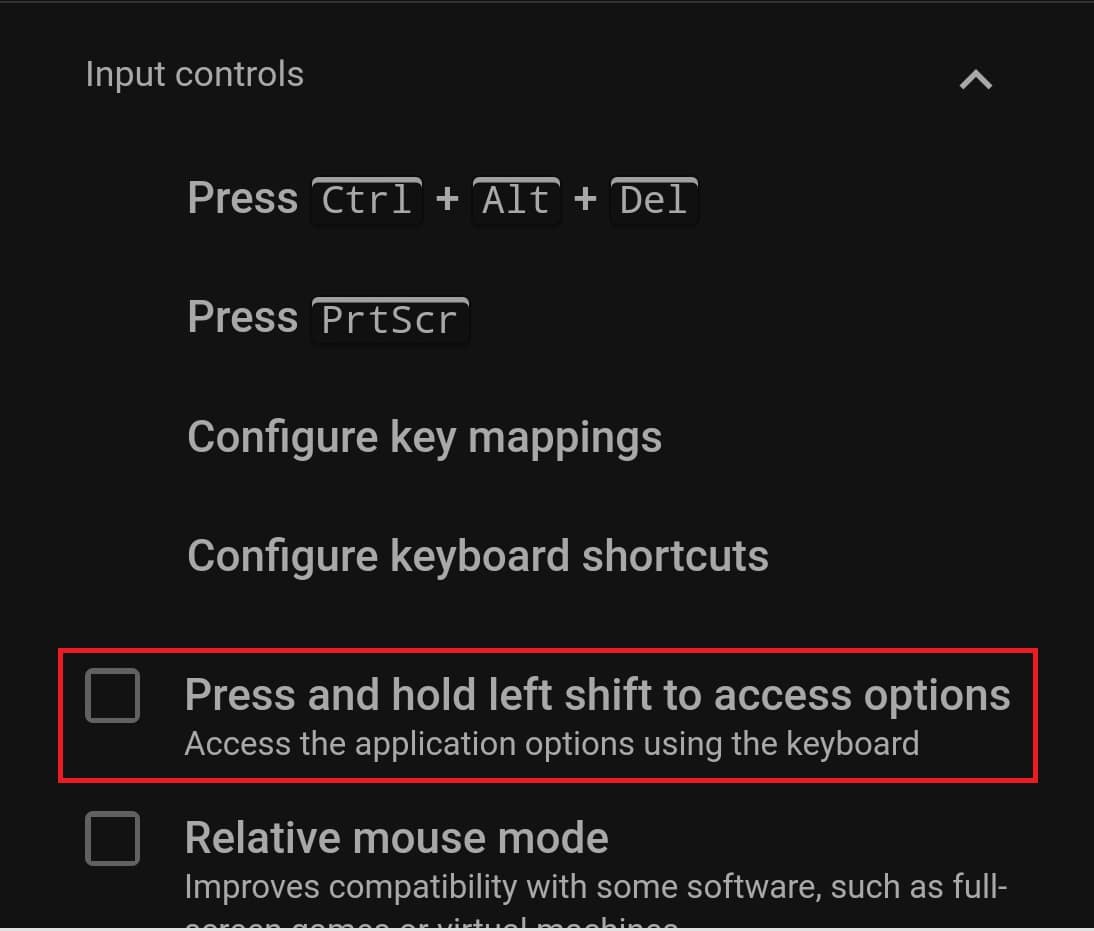
4. Moreover, check the box marked Press and hold left shift to access options shown highlighted, to access the given options quickly.
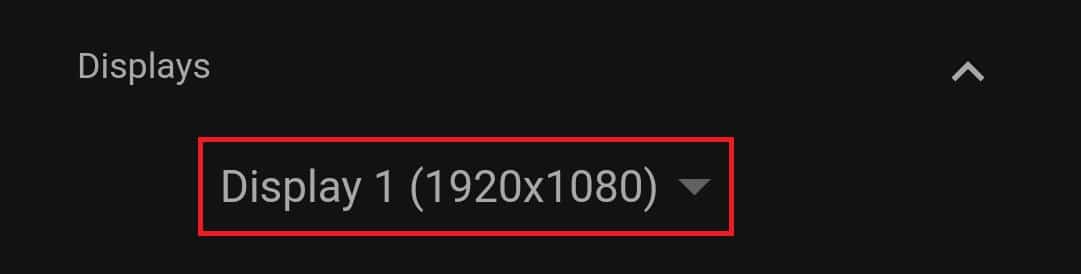
5. To display the remote desktop on a secondary display, use the drop-down list under Displays.
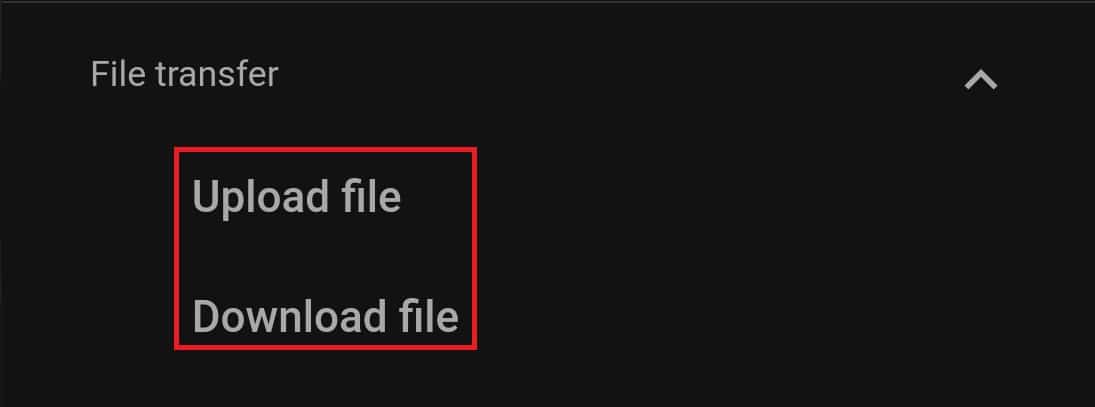
6. Using the options under File transfer, Upload file or Download file, as and when needed.
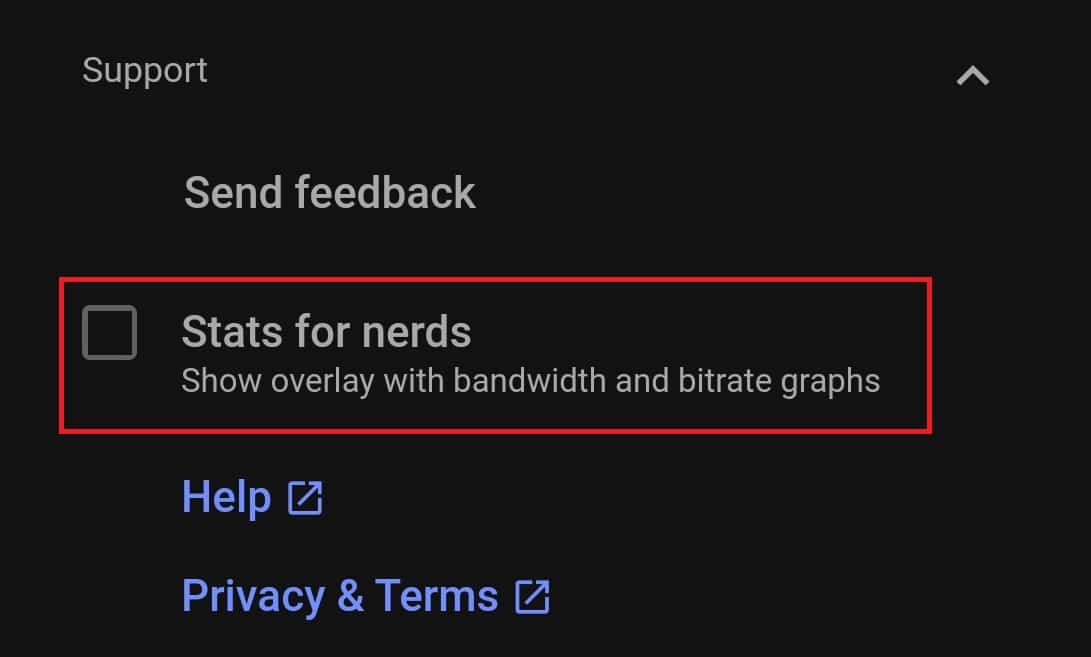
7. Furthermore, mark the box for Stats for nerds under Support section to view additional data like:
- bandwidth,
- frame quality,
- codec,
- network delay, etc.
8. You can pin the Options panel by clicking on the pin icon on the top of it.
9. To disconnect, click on Disconnect under Session options, as depicted.

Also Read: How to Download and Install Bing Wallpaper for Windows 11
Step V: Adjust Remote Device Properties
You can further explore Remote Access tab to configure Chrome Remote Desktop in Windows 11 as well. Here’s how you can do so:
1A. By clicking on the pencil icon in the right-hand corner, you can change the name of Remote Desktop.
1B. Or, click on the Bin icon to delete Remote Desktop from the list.
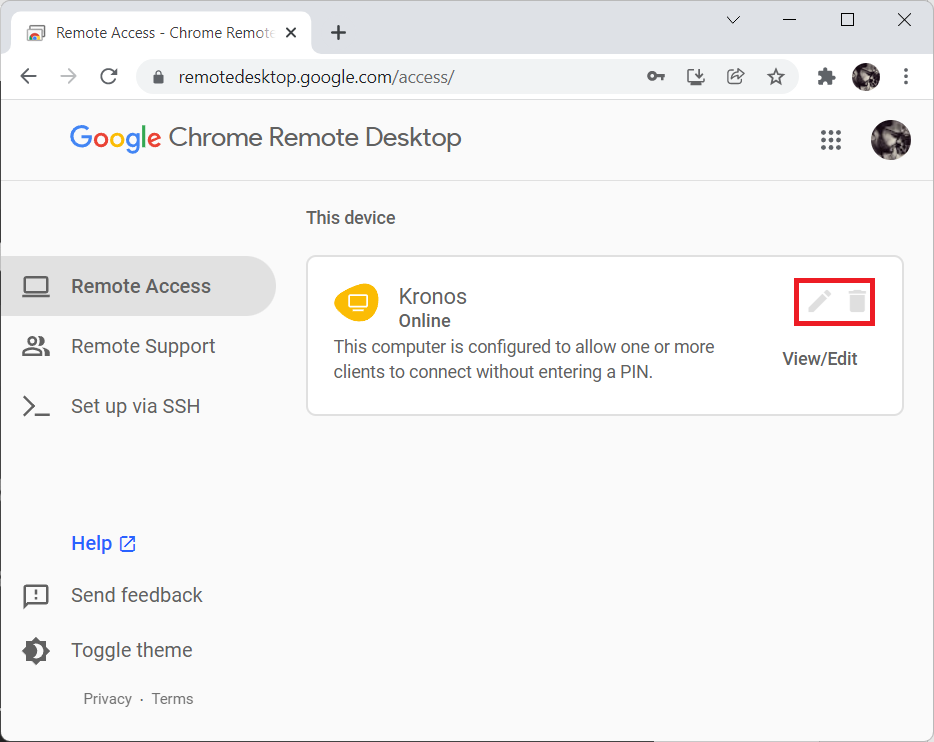
2. Click on OK in the confirmation prompt to save these changes for Remote Desktop.
Recommended:
Hope this article will help you understand how to use Chrome Remote Desktop on Windows 11. You can use the comment box below to send us your suggestions and question.