How to Encrypt Your Windows System Drive With VeraCrypt

VeraCrypt is a free and open-source disk encryption software program that can be utilized to encrypt your whole Home windows system drive. This is an in depth information on the way to encrypt your Home windows system drive with VeraCrypt:
NecessaryObserve:
- Encryption is a everlastingcourse of. When you encrypt your drive, you may want a password (or passphrase) to entry your information. Dropping this password will end in everlasting information loss.
- Backup EssentialKnowledge: Earlier than continuing, it is essential to again up all of your essential information to an exterior drive or cloud storage. Encryption can take time, and there is at all times a small threat of one thing going improper throughout the course of.
- System Necessities: Be sure your laptop meets the minimal system necessities for VeraCrypt. You will discover them on the VeraCrypt web site https://www.veracrypt.fr/code/VeraCrypt/.
Steps to Encrypt Your System Drive with VeraCrypt:
-
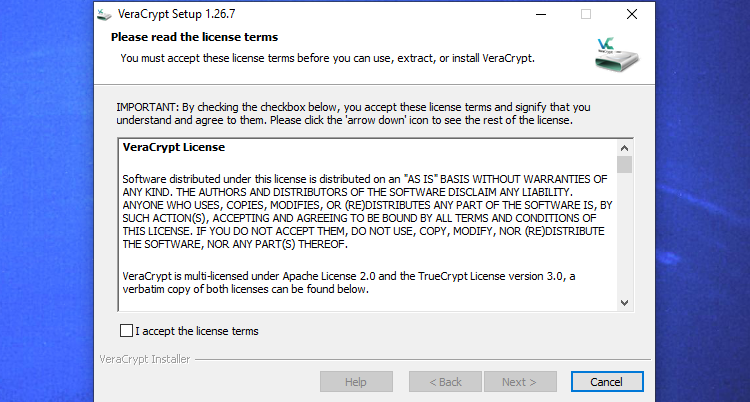
Obtain and Set up VeraCrypt: Obtain the most recent model of VeraCrypt for Home windows from the official web site https://www.veracrypt.fr/code/VeraCrypt/. Select the suitable installer (32-bit or 64-bit) based mostly in your system structure. Run the downloaded installer and comply with the on-screen directions to finish the set up.
-
Launch VeraCrypt: Open VeraCrypt out of your Begin menu or desktop shortcut.
-
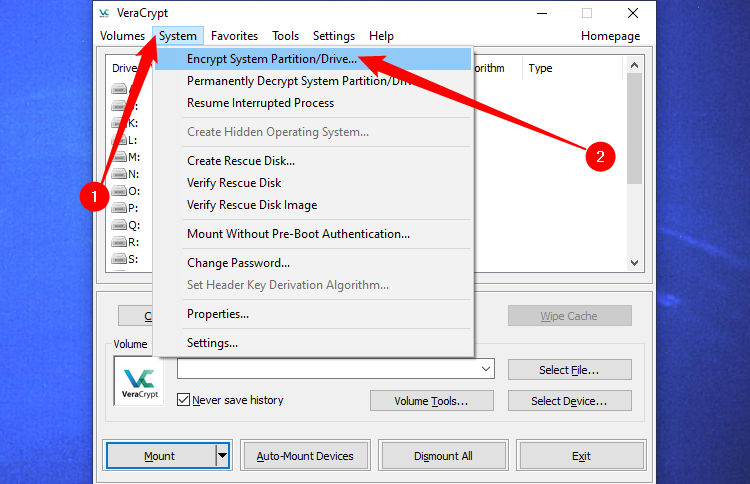
Choose Encryption Possibility: Within the VeraCrypt most important window, click on on “System” within the menu bar and choose “Encrypt System Partition/Drive” from the dropdown menu.
-
Select Encryption Sort: A wizard will seem guiding you thru the encryption course of. Within the first window, choose “Encrypt the system partition or whole drive” and click on “Subsequent.”
-
Choose Drive Choice: Right here, you may see a listing of accessible drives. Be sure to decide on the right drive that comprises your Home windows system (normally Drive C:). Double-check the drive choice earlier than continuing, as encrypting the improper drive can result in information loss. Click on “Subsequent” to proceed.
-
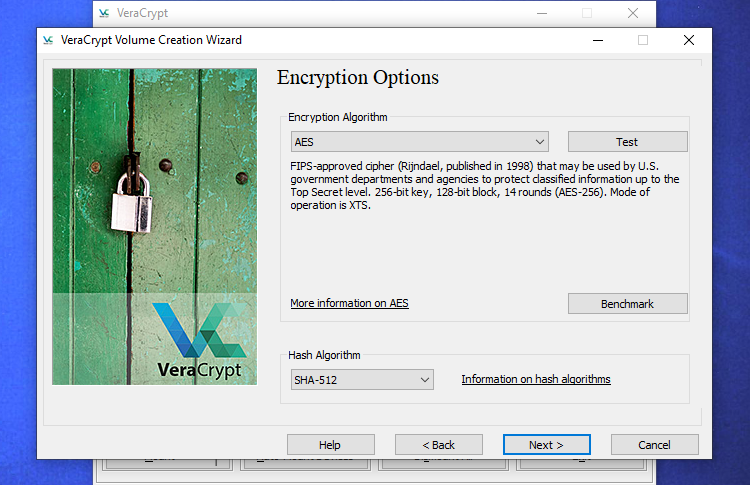
Encryption and Hashing Choices: VeraCrypt presents varied encryption algorithms and hash algorithms. For many customers, the default settings (AES-256 in CBC mode and SHA-256) are safe and really useful. You’ll be able to go away these settings unchanged except you’ve a selected purpose to switch them. Click on “Subsequent” to proceed.
-
Boot Loader Set up: VeraCrypt will set up its bootloader onto a separate partition throughout encryption. This bootloader is liable for prompting you in your password earlier than Home windows begins. You might have two choices right here:
-
Possibility 1: Set upthe brand new bootloader to a brand new system partition (really useful): That is the really useful possibility for many customers. VeraCrypt will robotically create a brand new partition and set up the bootloader there. Click on “Subsequent” to proceed.
-
Possibility 2: Set up the bootloader to an current partition: If in case you have an current unencrypted partition with sufficient free area, you’ll be able to select to put in the bootloader there. Nevertheless, this feature is usually not really useful for inexperienced persons because it includes extra guide steps.
-
-
Password Setup: It is a vital step. Set a robust and memorable password (or passphrase) to encrypt your system drive. The energy of your password is essential for the safety of your information. Listed below are some ideas for creating a robust password:
- Use a mixture of higher and lowercase letters, numbers, and symbols.
- Make it at the very least 15 characters lengthy, and even longer for max safety.
- Keep away from utilizing private data like birthdays or names in your password.
- Do not reuse passwords throughout completely different accounts or companies.
VeraCrypt will immediate you to re-enter your password for affirmation. Write down your password and retailer it securely (ideally not in your laptop) in case you neglect it. Click on “Subsequent” to proceed.
-
Encryption Choices: Right here, you’ll be able to select what number of sectors of your drive to overwrite with random information throughout encryption. This course of helps be certain that any remnants of previous information are destroyed. The default possibility (3 passes) is really useful and offers an excellent stability between safety and efficiency. Click on “Subsequent” to proceed.
-
Encryption Course of: VeraCrypt will now start the encryption course of. This may take a major period of time relying on the dimensions and velocity of your drive. It is really useful to go away your laptop uninterrupted throughout this course of. VeraCrypt will show the progress on the display screen.
-
Check Mode (Optionally available): As soon as the encryption course of is full, VeraCrypt will supply an non-obligatory take a look at mode. This lets you boot your system utilizing the brand new bootloader and confirm that every part works accurately earlier than completely changing the previous bootloader. It is really useful to carry out a take a look at boot earlier than continuing.
-
Actual Boot (Optionally available): If the take a look at boot is profitable, you’ll be able to proceed with the true boot possibility. It will completely exchange the previous bootloader and require your password each time you
See Also:
How to View YouTube Comment History on Windows 10
How to Manage User Account Settings in Windows 11
How to Change Your Keyboard Layout in Windows 11
Key Takeaways
- VeraCrypt is a free and open-source software that permits full-disk encryption on Home windows PCs, offering safety for delicate information towards theft or unauthorized entry.
- Establishing VeraCrypt is straightforward, and guides customers by means of the encryption course of and recommends safe password practices. VeraCrypt handles the encryption within the background, permitting regular use of the pc.
- VeraCrypt presents the choice to create hidden working methods for added safety, offering believable deniability.
Some Home windows 10 gadgets ship with “Gadget Encryption”, however different PCs require you to pay one other $99 to get BitLocker on Home windows Professional for full-disk encryption. Should you’d reasonably not, you need to use the free and open-source VeraCrypt software program to get full-disk encryption on any model of Home windows.
This Cybersecurity Consciousness Week article is dropped at you in affiliation with Incogni.
What’s VeraCrypt?
VeraCrypt is a free and open-source software you need to use to allow full-disk encryption on any Home windows PC. It really works on each Home windows 10 and Home windows 11, however it’ll work on earlier variations of Home windows too.
It is not difficult to make use of, both: After setting it up, you simply need to enter your encryption password every time you boot your PC. You utilize your laptop usually after it boots. VeraCrypt handles the encryption within the background, and every part else occurs transparently. It will possibly additionally create encrypted file containers, which is tremendous helpful, however we’re specializing in encrypting your system drive right here.
VeraCrypt is a challenge based mostly on the supply code of the previous TrueCrypt software program, which was discontinued. VeraCrypt has a wide range of bug fixes and helps fashionable PCs with EFI system partitions, a configuration most Home windows 10 PCs and all Home windows 11 PCs use.
What’s Full-Disk Encryption?
Encryption scrambles information into random-looking gibberish utilizing particular sorts of mathematical algorithms, guaranteeing that nobody can learn them with out a particular key or password.
Full-disk encryption does this to your your whole drive. That implies that even when somebody good points entry to your bodily laborious drive, they will want your password (or key file) to truly see what you’ve on the drive. In fact, this does not defend you towards malware that assaults your PC whereas it is operating — simply towards somebody stealing your PC or its laborious drive and making an attempt to view your information.
Given how a lot delicate information we retailer on our PCs, it is smart to guard it, similar to you would possibly a social safety quantity.
Why Use VeraCrypt to Encrypt Your Drive?
The first benefit of VeraCrypt is that you need to use it on nearly any laptop and it’s fully free. Home windows has BitLocker (which isn’t sometimes free), macOS has its personal built-in drive encryption, and Linux has a wide range of choices obtainable. VeraCrypt can run on any of them. You’ll be able to even apply it to gadgets with ARM-based processors, like a Raspberri Pi.
VeraCrypt additionally does an excellent job of guiding you thru the method and take the suitable precautions.
Methods to Set up VeraCrypt and Encrypt your System Drive
Obtain VeraCrypt to get began. Run the installer and choose the “Set up” possibility. You’ll be able to preserve all of the default settings within the installer — simply click on by means of it till VeraCrypt is put in in your laptop.
As soon as VeraCrypt is put in, open your Begin menu and launch the “VeraCrypt” shortcut.
Click on System > Encrypt System Partition/Drive within the VeraCrypt window to get began.
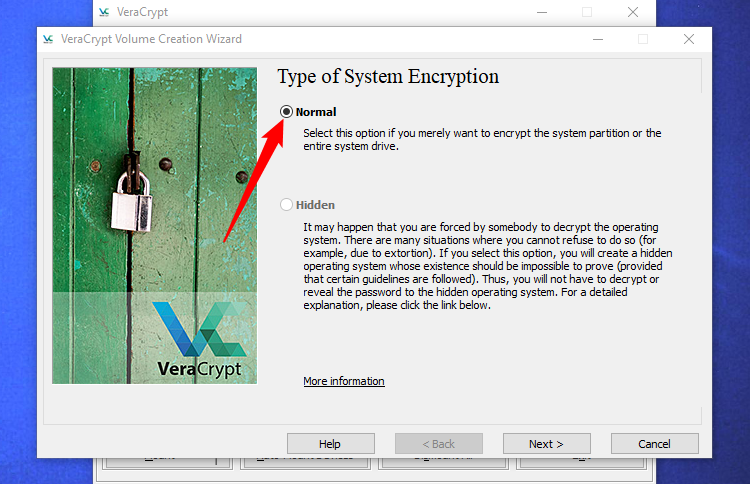
You may be requested whether or not you need to use “Regular” or “Hidden” system encryption.
The Regular possibility encrypts the system partition or drive usually. If you boot your laptop, you may have to supply your encryption password to entry it. Nobody will have the ability to entry your information with out your password.
The Hidden possibility creates an working system in a hidden VeraCrypt quantity. You may have each a “actual” working system, which is hidden, and a “decoy” working system. If you boot your PC, you’ll be able to enter the true password as well your hidden working system or the password to the decoy working system as well the decoy working system. If somebody is forcing you to supply entry to your encrypted drive — because of extortion, for instance — you’ll be able to present them with the password to the decoy working system they usually should not have the ability to inform there is a hidden working system in any respect.
When it comes to encryption, utilizing “Regular” encryption retains your information simply as safe. A “Hidden” quantity solely helps in the event you’re pressured to reveal your password to somebody and need to keep believable deniability concerning the existence of every other information.
Should you’re undecided which you need, choose “Regular” and proceed. We’ll be going by means of the method of making a traditional encrypted system partition right here, as that is what most individuals will need. Seek the advice of VeraCrypt’s documentation for more information about hidden operating systems.
You’ll be able to select to both “Encrypt the Home windows system partition” or “Encrypt the entire drive”. It is as much as you which of them possibility you favor.
If the Home windows system partition is the one partition on the drive, the choices might be principally the identical. Should you simply need to encrypt your Home windows system partition and go away the remainder of the drive alone, select “Encrypt the Home windows system partition”.
If in case you have a number of partitions with delicate information — for instance, a system partition at C: and a information partition at D: — choose “Encrypt the entire drive” to make sure all of your Home windows partitions are encrypted.

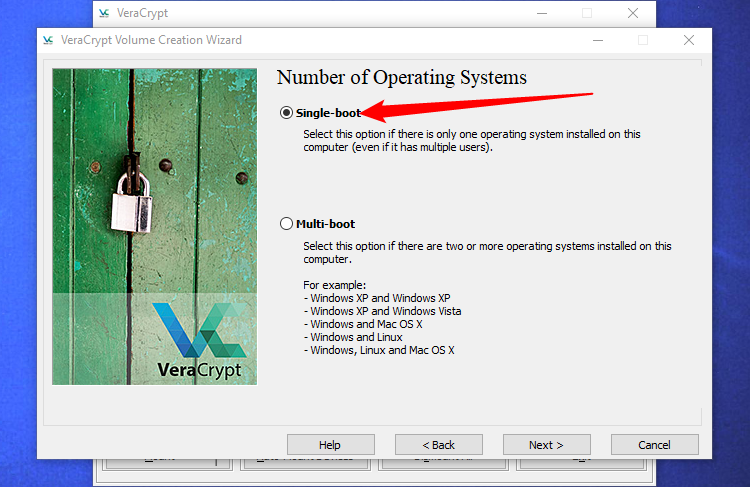
VeraCrypt will ask what number of working methods you’ve in your PC. Most individuals solely have a single working system put in and may select “Single-boot”. If in case you have a couple of working system put in and also you select between them while you boot your laptop, choose “Multi-boot”.
You may then be requested to decide on which kind of encryption you need to use. Whereas there are a number of choices obtainable, we advocate sticking with the default settings. “AES” encryption and the “SHA-256” hash algorithm are good decisions. They’re all strong encryption schemes.
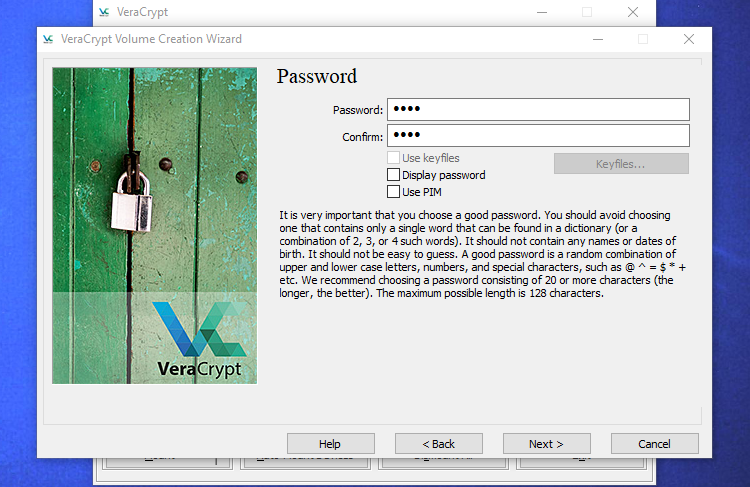
You may then be requested to enter a password. As VeraCrypt’s wizard notes, it is essential to decide on an excellent password. Selecting an apparent or easy password will make your encryption susceptible to brute-force assaults.
The wizard recommends selecting a password of 20 extra extra characters. You’ll be able to enter a password of as much as 64 characters. An excellent password is a random mixture of various kinds of characters, together with higher and decrease case letters, numbers, and symbols. You may lose entry to your information in the event you ever lose the password, so be sure to keep in mind it.
There are a number of extra choices right here, however they don’t seem to be obligatory. You’ll be able to go away these choices alone except you need to use them:
- Use keyfiles: You’ll be able to select to allow “Use keyfiles” and supply some information that should be current — for instance, on a USB drive — when unlocking your drive. Should you ever lose the information, you may lose entry to your drive.
- Show password: This selection simply unhides the password within the password fields on this window, permitting you to verify that what you have typed is right.
- Use PIM: VeraCrypt permits you to set a “Private Iterations Multiplier” by enabling the “Use PIM” checkbox. The next worth can assist stop towards brute power assaults. You may additionally want to recollect no matter quantity you enter and enter it alongside your password, supplying you with one thing else to recollect along with your password.
Choose any of those choices if you need them and click on Subsequent.
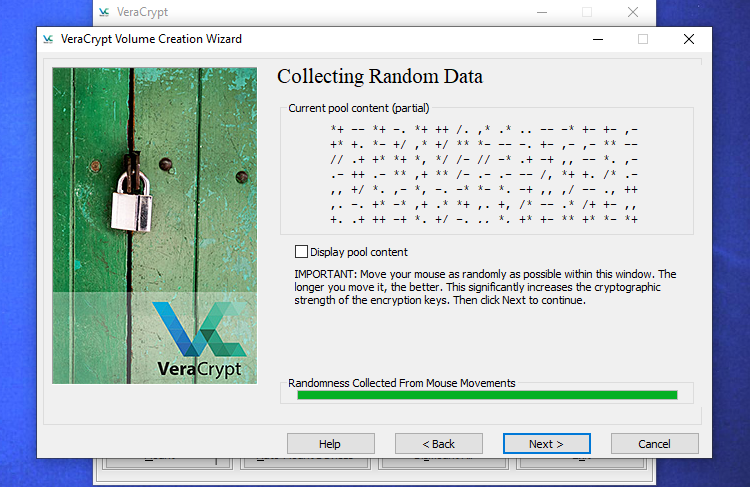
VeraCrypt will ask you to maneuver your mouse randomly round contained in the window. It makes use of these random mouse actions to extend the energy of your encryption keys. If you’ve stuffed up the meter, click on “Subsequent”.
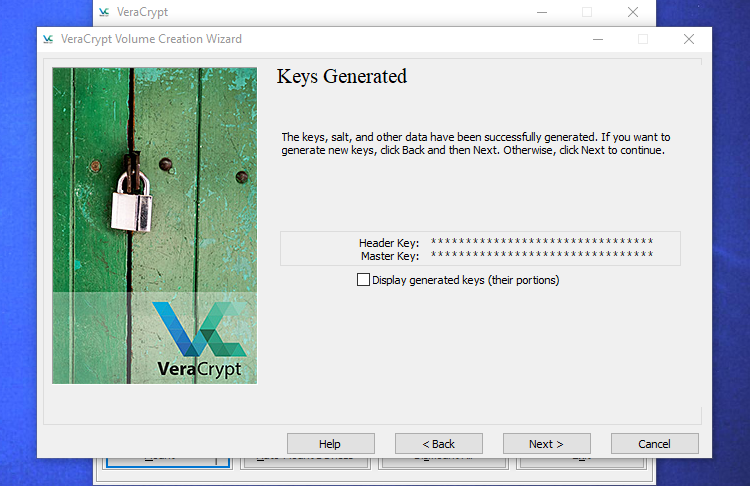
The wizard will inform you it is generated the encryption keys and different information it wants. Click on “Subsequent” to proceed.
The VeraCrypt wizard will power you to create a VeraCrypt Rescue Disk picture earlier than persevering with.
In case your bootloader or different information ever will get broken, you could boot from the rescue disk if you wish to decrypt and entry your information. The disk may even comprise a backup picture of the contents of the start of the drive, which is able to mean you can restore it if obligatory.
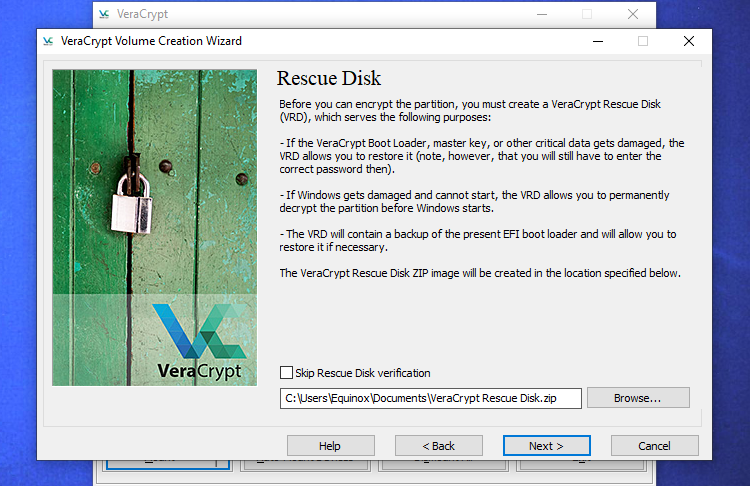
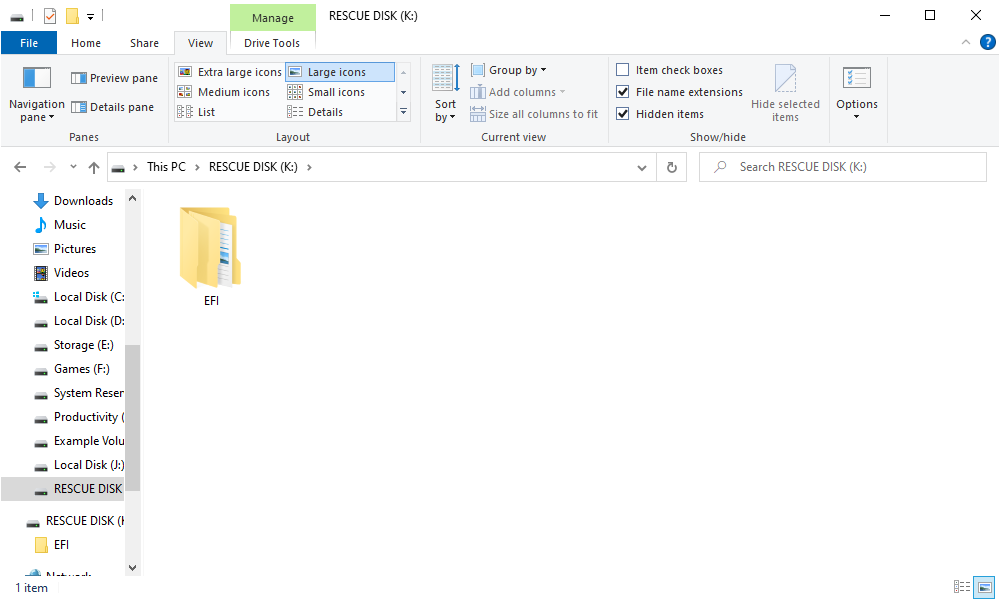
Observe that you will nonetheless want to supply your password when utilizing the rescue disk, so it is not a golden key that permits entry to all of your information. VeraCrypt will merely create a rescue disk ZIP at “C:UsersNAMEDocumentsVeraCrypt Rescue Disk.zip” by default. You may must extract the EFI folder from the ZIP to a flash drive or burn it to a disk. VeraCrypt will affirm that you have performed this accurately while you click on “Subsequent” a number of occasions.
Remember to burn a duplicate of the rescue disk so you’ll be able to entry your information if there’s ever an issue. You’ll be able to’t simply reuse the identical VeraCrypt rescue disk on a number of computer systems. You want a singular rescue disk for every PC! Seek the advice of VeraCrypt’s documentation for more information about VeraCrypt rescue disks.
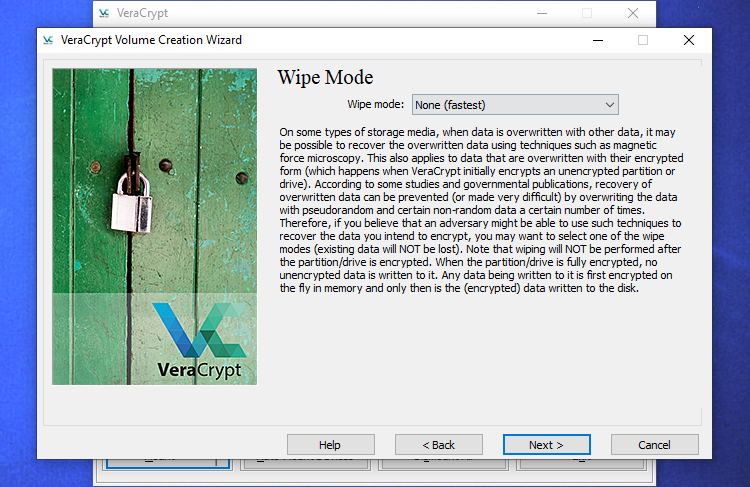
Subsequent, you may be requested for the “wipe mode” you need to use.
If in case you have delicate information in your drive and also you’re involved somebody would possibly try to look at your drive and get better the info, it is best to choose at the very least “1-pass (random information)” to overwrite your unencrypted information with random information, making it tough to not possible to get better.
Should you’re not involved about this, choose “None (quickest)”. It is quicker to not wipe the drive. The bigger the variety of passes, the longer the encryption course of will take.
This setting solely applies to the preliminary setup course of. After your drive is encrypted, VeraCrypt will not must overwrite any encrypted information to guard towards information restoration.
VeraCrypt will now confirm every part is working accurately earlier than it encrypts your drive. Click on “Check” and VeraCrypt will set up the VeraCrypt bootloader in your PC and restart. You may need to enter your encryption password when it boots.
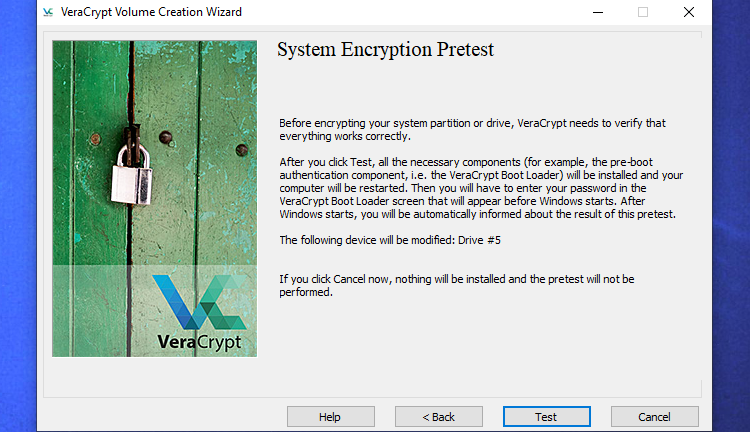
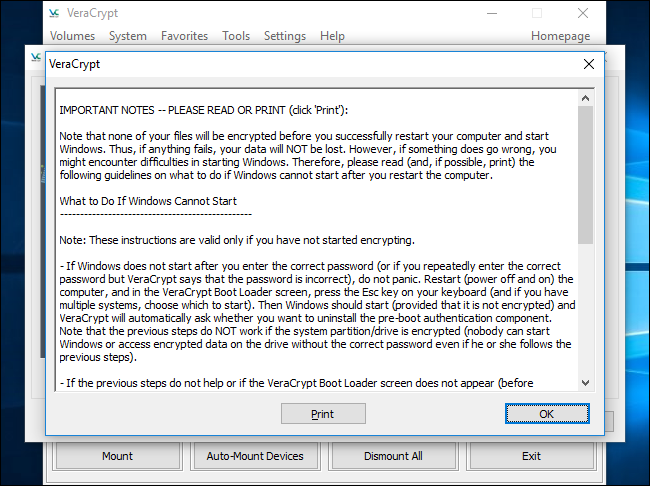
VeraCrypt will present details about what to do if Home windows does not begin. If Home windows does not begin correctly, it is best to restart your PC and press the “Esc” key in your keyboard on the VeraCrypt bootloader display screen. Home windows ought to begin and ask if you wish to uninstall the VeraCrypt bootloader.
If that does not work, it is best to insert the VeraCrypt rescue disk into your PC and boot from it. Choose Restore Choices > Restore Unique System Loader within the rescue disk interface. Restart your PC afterwards.
Click on “OK” after which click on “Sure” to restart your PC.
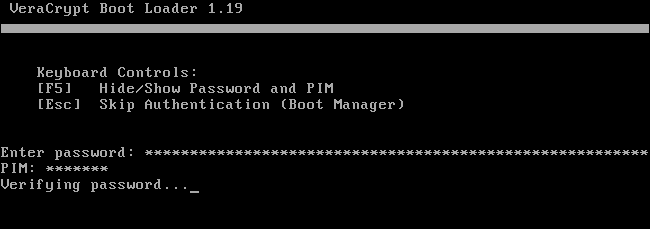
You may need to enter your VeraCrypt encryption password when your PC boots. Should you did not enter a customized PIM quantity, simply press “Enter” on the PIM immediate to simply accept the default.
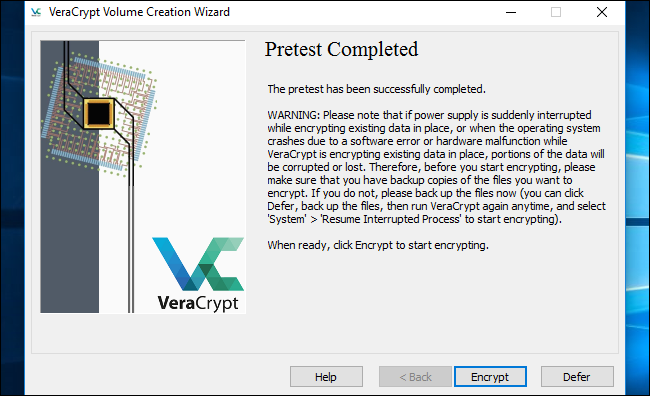
Signal into your PC when the conventional welcome display screen seems.You need to see a “Pretest Accomplished” window.
VeraCrypt advises that you’ve backup copies of the information you are encrypting. If the system loses energy or crashes, a few of your information might be irreversibly corrupted. It is at all times essential to have backup copies of your essential information, particularly when encrypting your system drive. If you have to again up your information, click on the “Defer” button and again up the information. You’ll be able to then relaunch VeraCrypt later and click on System > Resume Interrupted Course of to renew the encryption course of.
Click on the “Encrypt” button to truly encrypt your PC’s system drive.
VeraCrypt will present details about when it is best to use the rescue disk. After it does, it should start the method of encrypting your laborious drive.
When the method is full, your drive might be encrypted and you will have to enter your password every time you boot your PC.
Should you resolve you need to take away the system encryption sooner or later, launch the VeraCrypt interface and click on System > Completely Decrypt System Partition/Drive.