How to Install Windows 7 Without a Disc
Do you want to install Windows 7 without a disc or USB? Or, Are you looking to Factory Reset Windows 7 Without CD? As always, we have got you covered. Through this guide, we are going to discuss two different ways to install Windows 7. So, keep reading!
When the Windows operating system faces serious problems, many Windows users choose to reinstall the operating system since it can usually restore the system to normal. The same applies to Windows 7, 8, or 10. Now, the question arises: Is it feasible to reinstall Windows 7 without a Disc or CD? The answer is Yes, you can install Windows 7 with a bootable USB.

How to Install Windows 7 Without a Disc
Preparatory Step
Because the reinstallation process will delete all the data on your computer, it is suggested that you make a backup of it. You can prepare a backup for apps or important information or memories like your family photographs, ahead of time. You can utilize storage devices such as:
- an external hard drive or
- any cloud storage available online.
Method 1: Install Windows 7 with a USB
Using a flash drive to install Windows 7 has become quite popular these days since the process is quick and smooth. Here’s how to do it:
Step I: Optimize USB for Boot
1. Insert your USB drive into the USB port of your Windows 7 computer.
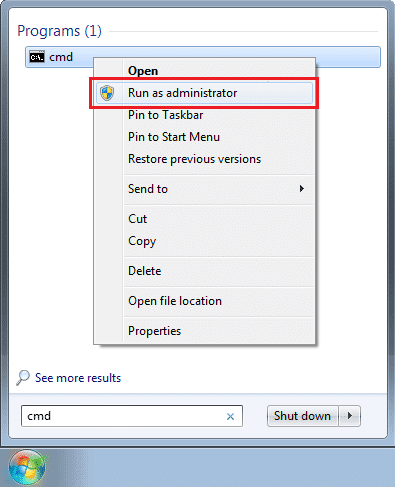
2. Click on the Start button then search for CMD in the search bar. Then, right-click on cmd and select Run as administrator.
3. Type diskpart and press Enter.
4. Press Enter after typing list disk, as shown. Note down the USB flash drive number.
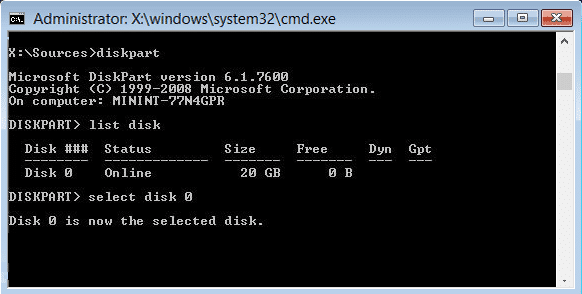
5. Now, enter the following commands individually, waiting for each one to finish.
Note: Replace x with the USB flash drive number obtained in Step 4.
select disk x
clean
create partition primary
select partition 1
format fs=NTFS
active
exit
Step II: Download Installation Files in USB
6. Type and search System in the Windows search box. Click on System Information to open it.

7. Here, locate the 25-character Product key which is usually, found at the rear side of the computer.
8. Download a fresh copy of Windows 7. Choose between 64-bit or 32-bit Download and confirm the Language and Product key.
Note: You can download Windows 7 update from here.
9. After downloading Windows 7, extract the downloaded ISO file to the USB drive.
Step III: Move the Boot Order Up
10. To navigate to the BIOS menu, Restart your PC and keep hitting the BIOS key until the BIOS screen appears.
Note: BIOS key is commonly Esc/Delete/F2. You can verify it from the product page of your computer manufacturer. Or else, read this guide: 6 Ways to Access BIOS in Windows 10 (Dell/Asus/ HP)
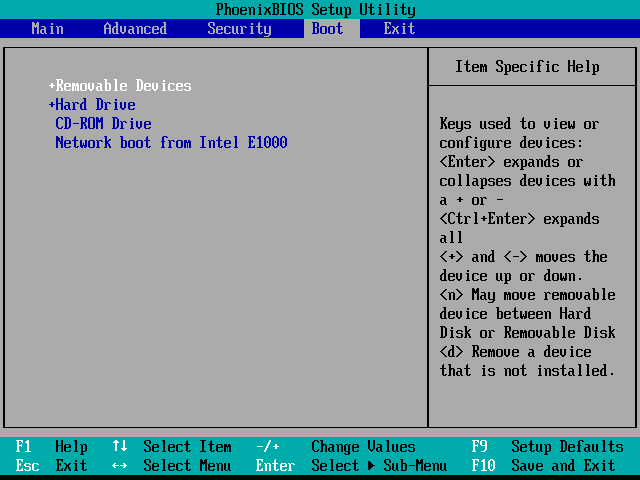
11. Switch to the Boot Order tab.
12. Select Removable Devices i.e. your USB flash drive and then, press (plus)+ key to bring it to the top of the list. This will make the USB device your Boot drive, as illustrated.
13. To save the settings, press the Exit key and then choose Yes.
Step IV: Start the installation process:
14. To start the boot process, Press any key.
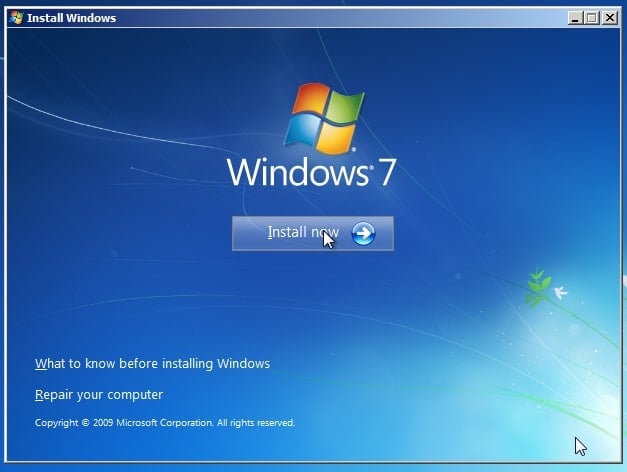
15. Click on Install Now then Accept the terms of the Microsoft license and agreement.
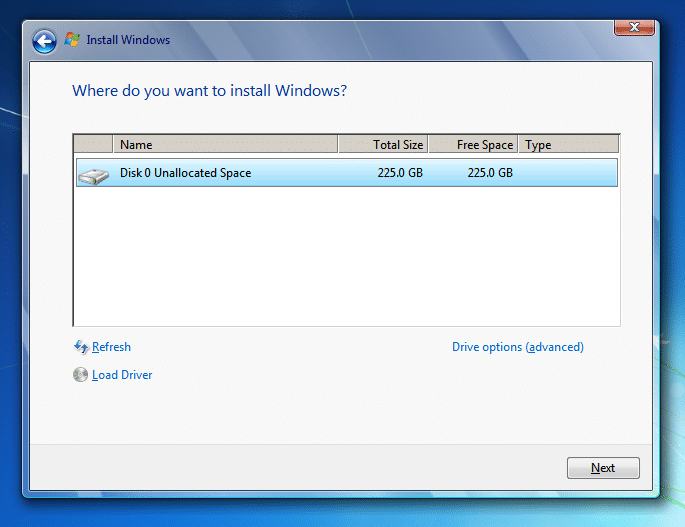
16. To delete the old copy of Windows 7, choose the hard drive where Windows 7 is loaded, and then click Delete.
17. After you choose the installation location and click Next, Windows 7 will begin to install.
This is how to Install Windows 7 with USB. However, if you feel that this process is time-consuming then, try the next one.
Also Read: Fix Windows 7 Updates Not Downloading
Method 2: Reinstall Windows 7 with System Image
If you’ve already made a System Image backup, you may restore your system to a previous working date. Here’s how to Install Windows 7 Without a Disc or USB:
1. Go to Windows search by pressing the Windows key and type Recovery in the search box.
2. Open Recovery Window from the search results.
3. Here, select Advanced Recovery Methods.
4. Choose the System Image Recovery option to restore your computer using a system image you created earlier, as highlighted below.
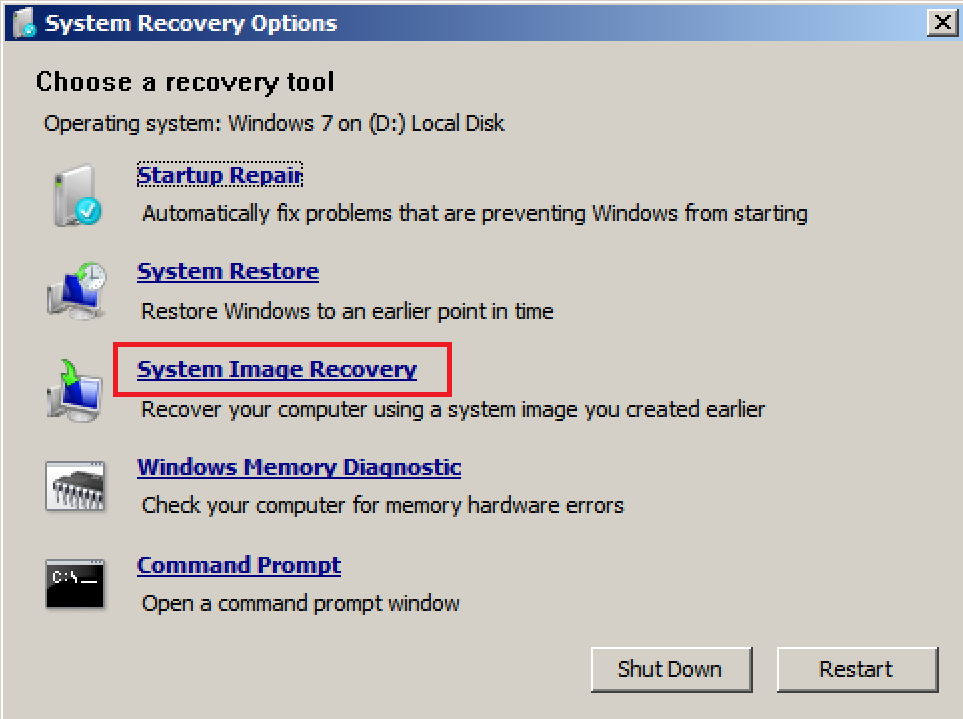
Everything on the computer, including Windows, applications, and files, will be replaced with the data saved on the system image. This will make your computer work properly, as it did before.
Also Read: SOLVED: No Boot Device Available Error in Windows 7/8/10
How to Factory Reset Windows 7 Without Cd
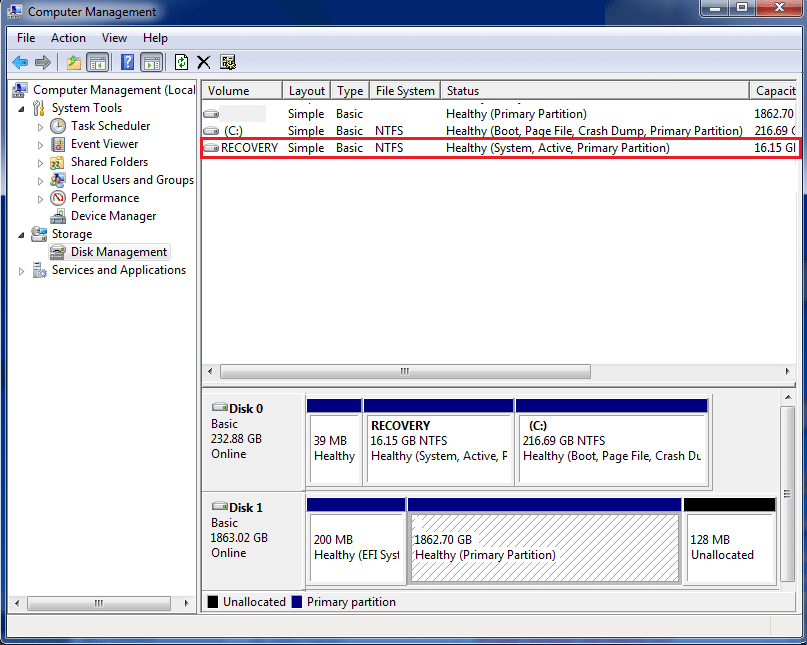
Several computers come with an in-built recovery partition that allows users to revert to factory default settings. Follow the given steps to Factory Reset Windows 7 without CD or USB:
1. Click on the Start button then right-click on My Computer then select Manage, as shown.
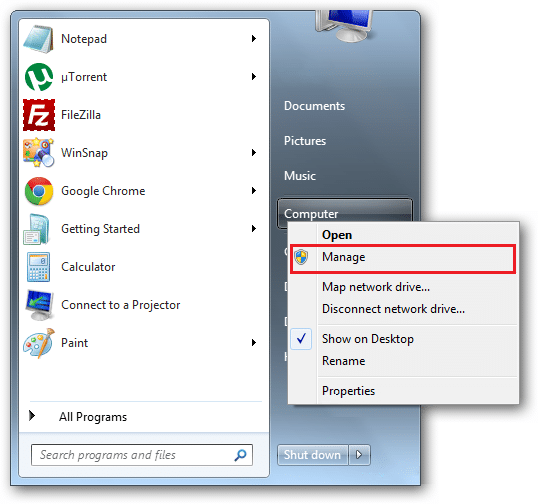
2. Select Storage > Disk Management from the left-hand window.
3. Check whether your computer has a Recovery partition. If it has such a provision, then select this partition.
4. Turn off the computer and then unplug all of your computer devices.
5. Now, start the computer by pressing the power button.
6. Repeatedly, press the Recovery Key on your keyboard until the Windows logo shows up.
7. Finally, follow the installation instructions to complete the process.
This method will Factory Reset the Windows 7 and your desktop/laptop will function like it is brand new.
Recommended:
We hope that this guide was helpful and you were able to install Windows 7 without a disk and factory reset Windows 7 without a CD. If you have any suggestions, then feel free to drop them in the comments section.