Are you looking to share files or folders over a network? Well, if you are then you need to first enable Network discovery and then setup Network file sharing on Windows 10. Don’t worry, this might seem like a complicated thing to do but with our guide, just follow all the listed steps and you will be good to go.
While working or doing something, there are times when you need to share some data or files that are on your computer with someone else. For example: If you, along with your friends or colleagues, working on some projects and everyone is doing their own tasks on their separate computers, and you need to share some files or data with them, then in this situation, what will you do? One way is to manually copy that data somewhere and then send it to all the persons who require that data or files individually. But this will be a very time-consuming process. So, you will try to find if there is an alternative method that can perform this task without taking too much time.
So, if you are looking for any such method, then you will be glad to know that Windows 10 provides a solution using which you can share the files with other people over the same network. This may seem a bit complicated, but with the help of the tools provided by Windows 10, it becomes a very simple task.
Files can be shared with other devices in many ways. You can share files over the same network using file-sharing or file explorer, and across the Internet by using the Windows 10 sharing feature. If you want to share files over the same network, then you can do it by using file-sharing, which includes sharing files using basic settings, advanced settings, etc. and if you want to share files using Internet, then you can do this using OneDrive, if you want to use Window 10 in-built feature then you will have to use Homegroup.
All these tasks seem to be a bit complicated, but in this article, a proper guide has been provided on how to carry these tasks step by step.
How To Setup Network Files Sharing On Windows 10
Sharing your files with other users over the same network using File explorer is the best available method as it is more flexible and provides you with various advantages over some of the other methods. You have all the control over what you want to share or don’t want to share, to whom you want to share, who can view or access the shared files and who can have the permission to edit those files. These files can be shared virtually with any device running Android, Mac, Linux, etc.
Sharing of files using File Explorer can be done in two ways:
1.Basic Settings: Using the Basic settings will allow you to share files with other people or over the same network with minimal configuration.
2.Advanced Settings: Using the advanced settings will allow you to set custom permissions.
Method 1: Sharing files using basic settings
To share the files over the same local network using the basic settings, follow the below steps:
1.Open file explorer by searching for it using the search bar.
2.Click on the top result of your search result, and File Explorer will open.
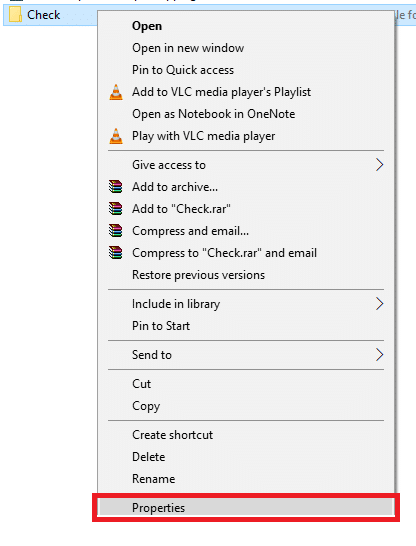
3.Navigate to the folder you want to share then right-click on it and select Properties.
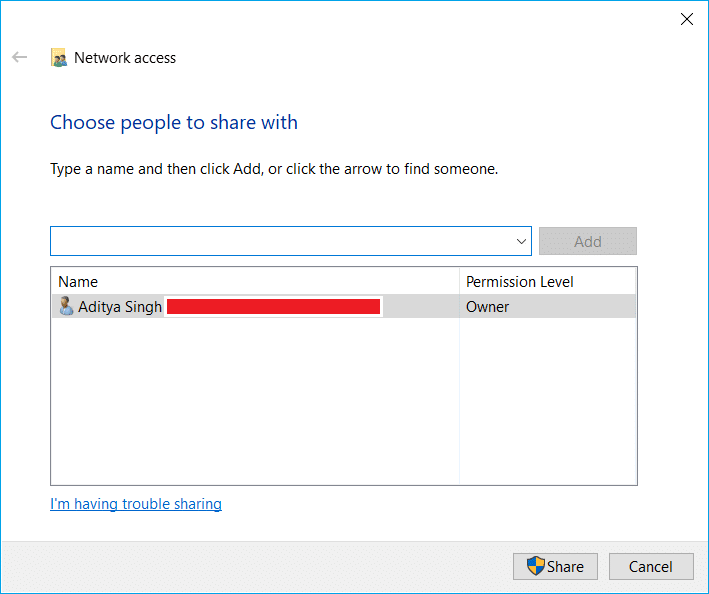
4.A dialog box will pop up. Switch to the Sharing tab from the Properties window.
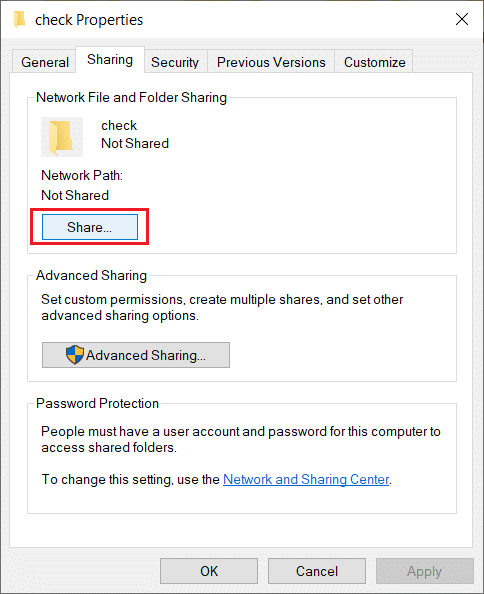
5.Now, click on the Share button present in the middle of the dialog box.
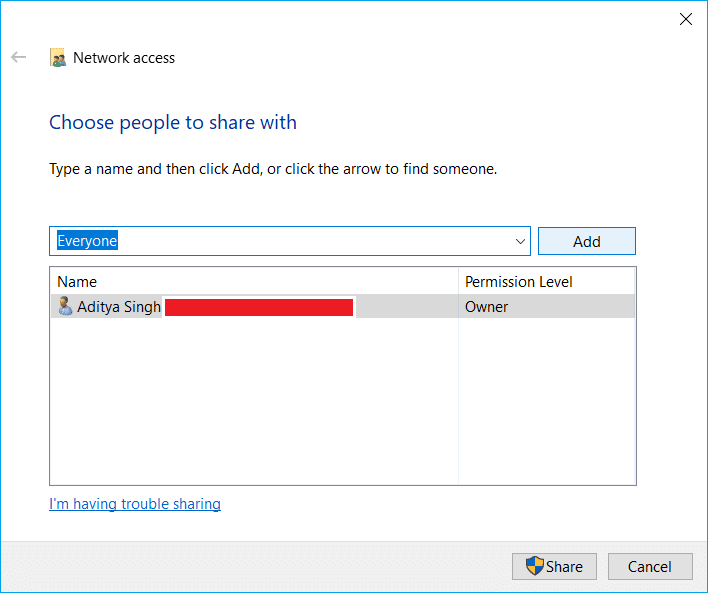
6.Click on the drop-down menu to select the user or the group with whom you want to share files or folders. Here, Everyone has been chosen. You can select whoever you want.
7.Once chosen with whom you want to share files, click on the Add button.
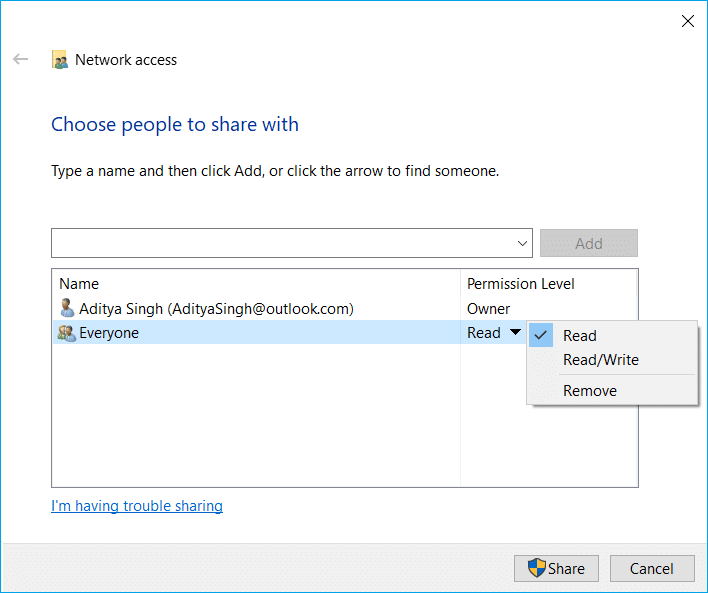
8.Under the permission Level, determine the type of permission you want to authorize to the person or group with whom you are sharing files. There are two permission options available which are read and read/write.
- Read: Selecting Read option as permission level, users will only be able to view the file and open the files. They will not be able to modify or make any changes in the files.
- Read/ Write Selecting Read/Write as permission level, users will be able to open the files, view the files, modify the files, and if they want they can even delete the files.
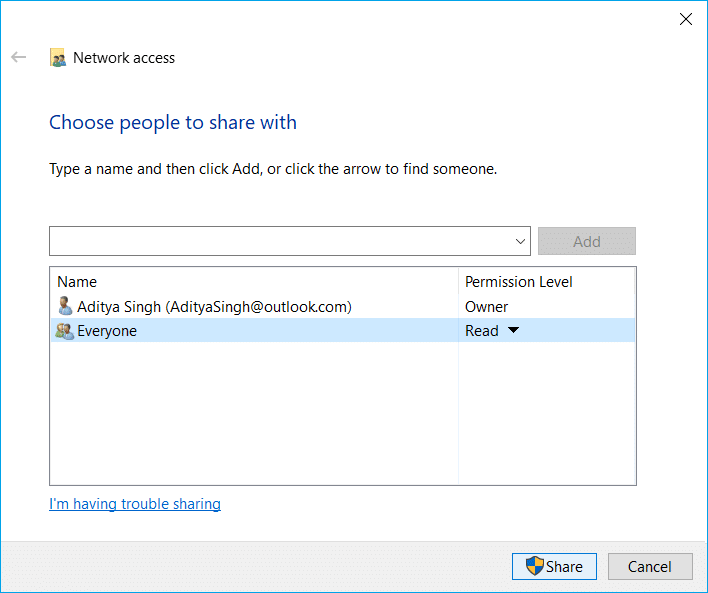
9.Next, click on the Share button.
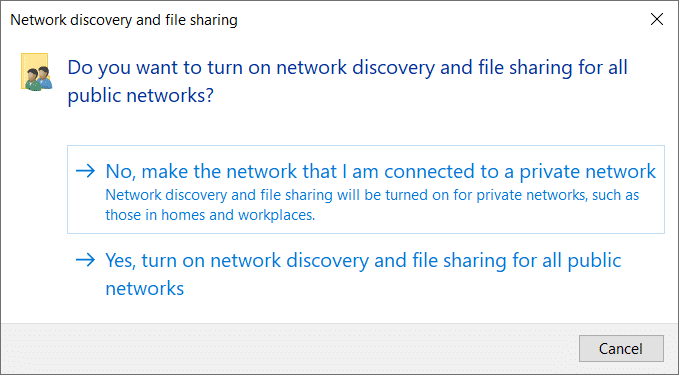
10.Below dialog box will appear which will ask if you want to turn on File sharing for all public networks. Choose any one option as per your choice. Choose first if you want your network to be a private network or second if you want to turn on file sharing for all networks.
11.Note down the network path for the folder that will appear as other users will need to access this path in order to view the content of the shared file or folder.
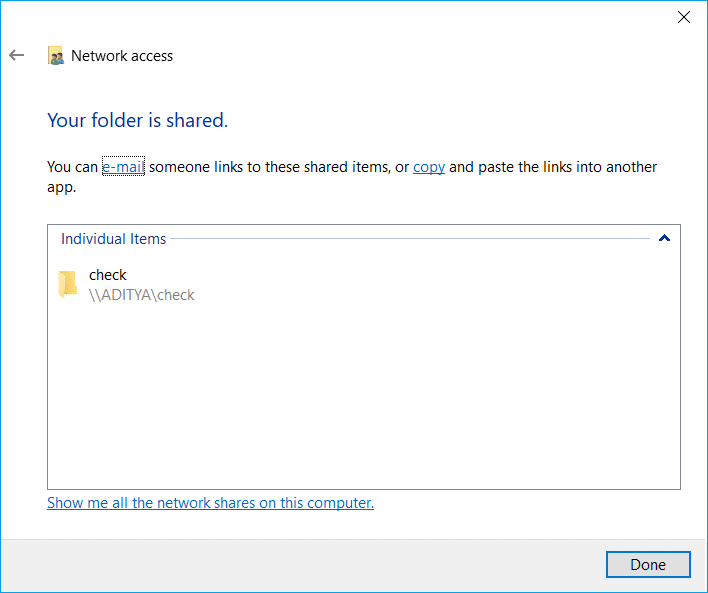
12.Click on the Done button available at the bottom right corner then click on the Close button.
Once the above steps are completed, anyone can access the shared files by using that folder path.
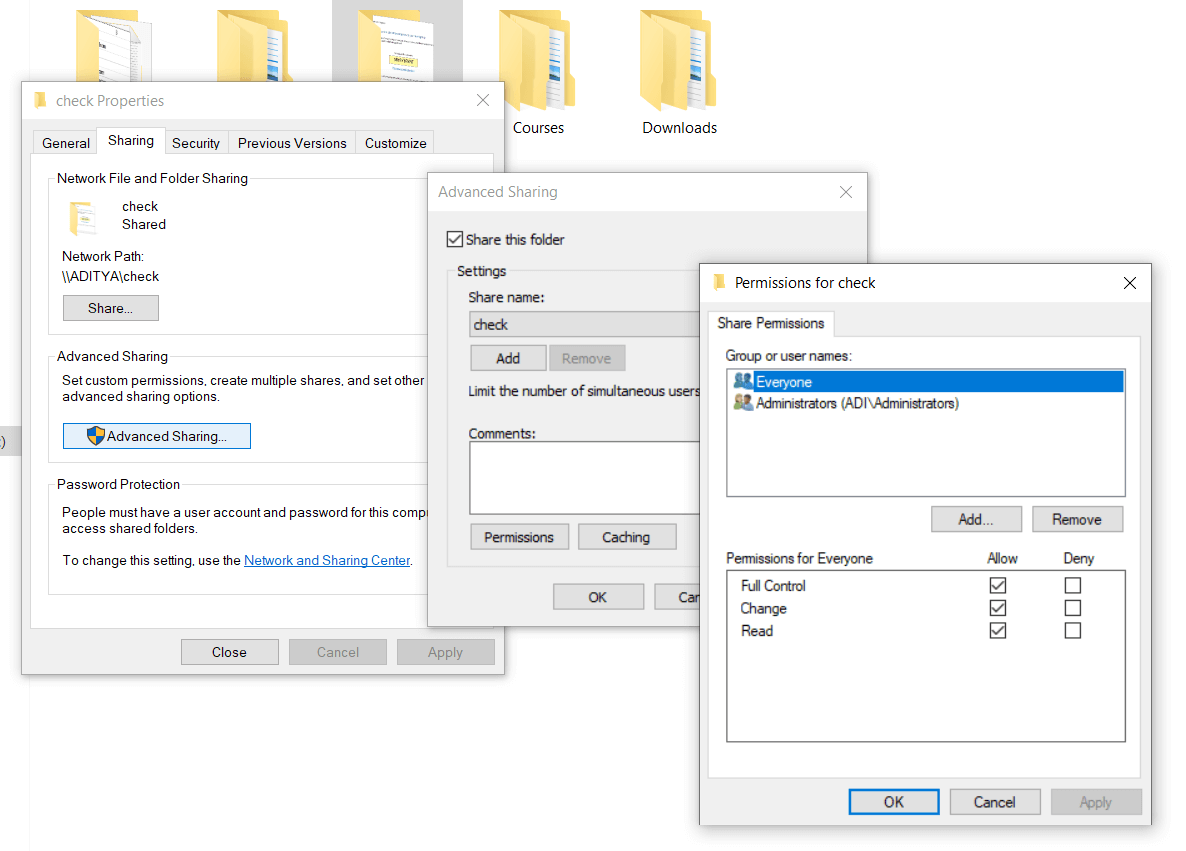
Method 2: Sharing files using Advanced settings
To share the files over the same local network using the advanced settings, follow the below steps:
1.Press Windows key + E to open the File Explorer.
2.Navigate to the folder you want to share then right-click on it and select Properties.
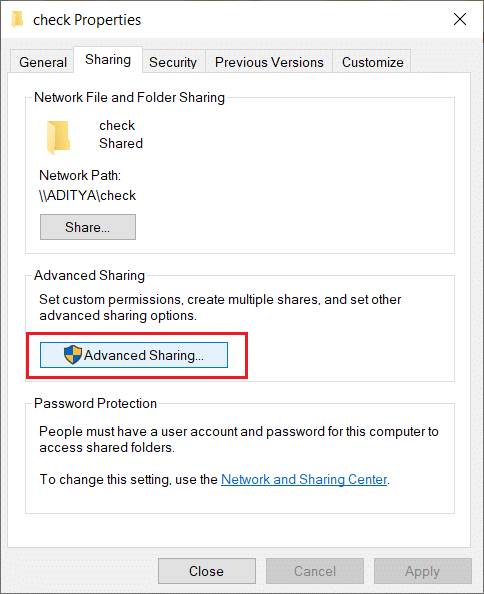
3.Switch to the Sharing tab from the Properties window.
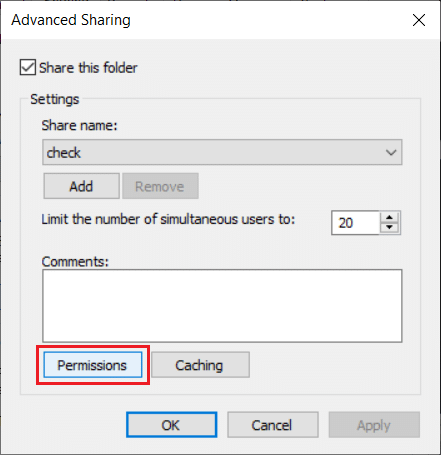
4.From the dialog box, click on the Advanced Sharing button.
5.Check the ‘Share this folder’ option if it is not checked already.
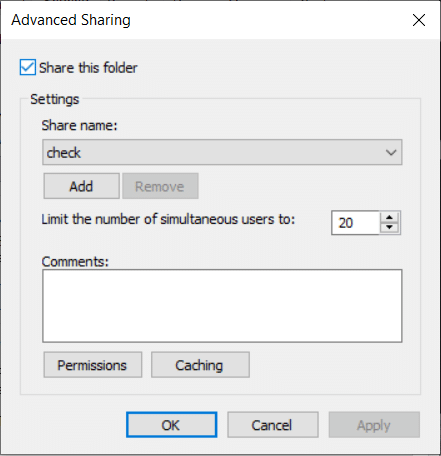
6.By default, using Advanced settings, Windows will provide users Read-only permission, which means users can only view the files and open the files, they cannot modify or delete the files.
7.If you want the users to view, edit, modify, delete files, or create new documents in the same location, then you need to change the permission. For that purpose, click on the Permissions button.
8.When you will open the permission window, you will see that everyone is selected as the default group with whom you can share the files. Using the section below ‘Permissions for Everyone‘, you can change the permission settings for a specific group or user.
9.If you want the user to only open and view the files, then check the checkbox next to Read option, and if you want the user to open, view, edit and delete the files, then checkmark “Full Control“.
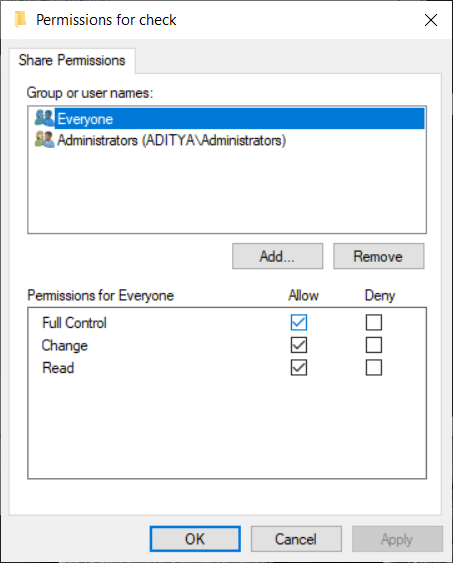
10.Then click on the Apply followed by OK to save changes.
HomeGroup is a network sharing feature that allows you to easily share files across the PC over the same local network. It is best suited for a home network to share files and resources that are running on Windows10, Windows 8.1, and Windows 7. You can also use it to configure other media streaming devices such as play music, watch movies, etc. from your computer to another device at the same local network.
To share files using HomeGroup, first, you need to create a HomeGroup.
Important: Starting with version 1803 and later, Windows 10 no longer supports Homegroup, you can still use Homegroup on the older version of Windows.
Step 1: Creating a HomeGroup
To create the HomeGroup, follow the steps below:
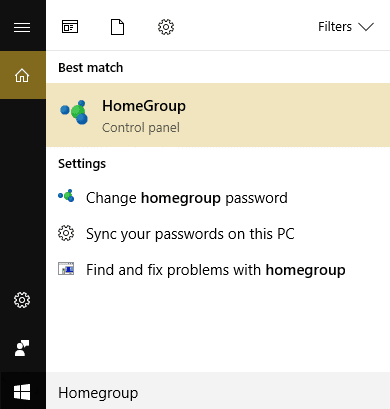
1.Type homegroup in Windows search then click on HomeGroup from the top of the search result.
2.Under HomeGroup, click on create a HomeGroup button available at the bottom right corner.

3.Click on the Next button.
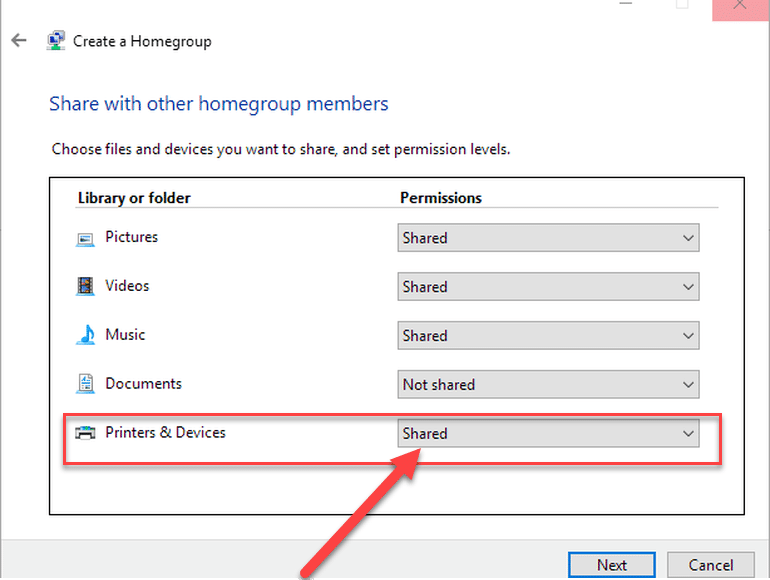
4.Click on the drop-down menu next to the folders ( Pictures, Videos, Music, Documents, Printers, and Devices, etc. ) and select the folders you want to share or don’t want to share. If you do not want to share any folder, then make sure to select the ‘Not Shared’ option.
5.Click on the Next button available at the bottom of the page.
6.A password will be displayed. Note down this password as you will need it later whenever you want to join other computers.
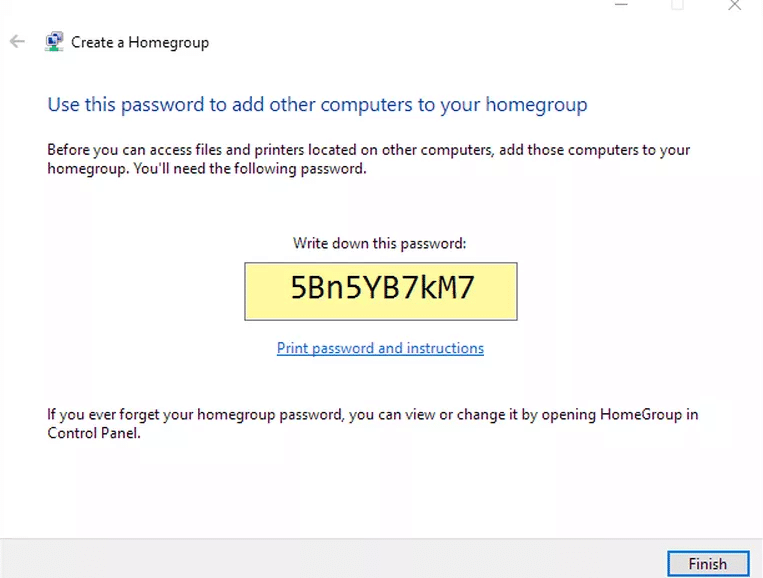
7.Click on the Finish button to complete the task.
After completing the above steps, your HomeGroup will be created using which you can now share files and folders you have selected as shared with other computers using the password that you have noted above.
Step 2: Joining A HomeGroup
Now, once you have created the HomeGroup and join the other computer to the HomeGroup to access the shared files on your device, follow the below steps:
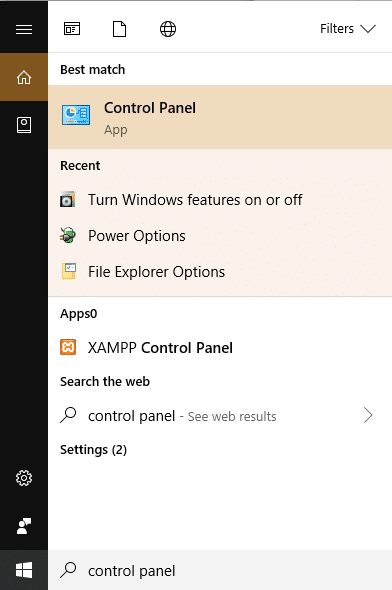
1.Open the Control Panel by searching for it using the Search bar and hit enter.
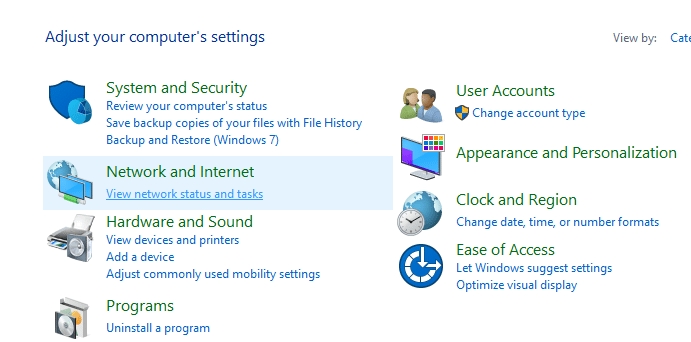
2.Click on Network and Internet.
3.Click on Choose HomeGroup and sharing options.
4.Click on the Join now button.
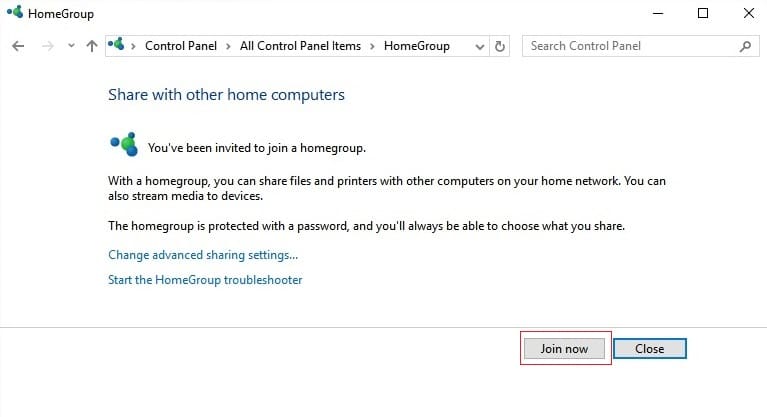
Follow the instructions that will appear and enter the HomeGroup password that you have noted down in the above steps.
Step 3: Sharing Files On A HomeGroup
Once you have created the HomeGroup, all the files and folders are already shared within the libraries. To send those folders and files to other locations with different users using the HomeGroup follow the below steps:
1.Search for the ‘File Explorer’ using the search bar.
2.Once you see the option of ‘File Explorer’ in the search result, click on it to open it.
3.Navigate to the folder you want to share.
4.Once you see the folder, right-click on it and select the share option from the pop-up menu that appears.
5.If not then select “Give access to” from the menu and in the submenu that will appear, you will see two options: Homegroup (view) and HomeGroup (View and Edit).
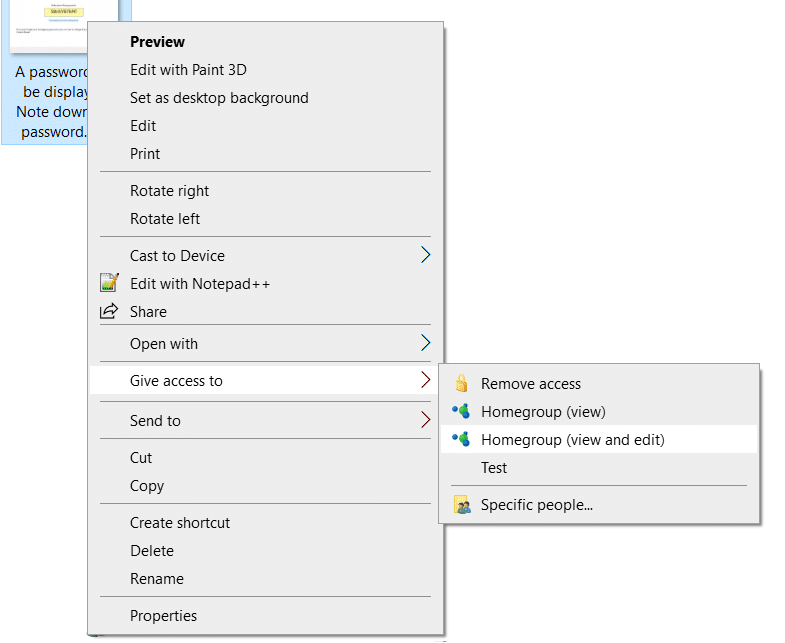
6.You want the users to have permission to only open and view the files then select HomeGroup(View) and if you want users to have permission to view, open, modify, and delete the files, then choose HomeGroup(View and Edit).
Once the above steps are completed, your selected files and folders will be shared with the connected computers.
Step 4: Sharing Files Using OneDrive
If you want to share files and folders with the people who are not on the same network or across the world, you can share files and folders with them using OneDrive. To share files using OneDrive, follow the below steps:
1.Open the file explorer folder by pressing Windows key + E and then click on the OneDrive folder.
2.Then right-click on the file or folder you want to share and select “Share a OneDrive link”.
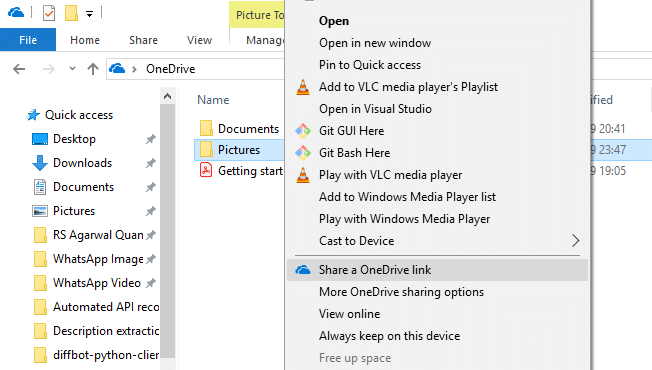
3.A notification will appear on the Notification bar that a unique link is created.
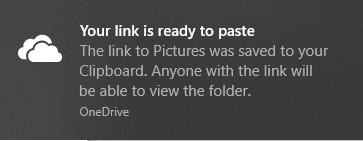
After performing all the above steps, your link will be copied to the Clipboard. You just have to paste the link and send it through email, messenger, social media, or through any medium of your choice to whom you want to send. But the user will only be able to view the files and folders.
If you want to give users the permission to view, edit and delete the folders inside the OneDrive then follow the below steps:
1.Open OneDrive on your favorite web browser.
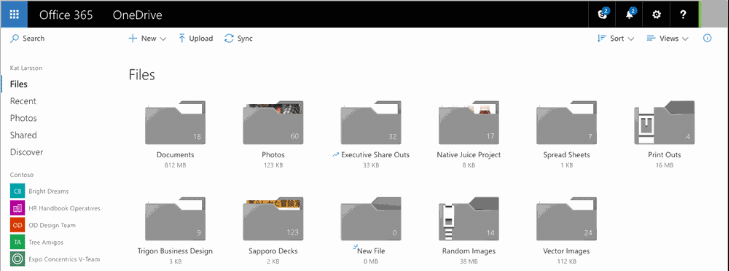
2.Navigate to the file or folder you want to share.
3.Right-click on the file or folder you want to share and select Share option.
4.Click on ‘Anyone with this link can edit the item’ link.
5.Also, make sure Allow editing is checked. If not, then check it.
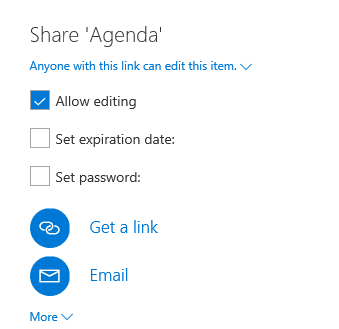
6.Select how do you want to share the link.
7.Follow the on-screen instruction and share the link.
After completing the above steps, your link will be shared, and the users who have that link can view, edit, and delete the files and folders.
Recommended:
Hopefully, using any of the above methods you will be able to Setup Network Files Sharing On Windows 10 but if you still have any queries then don’t worry just mention them in the comment section and we will get back to you.