Fix Windows 10 Freezes Randomly: If you have recently upgraded to Windows 10 from an earlier version of the Microsft OS then it might be possible that you may experience your Windows 10 freezes randomly without any load on the PC. This will happen frequently and you will have no other option to force shutdown your system. The issue occurs because of the incompatibility between hardware and drivers, as they were designed to work on your earlier version of Windows and after upgrading to Windows 10 the drivers become incompatible.
The freeze or hang issue mostly occurs because of the graphic card drivers being incompatible with Windows 10. Well, there are other issues which can cause this error and is not limited to graphic card drivers. It mostly depends on users system configuration as to why you see this error. Sometimes 3rd party software might also cause this issue as they are not being compatible with Windows 10. Anyway, without wasting any time let’s see how to actually Fix Windows 10 Freezes Randomly issue with the below-listed troubleshooting guide.
Note: Make sure to disconnect all USB extension or connected devices to your PC and again verify if the issue is resolved or not.
[SOLVED] Windows 10 Freezes Randomly
Make sure to create a restore point just in case something goes wrong.
Method 1: Update Graphics Card Drivers
1.Press Windows Key + R then type “devmgmt.msc” (without quotes) and hit enter to open Device Manager.

2.Next, expand Display adapters and right-click on your Nvidia Graphic Card and select “Update Driver Software.“

3.Select “Search automatically for updated driver software” and let it finish the process.

4.If the above step was able to fix your problem then very good, if not then continue.
5.Again select “Update Driver Software” but this time on the next screen select “Browse my computer for driver software.“

6.Now select “Let me pick from a list of device drivers on my computer.”

7.Finally, select the compatible driver from the list for your Nvidia Graphic Card and click Next.
9.Let the above process finish and restart your PC to save changes. After updating Graphic card you may be able to Fix Windows 10 Freezes Randomly Issue, if not then continue.
10.First of all, you should know what graphics hardware you have i.e. which Nvidia graphic card you have, don’t worry if you don’t know about it as it can be easily find.
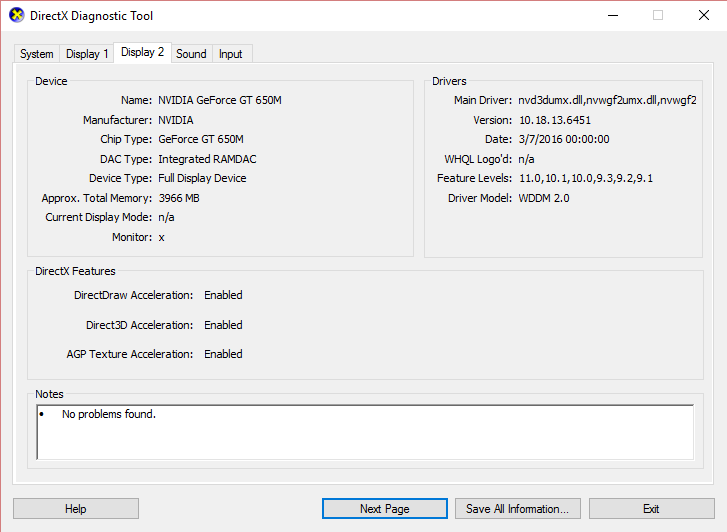
11.Press Windows Key + R and in the dialog box type “dxdiag” and hit enter.

12.After that search for the display tab (there will be two display tabs one for the integrated graphic card and another one will be of Nvidia’s) click on the display tab and find out your graphic card.
13.Now go to the Nvidia driver download website and enter the product details which we just find out.
14.Search your drivers after inputting the information, click Agree and download the drivers.

15.After successful download, install the driver and you have successfully updated your Nvidia drivers.
Method 2: Run Netsh Winsock Reset Command
1.Press Windows Key + X then select Command Prompt (Admin).

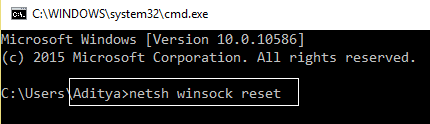
2.Type the following command into cmd and hit Enter after each one:
netsh winsock reset
netsh int ip reset reset.log hit
3.You will get a message “Successfully reset the Winsock Catalog.“
4.Reboot your PC and this will Fix Windows 10 Freezes Randomly.
Method 3: Run Windows Memory Diagnostic
1.Type memory in the Windows search bar and select “Windows Memory Diagnostic.“
2.In the set of options displayed select “Restart now and check for problems.“
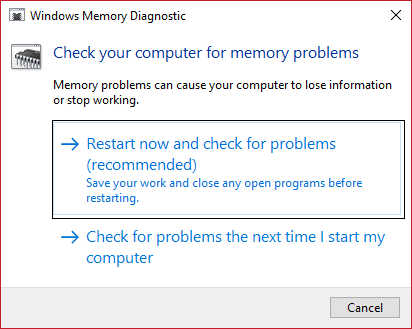
3.After which Windows will restart to check for possible RAM errors and will hopefully display the possible reasons as to why Windows 10 Freezes Randomly.
4.Reboot your PC to save changes.
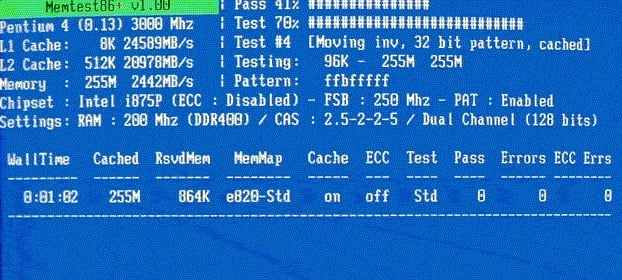
Method 4: Run Memtest86+
Now run the Memtest86+ which is a 3rd party software but it eliminates all the possible exceptions of memory errors as it runs outside of the Windows environment.
Note: Before starting, make sure you have access to another computer as you will need to download and burn the software to the disc or USB flash drive. It’s best to leave the computer overnight when running Memtest as it sure likely to takes some time.
1.Connect a USB flash drive to your system.
2.Download and install Windows Memtest86 Auto-installer for USB Key.
3.Right-click on the image file which you just downloaded and select “Extract here” option.
4.Once extracted, open the folder and run the Memtest86+ USB Installer.
5.Choose your plugged in USB drive to burn the MemTest86 software (This will format your USB drive).

6.Once the above process is finished, insert the USB to the PC in which Windows 10 not using full RAM.
7.Restart your PC and make sure that boot from the USB flash drive is selected.
8.Memtest86 will begin testing for memory corruption in your system.
9.If you have passed all the test then you can be sure that your memory is working correctly.
10.If some of the steps were unsuccessful then Memtest86 will find memory corruption which means Windows 10 Freezes Randomly because of bad/corrupt memory.
11.In order to Fix Windows 10 Freezes Randomly Issue, you will need to replace your RAM if bad memory sectors are found.
Method 5: Perform a Clean Boot
Sometimes 3rd party software can conflict with System and therefore the System might not shut down completely. In order Fix Windows 10 Freezes Randomly Issue, you need to perform a clean boot in your PC and diagnose the issue step by step.

Method 6: Increase Virtual Memory
1.Press Windows Key + R and type sysdm.cpl in Run dialog box and click OK to open System Properties.

2.In the System Properties window, switch to the Advanced tab and under Performance, click on Settings option.

3.Next, in the Performance Options window, switch to the Advanced tab and click on Change under Virtual memory.

4.Finally, in the Virtual memory window shown below, uncheck the “Automatically manage paging file size for all drive” option.Then highlight your system drive under Paging file size for each type heading and for the Custom size option, set the suitable values for fields: Initial size (MB) and Maximum size (MB). It is highly recommended to avoid selecting No paging file option here.
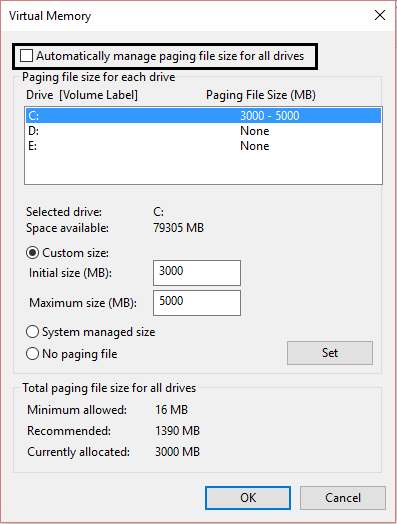
5.Select the radio button which says Custom size and set the initial size to 1500 to 3000 and maximum to at least 5000 (Both of these depends on the size of your hard disk).
6.Now if you’ve increased the size, a reboot is not mandatory. But if you’ve decreased the size of the paging file, you must have to reboot to make changes effective.
Method 7: Disable Fast Startup
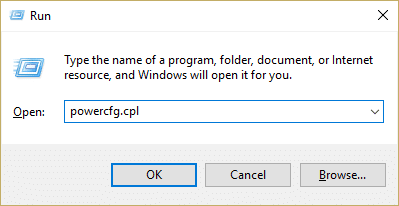
1.Press Windows Key + R then type “powercfg.cpl” and hit enter to open Power Options.
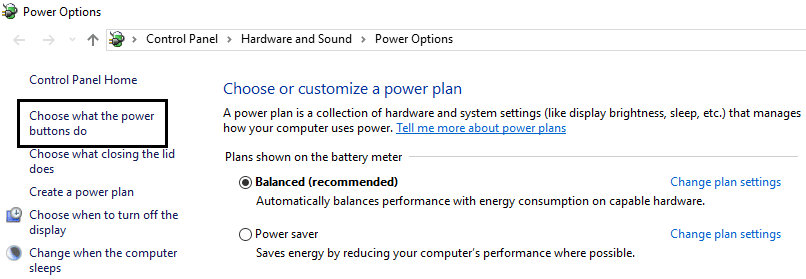
2.Click on Choose what the power buttons do in the top-left column.
3.Next, click on Change settings that are currently unavailable.
4.Uncheck Turn on Fast startup under Shutdown settings.
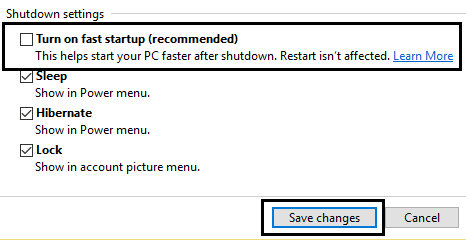
5.Now click Save Changes and Restart your PC.
Method 8: Run SFC and CHDKSK
1.Press Windows Key + X then click on Command Prompt(Admin).
2.Now type the following in the cmd and hit enter:
Sfc /scannow
sfc /scannow /offbootdir=c: /offwindir=c:windows (If above fails then try this one)

3.Wait for the above process to finish and once done restart your PC.
4.Next, run CHKDSK from here Fix File System Errors with Check Disk Utility(CHKDSK).
5.Let the above process complete and again reboot your PC to save changes.
Method 9: Turn Off Location Services
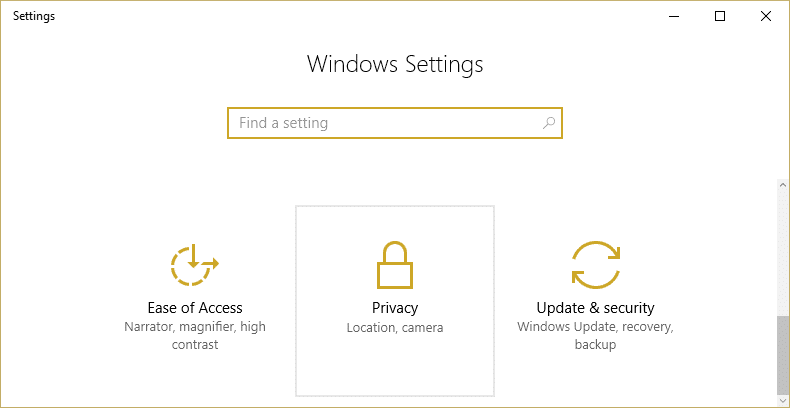
1.Press Windows Key + I to open Settings and then click on Privacy.
2.Now from the left-hand menu select Location and then disable or turn off Location Service.
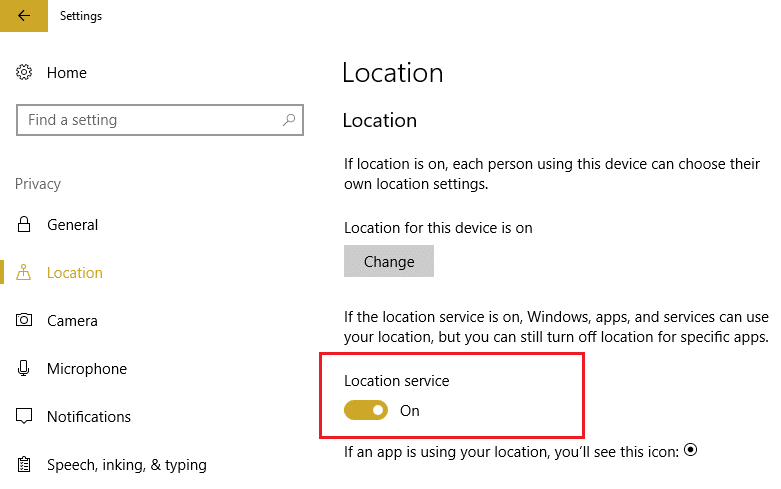
3.Reboot your PC to save changes and this would Fix Windows 10 Freezes Randomly Issue.
Method 10: Disable Hard Disk Hibernation
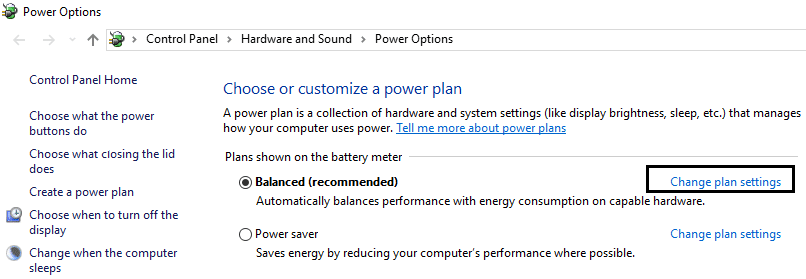
1.Right-click on Power icon on system tray and select Power Options.

2.Click Change plan settings next to your chosen Power plan.
3.Now click Change advanced power settings.
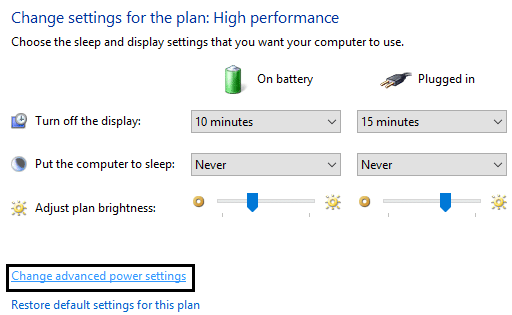
4.Expand Hard disk then expand Turn off hard disk after.
5.Now edit the setting for On battery and plugged in.
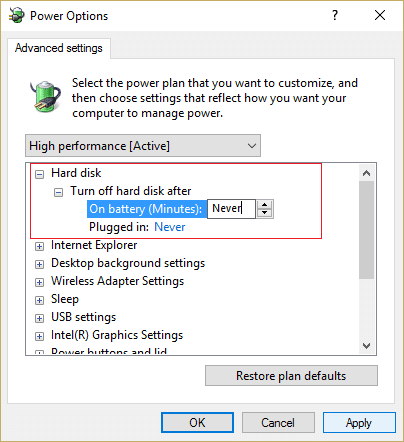
6.Type Never and hit Enter for both of the above settings.
7.Reboot your PC to save changes.
Method 11: Disable Link State Power Management
1.Press Windows Key + R then type “powercfg.cpl” and hit enter to open Power Options.
2.Click Change plan settings next to your chosen Power plan.
3.Now click Change advanced power settings.
4.Expand PCI Express then expand Link State Power Management.
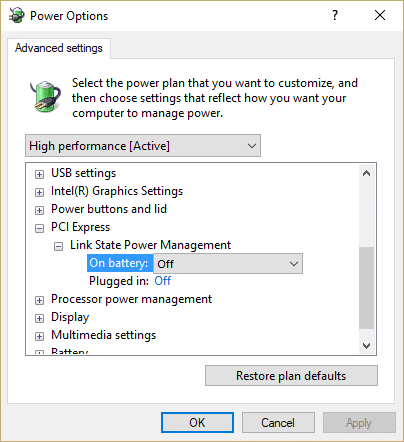
5.From the drop-down select OFF for both On battery and plugged in power settings.
6.Reboot your PC to save changes and see if you’re able to Fix Windows 10 Freezes Randomly.
Method 12: Disable Shell Extension
When you install a program or application in Windows, it adds an item in the right-click context menu. The items are called shell extensions, now if you add something which might conflict with the Windows this could certainly cause the Windows 10 Freezes Randomly issue. As Shell extension is part of Windows Explorer hence any corrupt program could easily cause this problem.
1.Now to check which of these programs are causing the crash you need to download a 3rd party software called
ShellExView.
2.Double click the application ShellExView.exe in the zip file to run it. Wait for few seconds as when it launches for the first time it takes some time to collect information about shell extensions.
3.Now click Options then click on Hide All Microsoft Extensions.
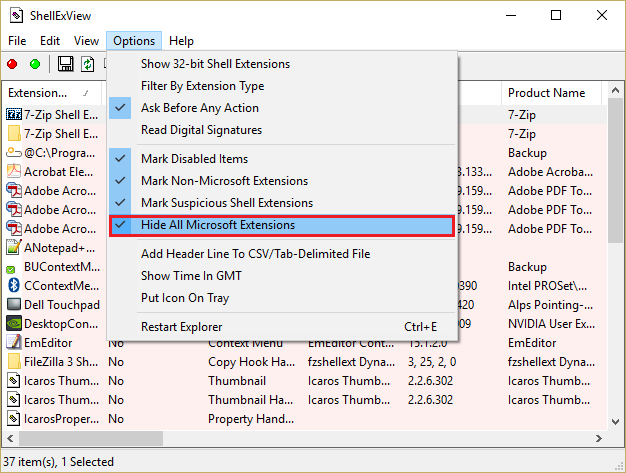
4.Now Press Ctrl + A to select them all and press the red button in the top-left corner.
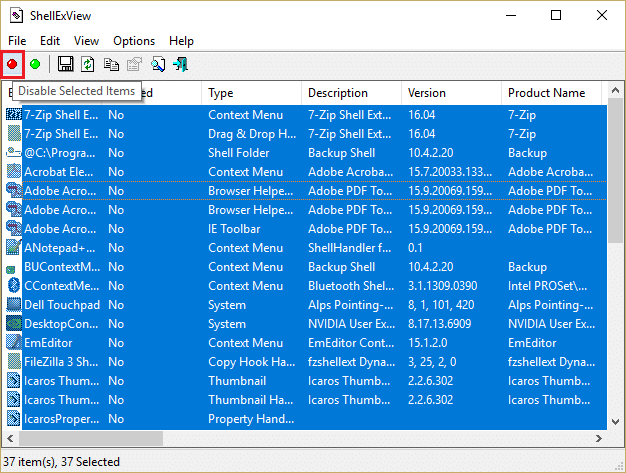
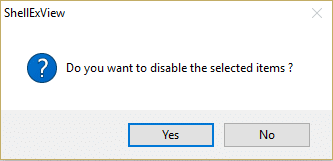
5.If it asks for confirmation select Yes.
6.If the issue is resolved then there is a problem with one of the shell extensions but to find out which one you need to turn them ON one by one by selecting them and pressing the green button on the top right. If after enabling a particular shell extension Windows 10 Freezes Randomly then you need to disable that particular extension or better if you can remove it from your system.
Method 13: Run DISM (Deployment Image Servicing and Management)
1.Press Windows Key + X and select Command Prompt(Admin).
2.Type the following command in cmd and hit enter after each one:
a) Dism /Online /Cleanup-Image /CheckHealth
b) Dism /Online /Cleanup-Image /ScanHealth
c) Dism /Online /Cleanup-Image /RestoreHealth

3.Let the DISM command run and wait for it to finish.
4. If the above command doesn’t work then try on the below:
Dism /Image:C:offline /Cleanup-Image /RestoreHealth /Source:c:testmountwindows
Dism /Online /Cleanup-Image /RestoreHealth /Source:c:testmountwindows /LimitAccess
Note: Replace the C:RepairSourceWindows with the location of your repair source (Windows Installation or Recovery Disc).
5.Reboot your PC to save changes.
Method 14: Update BIOS (Basic Input/Output System)
Performing BIOS update is a critical task and if something goes wrong it can seriously damage your system, therefore, an expert supervision is recommended.
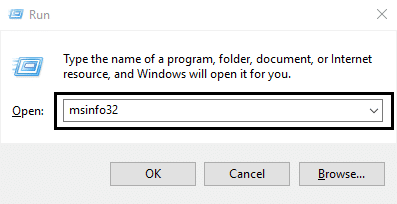
1.The first step is to identify your BIOS version, to do so press Windows Key + R then type “msinfo32” (without quotes) and hit enter to open System Information.
2.Once the System Information window opens locate BIOS Version/Date then note down the manufacturer and BIOS version.
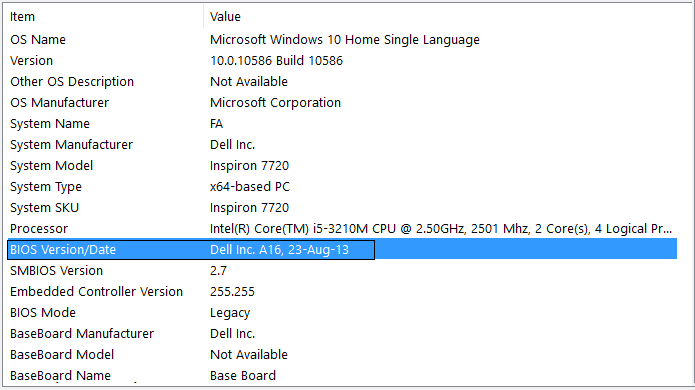
3.Next, go to your manufacturer’s website for e.g in my case it’s Dell so I will go to Dell website and then I will enter my computer serial number or click on the auto detect option.
4.Now from the list of drivers shown I will click on BIOS and will download the recommended update.
Note: Do not turn off your computer or disconnect from your power source while updating the BIOS or you may harm your computer. During the update, your computer will restart and you will briefly see a black screen.
5.Once the file is downloaded, just double click on the Exe file to run it.
6.Finally, you have updated your BIOS and this may also Fix Windows 10 Freezes Randomly Issue.
Method 15: Run CCleaner and Malwarebytes
1.Download and install CCleaner & Malwarebytes.
2.Run Malwarebytes and let it scan your system for harmful files.
3.If malware is found it will automatically remove them.
4.Now run CCleaner and in the “Cleaner” section, under the Windows tab, we suggest checking the following selections to be cleaned:

5.Once you’ve made certain the proper points are checked, simply click Run Cleaner, and let CCleaner run its course.
6.To clean your system further select the Registry tab and ensure the following are checked:

7.Select Scan for Issue and allow CCleaner to scan, then click Fix Selected Issues.
8.When CCleaner asks “Do you want backup changes to the registry?” select Yes.
9.Once your backup has completed, select Fix All Selected Issues.
10.Restart your PC to save changes and this would Fix Windows 10 Freezes Randomly Issue, if not then continue with the next method.
Method 16: Disable Your Dedicated Graphic Card
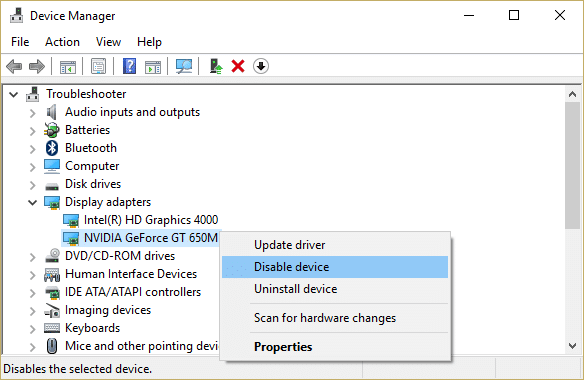
1.Press Windows Key + R then type “devmgmt.msc” (without quotes) and hit enter to open Device Manager.
2.Next, expand Display adapters and right-click on your Nvidia Graphic Card and select Disable.
3.Reboot your PC to save changes.
Method 17: Update your Network drivers
1.Press Windows key + R and type “devmgmt.msc” in Run dialogue box to open device manager.
2.Expand Network adapters, then right-click on your Wi-Fi controller (for example Broadcom or Intel) and select Update Driver Software.

3.In the Update Driver Software Windows, select “Browse my computer for driver software.“

4.Now select “Let me pick from a list of device drivers on my computer.“

5.Try to update drivers from the listed versions.
6.If the above didn’t work then go to manufacturers website to update drivers: https://downloadcenter.intel.com/

7.Install the latest driver from the manufacturer’s website and reboot your PC.
By reinstalling the network adapter, you can Fix Windows 10 Freezes Randomly Issue.
Method 18: Repair install Windows 10
This method is the last resort because if nothing works out then this method will surely repair all problems with your PC and will Fix Windows 10 Freezes Randomly Issue. Repair Install just uses an in-place upgrade to repair issues with the system without deleting user data present on the system. So follow this article to see How to Repair Install Windows 10 Easily.
Recommended for you:
That’s it you have successfully [SOLVED] Windows 10 Freezes Randomly but if you still have any questions regarding this post then feel free to ask them in the comment’s section.