Fix Uplay Google Authenticator Not Working

What to do if the code provided by the Google Authenticator is invalid for Uplay application. In the event, your Google Authenticator app is generating incorrect 2-Step Verification codes. Various Uplay users reported that a lot of time, Google Authenticator gives them the wrong codes, and because of this, they cannot connect to the service & play their favorite games.
To solve this issue, several users have synchronized the Google Authenticator application with Uplay, but even this process requires them to use the 2 step authentication method.
Uplay: It is a digital distribution, digital rights management multiplayer, and communication service developed by Ubisoft. They offer this service on multiple platforms (PC, PlayStation, Xbox, Nintendo, etc.)
Entered wrong authenticator code: Though the generated app code is displayed with one space after the first three letters inside the Google Authenticator app, uPlay would reject the code if it contains any spaces.
Time correction for codes is out of sync: Time correction is another popular culprit that might reject the codes generated by Google Authenticator. Basically, if the user is traveling between multiple time zones, time correction may go out of sync inside the Google Authentication app.
Date & time is incorrect on mobile devices: Whenever the date & time and timezones are incorrect with the region, then Google Authenticator generates faulty codes. Many users have resolved this issue by setting the correct values and restarting the device.
See Also:
17 Ways to Fix Netflix Not Working on Virgin Media
Fix Apps Not Working on Roku TV
Fix Google for Android Shows Offline Issue
How to Fix Facebook Notifications Not Working
An internal glitch in uPlay: In the beginning, the two-factor implementation on uPlay was full of bugs, and it is still to some degree. In a lot of cases, the users were not able to access their account after following the most common fixes as the only fix available was to open a support ticket to Ubisoft’s Desk.
However, if you are currently struggling to resolve this problem, then this article will help you find the best strategies to fix Uplay Google Authenticator not working:
Fix Uplay Google Authenticator Not Working
Method 1: Typing the Google Authenticator Code without Spaces
When the Google Authentication code is generated using which you will be able to access your Uplay account, it contains three numbers, then space and again three numbers as given in the below image.
Generally, to avoid any mistake while entering the code, people just copy the code and paste it wherever they need it.
But in Uplay, while entering the code you need to keep in mind that the code should be entered without any space that is if you have copied and pasted the code, then after pasting the code you need to remove the space between the numbers otherwise it will consider the wrong code, and you will keep on getting the Google Authentication error.
After removing the space in the Google Authentication code, most probably your error may be resolved.
Method 2: Syncing the Time Correction for Codes
As discussed above, due to different time zones sometimes, the code ‘receiving time’ and the device time may vary due to which the Google Authentication not working error occurs. So, by syncing the time correction for codes, your error may be resolved.
To sync the time correction for codes in Google Authenticator, follow the below steps:
Note: The steps mentioned below to sync the time correction for codes are the same for all the platforms like Android, iOS, etc.
1. Open the Google Authenticator app on your mobile device by clicking on its icon.
![]()
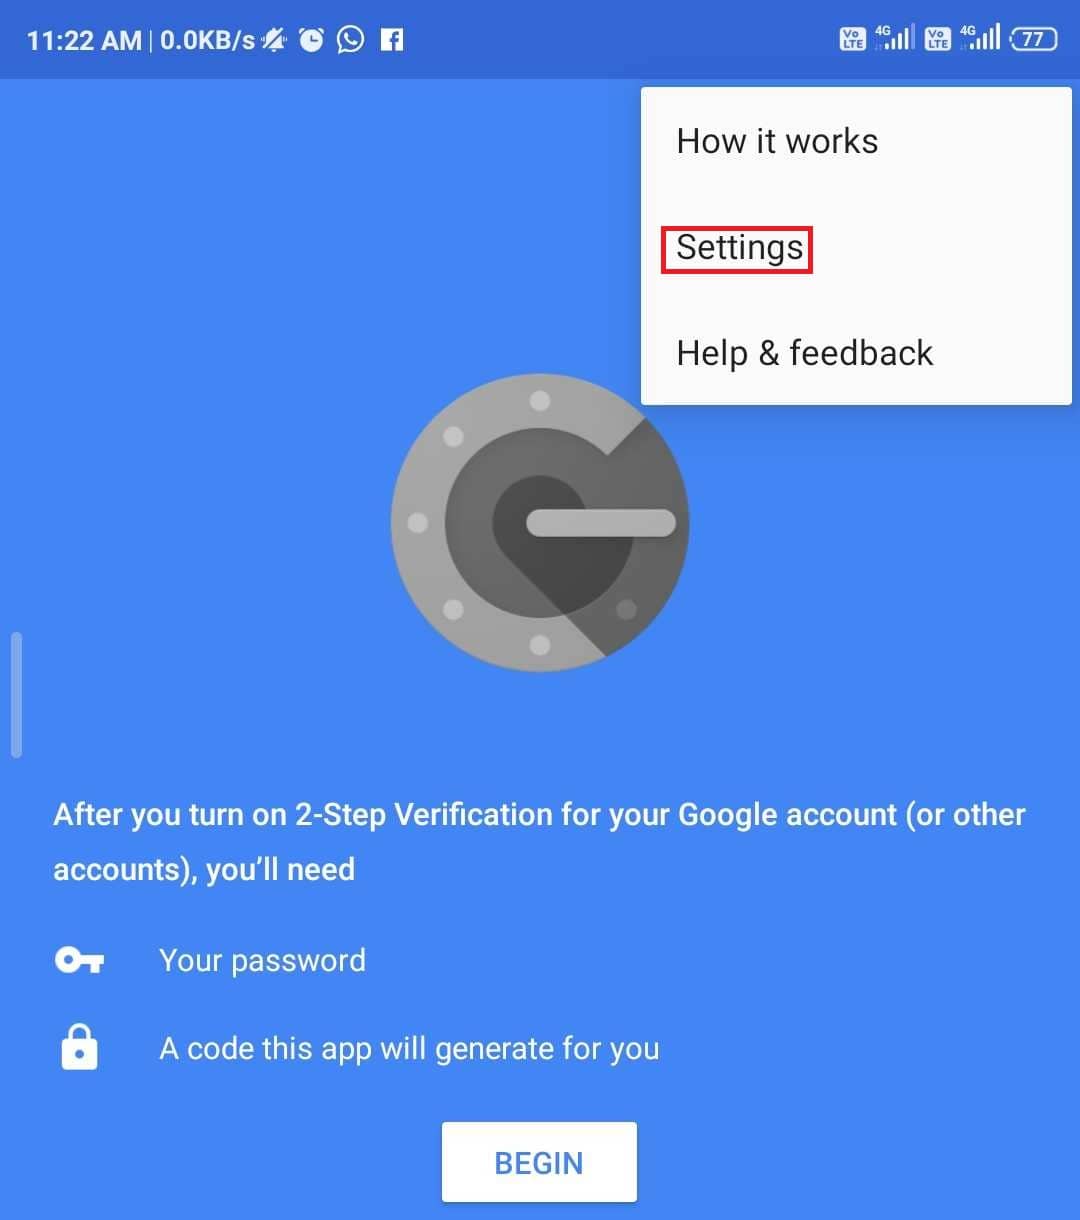
2. Inside the app, click on the three-dot icon available at the top right corner of the screen.
![]()
3. A menu will open up. then, click on the Settings option from the menu
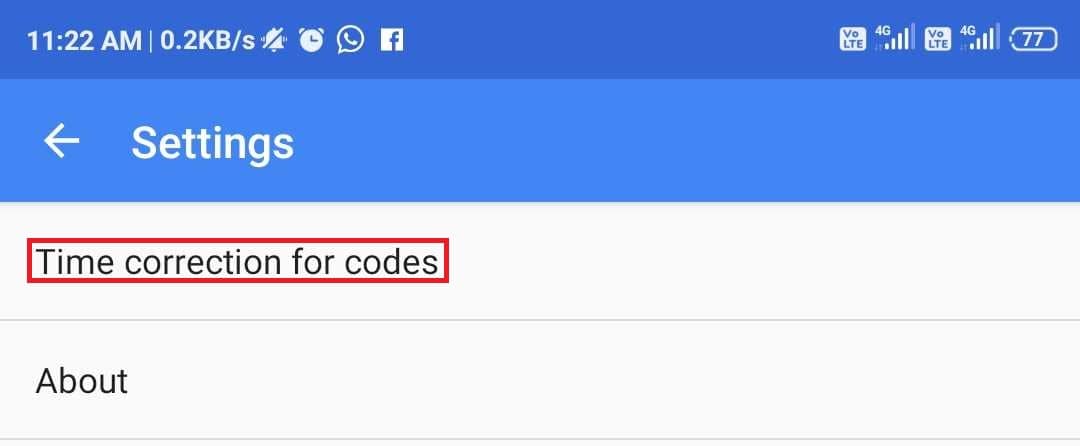
5. Under Settings, click on Time correction for codes option.
6. Under Time correction for codes, click on the “Sync now” option.
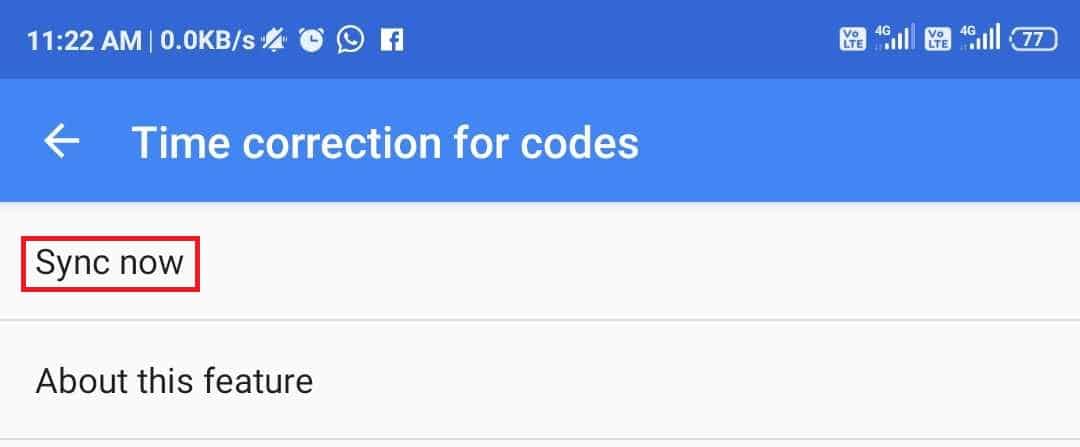
7. Now, wait for the process to be completed.
After completing the above steps, time correction for codes will be synced. Now, try to enter the Google Authenticator code. Your problem will be resolved now.
Also Read: 10 Best Android Emulators for Windows and Mac
Method 3: Setting the correct Date and Time on Mobile Devices
Sometimes, your mobile device time and date are not set according to your region because of which the Google Authentication code may give some error. By setting the time and date of your mobile device according to your region, your problem may be resolved.
To set the date and time of your Android mobile device, follow the below steps:
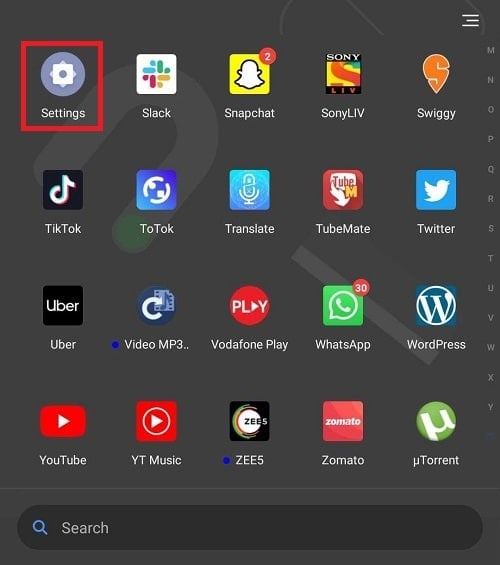
1. Open Settings of your phone by clicking on the settings icon.
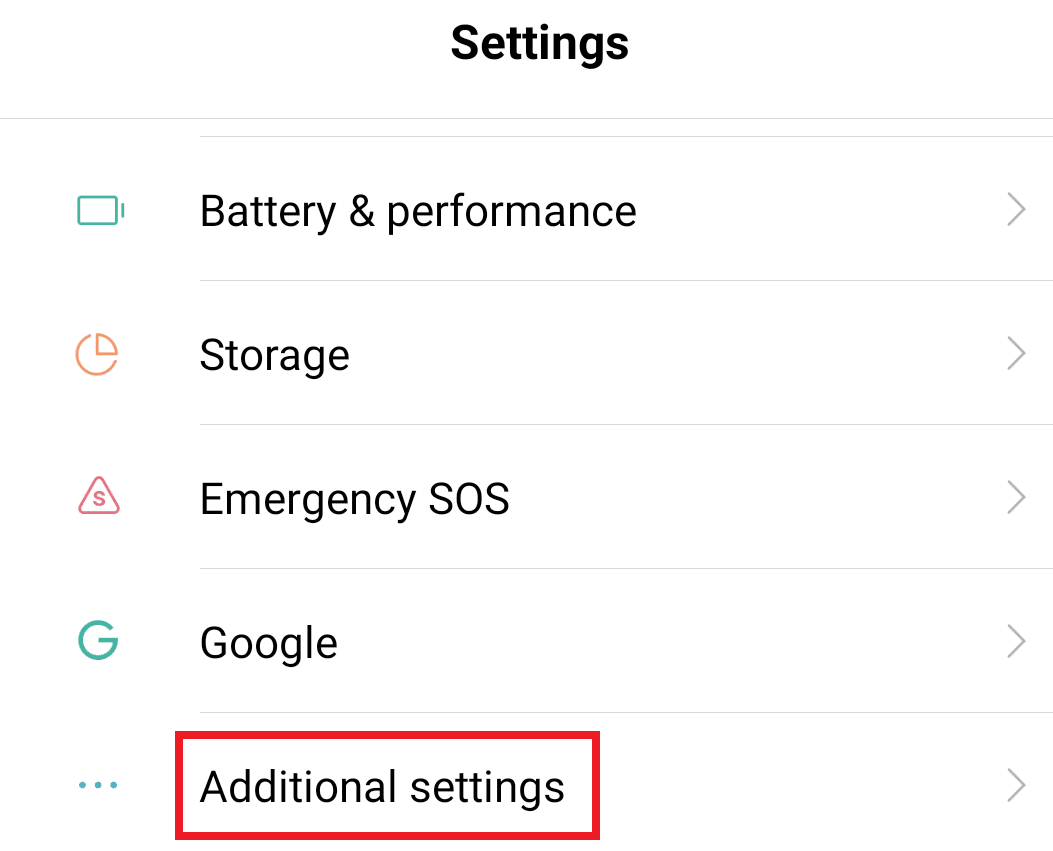
2. Under Settings, scroll down and reach to the additional settings option and click on it.
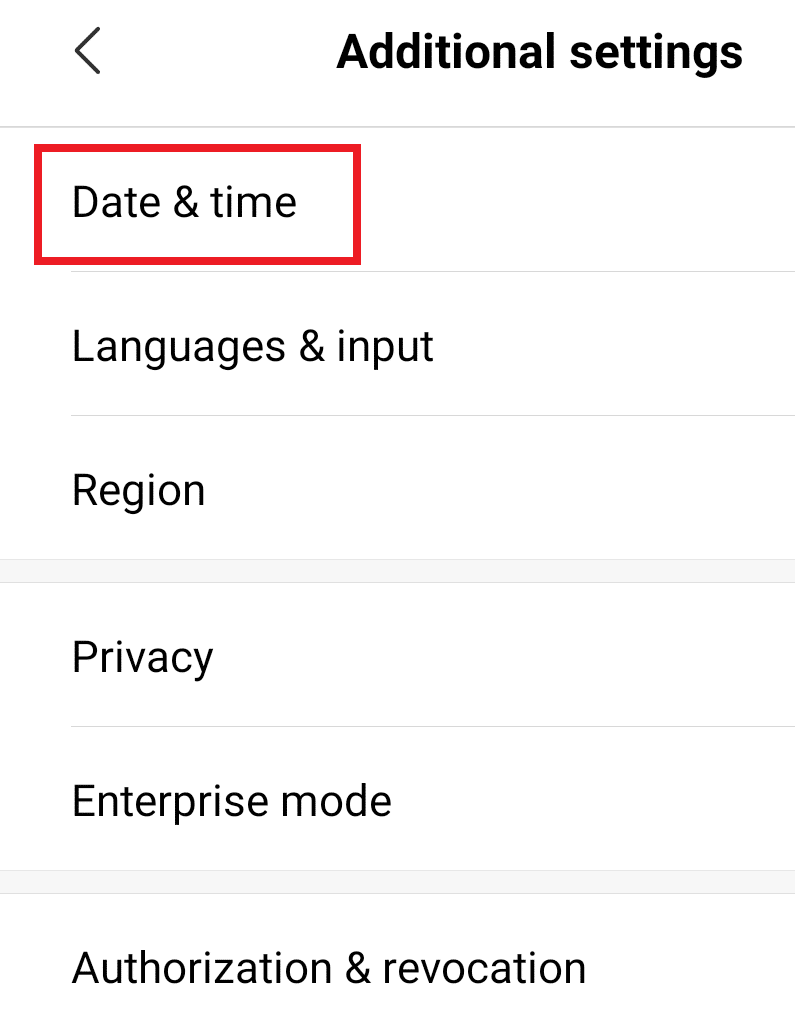
3. Now, under Additional Settings, click on the Date & Time option.
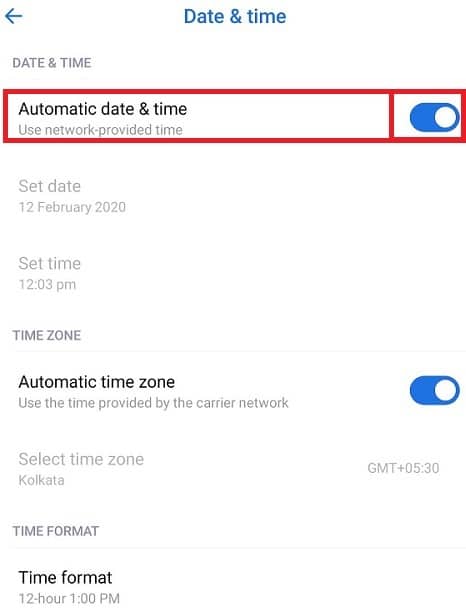
4. Under Date & time, make sure toggles associated with the Automatic date & time and Automatic time zone are enabled. If not, then enable them by toggling on the button.
5. Now, Restart your device.
To set the date and time of your iOS mobile device, follow the below steps:
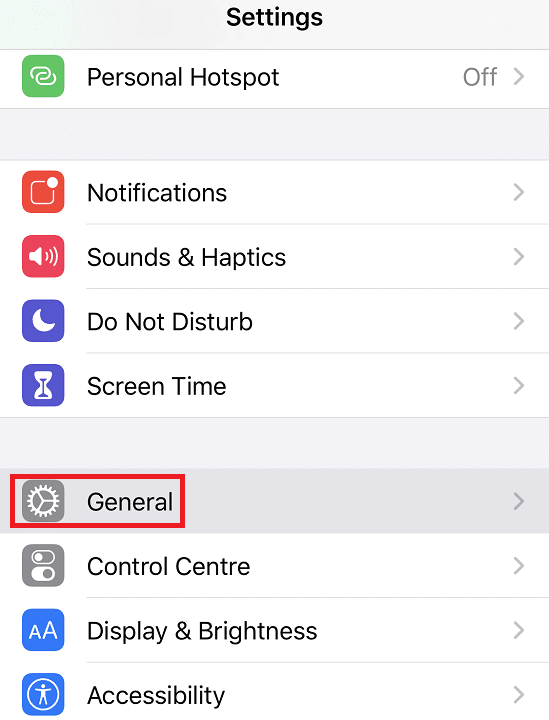
1. Open Settings of your iOS device.
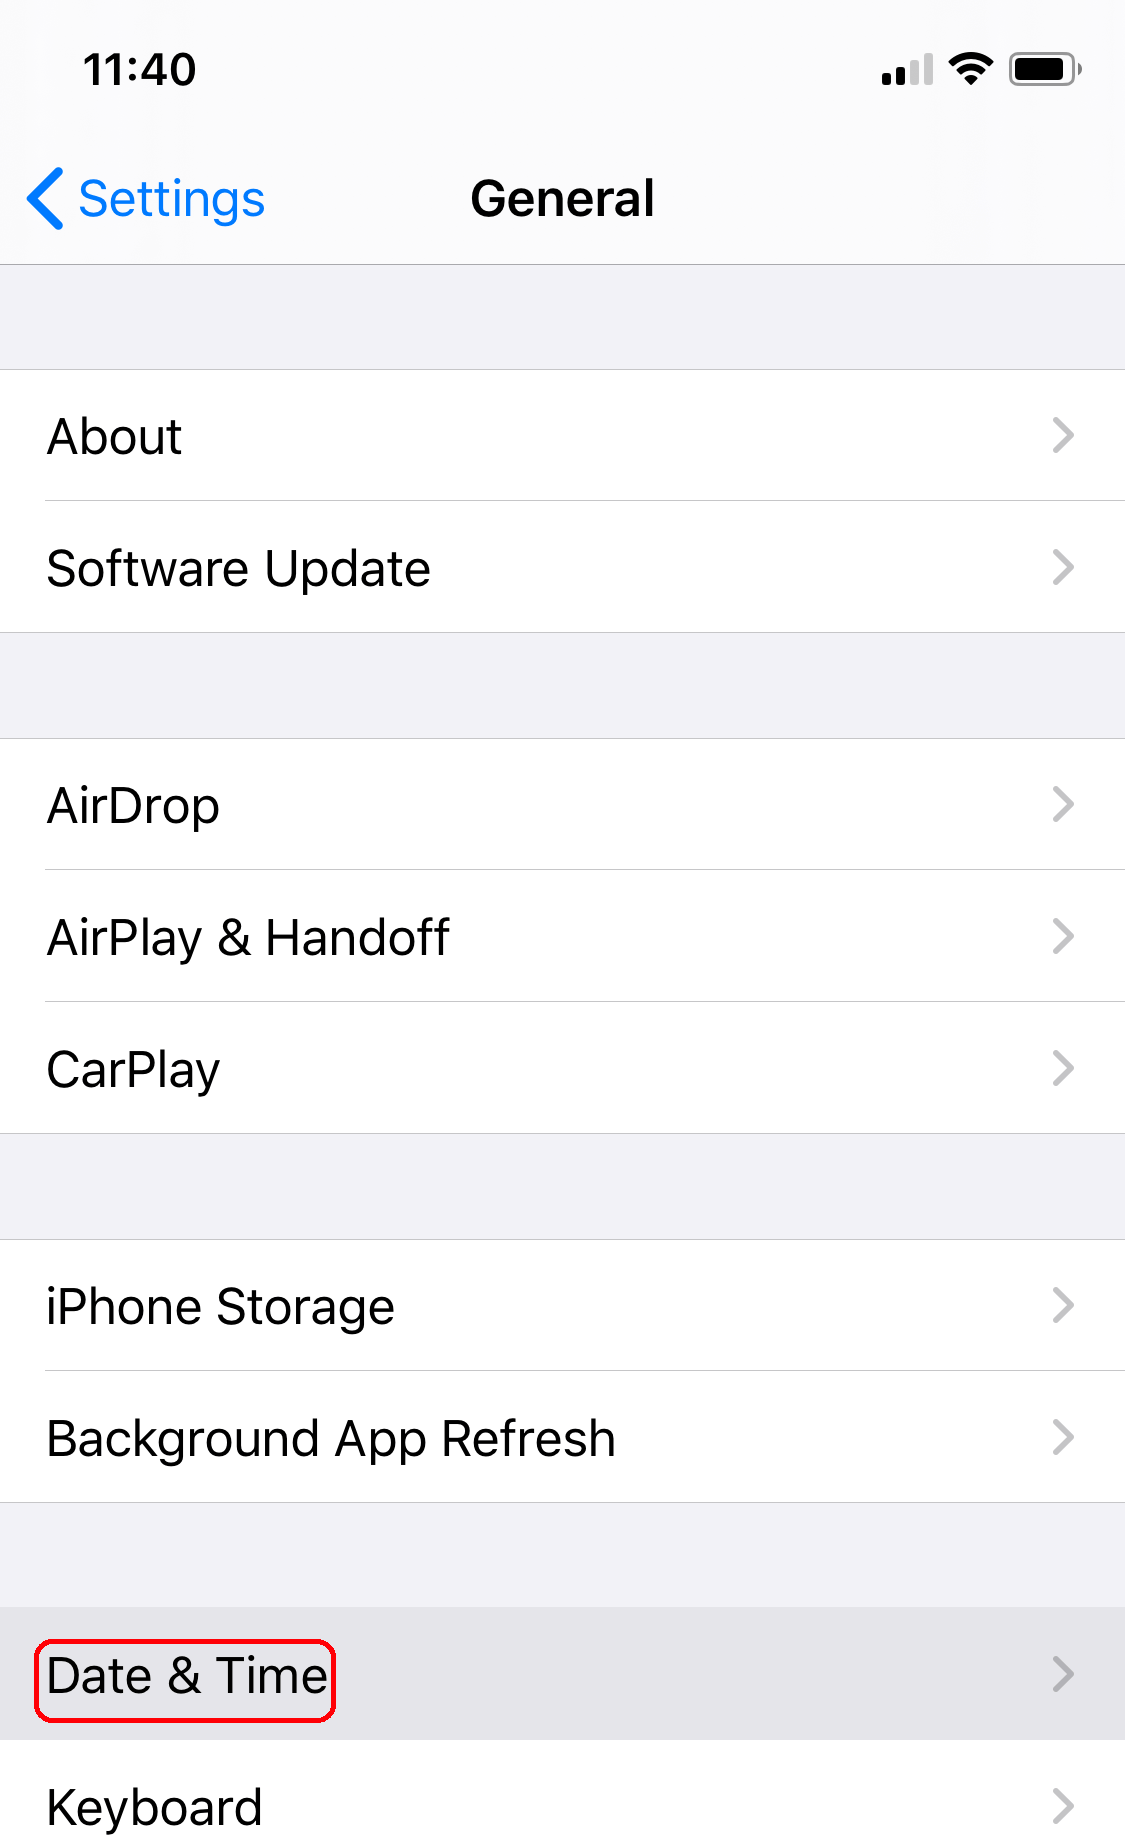
2. Under settings, click on the General option.
3. Under General, click on Date & time and set it to Automatic.
4. Again under settings, click on the Privacy option.
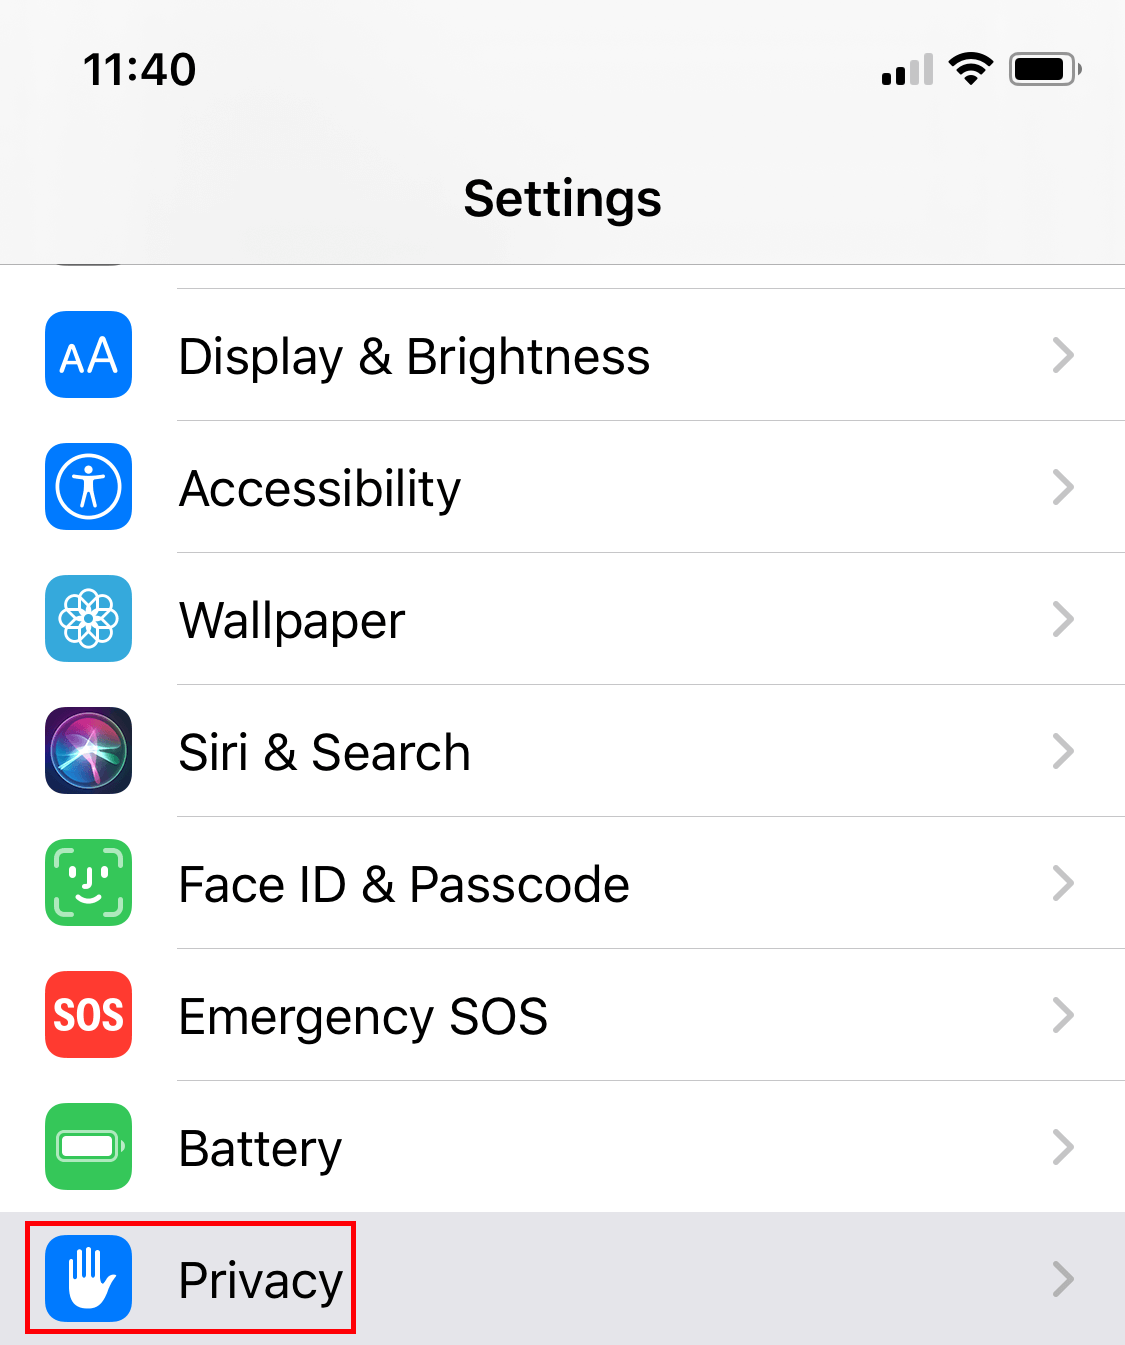
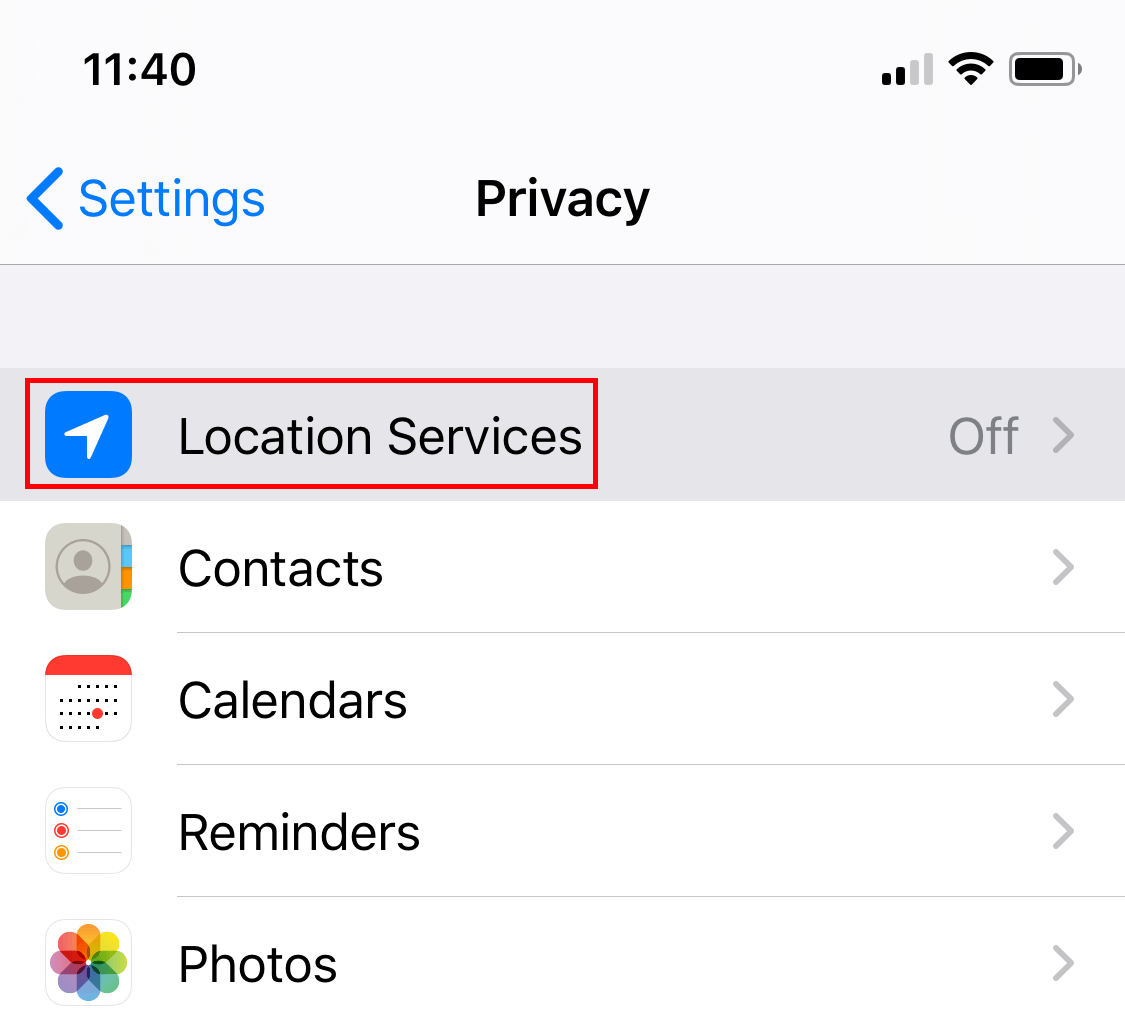
5. Under Privacy, click on Location Services and set it to always use for Google Authenticator app.
6. Restart your device.
Once the above steps are completed, restart your device, enter Google Authenticator code now, and your problem will be resolved.
Also Read: How to Link Your Android Phone With Windows 10?
Method 4: Open a Support Ticket
If, by using any of the above methods, if your Google Authenticator is still not working, then you need to take the help of Ubisoft’s support desk. You can register your query there, and it will be resolved by their support assistance team as soon as possible.
To raise a ticket for your query, visit the below link and register your query there, which will generally be resolved within 48 hours.
Link to raise the ticket: digital distribution
Hopefully, using one of the above methods, you will be able to fix Uplay Google Authenticator not working issue. But if you still have any questions then feel free to ask them in the comment section.