How to Remove Avast Completely from Windows 10: An antivirus or antimalware program is one of the first applications we install on a new computer. While there is a wide range of free and paid security programs available on the internet, Avast Free Antivirus is preferred by many. Avast does an excellent job of protecting your computer from any malicious attacks and safeguarding your personal info. The paid version of the program dials the security a notch higher and includes additional features to scan the websites you visit and the emails sent to you.
The built-in security program in the newer versions of Windows, Windows Defender, has proven to be quite sufficient for most users and has prompted them to uninstall other third-party security programs. Although removing third-party antivirus programs isn’t all that simple. Most security programs, along with Avast, include features like Self-Defense to prevent malicious applications from removing them without alerting the user.
Unfortunately, this implies that even users cannot get rid of the application by merely uninstalling via Windows Settings or Programs and Features. Instead, they will need to perform a few additional steps before (or after) to cleanse their computer of antivirus and the associated files thoroughly. In the case of Avast, if you do not properly uninstall it, you might continue to receive those annoying pop-ups requesting to update and, sometimes, threat alerts.
In this article, you will find five different methods to completely uninstall Avast Free Antivirus from your Windows 10 computer.
5 Ways to Remove Avast Antivirus from Windows 10 PC
Now, if you have already uninstalled Avast and are looking for ways to remove its residual files, skip to method 3,4, and 5. On the other hand, follow methods 1 or 2 to start executing the correct removal procedure for Avast.
Method 1: Disable Avast Self-Defense and then Uninstall Avast
As mentioned earlier, Avast includes a Self-Defense module to deter malware from removing it. If malware tries to uninstall Avast, the Self-Defense module displays a pop-up informing the user that an uninstall attempt has been made. The uninstallation process will only begin if the user clicks on the Yes button. To altogether remove Avast, you first need to disable Self-Defense in Avast settings and then proceed to uninstallation.
1. Double-click on Avast’s shortcut icon on your desktop to open it. If you do not have a shortcut icon in place, search for Avast in the start search bar (Windows key + S) and click on Open.
2. When the application interface opens up, click on the hamburger icon (three horizontally dashes) present at the top-right corner, from the menu that slides in, select Settings.
![]()
3. In the following Settings window, switch to the General tab using the left navigation menu and then click on Troubleshooting.
4. Finally, disable Self-Defense by unticking the box next to ‘Enable Self-Defense’.
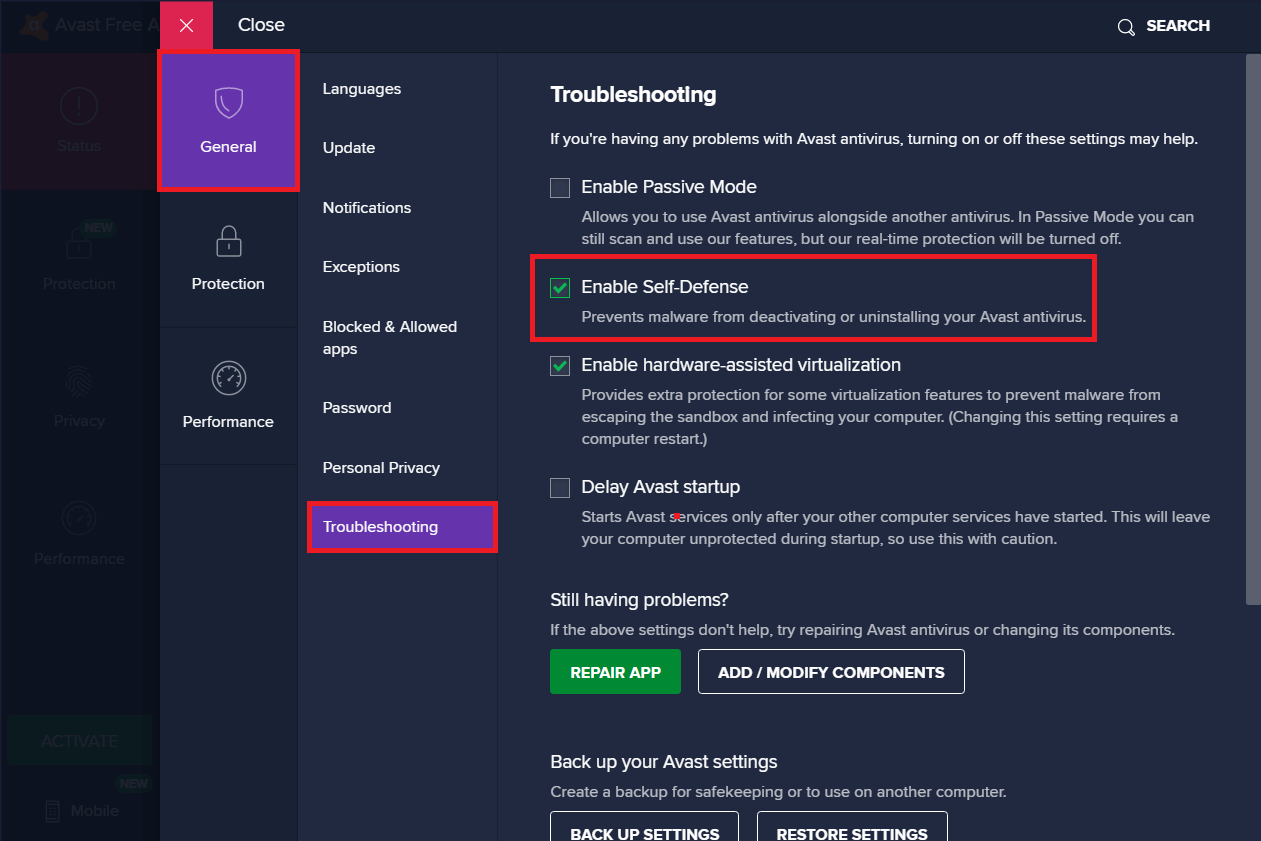
5. A pop-up message alerting you of an attempt to disable Self-Defense will appear. Click on Ok to confirm the action.
6. Now that we have turned off the Self-Defense module, we can move forward to uninstalling Avast itself.
7. Press the Windows key and start typing Control Panel, click on Open when search results arrive.

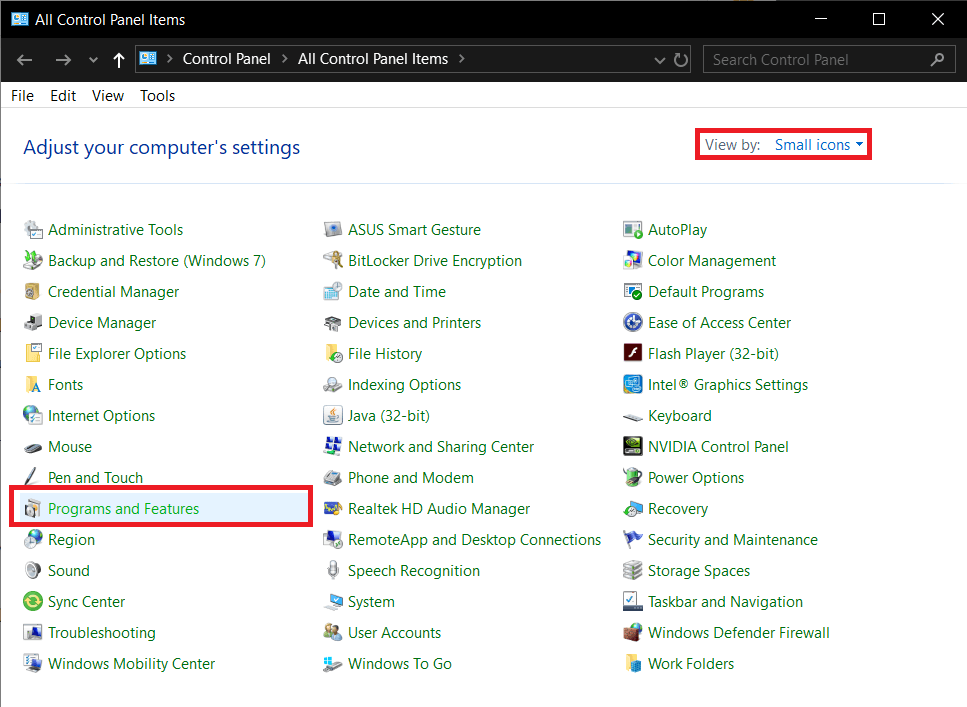
8. Click on Programs and Features. You can change the icon size to large or small using the View by the option on the top-right to make looking for the required item easier.
9. Locate Avast Free Antivirus in the following window, right-click on it and select Uninstall.
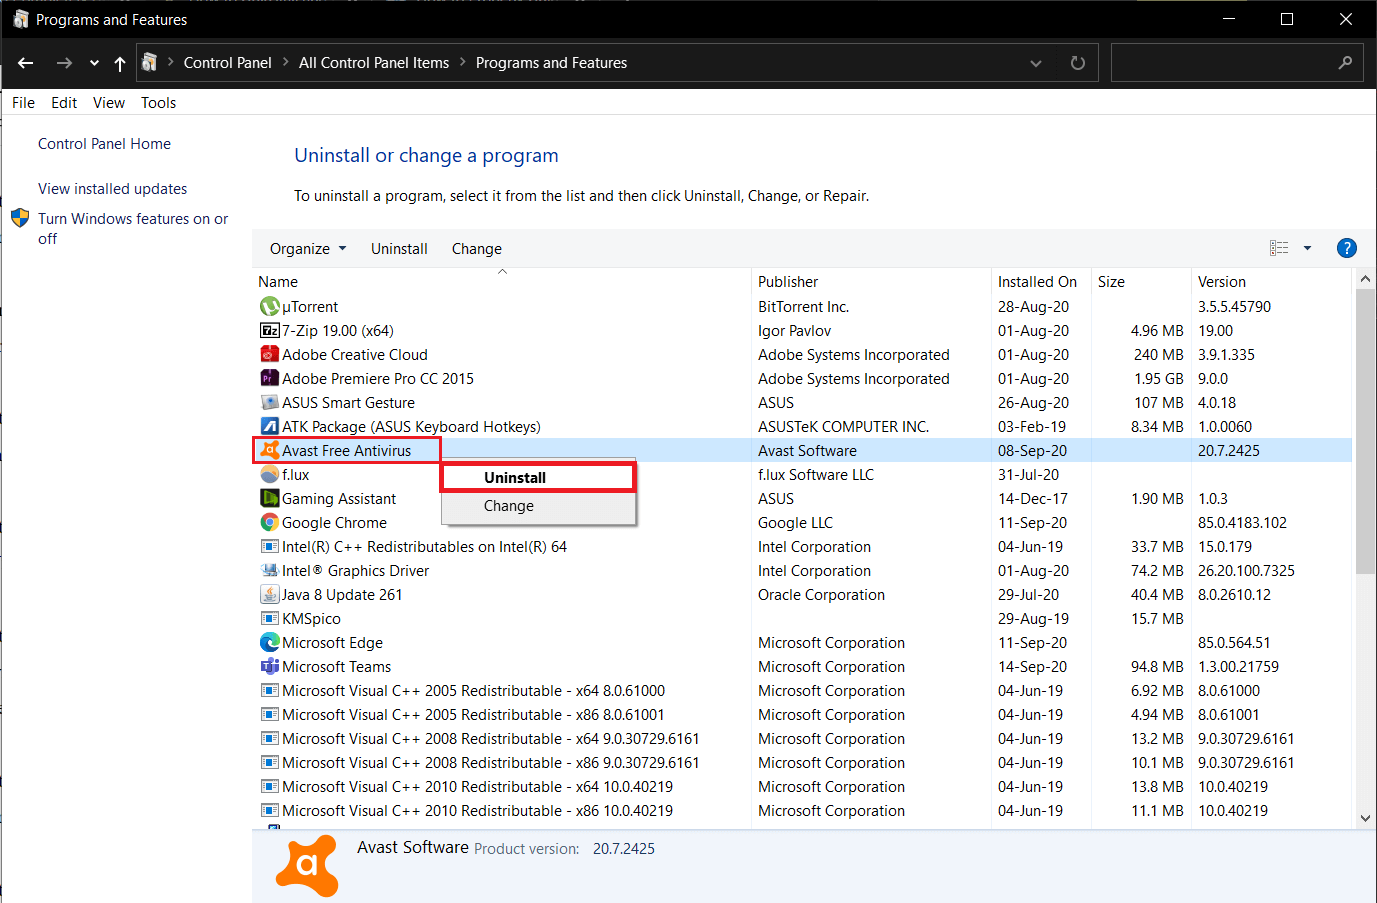
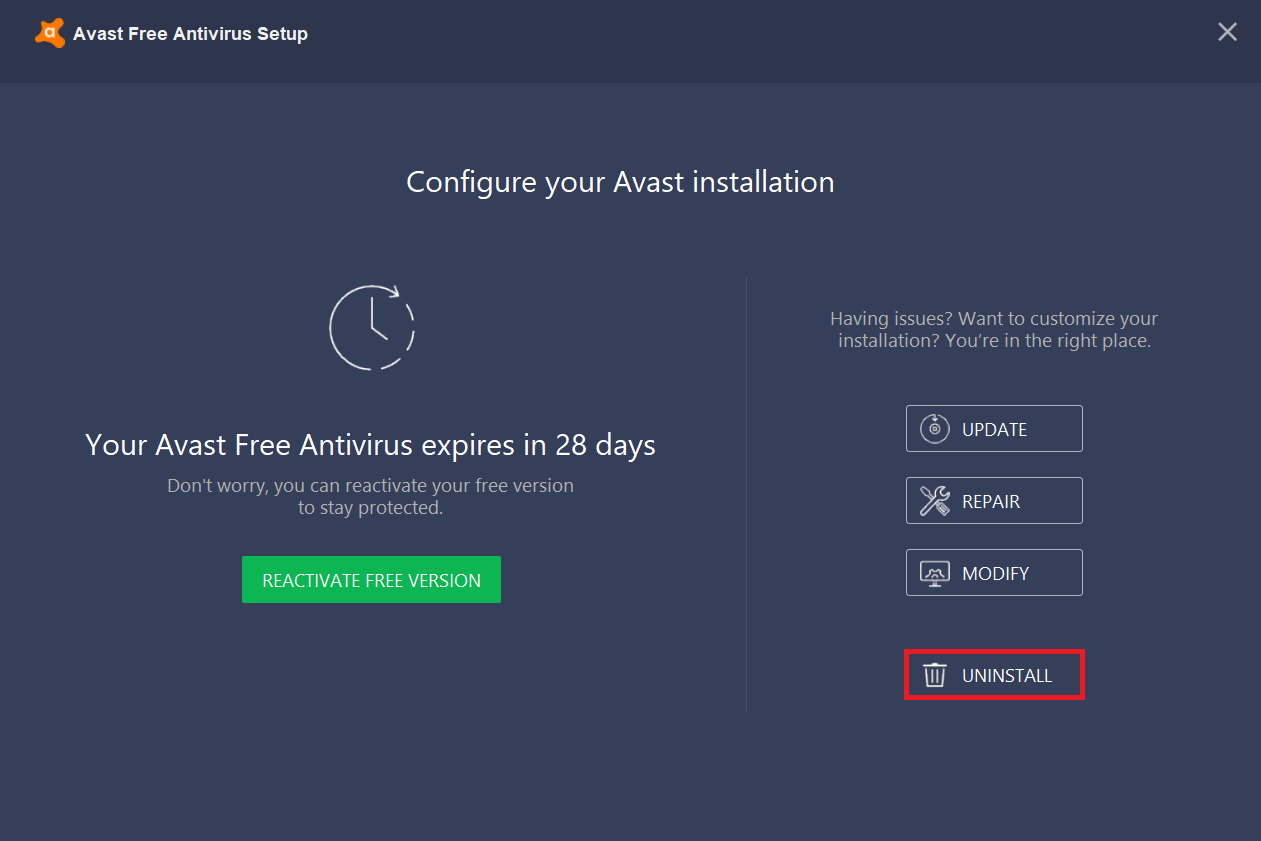
10. Avast Antivirus Setup window will appear when you click on Uninstall. The setup window lets you update, repair, or modify the application. An uninstall button can also be found at the bottom of the window. Click on it to continue.
11. You will again receive a pop-up requesting for confirmation; click on Yes to start the uninstallation process.
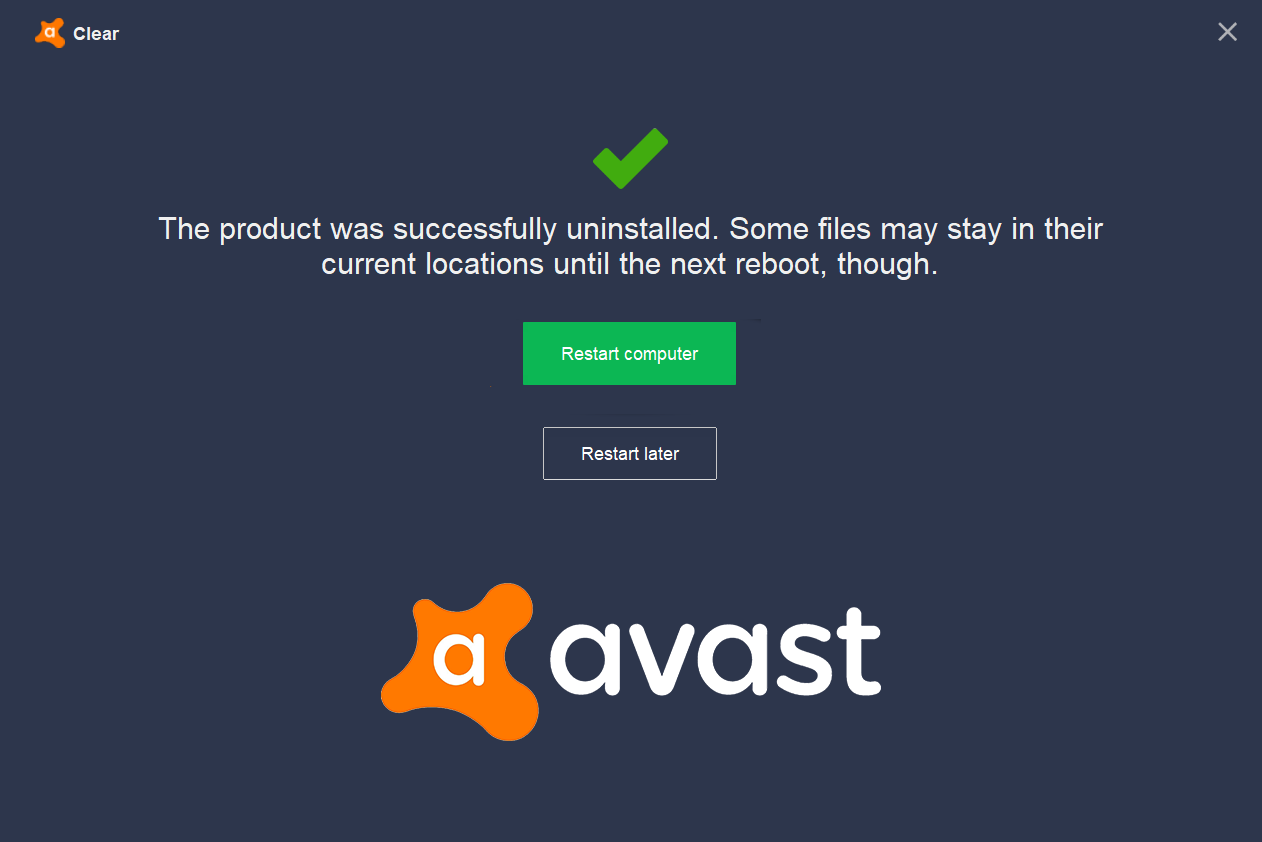
12. The uninstallation process will take a few minutes to finish. Upon completion, you will receive a confirmation message that reads, ‘The product was successfully uninstalled’ with options to Restart your computer now or later to remove all Avast files.
We recommend restarting immediately after uninstalling Avast but if you are in the middle of some critical work, continuing later does the job.
Method 2: Use Avast’s Uninstall Utility
Most antivirus companies have started rolling out special utility tools to remove their security programs properly. Similarly, Avastclear is an uninstall utility by Avast themselves to remove any of their applications from Windows 10 PC. The tool is pretty simple to use but requires you to boot the system in safe mode. So, sort out any immediate work before using Avastclear.
Also, some users, while using Avastclear, might encounter a pop-up that reads ‘Self-Defense module is preventing uninstallation’, follow steps 1 through 5 of the above method to disable the Self-Defense module and complete uninstallation.
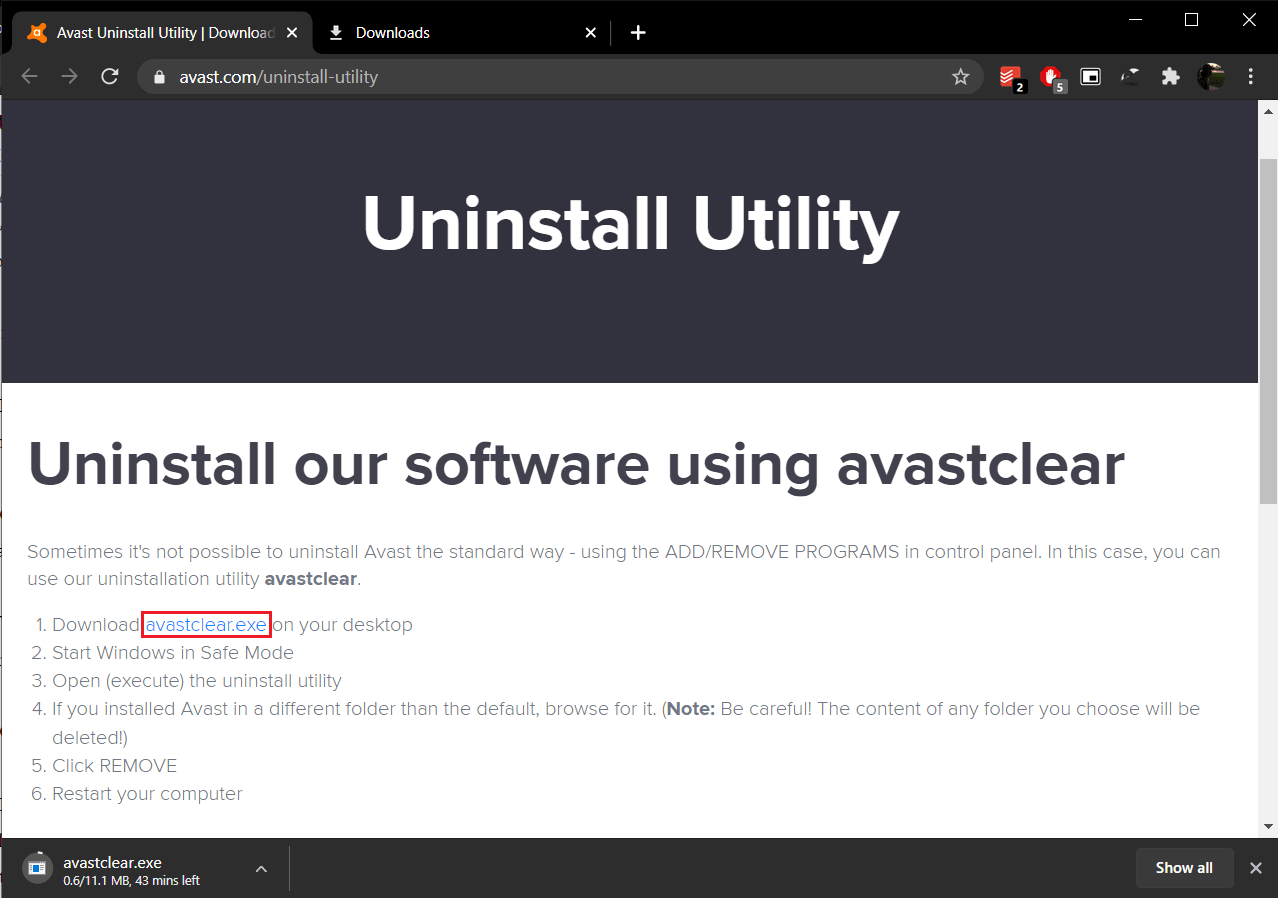
1. Head over to Uninstall Utility for Avast Removal and click on the avastcleaner.exe hyperlink to download the tool.
2. Open the Downloads folder (or the location where you saved the file), right-click on avastcleaner.exe, and select Run As Administrator.
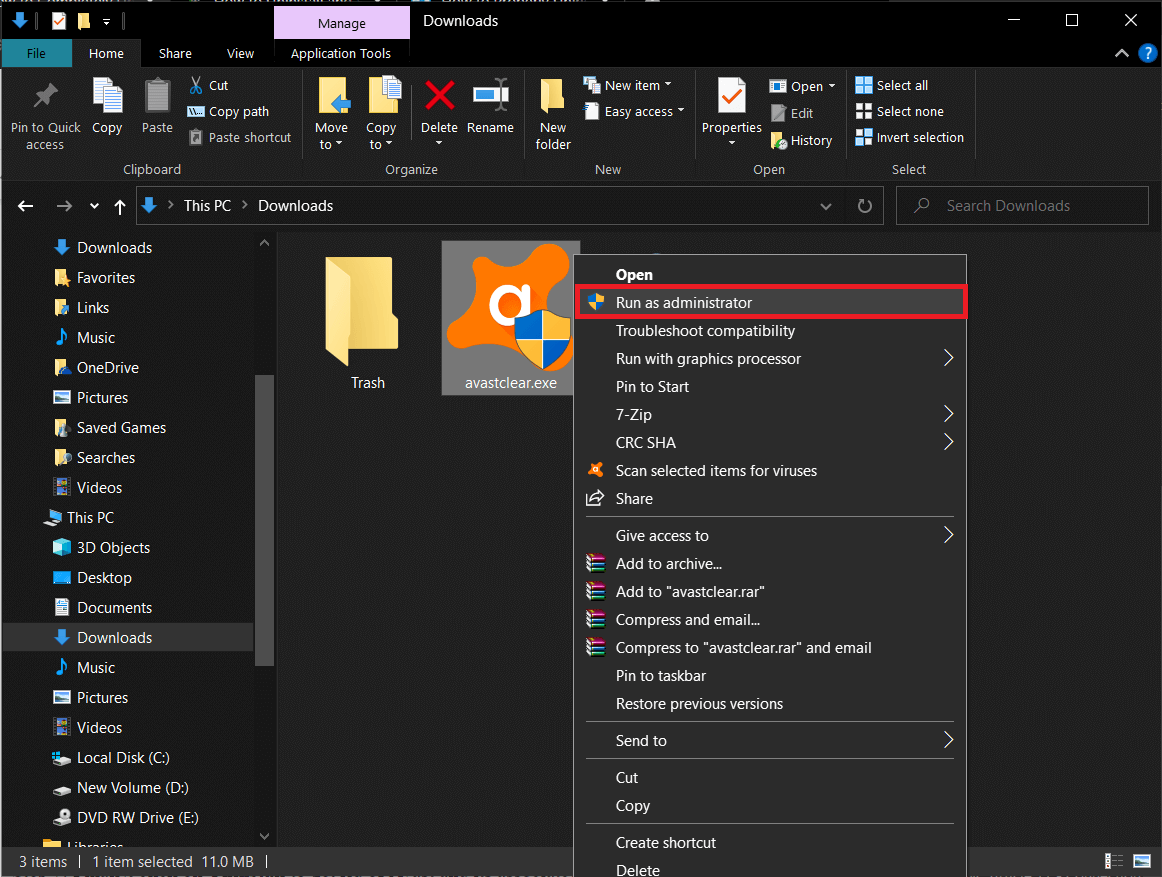
Note: Click on Yes in the following User Account Control pop-up to grant the necessary permission.
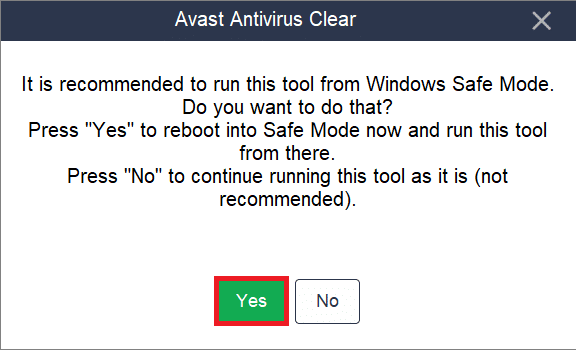
3. You will receive a message recommending you to run the tool in Windows Safe Mode. Click on Yes to boot into Safe Mode.
4. Once your computer boots in Safe Mode, find the file again and run it.
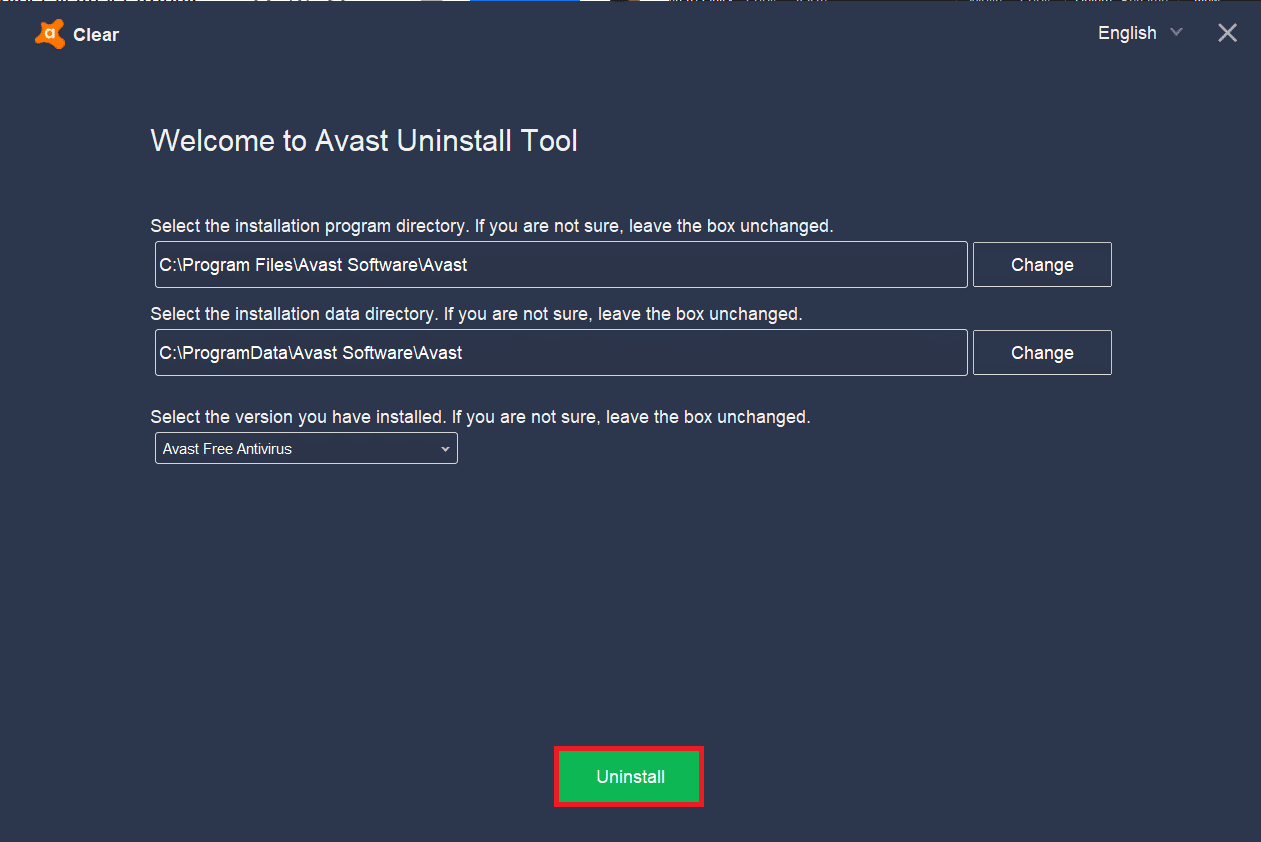
5. In the following window, click on Change to select the Avast installation folder. The removal tool automatically selects the default installation path, but if you have Avast installed in a custom folder, navigate to it and select the Avast version you have installed using the drop-down list.
6. Finally, click on Uninstall to get rid of Avast and its associated files.
After the residual files have been removed and the computer restarts, uninstall Avast Clear as well since you do not need it anymore.
Also Read: How to completely uninstall McAfee from Windows 10
Method 3: Remove Avast OS
Avast Antivirus installs a temporary Avast OS during its uninstallation. The OS is installed to assist in the removal of associated files. Although, once the files are removed, the Avast OS doesn’t uninstall itself. While the OS removes the residual Avast files, it gets set as the default OS for the computer and, therefore, isn’t automatically removed/deleted.
To stop receiving the Avast pop-ups, you will first need to re-select Windows as the default OS and then delete Avast OS manually.
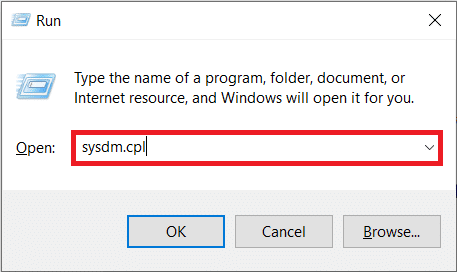
1. Launch the Run Command box by pressing Windows key + R, type sysdm.cpl, and press enter to open the System Properties window.
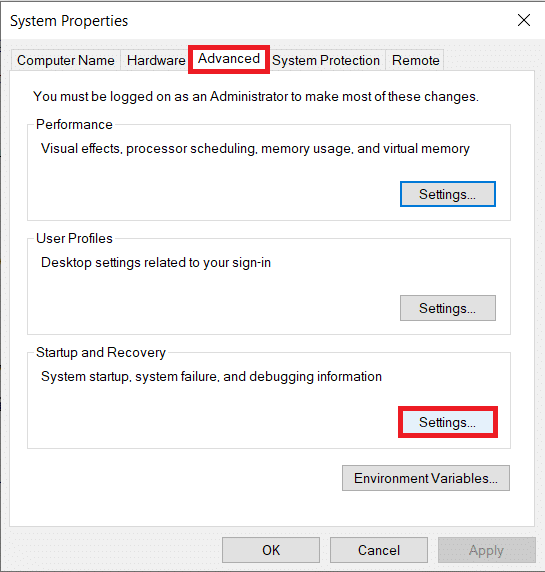
2. Switch to the Advanced tab and click on the Settings button under the Startup and Recovery section.
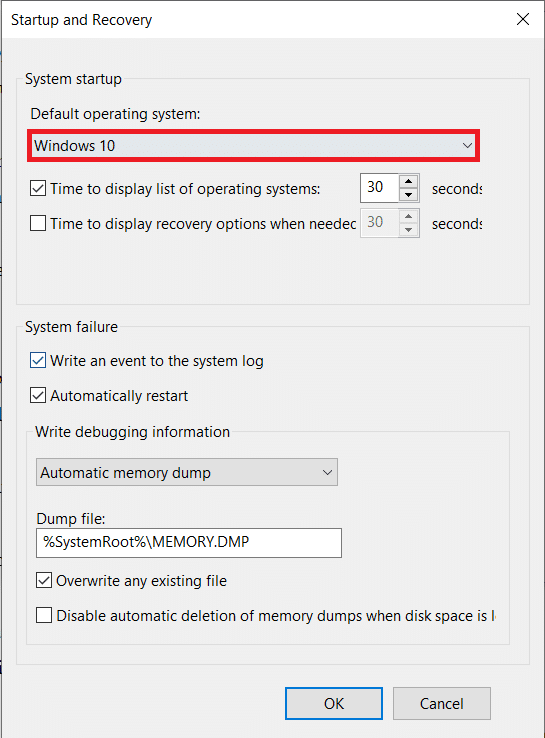
3. In the following window, ensure the Default operating system is set as Windows 10. If it is not, expand the drop-down list and select Windows 10. Click on OK to exit.
4. One can also set Windows as the default operating system from the boot selection menu. To access the selection menu, repeatedly press Esc or F12 when your computer boots on.
5. Once again, open the Run command box, type msconfig, and press enter.

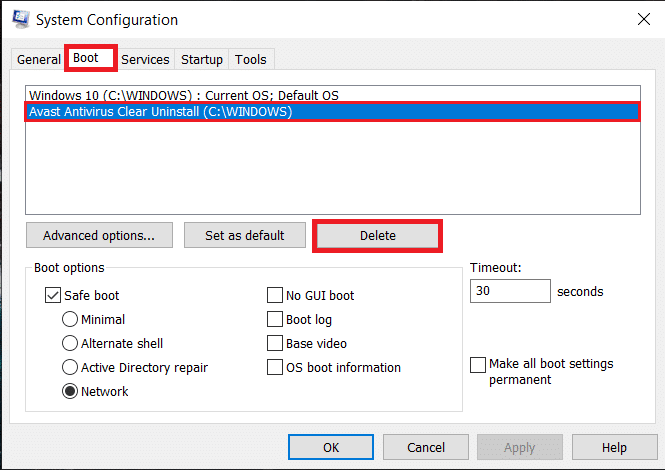
6. Move to the Boot tab of the following System Configuration window.
7. Select the Avast Operating System and click on the Delete button. Approve any confirmation messages you might receive.
Method 4: Use a third-party remover software
The internet is flooded with various residual file removal programs. A few popular remover tools for Windows are CCleaner and Revo Uninstaller. ESET AV Remover is a remover tool specially designed to remove antivirus & anti-malware programs and can entirely remove every available security program. In this case, we will use ESET AV Remover to completely uninstall Avast antivirus in Windows 10:
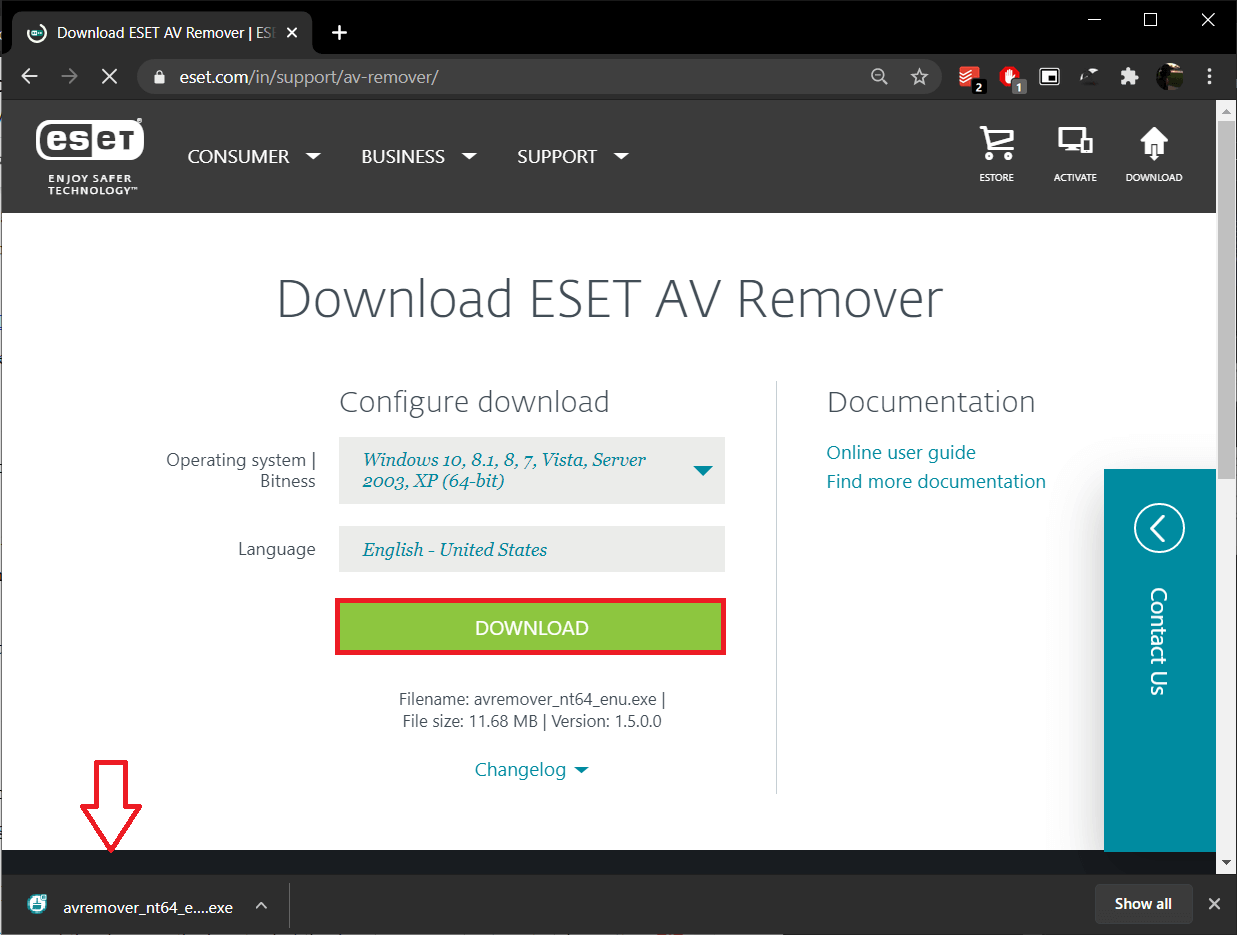
1. Visit Download ESET AV Remover and download the installation file suitable for your system architecture (32 bit or 64 bit).
2. Click on the .exe file to launch the installation wizard. Follow all the on-screen instructions to install ESET AV Remover.
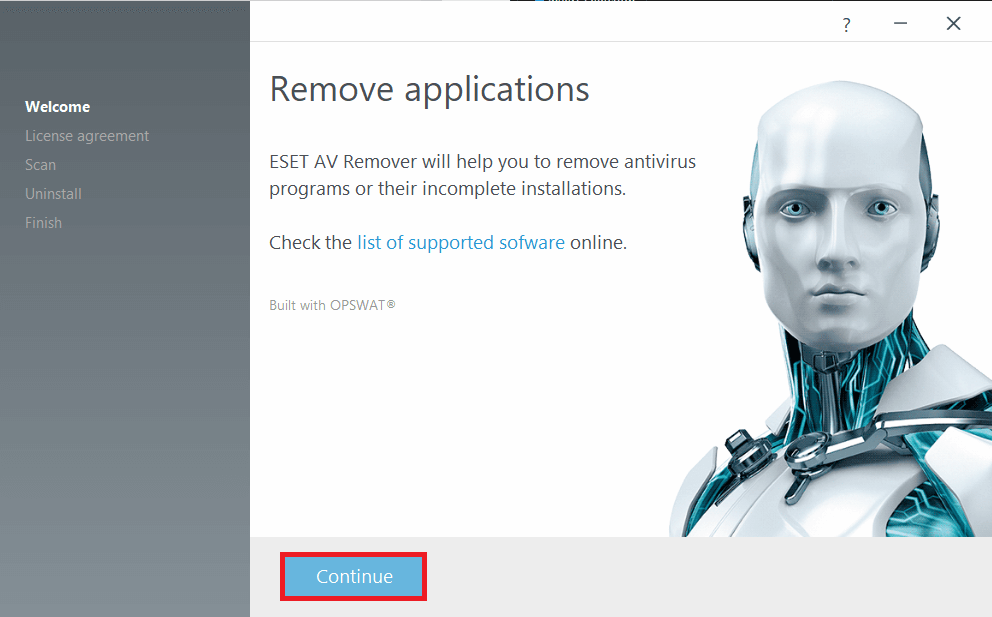
3. Once installed, open ESET AV Remover and click on Continue followed by Accept to let the application scan your computer for traces of any previously installed antivirus program.
4. Select Avast and all related programs from the scan list and click on Remove.
5. Click on Remove again in the confirmation/warning pop-up.
Check the Programs and Features list to ensure there are no Avast programs left behind on your PC. You can go ahead and also get rid of ESET AV Remover as it serves no purpose anymore.
Ultimately, if none of the above methods get rid of the Avast pop-ups, it is time to take matters into our own hands and delete all Avast files manually. All antivirus files are protected and can only be deleted/removed by a trusted installer. For Avast files, the trusted installer is Avast itself. Using this method, we will be upgrading our access status and then delete every Avast residual file manually.
1. Press Windows Key + E to open Windows File Explorer and copy-paste the following location in the address bar.
C:ProgramDataAVAST SoftwareAvast
2. Find the files you wish to delete, right-click on one of them, and select Properties.
3. Move to the Security tab and click on the Advanced button.
4. In the following window, click on the Change hyperlink to set yourself as the owner.
5. Set your account or an administrator account as the Owner and click on OK to save & exit. Close all the windows.
6. Right-click on the file with the changed properties and select Delete.
Repeat the above steps for all the files and folders you wish to delete. Some Avast files can also be found at %windir%WinSxS and %windir%WinSxSManifests. Change their ownership as well and delete them. Be wary of what files you are deleting, as trusted installer files should not be messed with.
Next, you may also want to check the Windows Registry Editor for residual Avast files.
1. Type regedit in the Run command box and press enter.
2. Copy-paste the below path in the address bar or navigate your way there using the navigation menu on the left.
ComputerHKEY_CURRENT_USERSOFTWAREAVAST Software
3. Right-click on the Avast Software folder and select Delete.
4. Also delete the folder present at ComputerHKEY_LOCAL_MACHINESOFTWAREAvast Software
Recommended:
So those were five different methods that you could use to completely uninstall Avast Antivirus in Windows 10. Let us know which one of the five worked for you in the comments section. If you are facing any trouble following any of the methods, get in touch with us below.