7 Ways to Fix iaStorA.sys BSOD Error on Windows 10
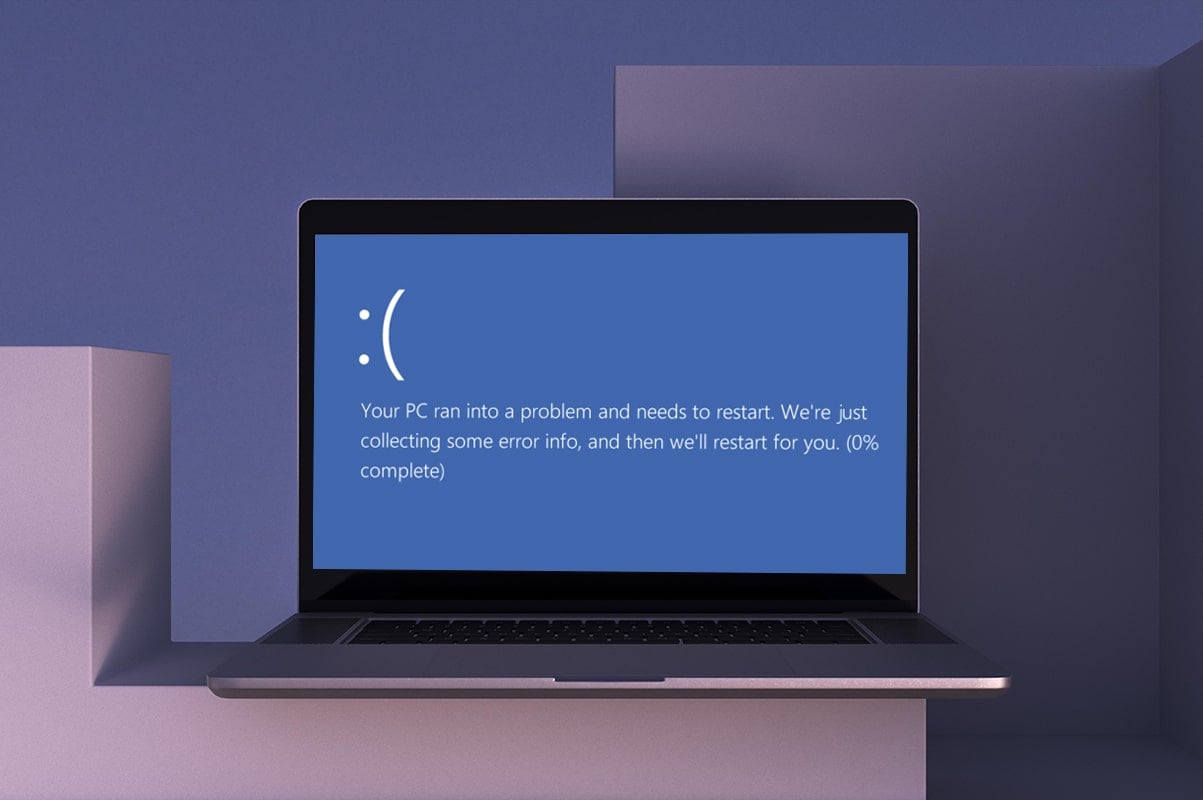
The Blue Screen of Death errors have been haunting Windows 10 users for a long time. Unfortunately, they do not seem to stop anytime soon either. They are indicative of fatal system errors caused either due to software crashes or hardware failure. Lately, users have been encountering two specific kinds of BSOD bearing the error messages listed below: DRIVER_IRQL_NOT_LESS_OR_EQUAL (iaStorA.sys) or SYSTEM_SERVICE_EXCEPTION (iaStorA.sys). Both of these errors point towards a driver file related to the Intel Rapid Storage Technology (IRST) which helps to improve the performance and reliability of your device equipped with SATA Disks. We bring a helpful guide that will teach you how to fix Windows 10 blue screen iaStorA.sys BSOD error code.
Ways to Fix iaStorA.sys BSOD Error on Windows 10
This Windows 10 Blue screen error code usually occurs due to:
- Issues in IRST drivers
- Unwanted processes running in the background
- Conflicting Third-party apps
- Corrupt Windows OS files
Method 1: Close All Background Services & Update Windows
The background services which are running unnecessarily might also cause this issue. Follow the given steps to disable them:
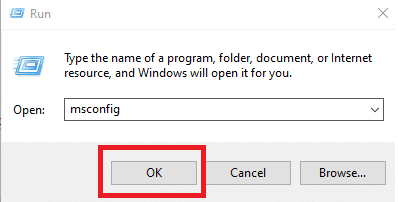
1. Hit Windows + R keys simultaneously to launch Run dialog box.
2. Type msconfig and click OK to launch System Configuration window.
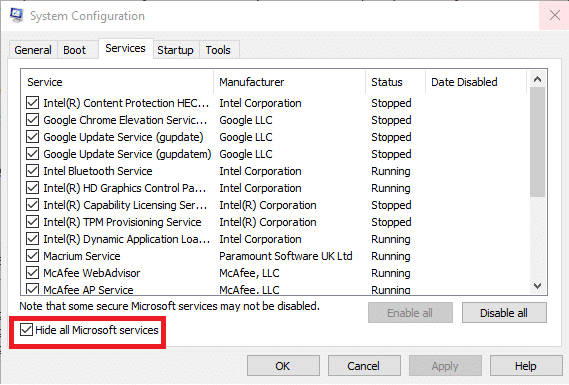
3. Navigate to the Services tab and check the box titled Hide all Microsoft services
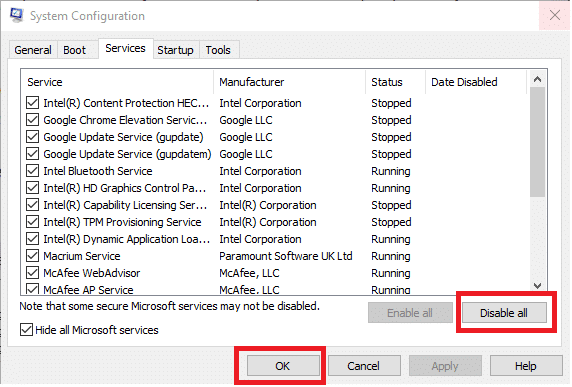
4. Now, click Disable all button and then, click on Apply > OK to save the changes.
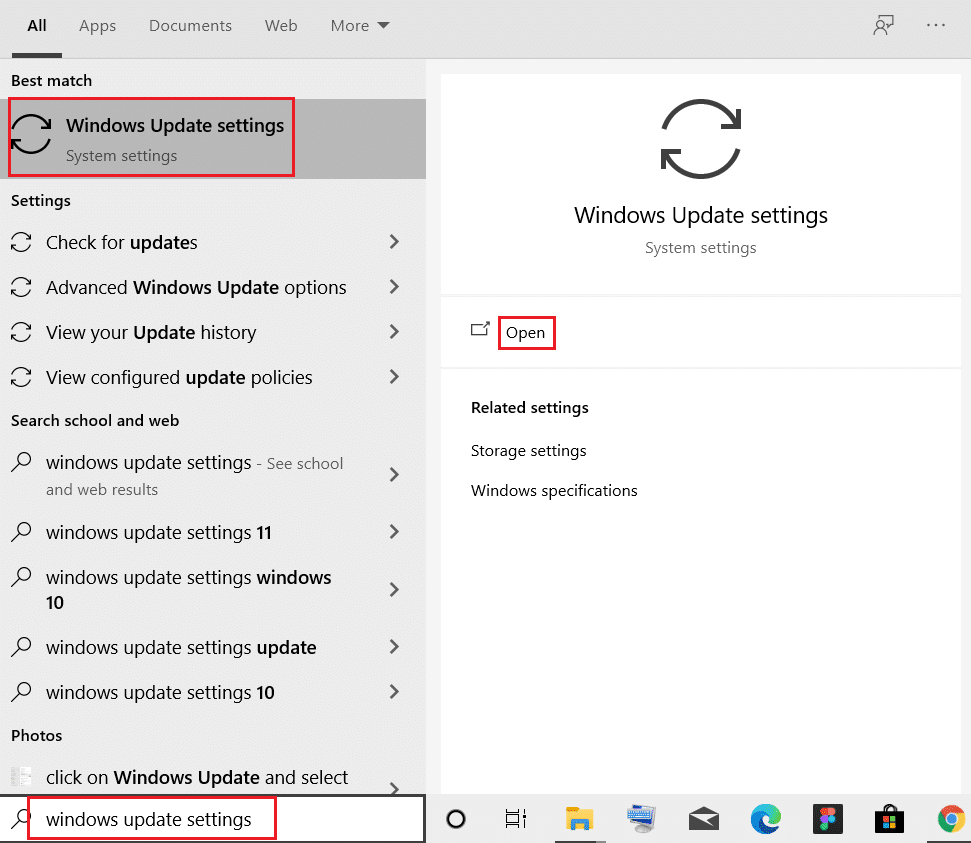
5. Next, press Windows key and type windows update settings, then click Open.
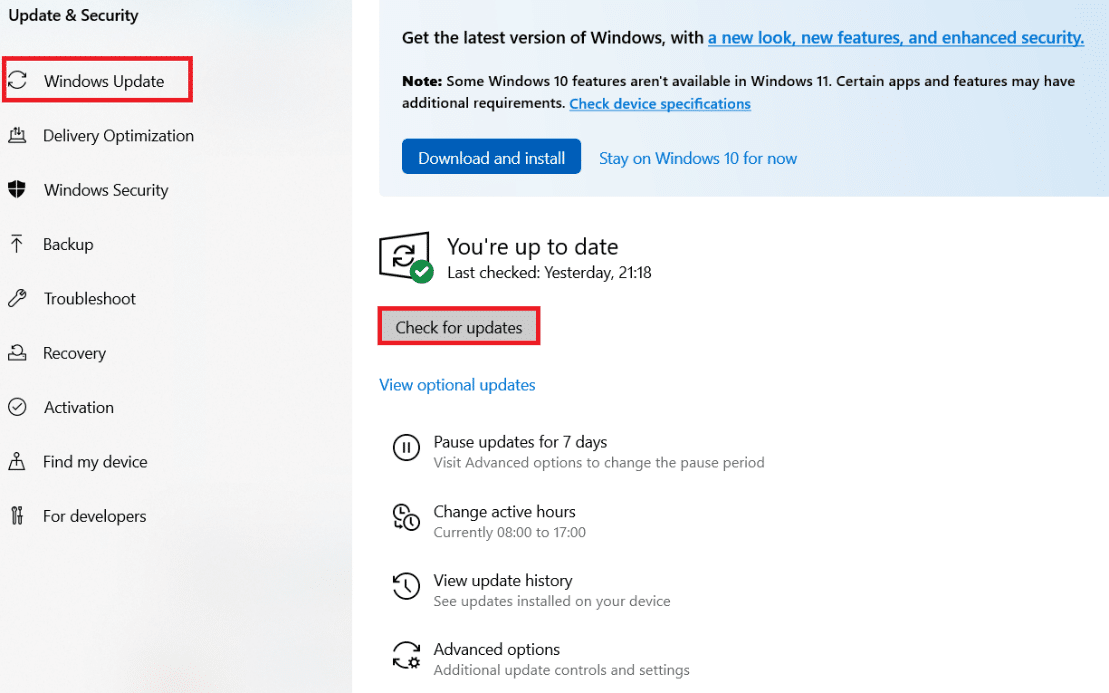
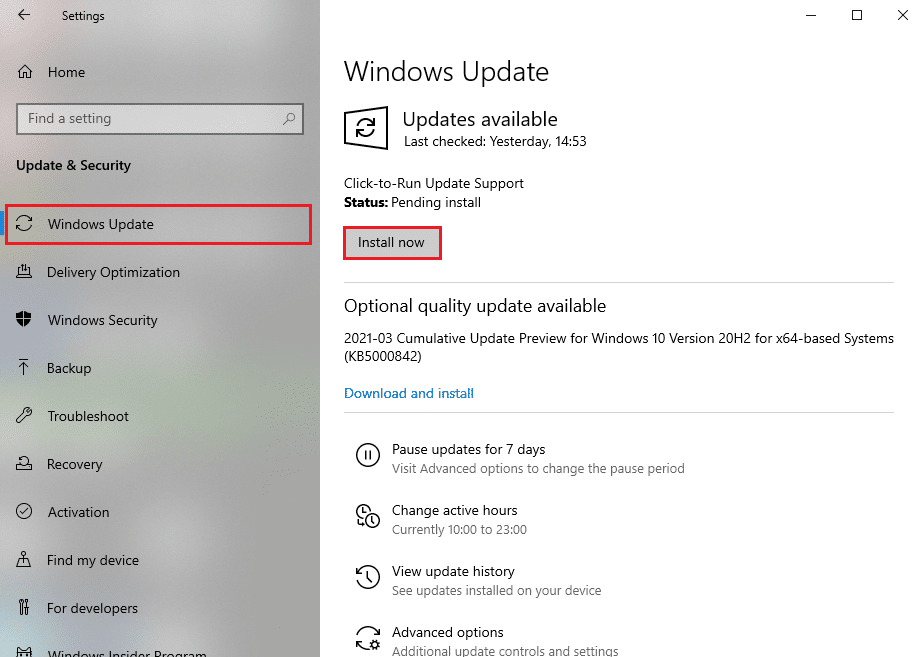
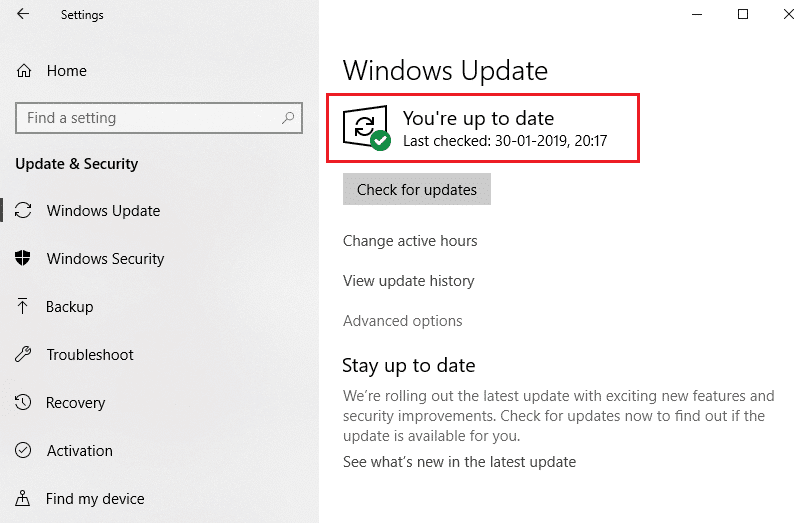
6. Click on Check for Updates button.
7A. Click on Install Now to download the available updates. Then, restart your PC.
7B. If there is no update available, then it will show You’re up to date message.
Also Read: How to Download and Install Optional Updates in Windows 11
Method 2: Update IRST drivers
If Windows operating system is unable to find correct driver files, you will encounter the BSOD iaStorA.sys error. In this case update the drivers by downloading the required files from the official manufacturer site, as explained below:
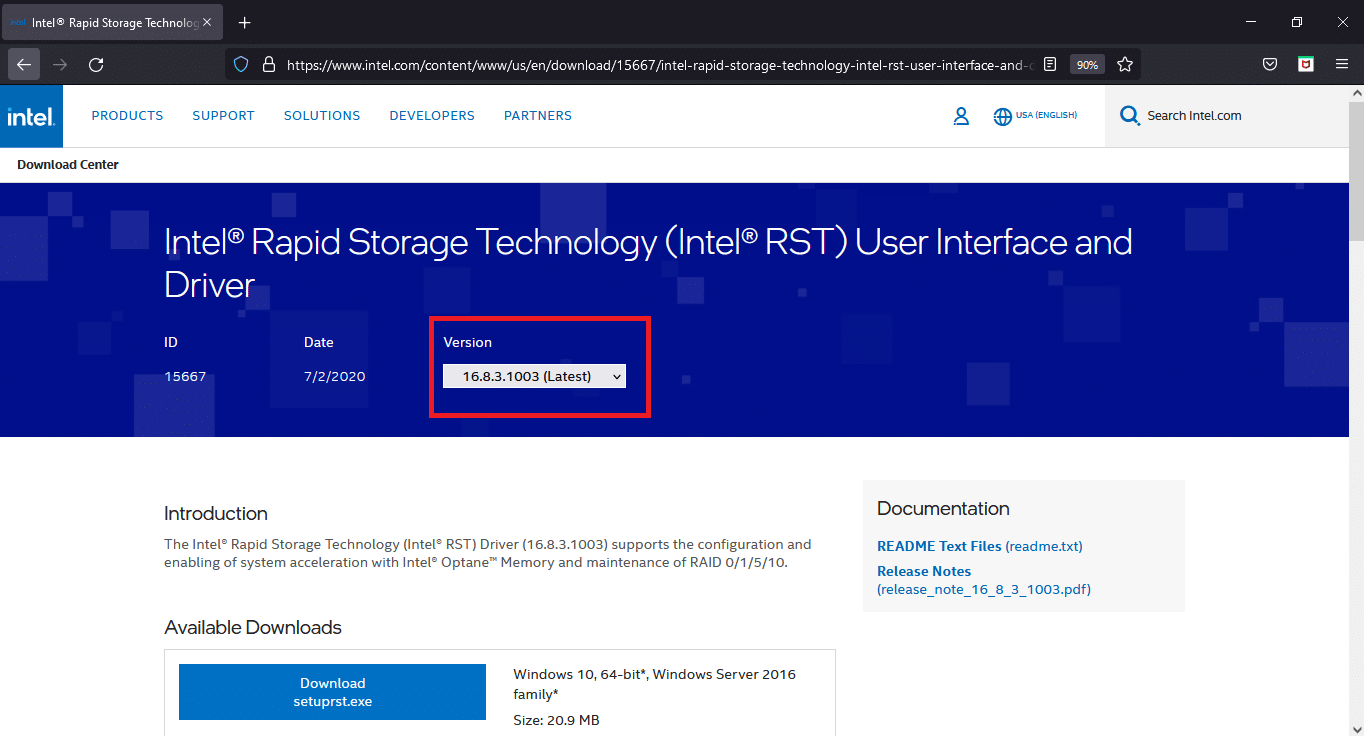
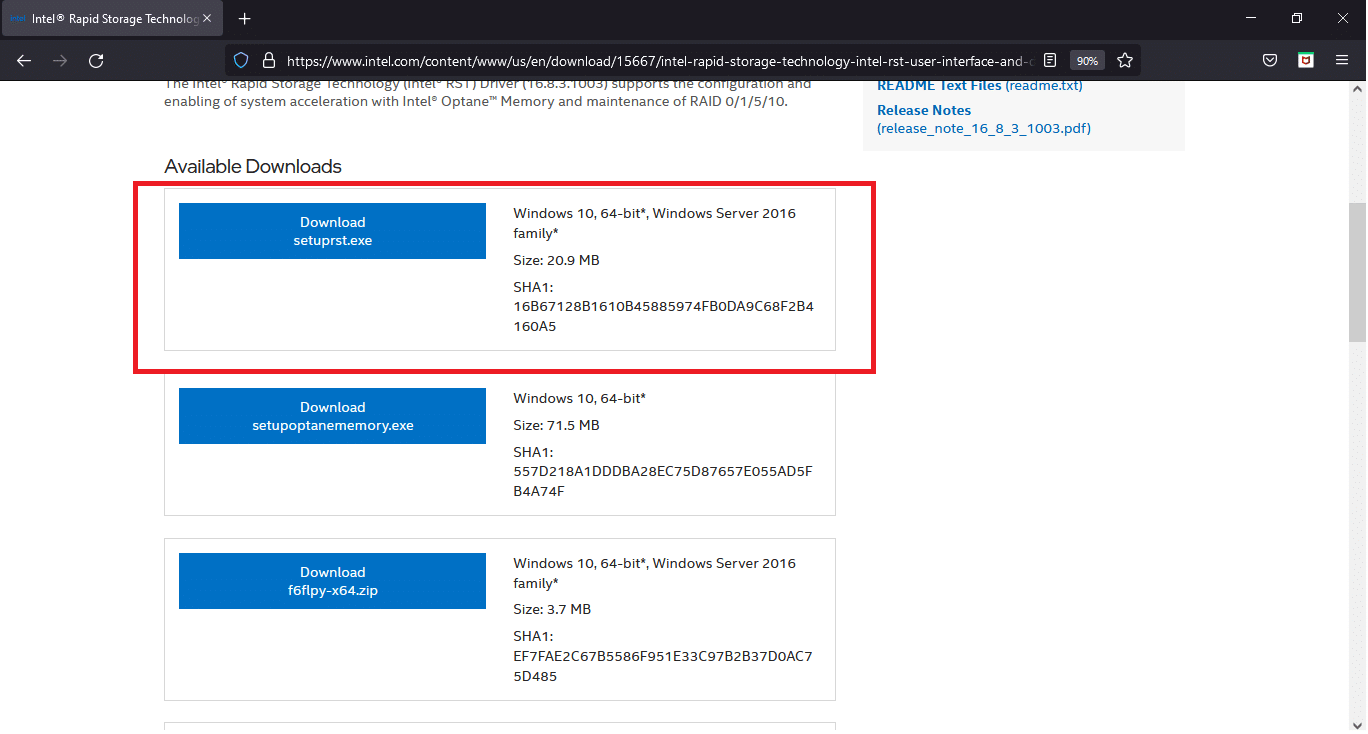
1. Open Intel IRST webpage on your web browser.
2. Here, choose the Latest Version from the drop-down list.
3. Then, select the first driver item in the list and click the Download button which shows setuprst.exe
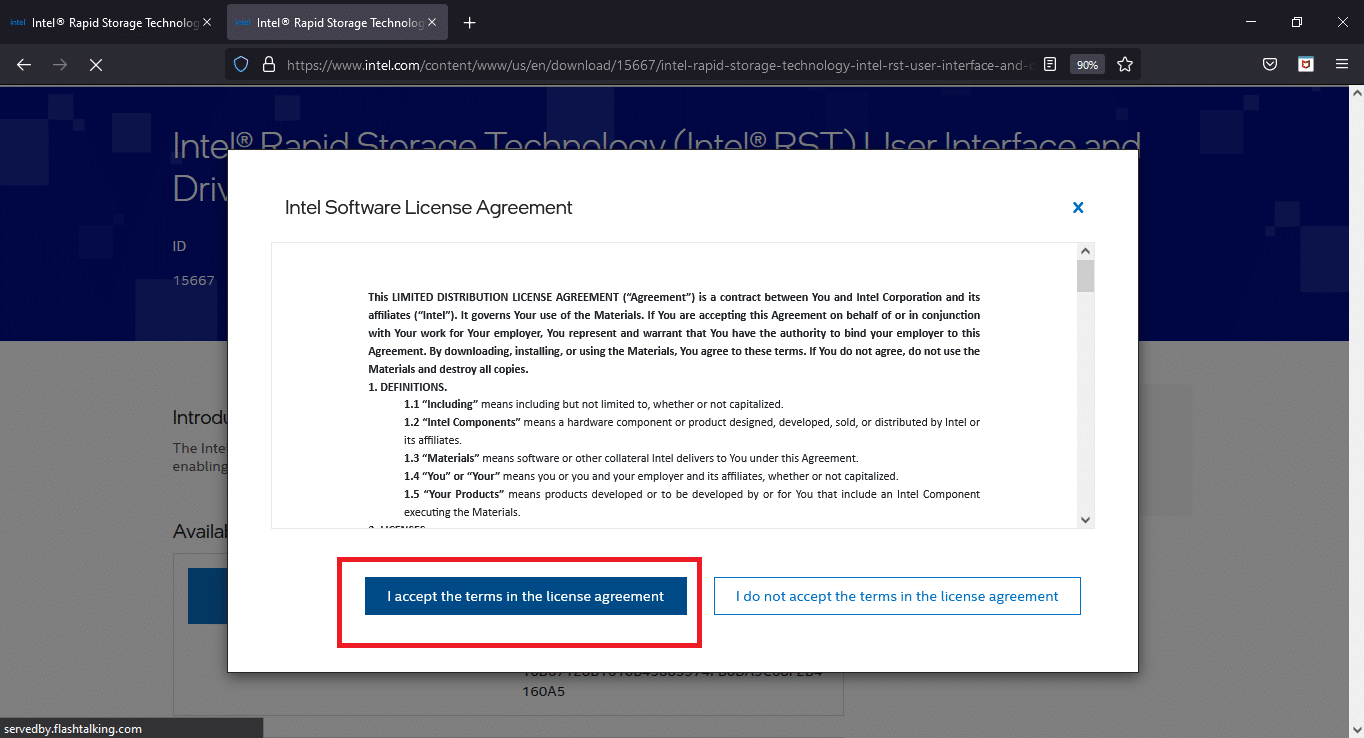
4. Click I accept the terms in the license agreement button to start the downloading process.
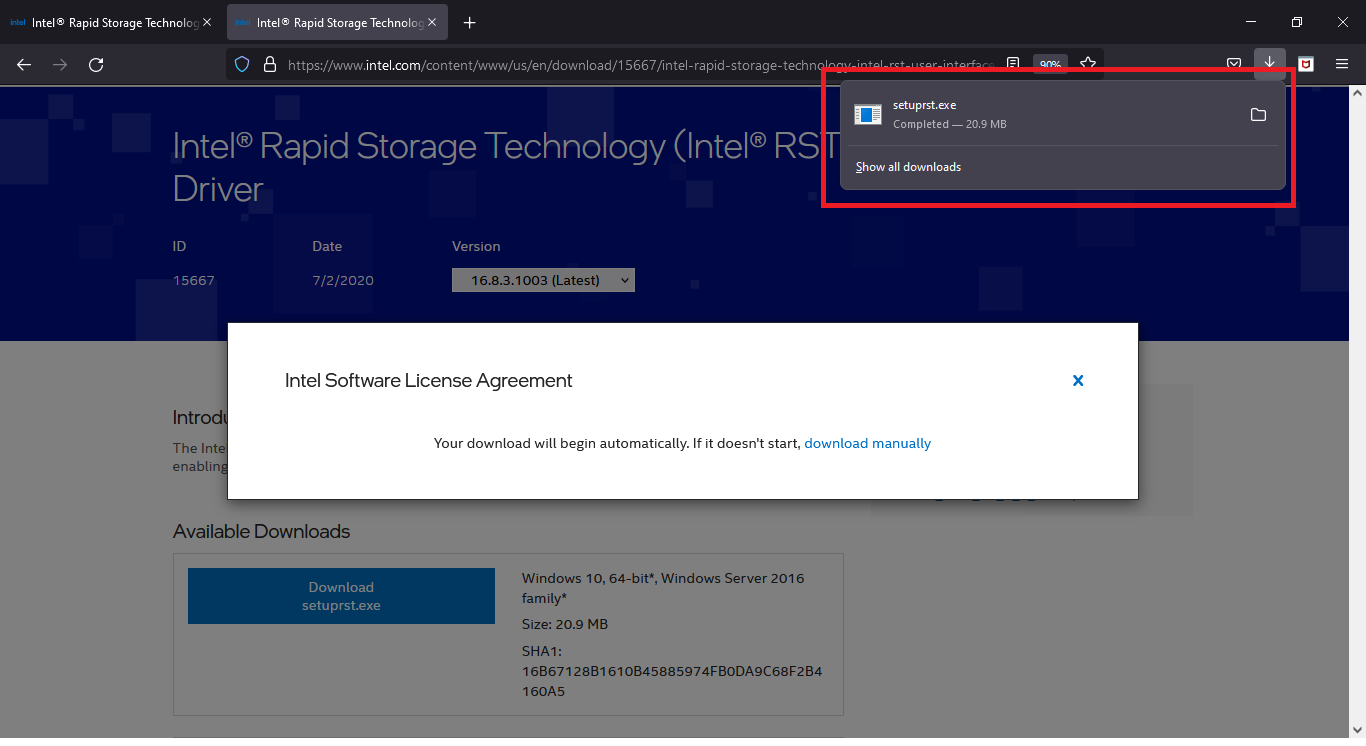
5. Once the download is completed, click setuprst.exe file to launch the installation wizard.
6. Click on Next and follow the on-screen instructions to finish installing the latest set of IRST drivers.
7. Finally, restart your PC.
Also Read: How to Fix Window 10 Laptop White Screen
Method 3: Reinstall IRST drivers
Before installing the latest version of IRST drivers, it is important to get rid of your existing ones to avoid any conflict that might arise between the two different versions. The current drivers are most probably corrupt and therefore, prompt BSOD error on your computer. This can occur due to a variety of factors, such as:
- Presence of malware and virus
- Improper installation of recent Windows update
- Bugs in the latest Windows build, etc.
Thus, to reinstall IRST drivers on your PC, follow these steps to fix iaStorA.sys BSOD error:
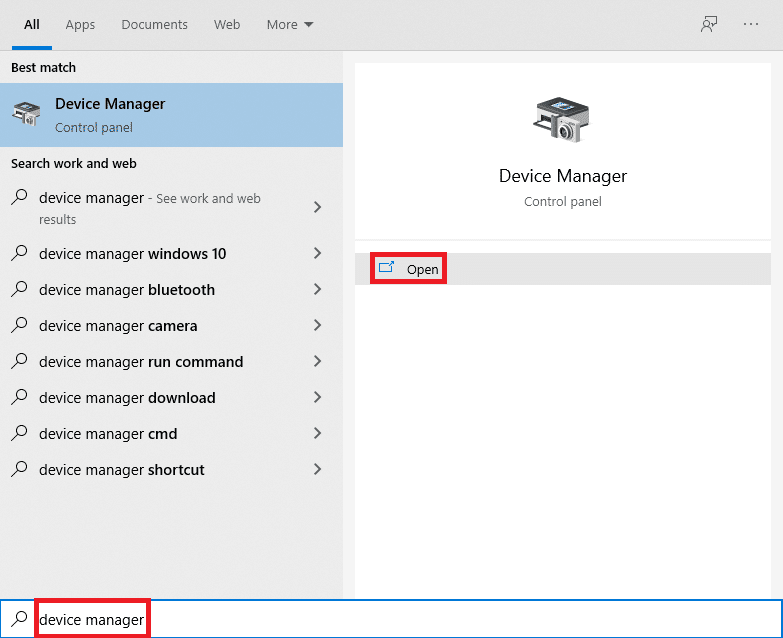
1. Press Windows + Q keys together and type device manager. Then, click on Open.
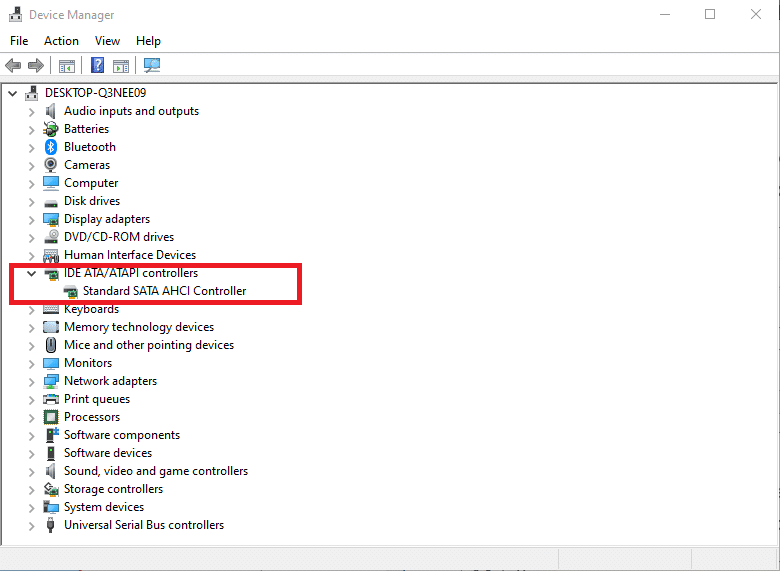
2. Double-click on IDE ATA/ATAPI controllers to expand the list, as shown.
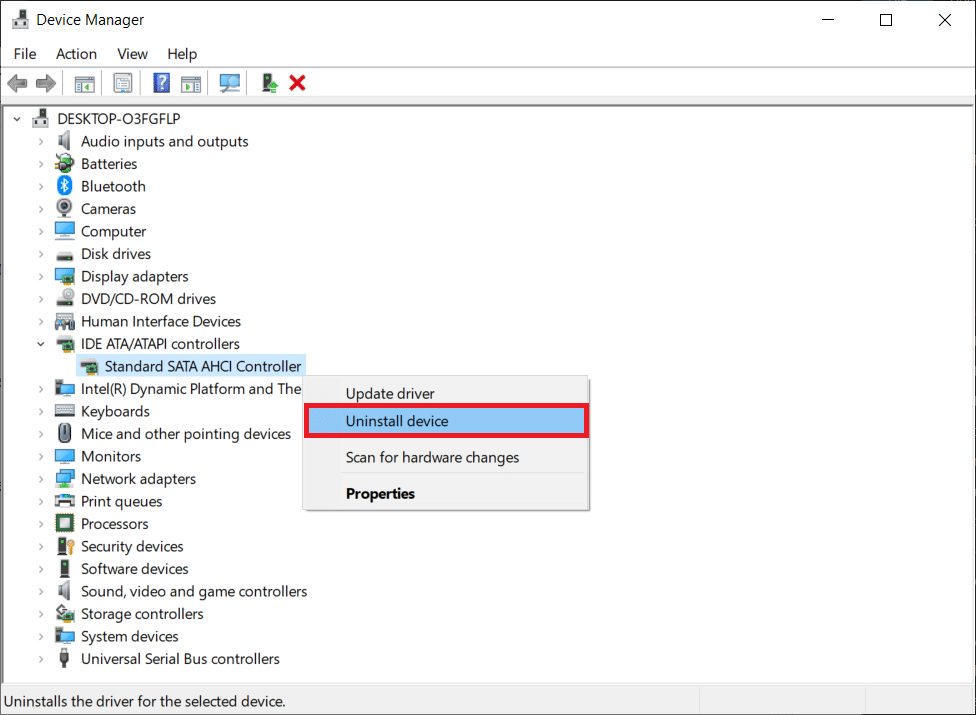
3. Right-click your device driver (e.g. Standard SATA AHCI Controller) and choose Uninstall device from the context menu, as depicted below.
4. Uncheck the Delete the driver software for this device option and click Uninstall button.
5. If there are multiple devices listed under IDE ATA/ATAPI controllers category, repeat the same for all.
6. Finally, restart your Windows 10 PC.
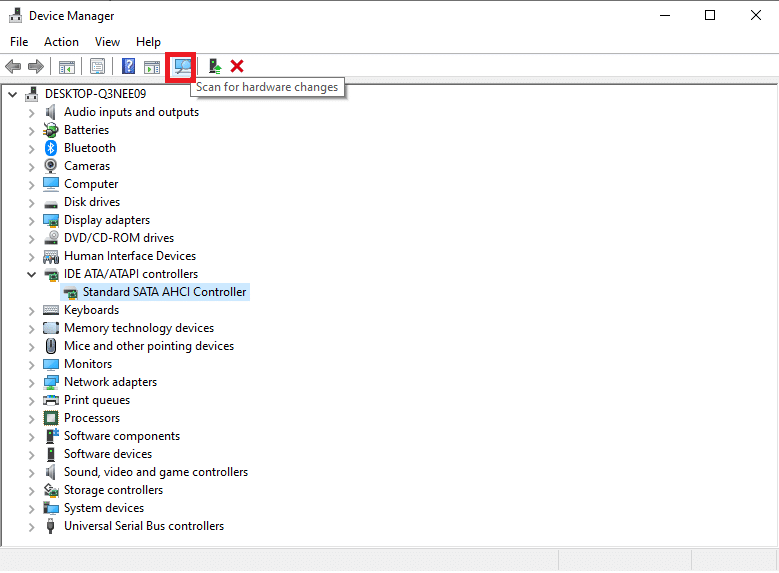
7. Go to Device Manager and click the Scan for Hardware Changes icon, as depicted below.
Note: Make sure your internet connection is working properly as Windows will automatically look for drivers on the next boot and install them.
Method 4: Remove Old Windows folder
When you update Windows, there is a folder that is created automatically containing the files of the previous operating system. So, if there are any bugs in these files, it will lead to BSOD iastora.sys Windows 10 error. Follow the given steps to delete the old OS files:
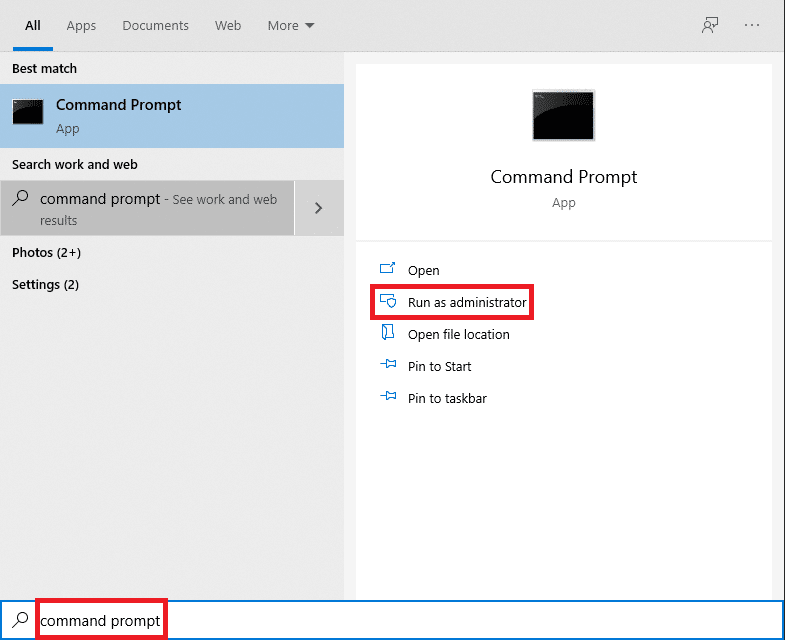
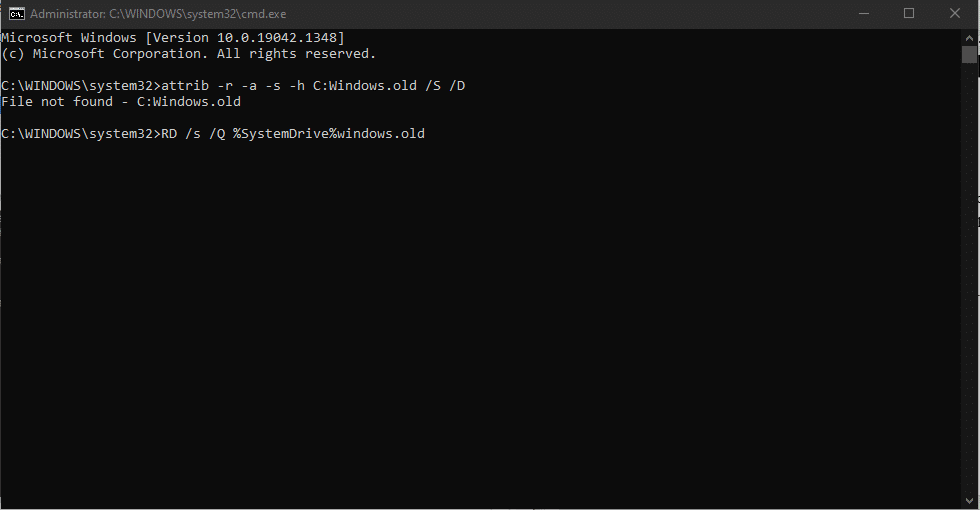
1. Press the Windows key, type Command Prompt and click on Run as administrator.
2. Execute the following commands to delete windows.old folder and hit Enter after each:
attrib -r -a -s -h C:Windows.old /S /D
RD /S /Q %SystemDrive%windows.old
3. After deleting the folder, restart your PC and try again.
Also Read: How to Delete Win Setup Files in Windows 10
Method 5: Remove Conflicting Third-Party Apps
Sometimes, recently installed third-party apps might cause this iaStorA.sys Windows 10 blue screen error code. Hence, first, boot into the Safe Mode by following our guide on How to boot to Safe Mode in Windows 10. Then, follow the given steps:
1. Press Windows + I keys together to launch Settings.
2. Choose Apps from the given tiles
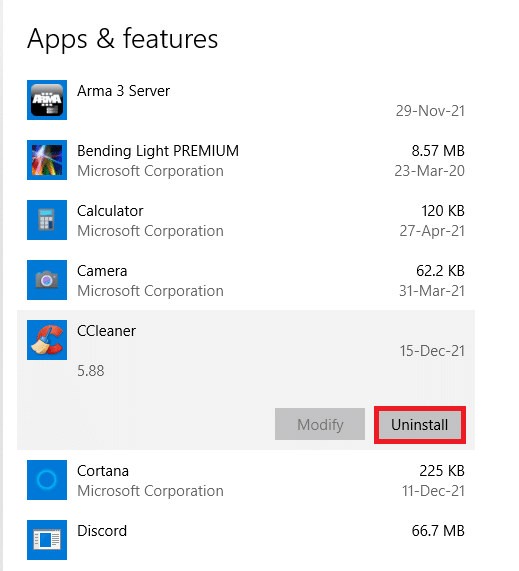
3. Under Apps & Features in the right pane, choose the conflict-causing third-party application and click Uninstall button to remove it.
Note: We have shown CCleaner as an example below.
4. Once you uninstall all troubling apps, restart your PC.
Method 6: Restore Windows 10 PC
If the issue persists then, try to restore your Windows 10 PC to a state with no s=issues. Use your backup image files to restore your system files to the previous one to fix iaStorA.sys BSOD error, as discussed below:
Note: This is only applicable if you have previously created System Restore Point.
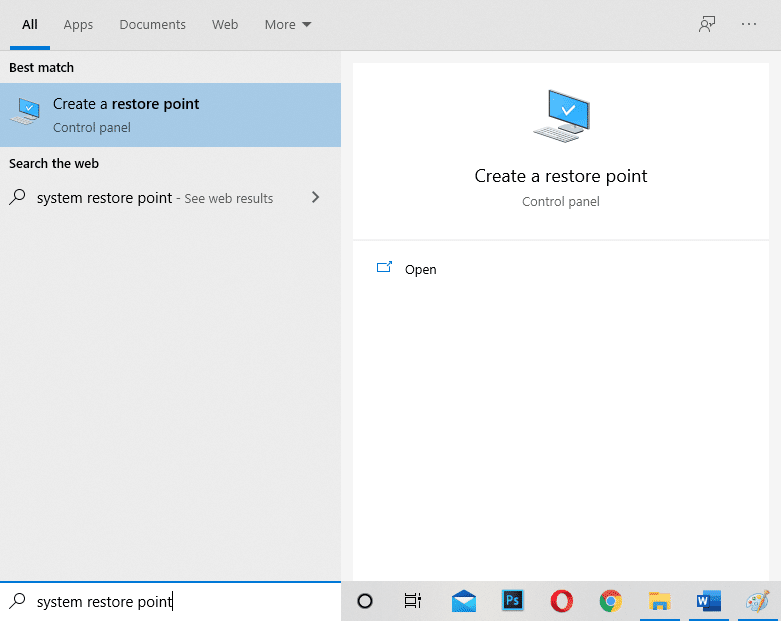
1. Hit Windows + Q keys together, type system restore point, and press the Enter key.
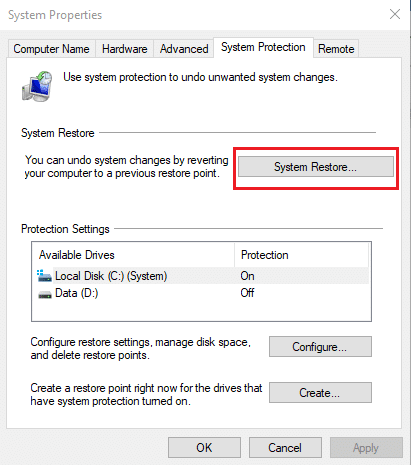
2. Go to the System Protection tab and click the System Restore… button, as shown.
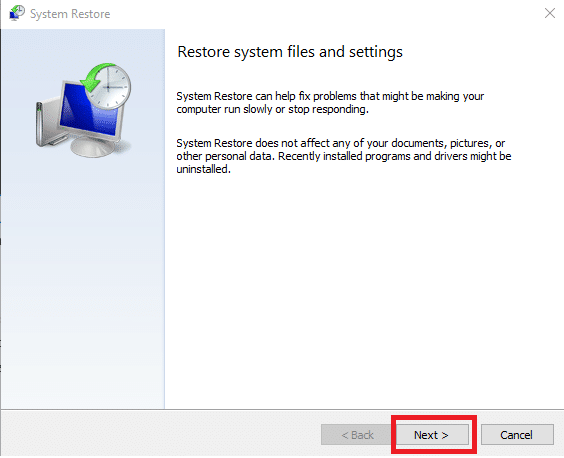
3. Click on the Next > button in the System Restore window.
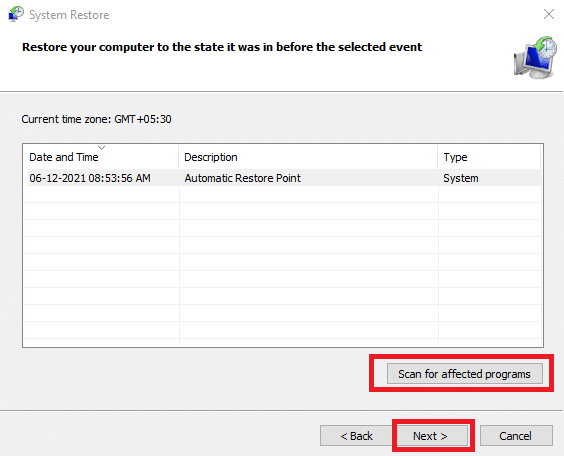
4. Choose the restore point and click Scan for affected programs to detect the corrupt files in Windows system.
5. Then, click on the Next > button.
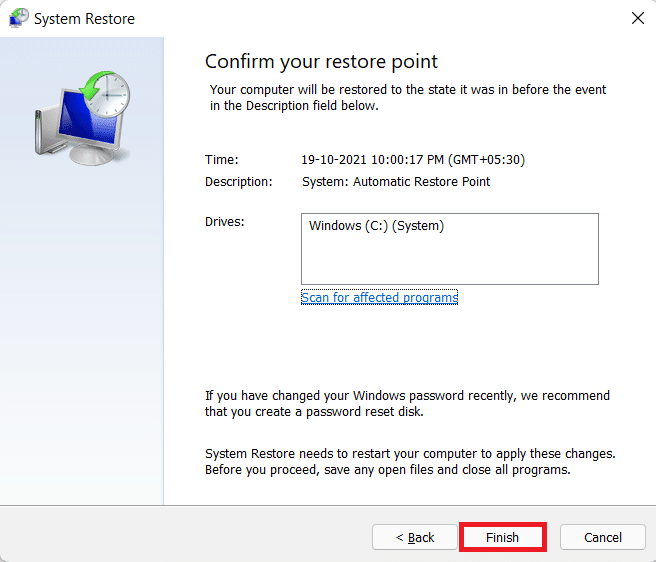
6. Finally, click on Finish to restore.
7. After restoring, restart your PC.
Also Read: Fix Windows 10 Yellow Screen of Death
Method 7: Reset Windows PC
The above fixes should have gotten rid of iaStorA.sys BSOD issue. In case, it did not, your sole option is to reset Windows or perform a clean installation altogether. Resetting is bound to solve most Windows problems as it restores all settings, system files & applications, drivers, etc. to their default state.
Note: It is advisable to backup all data since resetting the files will delete system files & folders.
1. Press Windows + I keys simultaneously to open Windows Settings.
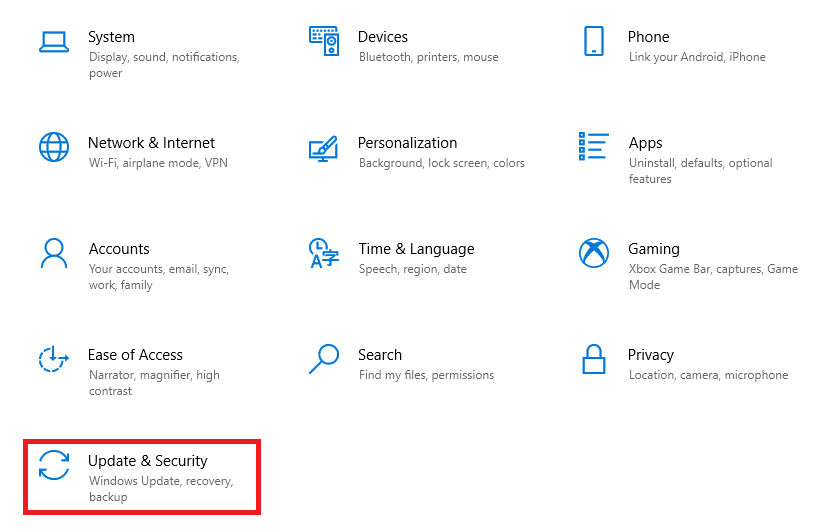
2. Next, click the Update & Security tile.
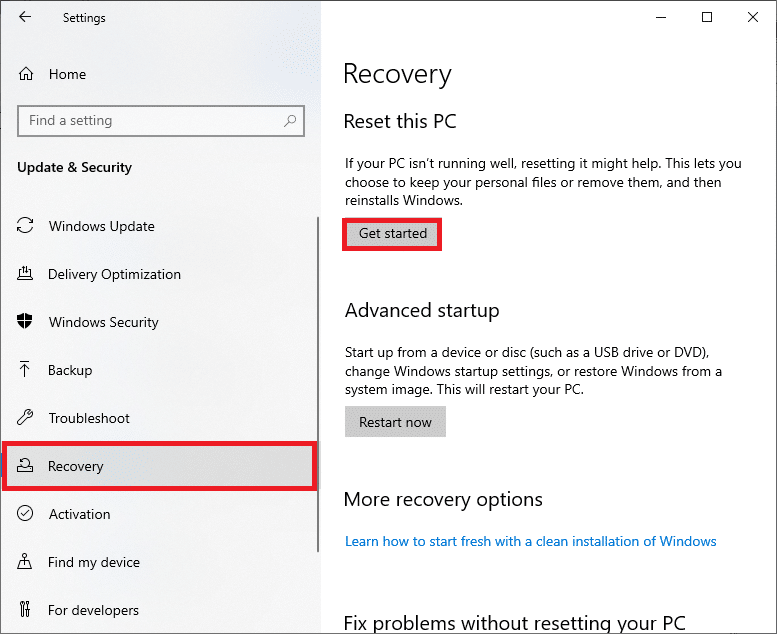
3. Navigate to the Recovery menu in the left pane.
4. Finally, click Get started button under the Reset this PC section.
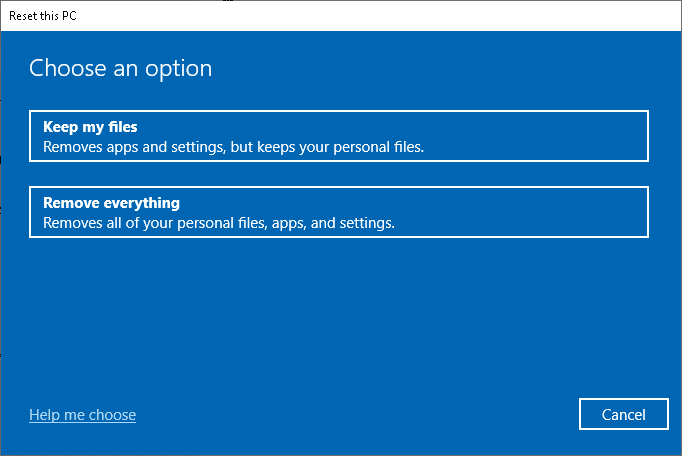
5. Choose either of the two options: Keep my files or Remove everything, preferably the former.
6. Follow the on-screen instructions to reset your computer and resolve the said error permanently.
Read our article on How to Fix Windows 10 Blue Screen Error to read other common solutions to fix such issues.
Recommended:
Hope this article helped you to fix BSOD Error iaStorA.sys on Windows 10. Let us know which method worked for you the best. Also, if you have any queries/suggestions regarding this article, then feel free to drop them in the comments section.
