Create Desktop Shortcut in Windows 10 (TUTORIAL)
How to Create Desktop Shortcut in Windows 10: Isn’t good to get the access of particular program of your system instantly? This is for shortcuts used for. Earlier before Windows 10, we used to find it easy to create a Desktop shortcut but in Windows 10 it is a bit tricky one. While in Windows 7 we only need to right click on the programs and choose the send to option and from there select Desktop (Create Screenshot).
While creating desktop shortcut may be an easier task for some but others may find it difficult to create a shortcut on the desktop, especially those who are using Windows 10 operating system. Since we do not get that option in Windows 10, it becomes difficult for many users to create Desktop screenshot. You do not worry, in this guide, we will learn about some methods through which you can easily create a desktop shortcut in Windows 10.
Create Desktop Shortcut in Windows 10 (TUTORIAL)
Make sure to create a restore point just in case something goes wrong.
Method 1 – Create Shortcut by Dragging and Dropping
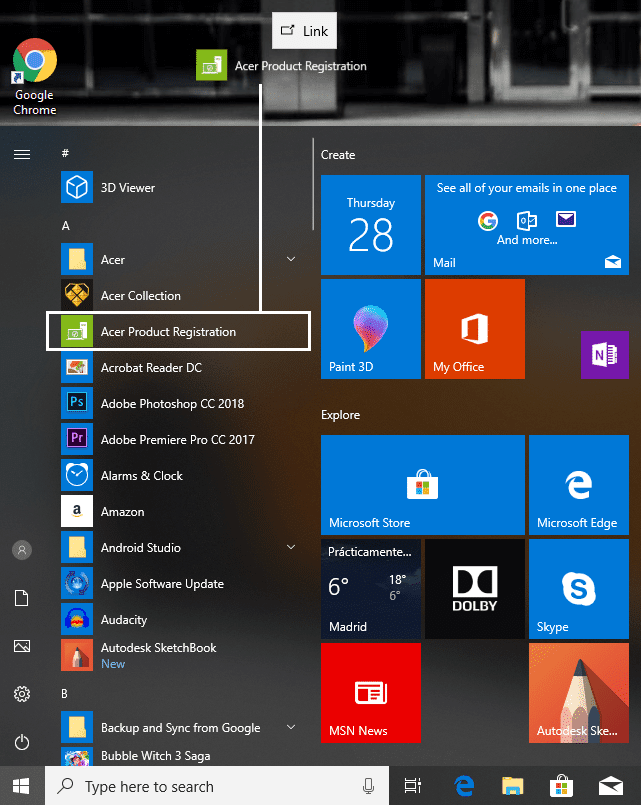
Windows 10 gives you the option of dragging and dropping particular program shortcut like Windows 7 from the start menu to desktop. Follow the below-mentioned steps to get this task done properly.
Step 1 – First you need to minimize the running program and so that you can see the Desktop
Step 2 – Now click on the Start Menu or press the Windows key on the keyboard to launch the Start Menu.
Step 3 – Select the particular app from the menu and drag-drop the particular app from the menu to the desktop.
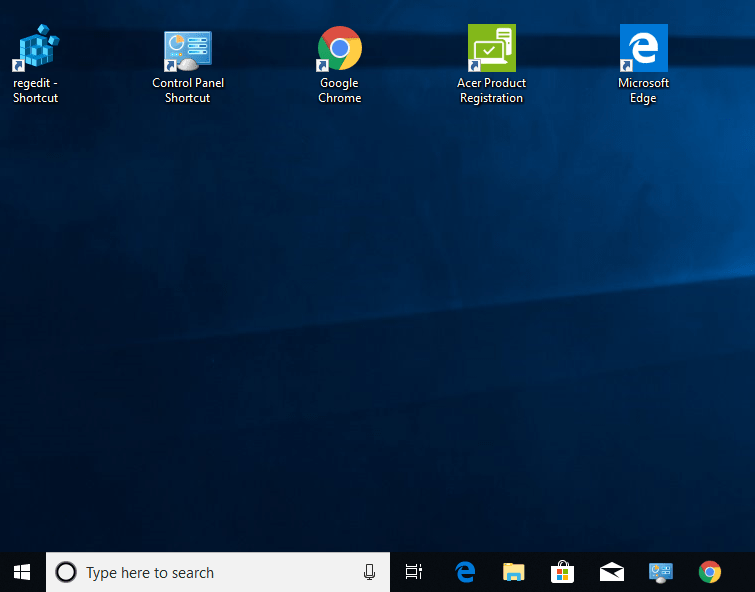
Now you would be able to see the app shortcut on your screen. If you do not find any icons on the Desktop, you can simply right click and choose View and click on Show Desktop icons.
Method 2 – Create Shortcut on the desktop by creating a shortcut to executable
If you do not find the above method working for you or you do not find yourself comfortable with the above option you can check the below-mentioned method. This method will give you the option to create a shortcut on your desktop.
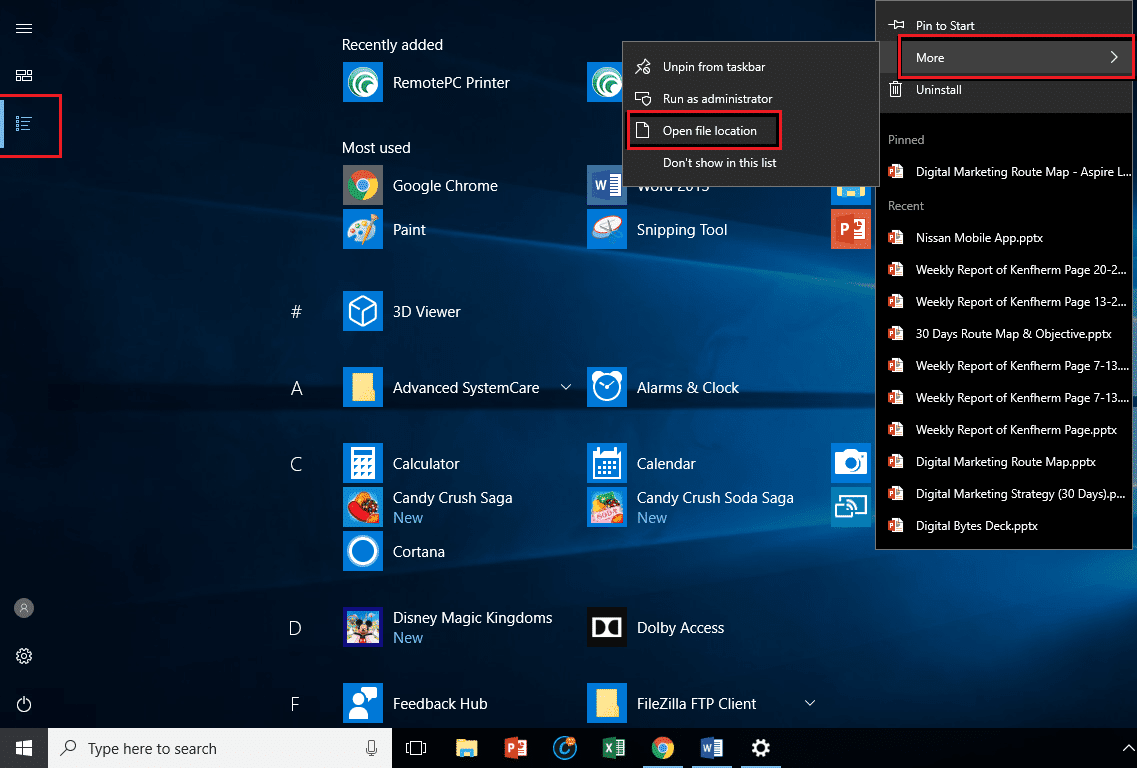
Step 1 – Open Start Menu either by clicking on the Start Menu or by pressing the Windows key.
Step 2 – Now select “All Apps” and here you need to choose the app that you want to have in your desktop as a shortcut.
Step 3 – Right-Click on the program and navigate to More>Open File Location
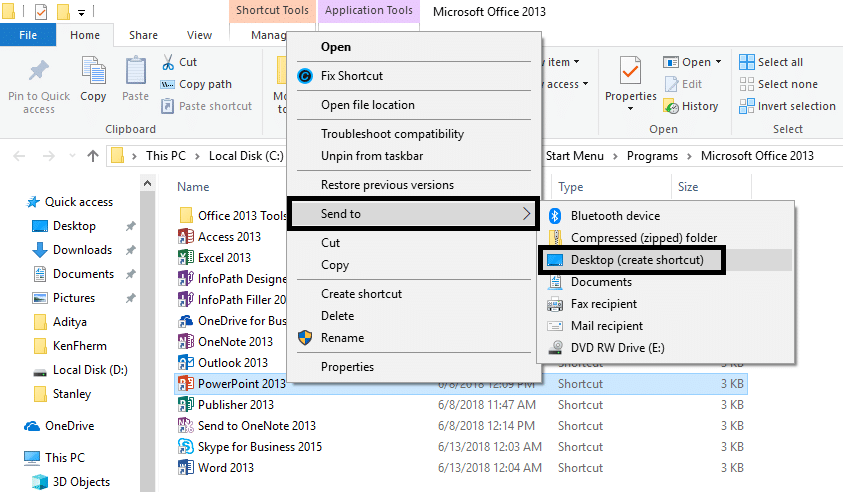
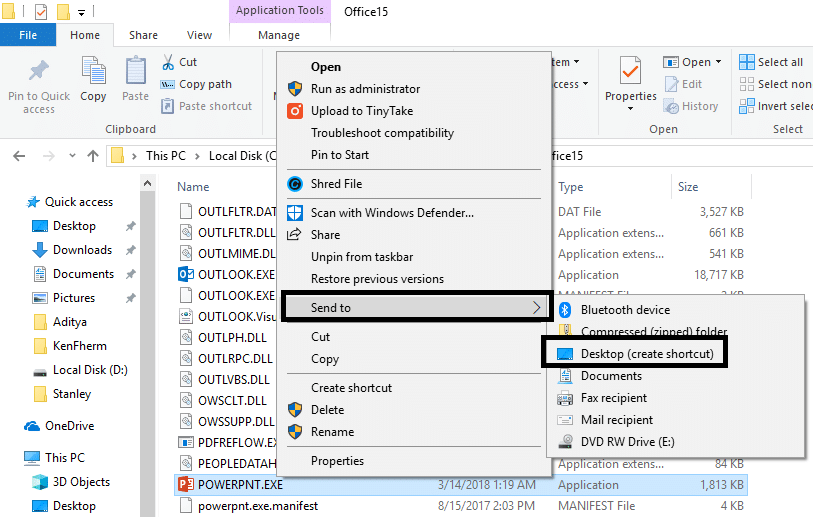
Step 4 – Now click on the program in the file location section and navigate to “Send To” and then click on “Desktop (create shortcut)”.
This method will immediately create the program shortcut on your desktop giving you instant access to that program. Now you can launch that programs directly from your desktop without any hassles.
Method 3 – Creating a Shortcut by creating a shortcut of the program executable
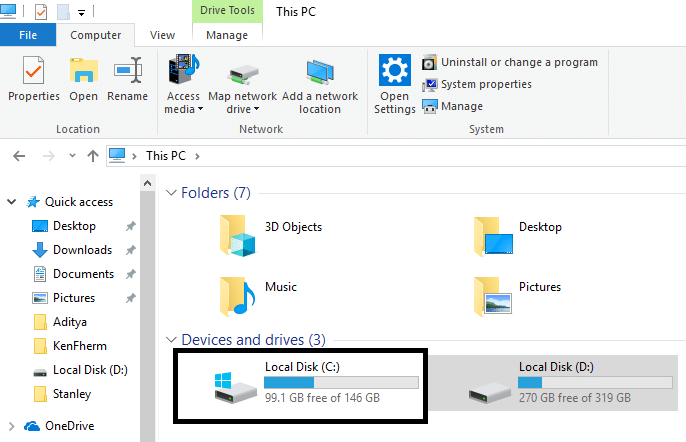
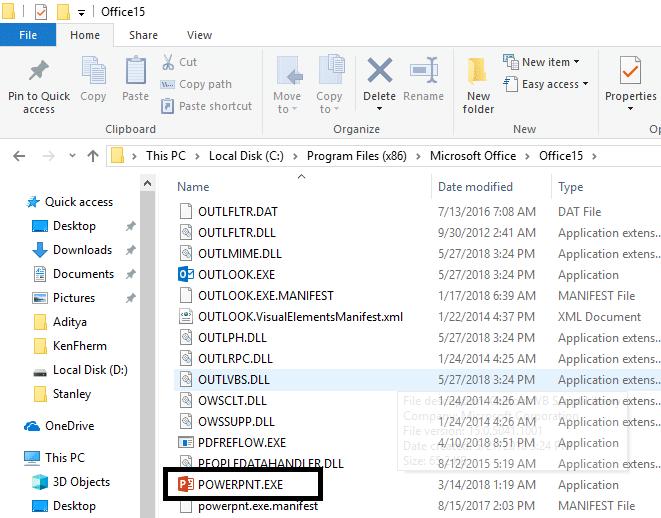
Step 1 – You need to open the drive where Windows 10 Installed. If it is installed in “C” drive you need to open the same.
Step 2 – Open Program Files (x86) and here you need to find the folder having a program that you want to create a shortcut on your desktop. Usually, the folder will have the name of the program or Company/Developer name.
Step 3 – Here you need to look for the .exe file (executable file). Now Right-Click on the program and navigate to Send To>Desktop (Create Shortcut) to create a desktop shortcut of this program.
Above mentioned all three methods will help you to create a desktop shortcut. Shortcuts enable to get instant access to that particular program. To make your working easier and faster, it is always recommended to keep the desktop shortcut of your frequently used program. Whether it is a game or office app that you use frequently, keep the desktop shortcut and get instant access to that app or program. Depending on the Windows configuration, you may experience some trouble in finding the correct instructions to create a desktop shortcut. However, we have mentioned steps that will work on all Windows 10 version. All you need to do is make sure that you follow the instructions carefully. While creating shortcuts, you need to make sure that you organize your desktop icons so that it should not appear cluttered in any way. Keep your desktop de-cluttered and organized in the most effective manner.
Recommended:
I hope the above steps were helpful and now you can easily Create Desktop Shortcut in Windows 10, but if you still have any questions regarding this tutorial then feel free to ask them in the comment’s section.
