Defer Feature and Quality Updates in Windows 10
If you use Windows 10 Pro, Education, or Enterprise Edition, you can easily defer feature and quality updates on Windows 10. When you defer updates, new features won’t be downloaded or installed. Also, one essential thing to note here is that this doesn’t affect security updates. In short, your computer security won’t be compromised, and you will still be able to defer upgrades without any issues.
Defer Feature and Quality Updates in Windows 10
Note: This tutorial only works if you have Windows 10 Pro, Enterprise, or Education edition PC. Make sure to create a restore point just in case something goes wrong.
Method 1: Defer Feature and Quality Updates in Windows 10 Settings
1. Press Windows Key + I to open Settings then click on Update & Security.
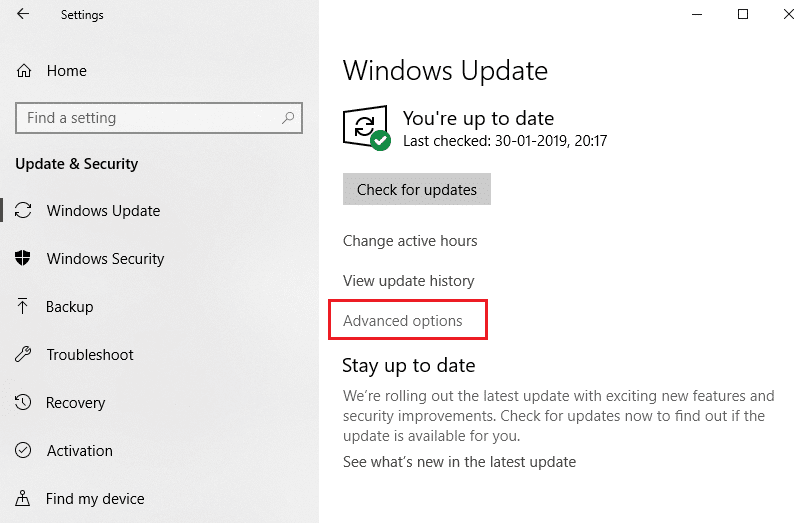
2. From the left-hand window pane click on Windows Update.
3. Now in the right window pane click on Advanced options link at the bottom.
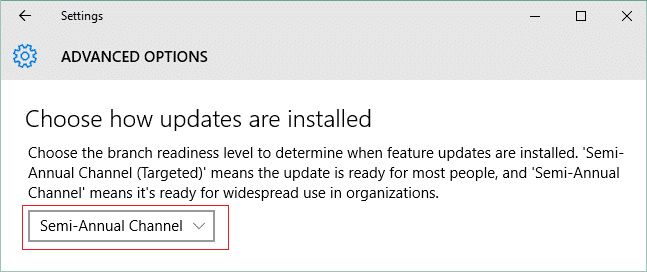
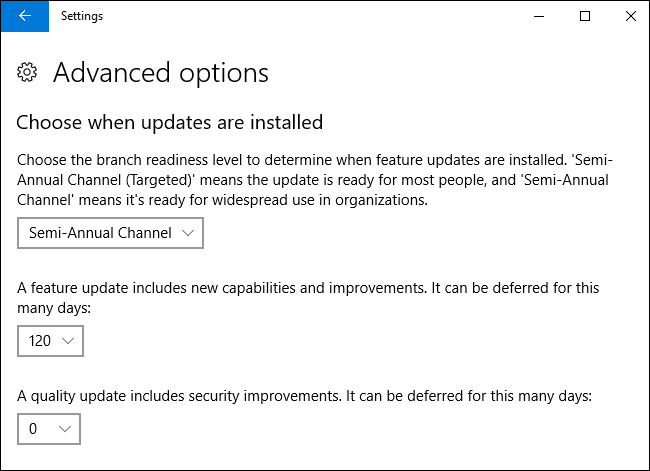
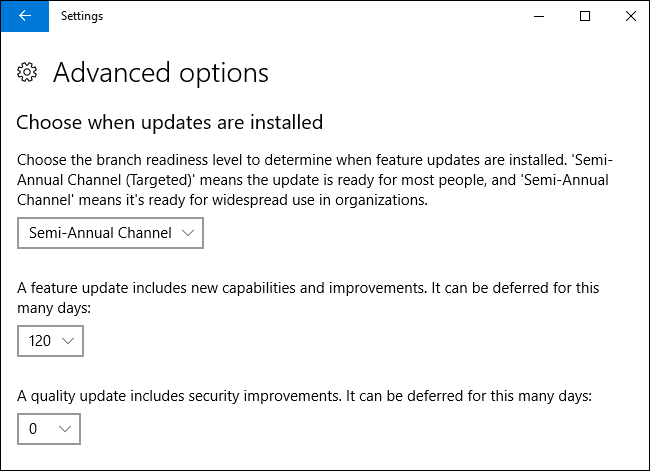
4. Under “Choose when updates are installed” select Semi-Annual Channel (Targeted) or Semi-Annual Channel from the drop-down.
5. Similarly, under “A feature update include new capabilities and improvements. It can be deferred for this many days” select to defer the feature updates for 0 – 365 days.
Note: The default is 0 days.
6. Now under “A quality updates include security improvements. It can be deferred for this many days” select to defer the quality update for 0 – 30 days (the default is 0 days).
7. Once finished, you can close everything and reboot your PC.
This is how you Defer Feature and Quality Updates in Windows 10, but if the above settings are greyed out, follow the next method.
Method 2: Defer Feature and Quality Updates in Registry Editor
1. Press Windows Key + R then type regedit and hit Enter to open Registry Editor.
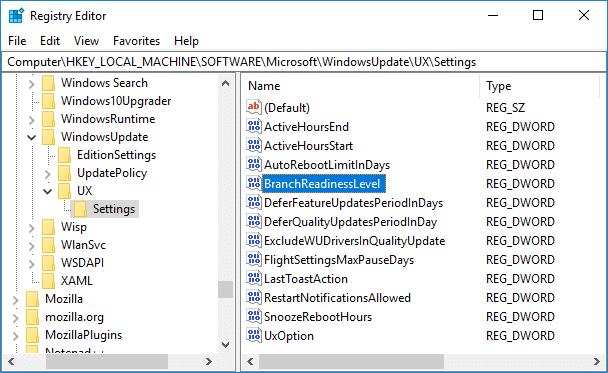
2. Now navigate to the following registry key:
HKEY_LOCAL_MACHINESOFTWAREMicrosoftWindowsUpdateUXSettings
3. Select Settings then in the right window pane double-click on BranchReadinessLevel DWORD.
4. Type the following in the Value data field and click OK:
| Value Data | Branch Readiness Level |
| 10 | Semi-Annual Channel (Targeted) |
| 20 | Semi-Annual Channel |
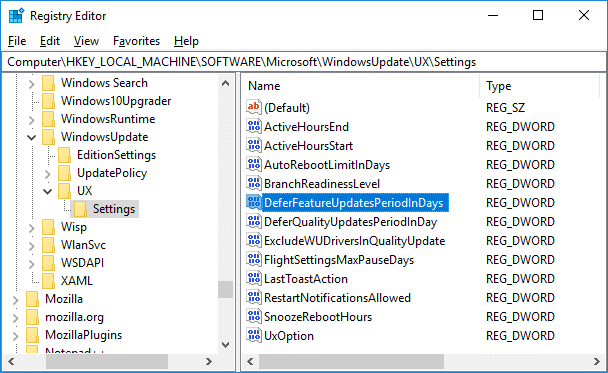
5. Now to set the number of days you want to defer the feature updates double-click on
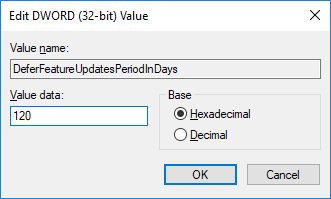
DeferFeatureUpdatesPeriodInDays DWORD.
6. In the value data field type the value between 0 – 365 (days) for how many days you want to defer feature updates and click OK.
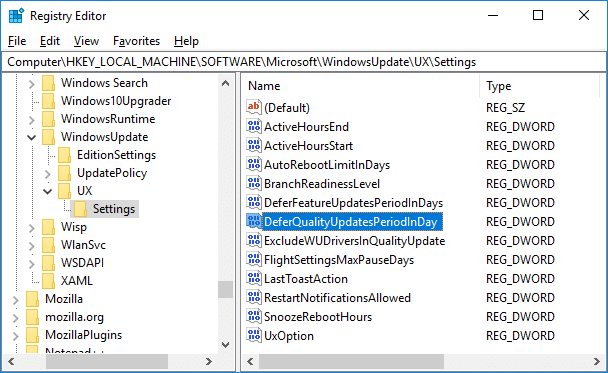
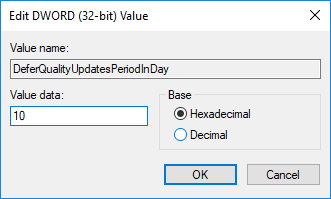
7. Next, again in the right window pane double-click on DeferQualityUpdatesPeriodInDays DWORD.
8. Change the value in the Value data field between 0 – 30 (days) for how many days you want to defer quality updates and click OK.
9. Once finished close everything and rebooted your PC to save changes.
Recommended:
That’s it you have successfully learned How to Defer Feature and Quality Updates in Windows 10 but if you still have any queries regarding this tutorial then feel free to ask them in the comment’s section.
