When your PC is sitting idle, Windows 10 performs automatic maintenance, including Windows update, security scanning, system diagnostics etc. Windows run automatic maintenance daily when you are not using your PC. If you’re using your computer at the scheduled time of maintenance, then the automatic maintenance will run the next time your computer is idle.
The automatic maintenance goal is to optimize your PC and perform various background tasks when your PC is not in use, which improves your system performance, so disabling system maintenance might not be a good idea. If you don’t want to run the automatic maintenance at the scheduled time, you could postpone the maintenance.

Although I already told that disabling Automatic Maintenance is not a good idea, there might be some case where you need to disable it. For example, if your PC freezes during automatic maintenance, you should disable maintenance to troubleshoot the issue. Anyway without wasting any time let’s see How to Disable Automatic Maintenance in Windows 10 with the help of the below-listed tutorial.
Disable Automatic Maintenance in Windows 10
Make sure to create a restore point just in case something goes wrong.
First, let’s see how you could change the Schedule of Automatic Maintenance then if this doesn’t work out for you, you can easily disable the automatic maintenance.
Method 1: Change Automatic Maintenance Schedule
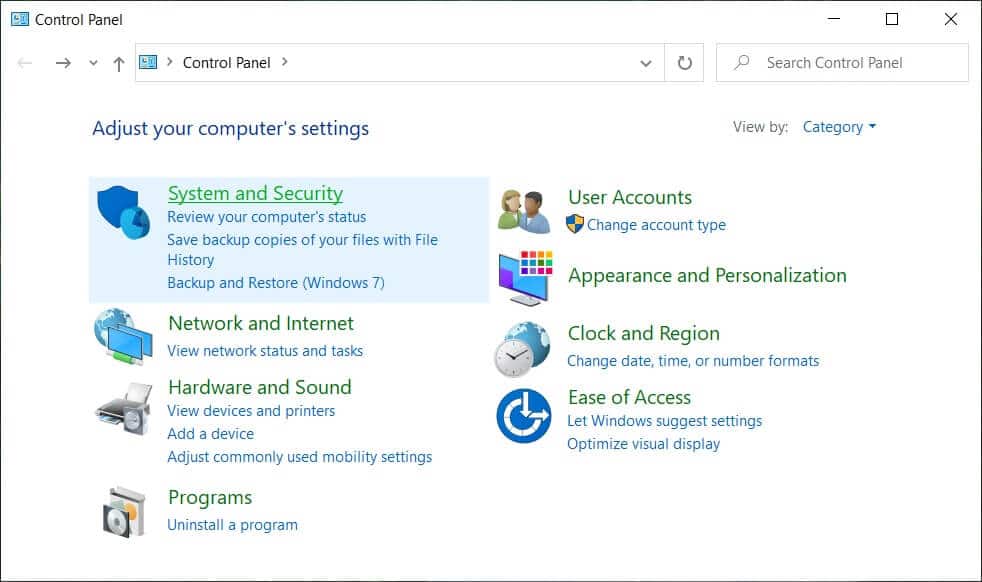
1. Type Control Panel in the window search bar and press enter.

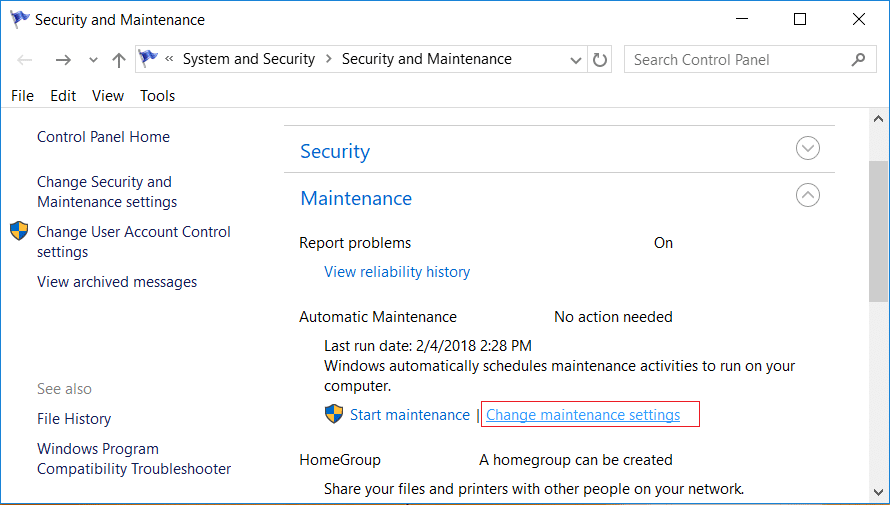
2. Click on System and Security then click on Security and Maintenance.
3. Now expand Maintenance by clicking the downward-facing arrow.
4. Next, click on “Change maintenance settings” link under Automatic Maintenance.
5. Select the time you want to run the Automatic Maintenance and then check or uncheck “Allow scheduled maintenance to wake up my computer at the scheduled time“.
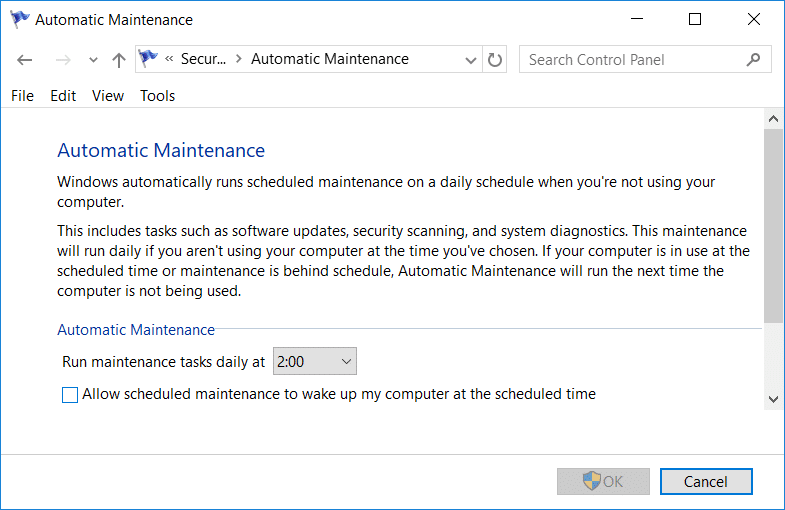
6. Once finished setting up scheduled maintenance, click Ok.
7. Restart your PC to save changes.
Method 2: Disable Automatic Maintenance in Windows 10
1. Press Windows Key + R then type regedit and hit Enter to open Registry Editor.

2. Navigate to the following Registry key:
HKEY_LOCAL_MACHINESOFTWAREMicrosoftWindowsNTCurrentVersionScheduleMaintenance
3. Right-click on Maintenance then selects New > DWORD (32-bit) Value.

4. Name this newly created DWORD as MaintenanceDisabled and hit Enter.
5. Now to Disable Automatic Maintenance double-click on MaintenanceDisabled then change it’s value to 1 and click OK.
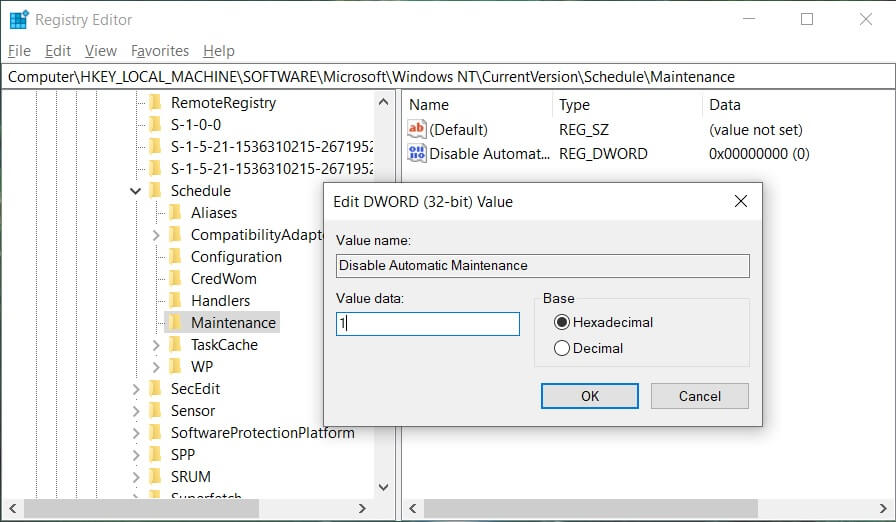
6. If in future, you need to Enable Automatic Maintenance, then change the value of MaintenanceDisabled to 0.
7. Close Registry Editor then restart your PC.
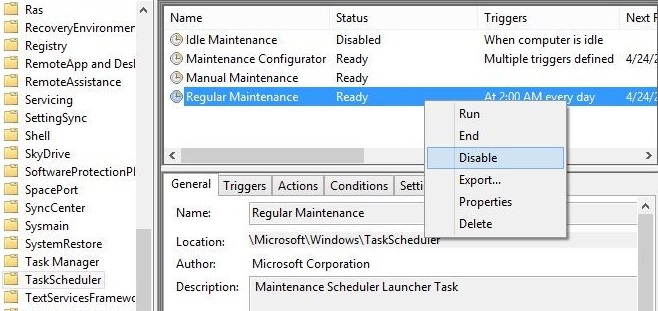
Method 3: Disable Automatic Maintenance Using Task Scheduler
1. Press Windows Key + R then type taskschd.msc and hit Enter.

2. Navigate to the following inside task scheduler:
Task Scheduler > Task Scheduler Library > Microsoft > Windows > TaskScheduler
3. Now right-click on the following properties one by one then select Disable:
Idle Maintenance,
Maintenance Configurator
Regular Maintenance
4. Reboot your PC to save changes.
Recommended:
That’s it, and you successfully learned How To Disable Automatic Maintenance in Windows 10 but if you still have any queries regarding this tutorial then feel free to ask them in the comment’s section.