AutoPlay allows you to choose different actions when you insert a removable device such as a CD, DVD or memory card into your PC. One of the best things about Windows 10 is that it lets you set AutoPlay default for the different type of media. AutoPlay detects the type of media you have on the disc and automatically opens the program you have set as AutoPlay default for that particular media. For example, if you have a DVD containing photos, then you could set the AutoPlay default to open the disc in File Explorer to view the media files.
Similarly, AutoPlay lets you choose which program to use for particular media such as DVD or CD containing photos, songs, videos etc. Also, don’t confuse AutoPlay with AutoRun as both are very different and fulfil different purposes. Anyway, if AutoPlay annoys you, then there are various ways through which you can disable it easily. So without wasting any time, let’s see How to Enable or Disable AutoPlay in Windows 10 with the help of the below-listed tutorial.
How to Enable or Disable AutoPlay in Windows 10
Make sure to create a restore point just in case something goes wrong.
Method 1: Enable or Disable AutoPlay in Windows 10 Settings
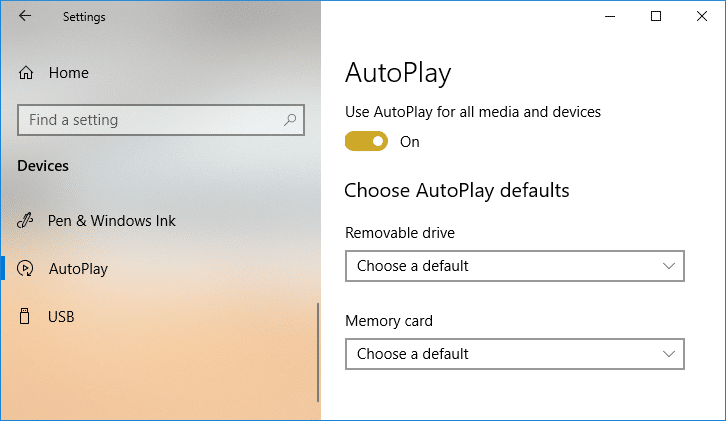
1. Press Windows Key + I to open Settings then click on Devices.

2. Now, from the left-hand menu, click on AutoPlay.
3. Next, turn off the toggle for “Use AutoPlay for all media and devices” to disable the AutoPlay feature.
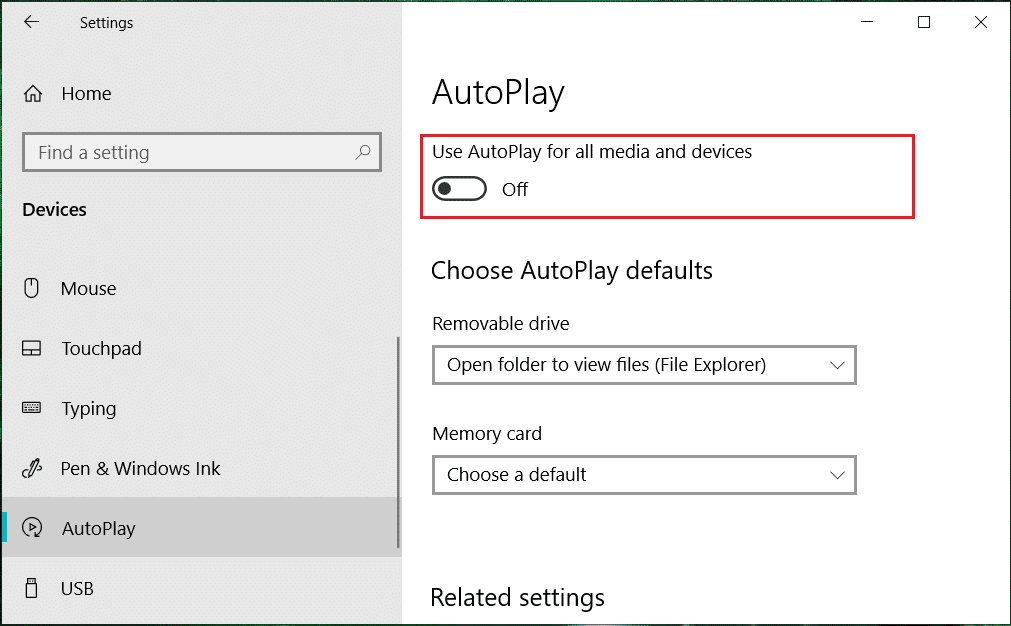
4. In case you need to enable AutoPlay to turn the toggle to ON.
5. Restart your PC to save changes.
Method 2: Enable or Disable AutoPlay in Control Panel
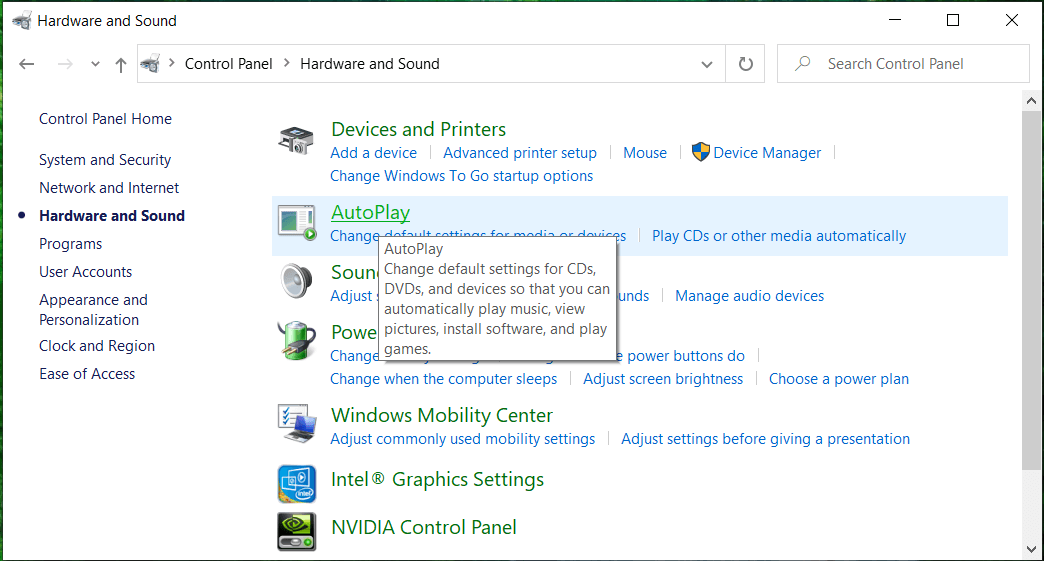
1. Type Control Panel in the Window search bar and press enter.

2. Now click on “Hardware and Sound” then click on AutoPlay.
3. If you want to Enable AutoPlay then checkmark “Use AutoPlay for all media and devices” and in case you need
to disable it then uncheck it then click Save.
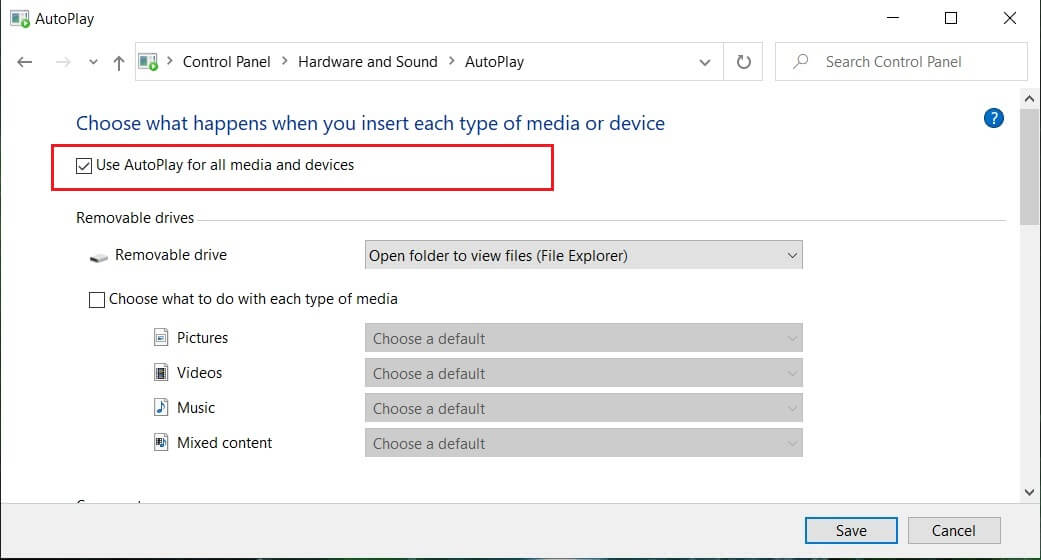
Note: You can click on the “Reset all defaults” button at the bottom to quickly set “Choose a default” as the AutoPlay default for all media and devices.
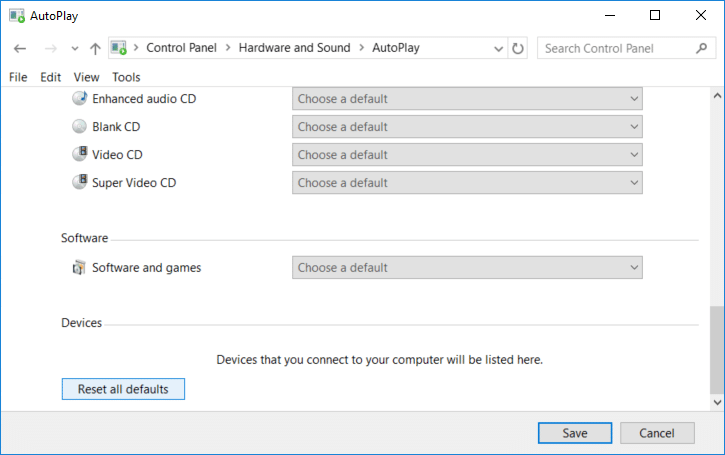
4. Reboot your PC to save changes.
This is how to Enable or Disable AutoPlay in Windows 10 but if this method didn’t work for you then continue to the next method.
Method 3: Enable or Disable AutoPlay in Registry
1. Press Windows Key + R then type regedit and hit Enter to open Registry Editor.

2. Navigate to the following registry key:
HKEY_CURRENT_USERSOFTWAREMicrosoftWindowsCurrentVersionExplorerAutoplayHandlers
3. Make sure to select AutoplayHandlers then in the right window, pane double-click on DisableAutoplay.
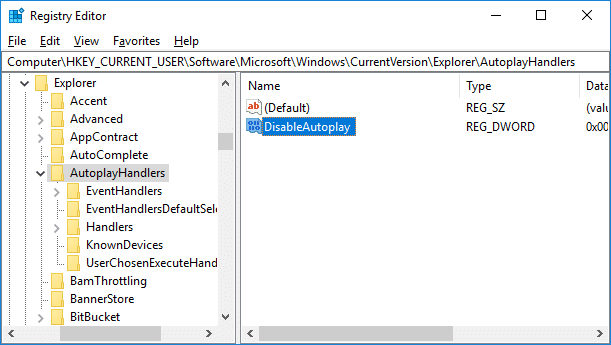
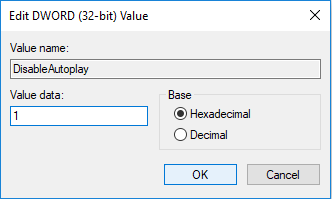
4. Now change it’s value to the following according to your choice then click OK:
Disable AutoPlay: 1
Enable AutoPlay: 0
5. Close everything then reboot your PC to save changes.
Method 4: Enable or Disable AutoPlay in Group Policy Editor
Note: This method won’t work for Windows 10 Home Edition users.
1. Press Windows Key + R then type gpedit.msc and hit Enter.

2. Navigate to the following policy:
Computer Configuration > Administrative Templates > Windows Components > AutoPlay Policies
3. Select AutoPlay Policies then in the right window pane double-click on “Turn off AutoPlay“.
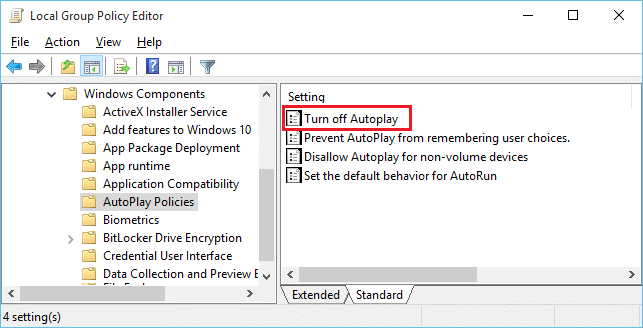
4. To enable AutoPlay, simply checkmark “Disabled” and click OK.
5. To disable AutoPlay, then checkmark “Enabled” and then select “All drives” from the “Turn off AutoPlay on” drop-down.
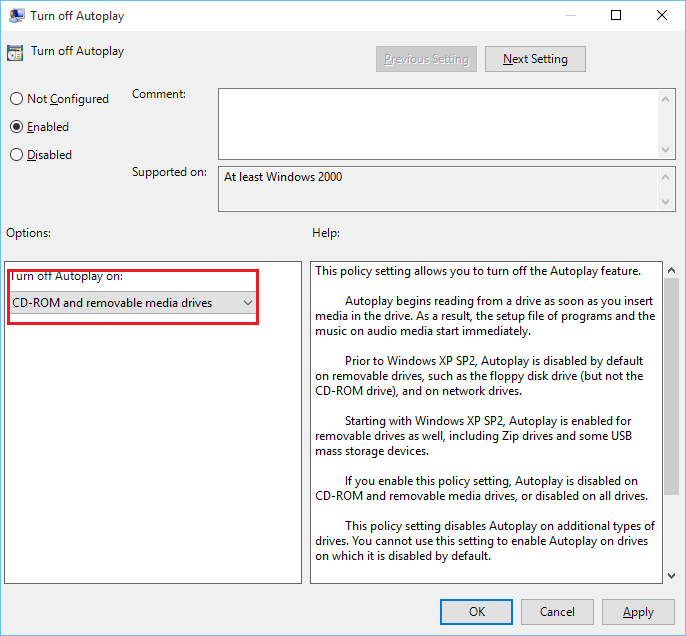
6. Click Apply, followed by OK.
7. Restart your PC to save changes.
Recommended:
That’s it, and you successfully learned How To Enable or Disable AutoPlay in Windows 10 but if you still have any questions regarding this tutorial then feel free to ask them in the comment’s section.