Enable or Disable Developer Mode in Windows 10
Enable or Disable Developer Mode in Windows 10: Earlier to develop, install or test apps in Windows, you require to purchase developer license from Microsoft which needed renewing every 30 or 90 days but since the introduction of Windows 10, there is no longer need for the developer license. You just need to enable developer mode and you can start installing or testing your apps inside Windows 10. Developers mode helps you test your apps for bugs and further improvements before you submit it to the Windows App Store.
You could always choose the level of security of your device using these settings:
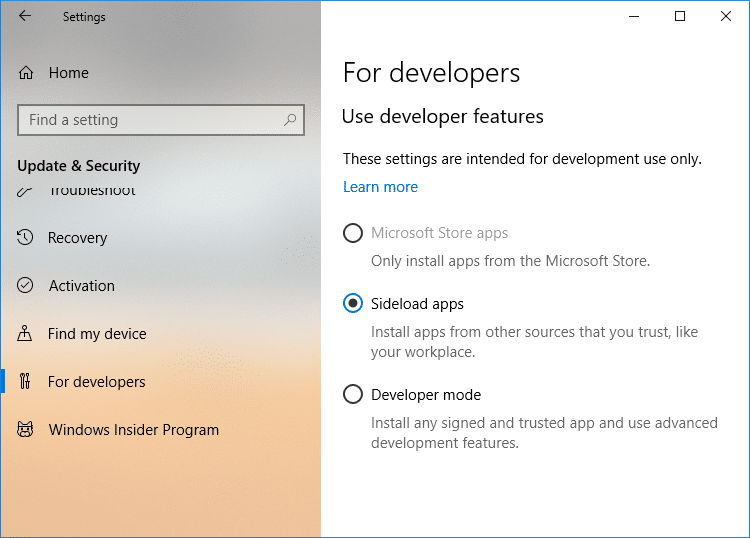
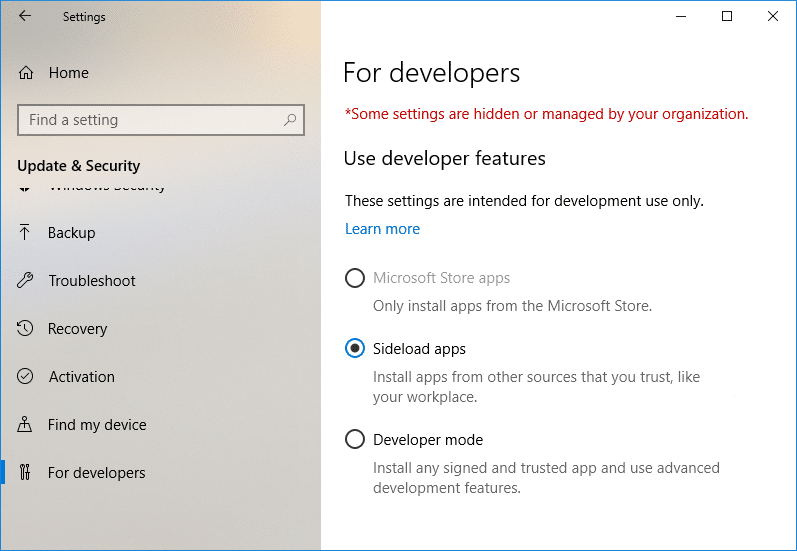
Windows Store apps: This is the default settings which only let you install apps from the Window Store
Sideload apps: This means installing an app that has not been certified by the Windows Store, for example, an app that is internal to your company only.
Developer mode: Lets you test, debug, install your apps on your device and you can also Sideload apps.
So if you’re a developer or you need to test a 3rd party app on your device then you need to enable Developer mode in Windows 10. But some people also need to disable this feature as not everybody uses developer mode, so without wasting any time let’s see How to Enable or Disable Developer Mode in Windows 10 with the help of the below-listed tutorial.
Enable or Disable Developer Mode in Windows 10
Make sure to create a restore point just in case something goes wrong.
Method 1: Enable or Disable Developer Mode in Windows 10 Settings
1.Press Windows Key + I to open Settings then click on Update & security icon.
2.From the left-hand menu make sure to select “For developer“.
3.Now according to your choice select either Windows Store apps, Sideload apps, or Developer mode.
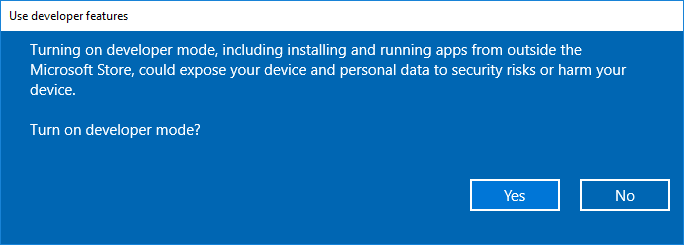
4.If you selected Sideload apps or Developer mode then click on Yes to continue.
5.Once finished, close Settings and reboot your PC.
Method 2: Enable or Disable Developer Mode in Registry Editor
1.Press Windows Key + R then type regedit and hit Enter to open Registry Editor.
2.Navigate to the following registry key:
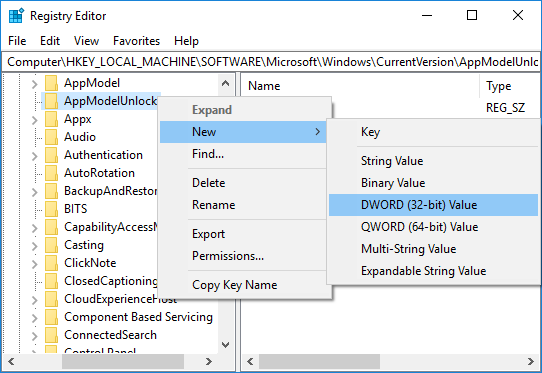
HKEY_LOCAL_MACHINESOFTWAREMicrosoftWindowsCurrentVersionAppModelUnlock
3.Right-click on AppModelUnlock then select New > DWORD (32-bit) Value.
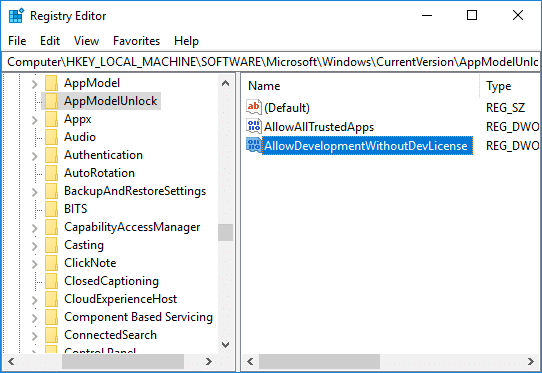
4.Name this newly created DWORD as AllowAllTrustedApps and hit Enter.
5.Similarly, create a new DWORD with the name AllowDevelopmentWithoutDevLicense.
6.Now depending on your choice set the value of the above registry keys as:
Windows Store apps – Set the value of AllowAllTrustedApps and AllowDevelopmentWithoutDevLicense to 0
Sideload apps – Set the value of AllowAllTrustedApps to 1 and AllowDevelopmentWithoutDevLicense to 0
Developer mode – Set the value of AllowAllTrustedApps and AllowDevelopmentWithoutDevLicense to 1
7.Once finished, close everything and restart your PC.
Method 3: Enable or Disable Developer Mode in Group Policy Editor
1.Press Windows Key + R then type gpedit.msc and hit Enter.
2.Navigate to the following path:
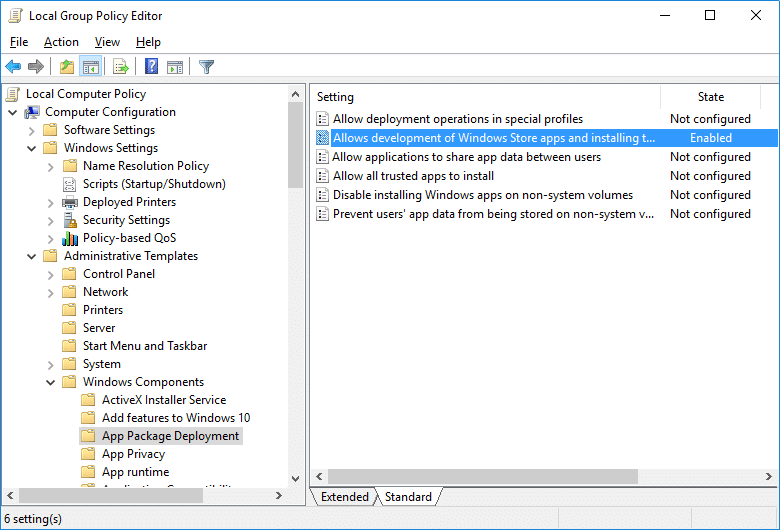
Computer Configuration > Administrative Templates > Windows Components > App Package Deployment
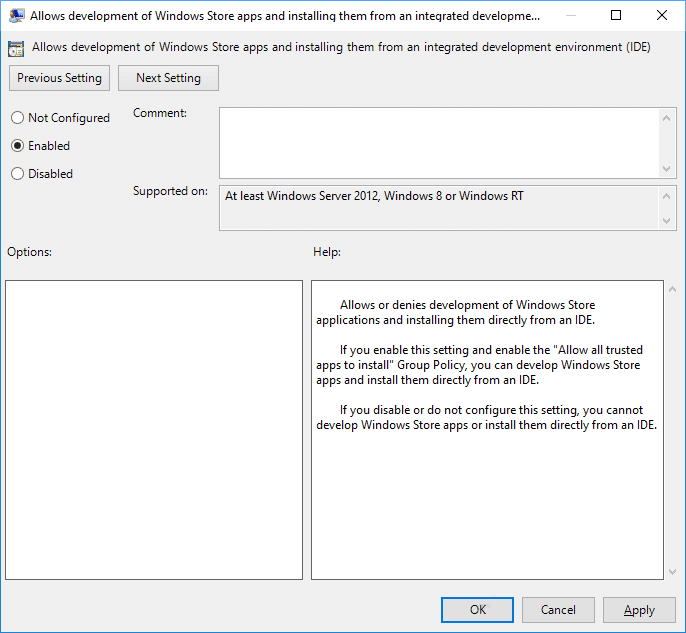
3.Make sure to select App Package Deployment then in right window pane double-click on “Allow all trusted apps to install” and “Allows development of Windows Store apps and installing them from an integrated development environment (IDE)” policy.
4.To Enable Developer Mode in Windows 10, set the above policies to Enabled and then click Apply followed by OK.
Note: If in future you need to disable Developer Mode in Windows 10, then simply set the above policies to Disabled.
5.Reboot your PC to save changes.
Recommended:
That’s it you have successfully learned How to Enable or Disable Developer Mode in Windows 10 but if you still have any questions regarding this tutorial then feel free to ask them in the comment’s section.
