Enable or Disable Thumbnail Previews in Windows 10
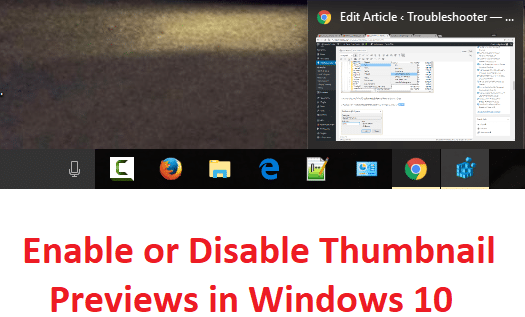
Thumbnail preview is an important feature of Windows 10 which let you have a preview of the app’s window on your taskbar when you hover over it. Basically, you get a peek of the tasks, and the hover time is predefined, which is set to half a second. So when you hover over the taskbar’s tasks, a thumbnail preview pop up window will show you what is running on the current application. Also, if you have multiple windows or tabs of that app, for example, Microsoft Edge, you will be shown the preview of each one.
Sometimes, this feature is more of a problem because the thumbnail previews window comes in your way whenever you try to work with multiple windows or apps. In this case, it will be best to disable the Thumbnail Previews in Windows 10 to work smoothly. Sometimes, it can be disabled by default so some users might want to enable thumbnail previews, so this guide will show you How to Enable or Disable Thumbnail Previews in Windows 10.
Enable or Disable Thumbnail Previews in Windows 10
Make sure to create a restore point just in case something goes wrong.
Method 1: Enable or Disable Thumbnail Previews using System Performance Settings
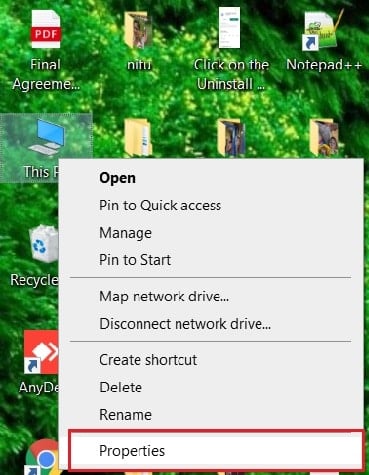
1. Right-click on This PC or My Computer and select Properties.
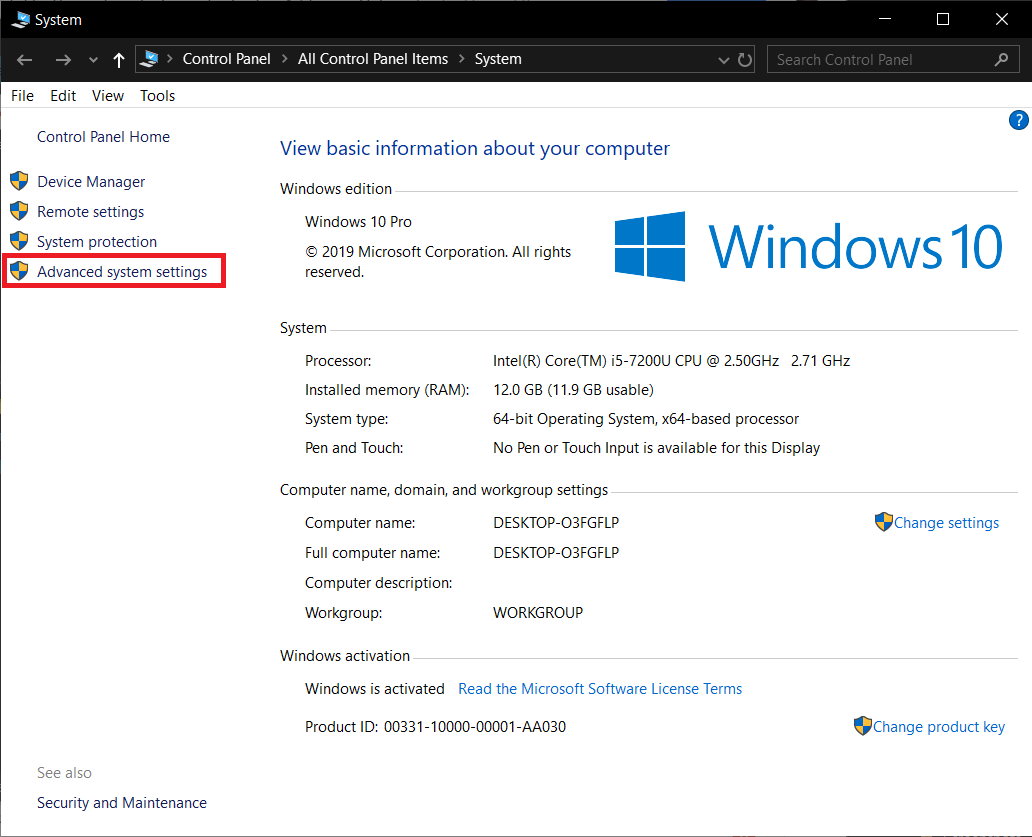
2. From the left-hand menu, click on Advanced system settings.
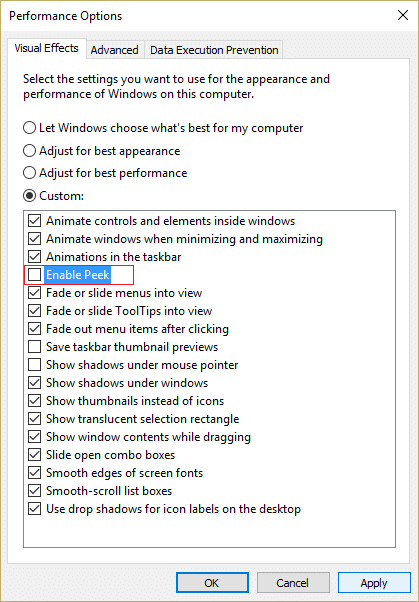
3. Make sure the Advanced tab is selected and then click Settings under Performance.
4. Uncheck Enable Peek to Disable Thumbnail Previews.
5. If you want to Enable Thumbnail Previews, then check Enable Peek.
5. Click Apply, followed by OK.
6. Reboot your PC to save changes.
Method 2: Enable or Disable Thumbnail Previews using Registry Editor
1. Press Windows Key + R then type regedit and hit Enter to open Registry Editor.
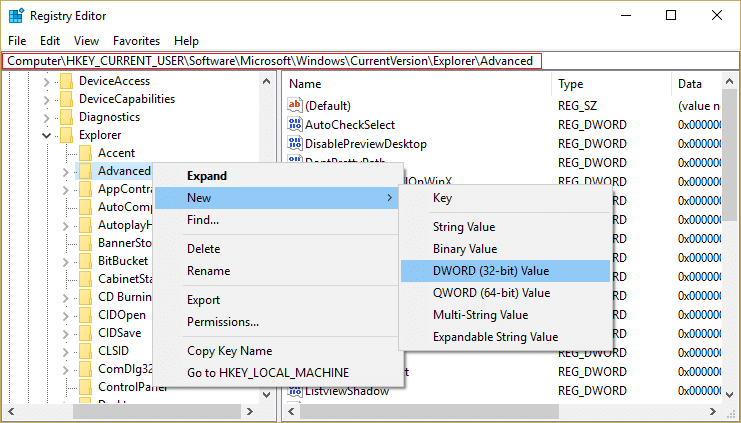
2. Navigate to the following Registry key:
HKEY_CURRENT_USERSoftwareMicrosoftWindowsCurrentVersionExplorerAdvanced
3. Now select Advanced registry key then right-click and select New > DWORD (32-bit) value.
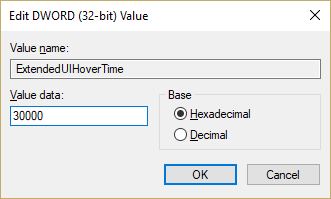
4. Name this new DWORD as ExtendedUIHoverTime and press Enter.
5. Double click on ExtendedUIHoverTime and change its value to 30000.
Note: 30000 is the time delay (in milliseconds) showing the Thumbnail Preview when you hover over the tasks or apps on the Taskbar. In short, it will disable thumbnails to appear on hover for 30 seconds, which is more than enough to disable this feature.
6. If you want to enable thumbnail preview set its value to 0.
7. Click OK and close the Registry Editor.
8. Reboot your PC to save changes.
Method 3: Disable Thumbnails Previews only for multiple instances of the app window
1. Press Windows Key + R then type regedit and hit Enter.
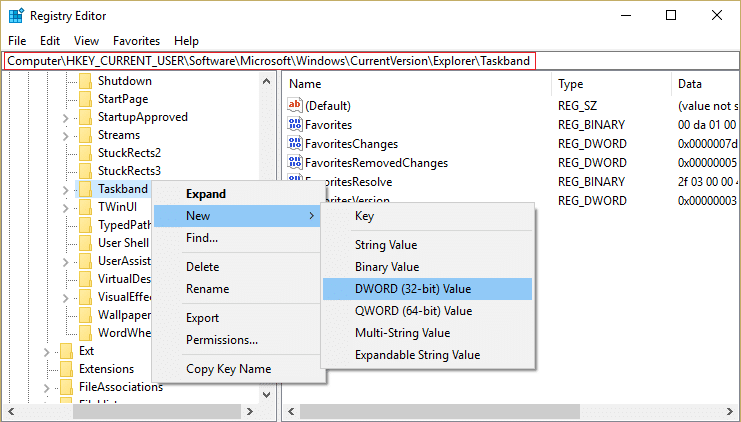
2. Navigate to the following registry key:
HKEY_CURRENT_USERSOFTWAREMicrosoftWindowsCurrentVersionExplorerTaskband
3. Right-click on Taskband and then select New > DWORD (32-bit) value.
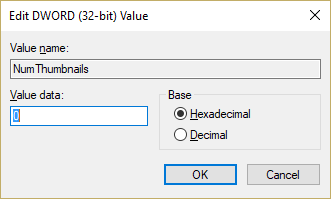
4. Name this key as NumThumbnails and double click on it to change its value.
5. Set its value to 0 and click OK.
6. Reboot your PC to save changes.
Recommended:
That’s it you have successfully learned How to Enable or Disable Thumbnail Previews in Windows 10 but if you still have any questions regarding this post then feel free to ask them in the comment’s section.
