Enable Verbose or Highly Detailed Status Messages in Windows 10
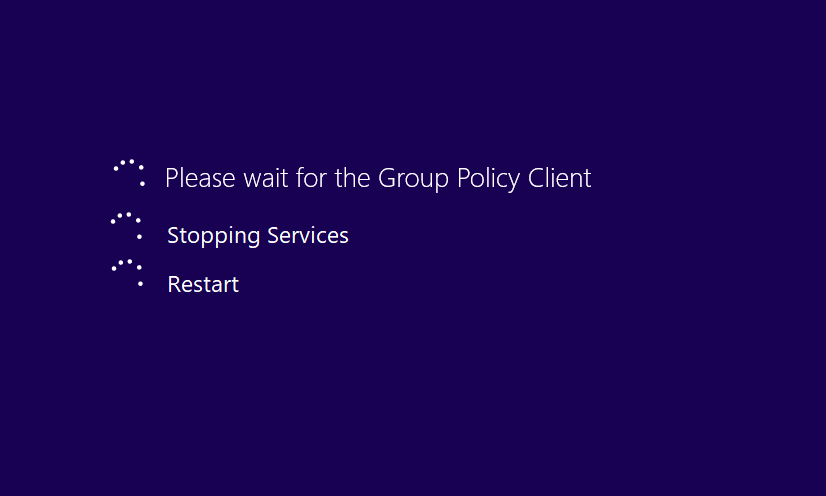
Enable Verbose or Highly Detailed Status Messages in Windows 10: Windows offers to display detailed information status messages which shows exactly whats going on when the system starts up, shutdown, logon, and logoff operations. These are referred as to as verbose status message but by default they are disabled by Windows. So without wasting any time let’s see How to Enable Verbose or Highly Detailed Status Messages in Windows 10 with the help of the below-listed tutorial.
Enable Verbose or Highly Detailed Status Messages in Windows 10
Make sure to create a restore point just in case something goes wrong.
Method 1: Enable Verbose or Highly Detailed Status Messages in Registry Editor
1.Press Windows Key + R then type regedit and hit Enter to open Registry Editor.
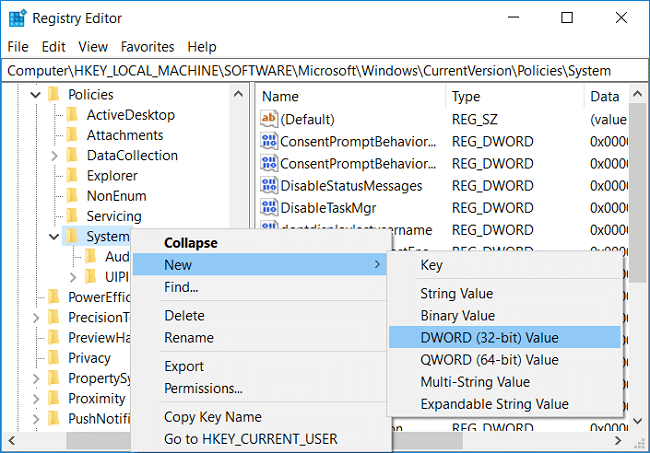
2.Navigate to the following registry key:
HKEY_LOCAL_MACHINESOFTWAREMicrosoftWindowsCurrentVersionPoliciesSystem
3.Right-click on System then select New > DWORD (32-bit) Value.
Note: Even if you’re on a 64-bit Windows, you still need to create the 32-bit value DWORD.
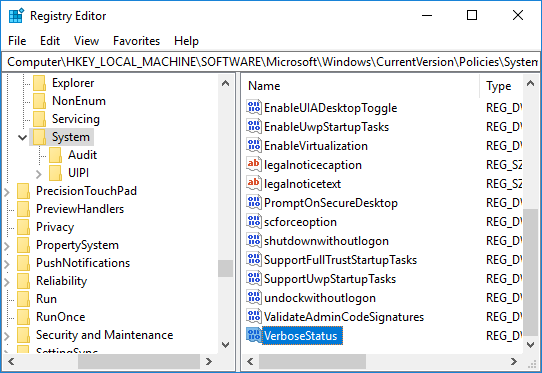
4.Name this newly created DWORD as VerboseStatus and hit Enter.
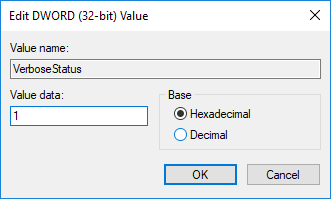
5.Now double-click on VerboseStatus DWORD and change its value to according to:
To Enable Verbose: 1
To Disable Verbose: 0
6.Click OK and close registry editor.
7.Reboot your PC to save changes.
Method 2: Enable Verbose or Highly Detailed Status Messages in Group Policy Editor
1.Press Windows Key + R then type gpedit.msc and hit Enter.
2.Navigate to the following path:
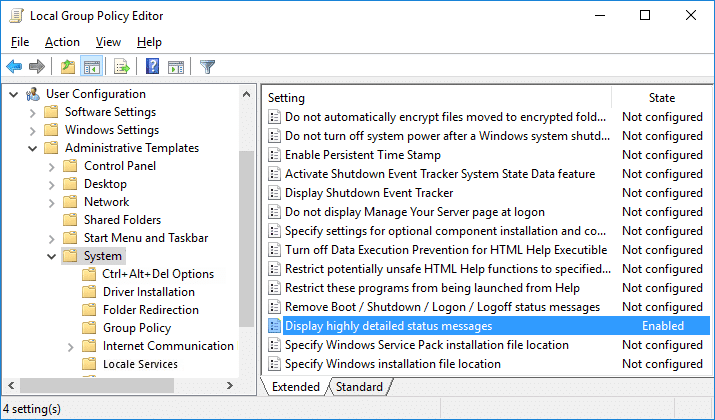
Computer Configuration > Administrative Templates > System
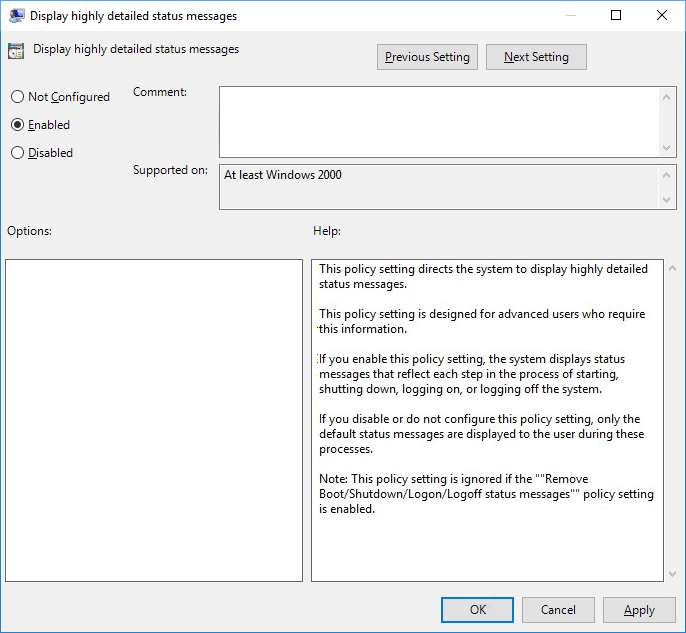
3.Make sure to select System then in the right window pane double-click on Display highly detailed status messages policy.
4.Change the value of the above policy according to:
To Enable Highly Detailed Status Messages: Enabled
To Disable Highly Detailed Status Messages: Not Configured or Disabled
Note: Windows ignores this setting if the Remove Boot / Shutdown / Logon / Logoff status messages setting is turned on.
5.Once done with the above setting click Apply followed by OK.
6.Once finished, close Group Policy Editor and restart your PC.
Recommended:
That’s it you have successfully learned How to Enable Verbose or Highly Detailed Status Messages in Windows 10 but if you still have any queries regarding this tutorial then feel free to ask them in the comment’s section.

