Fix Clock Watchdog Timeout Error on Windows 10
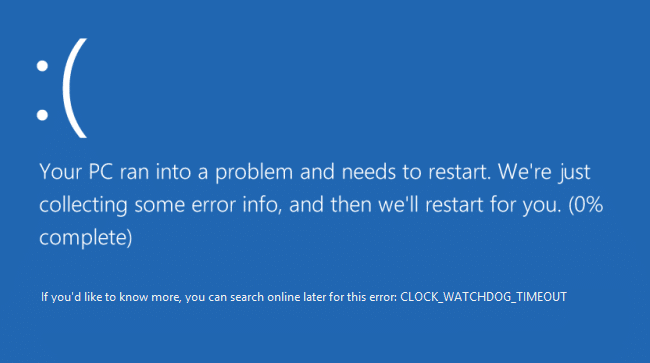
While playing a video game, your PC might suddenly restart, and you may face Blue Screen of Death (BSOD) with error message CLOCK_WATCHDOG_TIMEOUT. You can also face this error when trying to run a clean installation of Windows 10. Once you face the CLOCK_WATCHDOG_TIMEOUT error, your PC will freeze, and you will have to force restart your PC.
You may face the Clock Watchdog Timeout Error on Windows 10 because of the following reasons:
- You may have overclocked your PC hardware.
- Damaged RAM
- Corrupted or outdated Graphic Card drivers
- Incorrect BIOS configuration
- Corrupted System files
- Damaged Hard Disk
According to Microsoft, the CLOCK_WATCHDOG_TIMEOUT error indicates that an expected clock interrupt on a secondary processor, in a multi-processor system, was not received within the allocated interval. Anyway, without wasting any time let’s see How to Fix Clock Watchdog Timeout Error on Windows 10 with the help of the below-listed tutorial.
Fix Clock Watchdog Timeout Error on Windows 10
Make sure to create a restore point just in case something goes wrong.
Note: Before continuing with below steps, make sure you:
A.Disconnect all USB devices connected to your PC.
B.If you’re overclocking your PC, make sure you don’t and see if this fixes the issue.
C.Make sure that your computer doesn’t overheat. If it does, then this might be the cause of the Clock Watchdog Timeout Error.
D.Make sure you haven’t changed your software or hardware recently, for example, if you have added extra RAM or installed a new graphics card then maybe this is the reason for BSOD error, remove recently installed hardware and uninstall the device software from your PC and see if this fixes the issue.
Method 1: Run Windows Update
1.Press Windows Key + I and then select Update & Security.
2. From the left-hand side, menu clicks on Windows Update.
3. Now click on the “Check for updates” button to check for any available updates.
4. If any updates are pending, then click on Download & Install updates.
5. Once the updates are downloaded, install them, and your Windows will become up-to-date.
Method 2: Temporarily Disable Antivirus and Firewall
Sometimes the Antivirus program can cause an error, and in order to verify this is not the case here, you need to disable your antivirus for a limited time so that you can check if the error still appears when the antivirus is off.
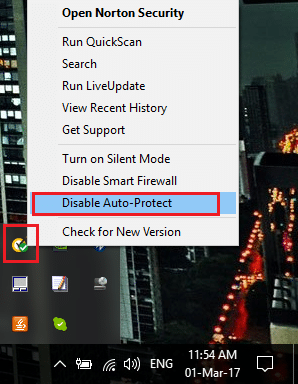
1. Right-click on the Antivirus Program icon from the system tray and select Disable.
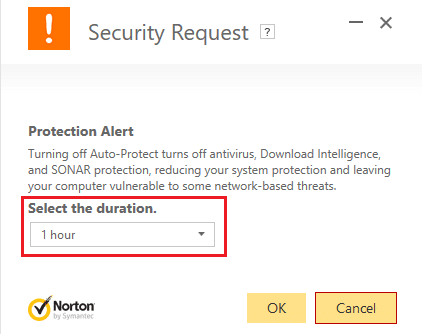
2. Next, select the time frame for which the Antivirus will remain disabled.
Note: Choose the smallest amount of time possible, for example, 15 minutes or 30 minutes.
3. Once done, again try to connect to open Google Chrome and check if the error resolves or not.
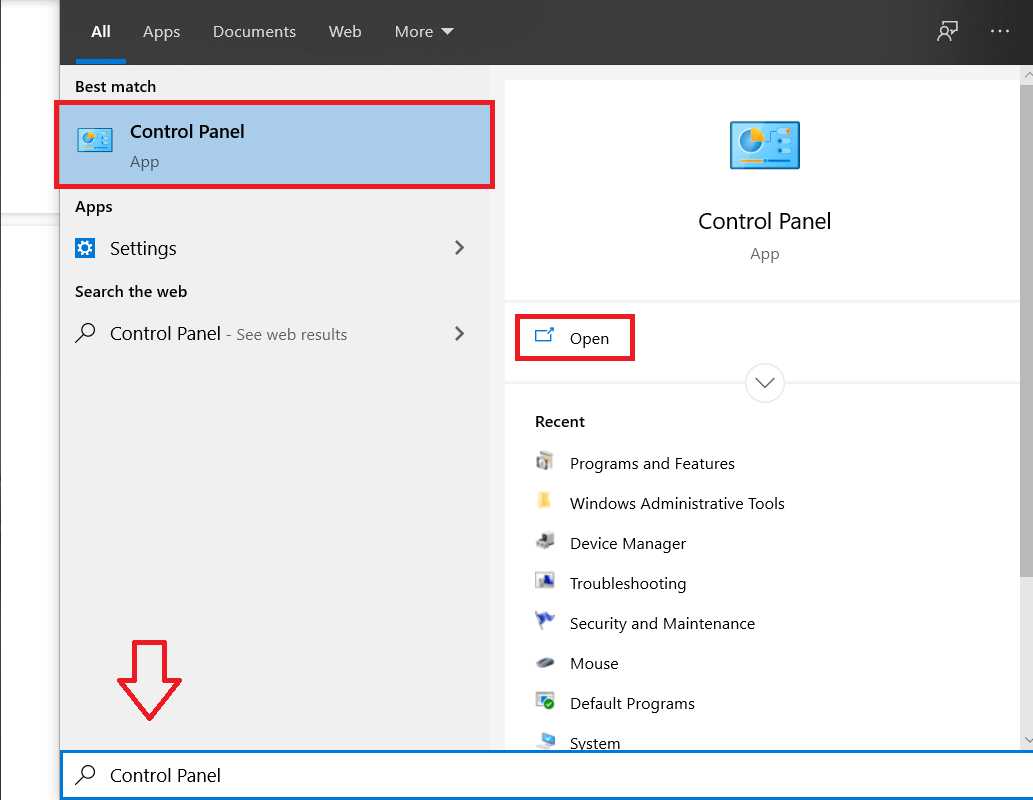
4. Search for the control panel from the Start Menu search bar and click on it to open the Control Panel.
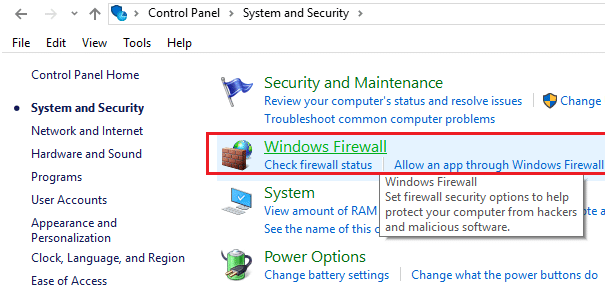
5. Next, click on System and Security then click on Windows Firewall.
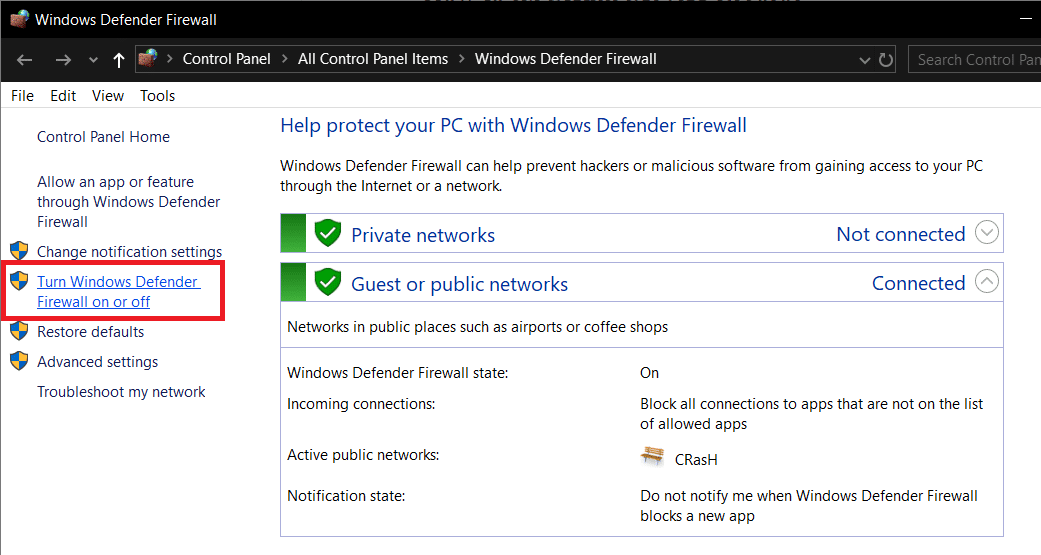
6. Now from the left window pane click on Turn Windows Firewall on or off.
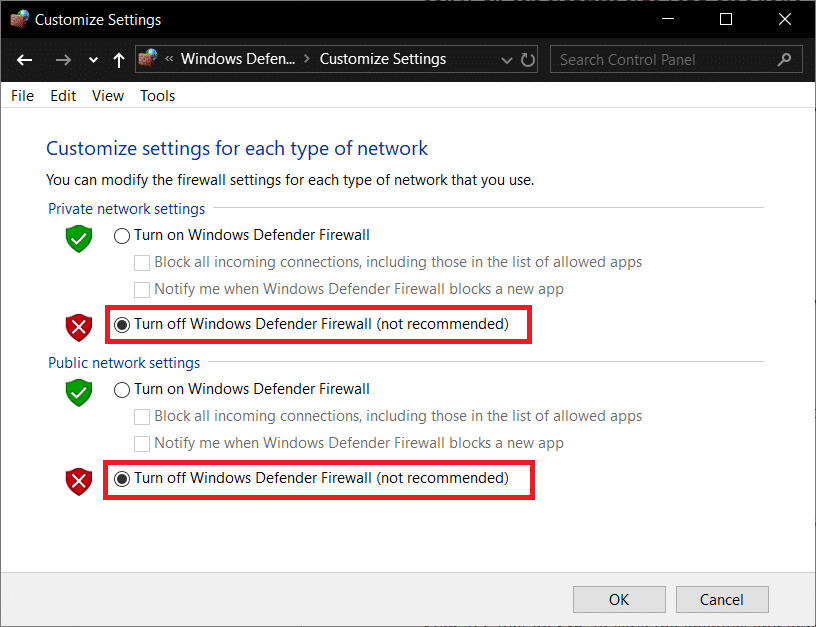
7. Select Turn off Windows Firewall and restart your PC.
Again try to open Google Chrome and visit the web page, which was earlier showing the error. If the above method doesn’t work, make sure to follow the same steps to turn on your Firewall again.
Method 3: Reset BIOS to default settings
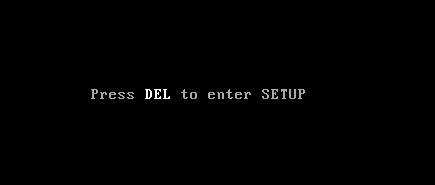
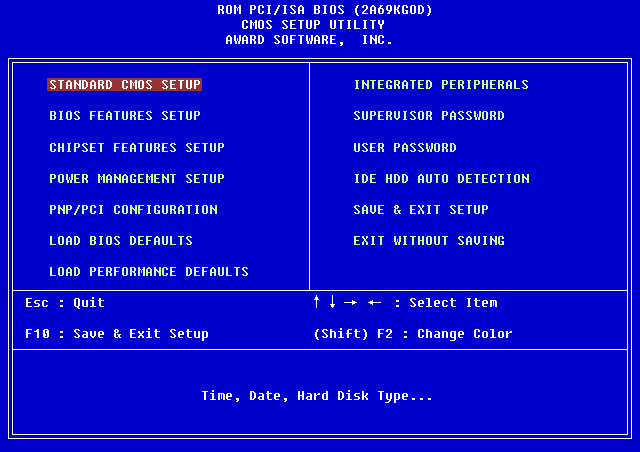
1. Turn off your laptop, then turn it on and simultaneously press F2, DEL or F12 (depending on your manufacturer) to enter into BIOS setup.
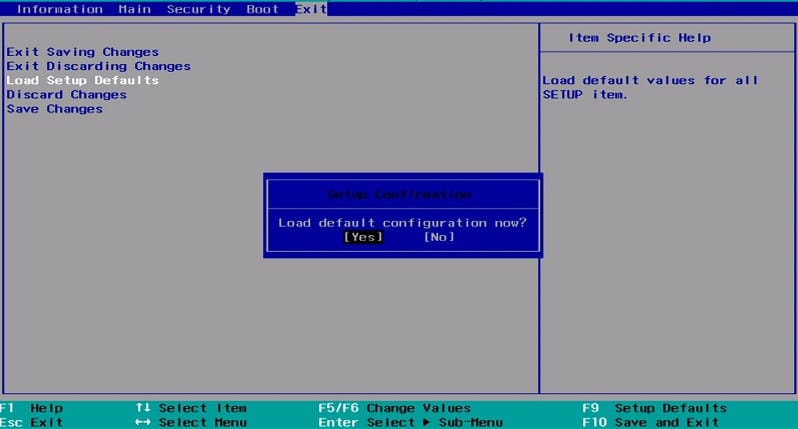
2. Now you’ll need to find the reset option to load the default configuration, and it may be named Reset to default, Load factory defaults, Clear BIOS settings, Load setup defaults, or something similar.
3. Select it with your arrow keys, press Enter, and confirm the operation. Your BIOS will now use its default settings.
4. Once you’re logged into Windows see if you’re able to Fix Clock Watchdog Timeout Error on Windows 10.
Method 4: Run MEMTEST
1. Connect a USB flash drive to your system.
2. Download and install Windows Memtest86 Auto-installer for USB Key.
3. Right-click on the image file which you just downloaded and selected “Extract here” option.
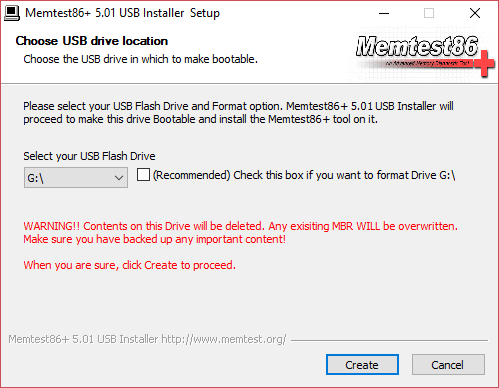
4. Once extracted, open the folder and run the Memtest86+ USB Installer.
5. Choose you’re plugged in a USB drive, to burn the MemTest86 software (This will format your USB drive).
6. Once the above process is finished, insert the USB to the PC where you’re getting the “Clock Watchdog Timeout Error“.
7. Restart your PC and make sure that boot from the USB flash drive is selected.
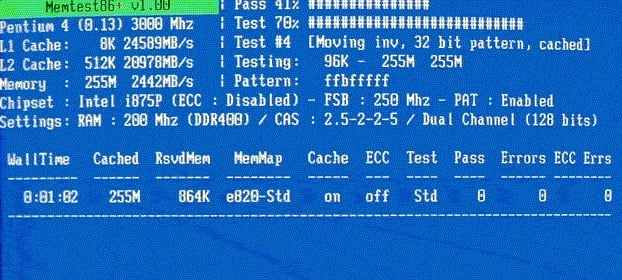
8. Memtest86 will begin testing for memory corruption in your system.
9. If you have passed all the test, then you can be sure that your memory is working correctly.
10. If some of the steps were unsuccessful, then Memtest86 will find memory corruption which means “Clock Watchdog Timeout Error” is because of bad/corrupt memory.
11. To Fix Clock Watchdog Timeout Error on Windows 10, you will need to replace your RAM if bad memory sectors are found.
Method 5: Run SFC and DISM
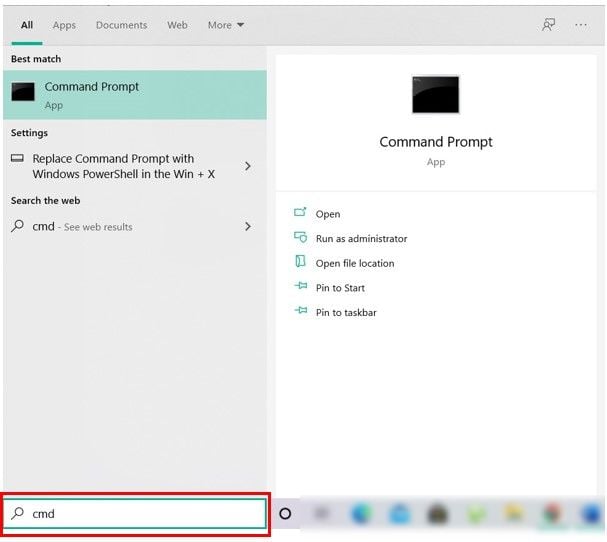
1. Open Command Prompt. The user can perform this step by searching for ‘cmd’ and then press Enter.
2. Now type the following in the cmd and hit enter:
Sfc /scannow
sfc /scannow /offbootdir=c: /offwindir=c:windows (If above fails then try this one)
3. Wait for the above process to finish and once done, restart your PC.
4. Again open cmd and type the following command and hit enter after each one:
Dism /Online /Cleanup-Image /CheckHealth
Dism /Online /Cleanup-Image /ScanHealth
Dism /Online /Cleanup-Image /RestoreHealth
5. Let the DISM command run and wait for it to finish.
6. If the above command doesn’t work, then try on the below:
Dism /Image:C:offline /Cleanup-Image /RestoreHealth /Source:c:testmountwindows
Dism /Online /Cleanup-Image /RestoreHealth /Source:c:testmountwindows /LimitAccess
Note: Replace the C:RepairSourceWindows with your repair source (Windows Installation or Recovery Disc).
7. Reboot your PC to save changes and see if you’re able to Fix Clock Watchdog Timeout Error on Windows 10.
Method 6: Update Device Drivers
In some cases, Clock Watchdog Timeout error can be caused due to outdated, corrupt or incompatible drivers. And to fix this issue, you need to update or uninstall some of your essential device drivers. So first, Start your PC into Safe Mode using this guide then make sure to follow the below guide to update the following drivers:
- Network Drivers
- Graphics Card drivers
- Chipset Drivers
- VGA Drivers
Note: Once you Update the driver for any one of the above, then you need to Restart your PC and see if this fixes your problem, if not then again follow the same steps to update drivers for other devices and again restart your PC. Once you found the culprit for Clock Watchdog Timeout Error, you need to uninstall that particular device driver and update the drivers from the Manufacturer’s website.
1. Press Windows Key + R then type devicemgmt.msc and hit Enter to open Device Manager.
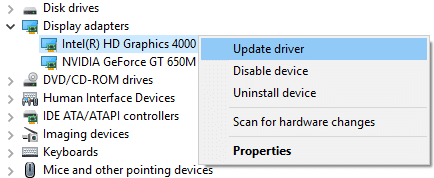
2. Expand Display Adapter then right-click on your Video adapter and select Update Driver.
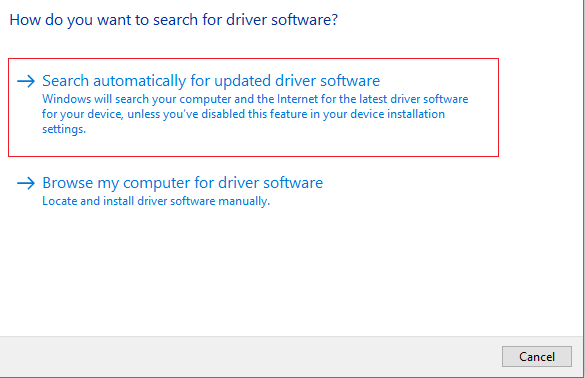
3. Select “Search automatically for updated driver software” and let it finish the process.
4. If the above step could fix your problem, then very good, if not then continue.
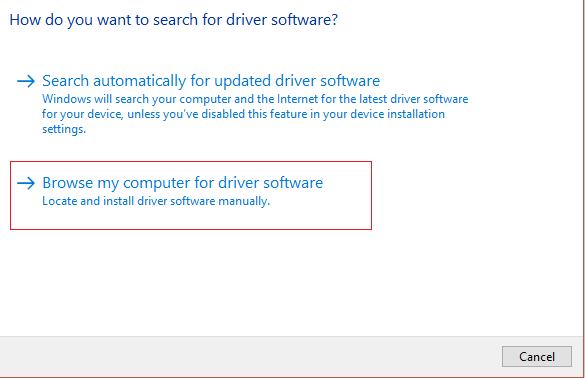
5. Again select “Update Driver” but this time on the next screen select “Browse my computer for driver software.”
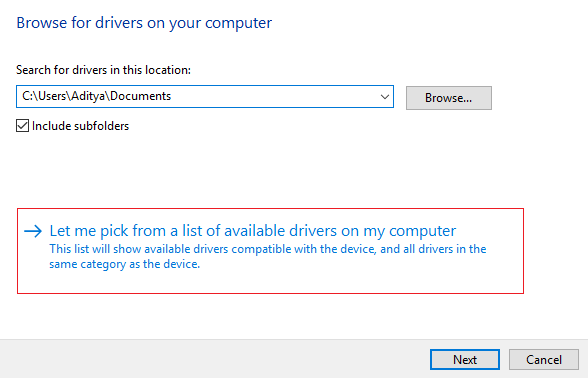
6. Now select “Let me pick from a list of available drivers on my computer.”
7. Finally, select the compatible driver from the list and click Next.
8. Reboot your PC to save changes.
Now follow the above method to update Network Drivers, Chipset Drivers, and VGA Drivers drivers.
Method 7: Update BIOS
Sometimes updating your system BIOS can fix this error. To update your BIOS, go to your motherboard manufacturer website and download the latest BIOS version and install it.
If you have tried everything but still stuck at USB device not recognized problem, see this guide: How to Fix USB Device not recognized by Windows.
Method 8: Repair Install Windows 10
This method is the last resort because if nothing works out, then, this method will surely repair all problems with your PC. Repair Install uses an in-place upgrade to repair issues with the system without deleting user data present on the system. So follow this article to see How to Repair Install Windows 10 Easily.
Method 9: Roll Back to the previous build
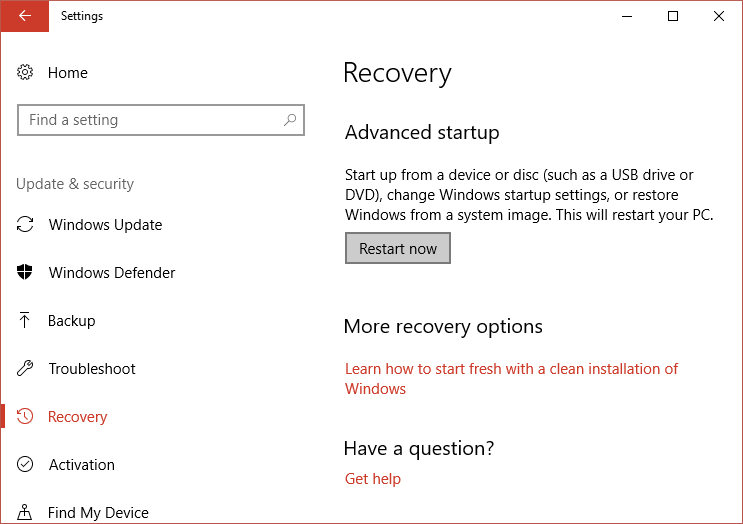
1. Press Windows Key + I to open Settings then click on Update & Security.
2. From the left-hand menu, click on Recovery.
3. Under Advanced startup clicks Restart Now.
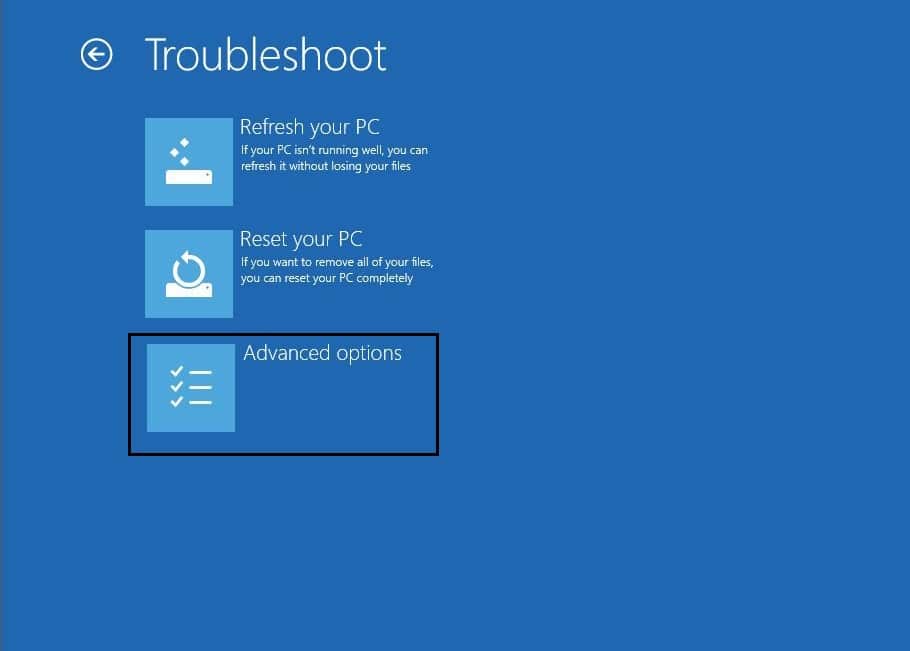
4. Once the system boots into the Advanced startup, choose to Troubleshoot > Advanced Options.
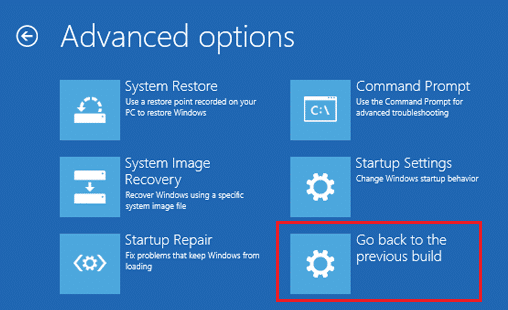
5. From the Advanced Options screen, click “Go back to the previous build.”
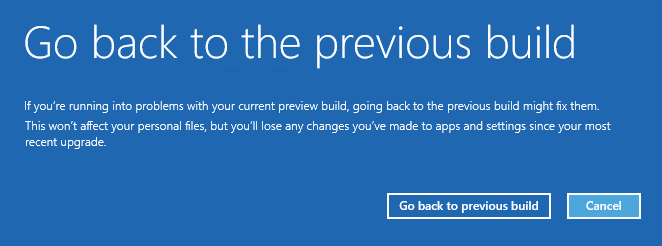
6. Again click on “Go back to previous build” and follow the on-screen instructions.
Recommended:
That’s it you have successfully Fix Clock Watchdog Timeout Error on Windows 10 but if you still have any questions regarding this tutorial then feel free to ask them in the comment’s section.


