Fix Error 1310 Verify That You Have Access to That Directory
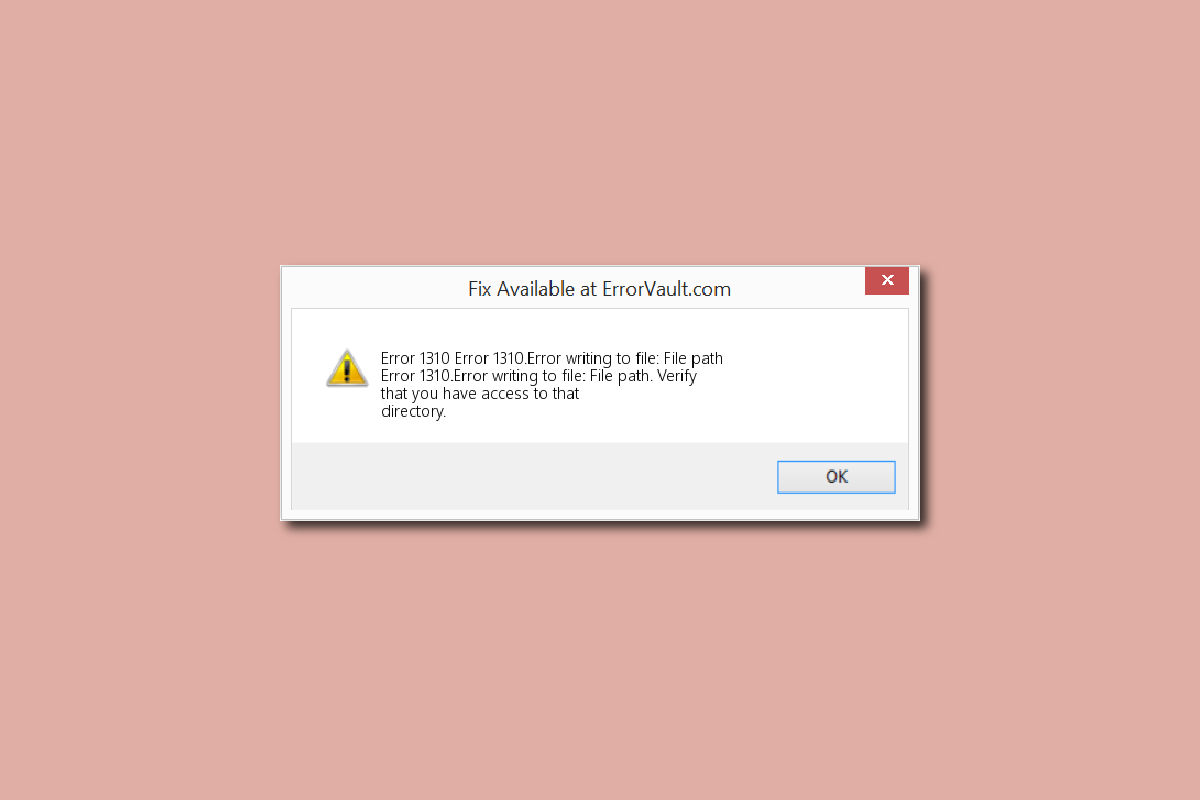
You cannot install a new application due to error 1310 or an error message stating verify that you have access to that directory, and have tried installing the app multiple times and still facing the same error. Well, worry not, it’s a common error. Many users have complained regarding the same. This can happen with bundled apps, or with any application depending on system settings and app requirements. If you are also dealing with error writing to file problem and couldn’t fix it, then you are at the right place. We bring you a perfect guide that will help you fix error 1310 problem.
How to Fix Error 1310 Verify That You Have Access to That Directory
This usually happens when installing MS Office apps like PowerPoint, Excel, Word, Adobe Photoshop or Autodesk, and AutoCAD. The following are some of the primary causes of the error:
- The required file location is already being used by another piece of software.
- Windows Installer is not functioning properly.
- Insufficient permissions to access the directory where the new software will be installed.
- Previously installed an app and did not uninstall it properly or completely, and as a result, there may be some older files and folders in your system that are causing error 1310.
Method 1: Uninstall Older App Version
As mentioned above, if you had installed the same app before and didn’t uninstall it completely, then you will likely face the error, also if the older version of the app is there in your system. So, check your application folder and file explorer to see if an older version is installed. Also, if you have uninstalled the app, make sure there are no remaining files related to that app. Here’s what needs to be done to fix error 1310 verify that you have access to that directory issue.
1. Press the Windows + R keys together to open the Run dialog box.
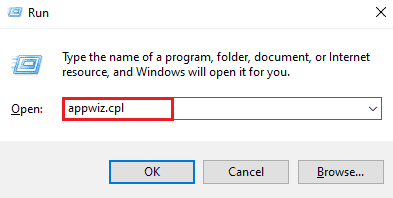
2. Type appwiz.cpl and hit the Enter key to launch Programs and Features window.
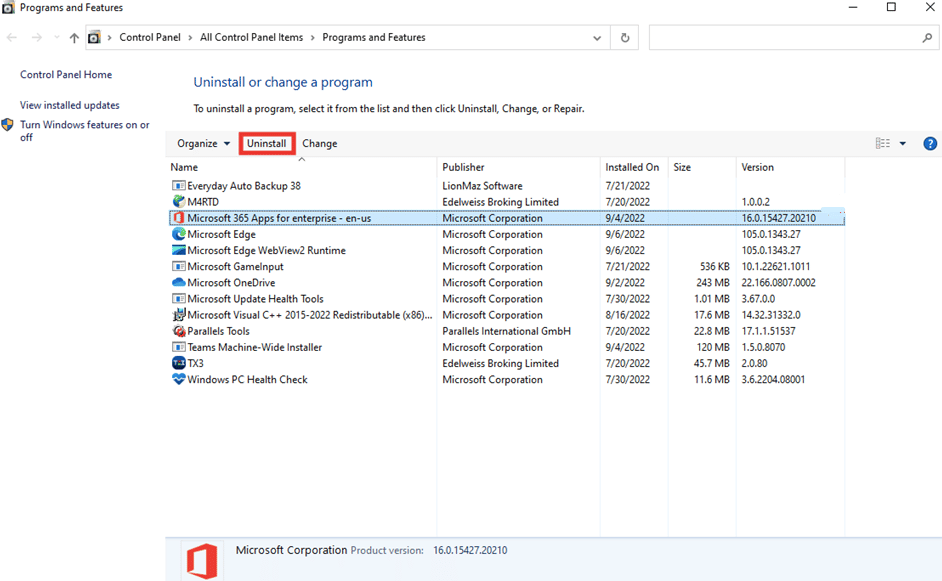
3. Check whether there is an older version of app you are trying to install. If there is one, select it and click on Uninstall.
Note: Here we have shown Microsoft 365 apps as an example.
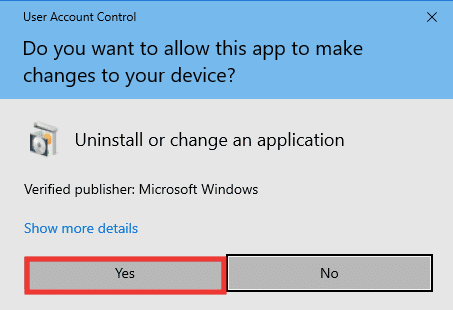
4. Then, click on Yes to Uninstall.
Note: It is always recommended that you uninstall the application with the appropriate method and should avoid deleting the app directly.
Also Read: Fix Microsoft Office Not Opening on Windows 10
Method 2: Re-register Windows Installer
Any new app installation has to go through the Windows installer, which is the core for installing and uninstalling. And, if there is any problem with the installer, then it is likely for an error message, verify that you have access to that directory to appear. Do the following to unregister and re-register the Windows installer:
1. Launch the Run dialog box.
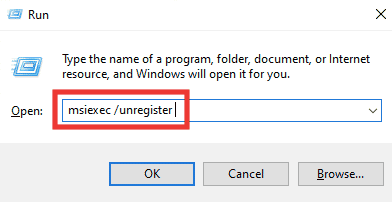
2. Here, type msiexec /unregister and press the Enter key to unregister Windows Installer.
3. Again open the Run dialog box.
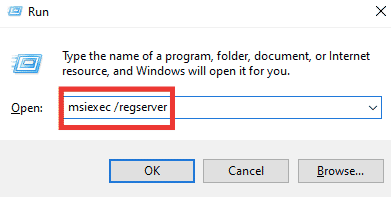
4. Now, type msiexec /regserver and hit the Enter key to re-register Windows Installer.
5. Finally, restart the PC and try installing the app again.
Also Read: Fix NSIS Error Launching Installer in Windows 10
Method 3: Grant Full Permission to File Location
This method will provide the required permissions to write the data in the particular installation folder. When the error message of verify that you have access to that directory appears, you will see which folder is asking for access to the directory. So, now you know to which folder you have to give permission. Do the following to fix error writing to file.
1. Open File Explorer by pressing the Windows key + E key.
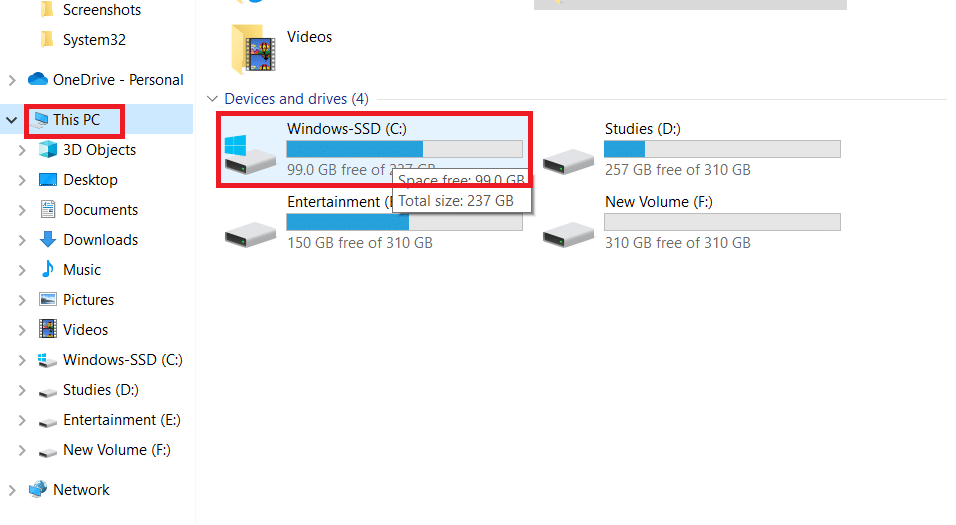
2. Open Local Disk (C:) by double-clicking on it.
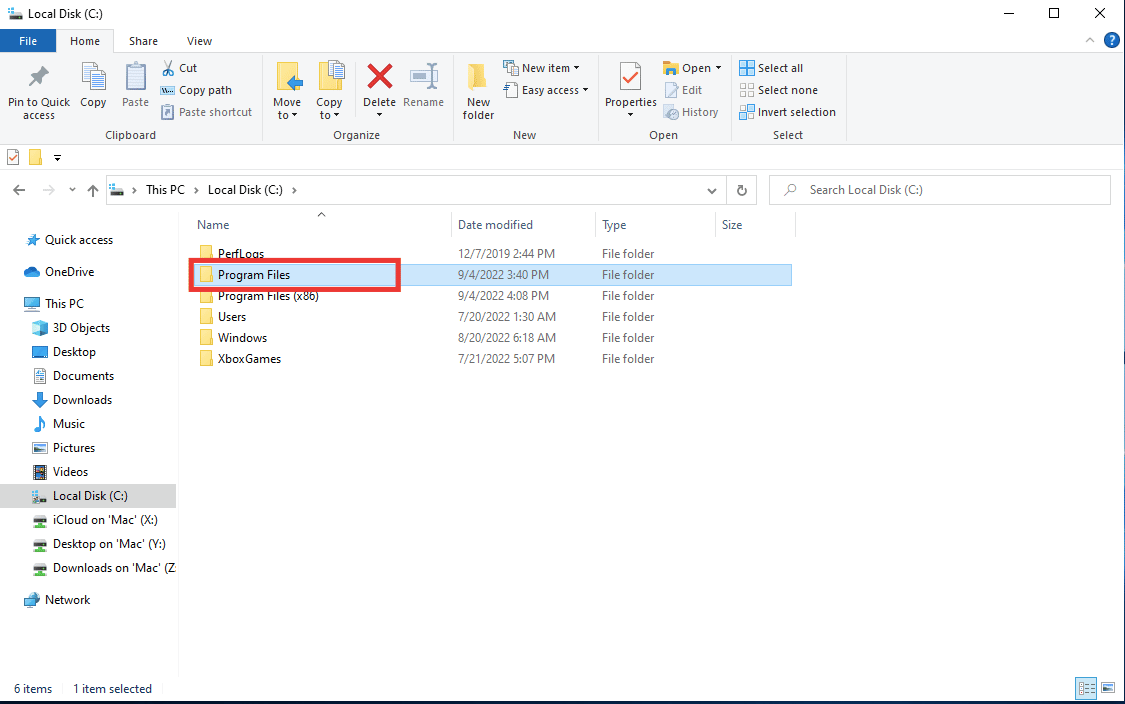
3. Double-click on Program Files folder.
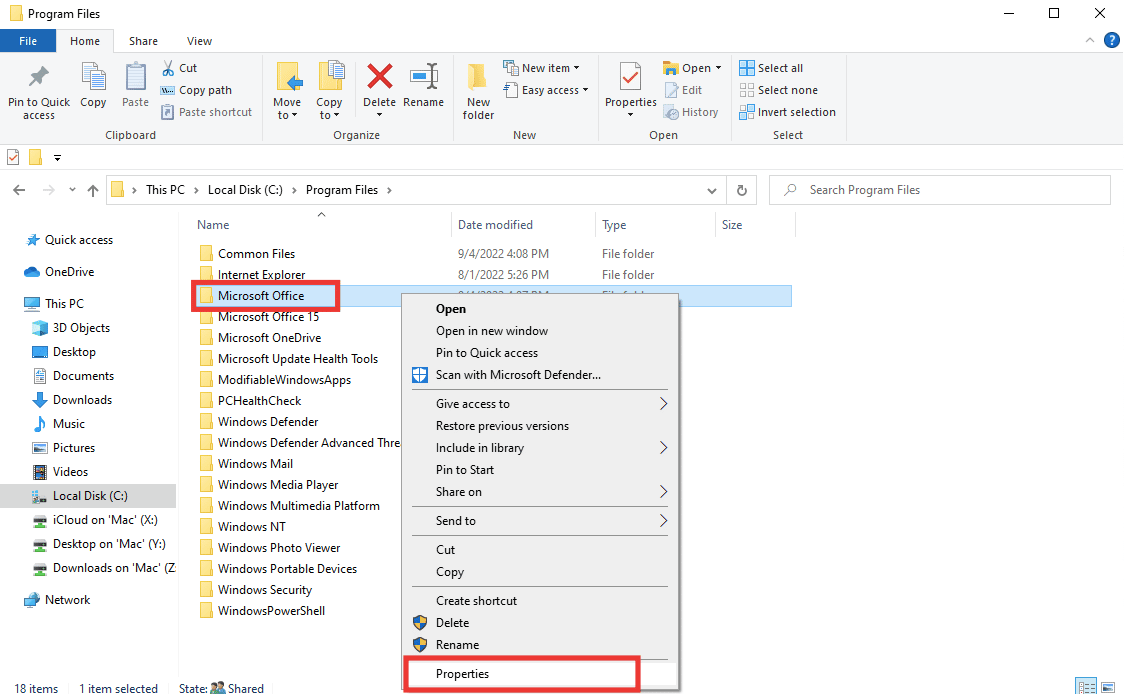
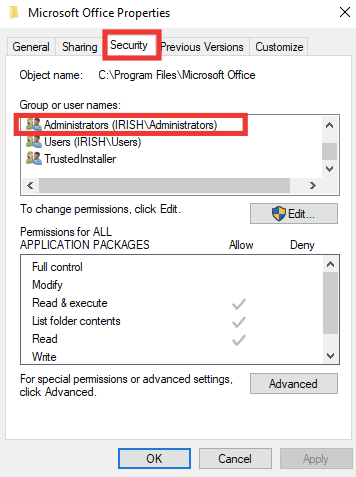
4. Find the software that you are trying to install, right-click on it and click on Properties.
5. Go to Security tab and Below Group or user names section click on Administrators.
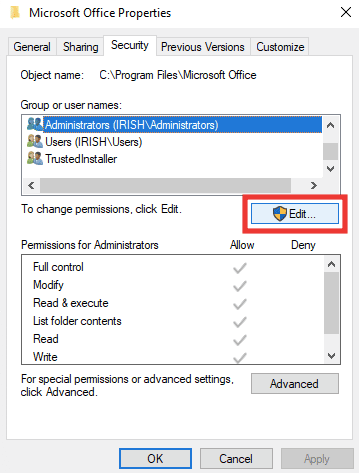
6. To change the permission, click on Edit….
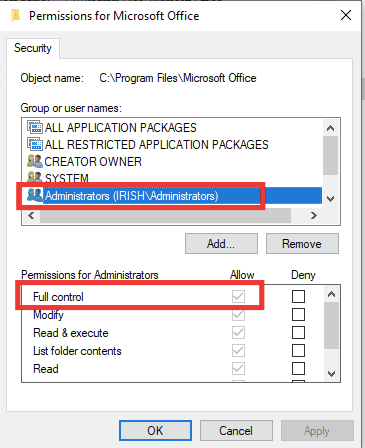
7. Select Administrators again and click on the checkbox of Full control.
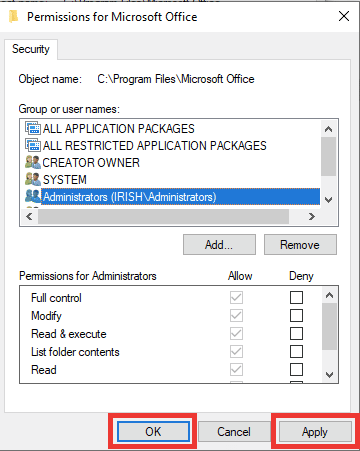
8. Click on Apply and OK.
9. Finally, reboot the PC and try installing the software.
Note: you can also try this procedure in the following folder location paths as well:
C:Program FilesCommon FilesApp name
C:Program Files (x86)App name
C:Program Files (x86)Common FilesApp name
Also Read: How to Stop Windows 10 From Asking Permission
Method 4: Install Software in Clean Boot State
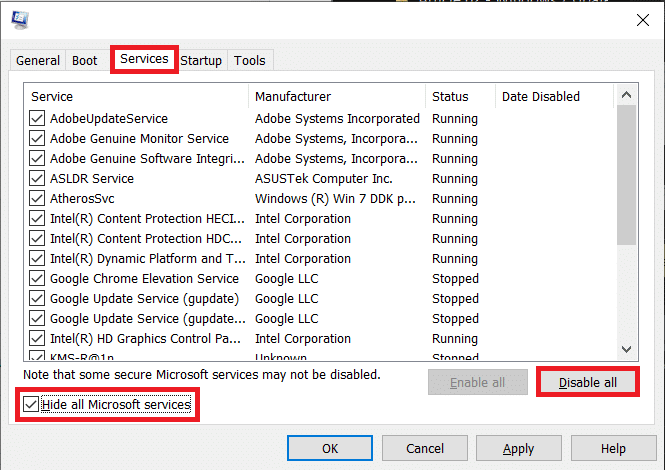
Finally, if none of the previous methods worked, you can try installing the app in clean boot mode, which disables all unnecessary apps and services that may be interfering with the installation and causing error 1310. If you can install the app in a clean boot state, it means that the error was caused by a third-party app or service. Read our guide to Perform Clean boot in Windows 10.
Recommended:
We hope that this guide was helpful and you were able to fix error 1310 verify that you have access to that directory. Let us know which method worked for you best to fix error writing to file. If you have any queries or suggestions regarding any tech-related issues, then feel free to drop them in the comments section below.
