Steam is an online game management platform loved by millions of users around the globe. It has a cloud-based gaming library that allows you to buy and install games on your computer easily. According to several online reports, gamers are facing error code 118 on Steam recently. If you are also facing the same error code, don’t worry! This troubleshooting guide will help you fix Steam unable to connect to server error. So, continue reading!
How to Fix Error Code 118 Steam in Windows 10
When you play or launch your game on Steam, you may face error code 118 Steam. The complete error message will be Unable to connect to the server. Server maybe offline accompanied by an error code 118. The most common reasons that cause error code 118 Steam are listed below.
- Improper internet connectivity.
- Broken Wi-Fi connection.
- Steam is blocked by Firewall and antivirus.
- Some apps on your device block Steam games.
- Outdated Steam and missing integrity files.
- Presence of virus.
- Outdated drivers and OS.
- Background processes are interfering with Steam.
Here are a few simple effective troubleshooting methods that will help you fix error code 118 Steam.
Note: Always ensure you create a System restore point to restore your PC if something goes wrong.
Method 1: Basic Troubleshooting Steps
- Move your router to some other place and check the internet connectivity.
- Avoid wireless interference from devices like wireless headphones, headsets, TV and a lot more.
- Move your PC closer to the router and check if the error recurs again.
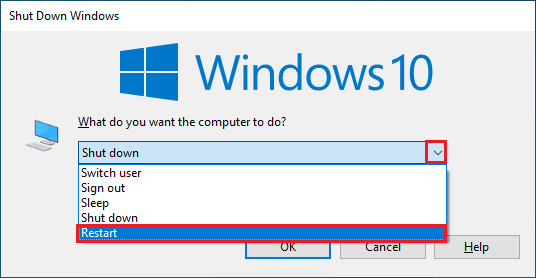
- Restart your PC. This will fix all the temporary glitches associated with your Windows 10 PC.
Method 2: Ensure Strong Internet Connection
You will not face Steam unable to connect to server in your Windows 10 computer only if you have a stable network connection. If there are any obstacles between your router and your computer, they may interfere with the wireless signal and will cause Steam unable to connect to server error.
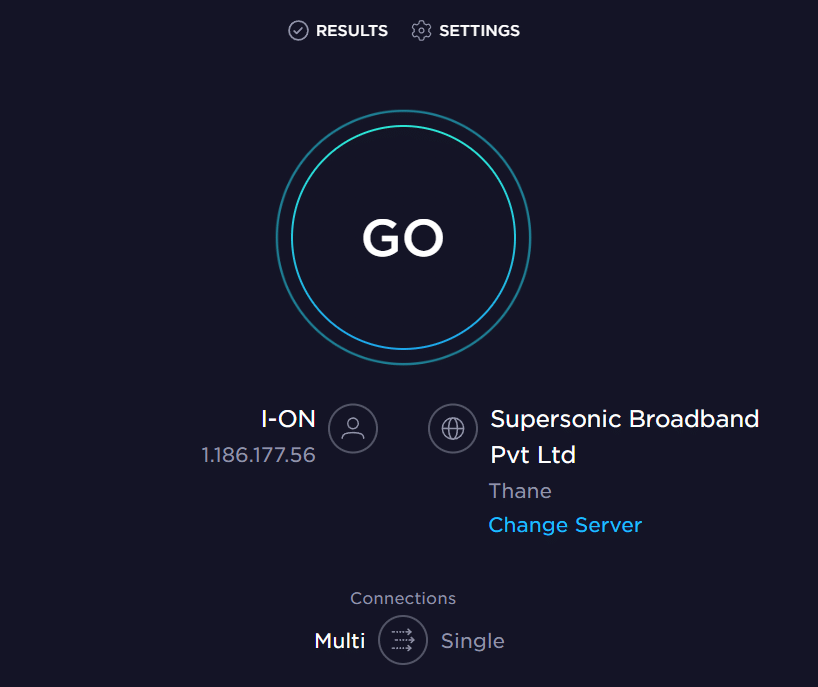
- Find the signal strength of your network and if it is very low, clear all the obstructions in between the way. You can run SpeedTest to view your network speed.
- Avoid too many devices connected to the same network.
Also Read: Fix Steam Error Code e502 l3 in Windows 10
Method 3: Restart Router
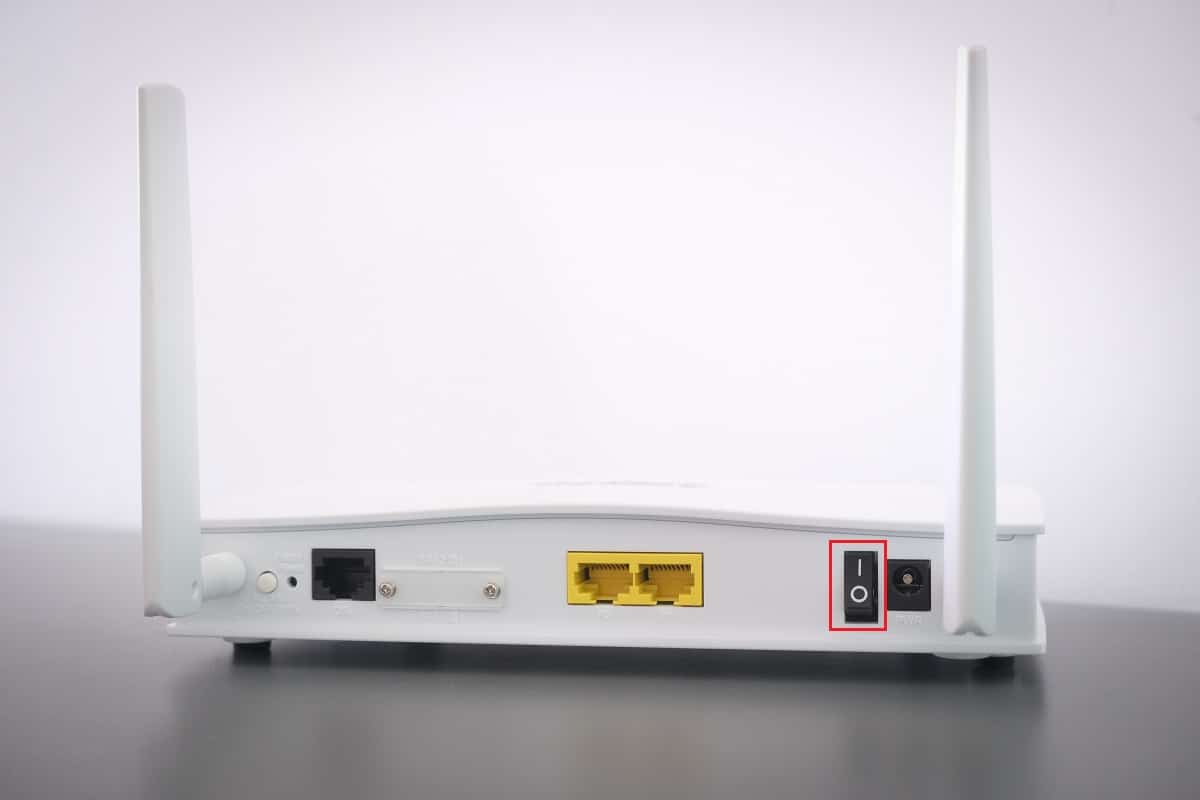
The very common reason that cause error code 118 Steam is inadequate network speeds and a poor signal. The connectivity problem between the Steam server and client can be sorted out when you restart your router. By doing so, you will establish a fresh internet connection between the client and the server. You can restart your router by following our guide Restart Router or Modem. Once your router has restarted, check if you can have fixed the error.
Method 4: Reconnect Internet
This is another simple workaround that fixes error code 118 Steam. The Windows 10 PC should connect either to Ethernet or to Wi-Fi network at a time. Check if this condition applies to your computer and if you guess any interruptions between your wired and wireless connections, reconnect them as instructed below.
1. Disconnect your network connection, wait for a while and reconnect it again.
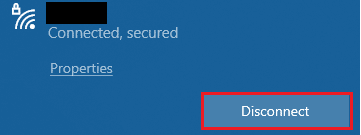
2. If the Ethernet cable is plugged in, remove it from your PC. Then, reconnect it or connect it to a Wi-Fi network. This will ensure there is no flickering between the wired and wireless connections.
Also Read: How to Disable Steam Overlay in Windows 10
Method 5: Run Network Troubleshooter
To fix various internet connectivity issues, you can use the inbuilt tool provided in Windows 10 PC whenever needed. By using the Windows network troubleshooter tool, you can analyze and diagnose any common network-related issues. It is a systematic process, when implemented step by step, will help you fix Steam unable to connect to server. Follow our guide How to Troubleshoot Network Connectivity Problems on Windows 10 to learn basic troubleshooting steps to fix all network-related issues by using Windows Network Adapter troubleshooter.
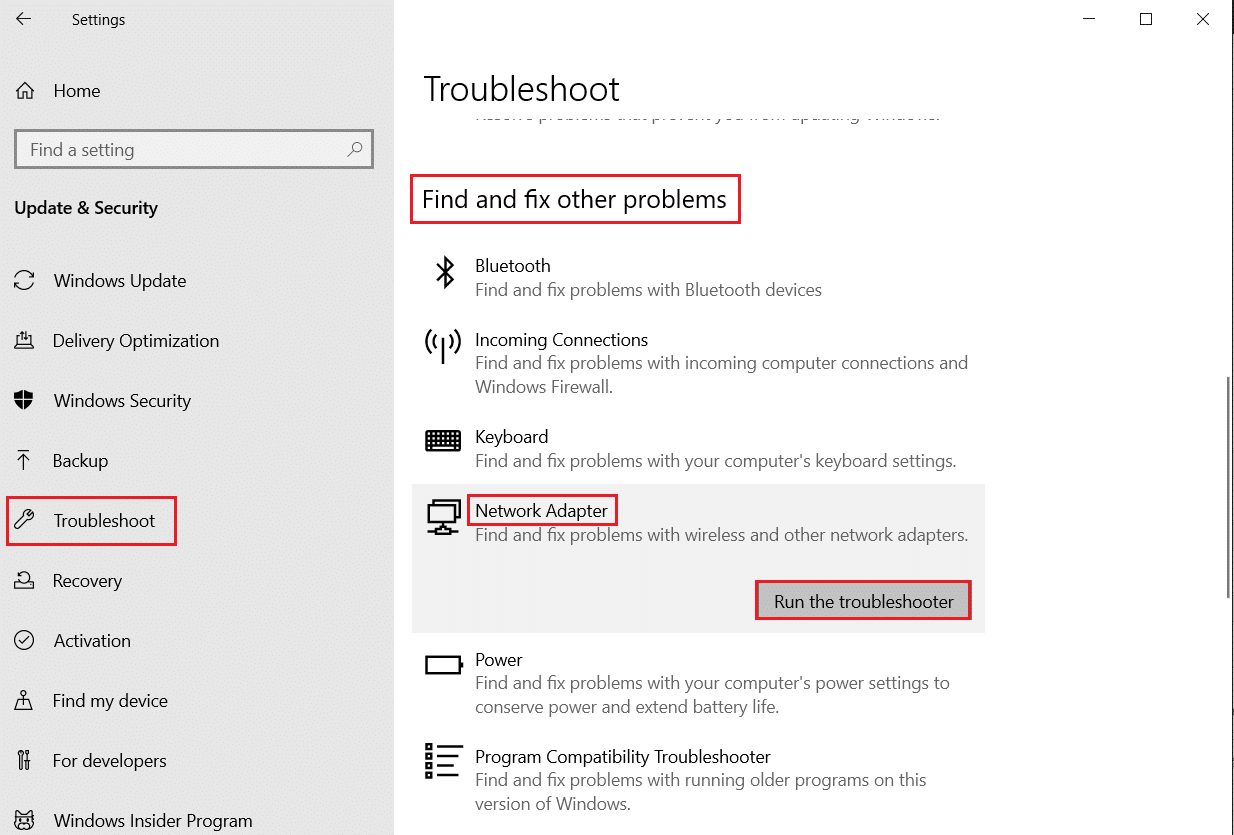
You can use the steps mentioned in the guide to diagnose Wi-Fi connections, Ethernet, and all network adapters in your Windows 10 PC. Finally, check if you have fixed Steam store error code 118.
Method 6: Exit All Background Processes
If there are any conflicting third party applications running in your PC, your Steam client may trigger random error codes. Therefore, to fix error code 118 Steam, close all the background processes by following our guide How to End Task in Windows 10 in your Windows 10 PC.
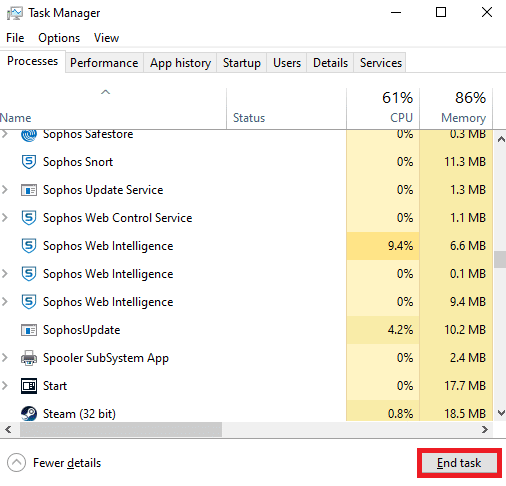
After closing all the background processes, check if Steam unable to connect to server error code is fixed or not.
Also Read: Fix Steam Image Failed to Upload
Method 7: Update Steam Client
If you use an outdated Steam application, you will face Steam store error code 118. Hence always make sure you use an updated version of Steam and your game before launching it.
1. Hit the Windows key and type Steam. Then, click on Open.
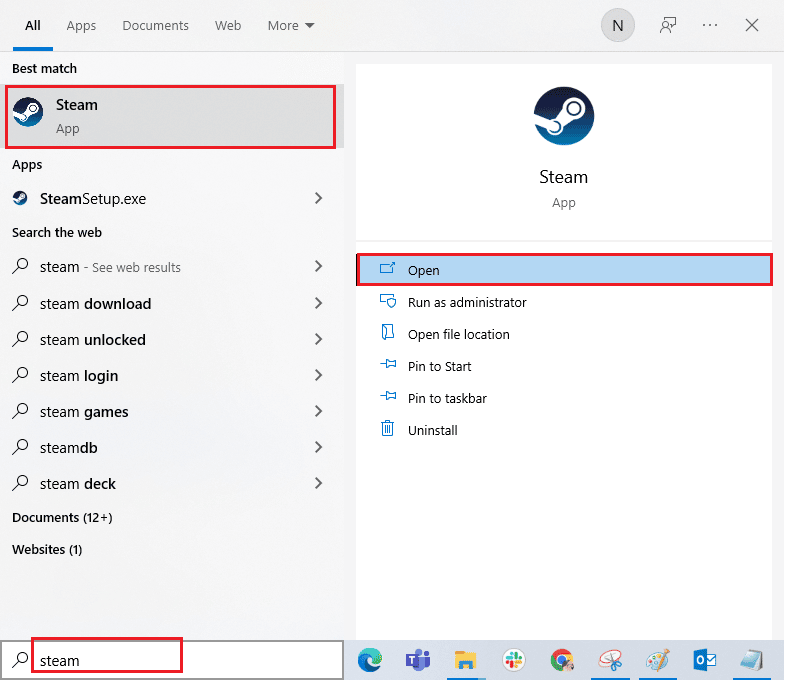
2. Now, click on Steam in the top left corner of the screen followed by Check for Steam Client Updates… as highlighted below.
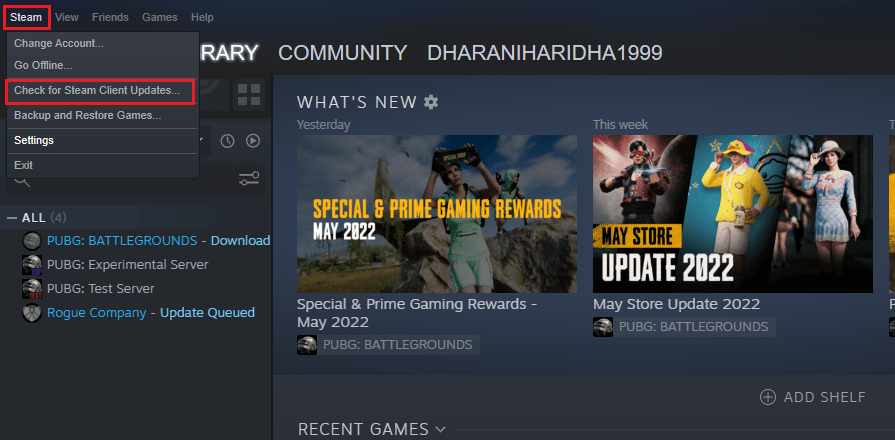
3. If you have any new updates to be downloaded, install them and ensure your Steam client is up-to-date.
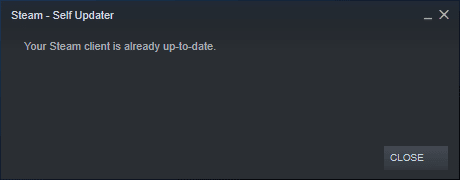
4. Now, relaunch Steam and check if Steam unable to connect to server error code is solved now.
Method 8: Repair System Files
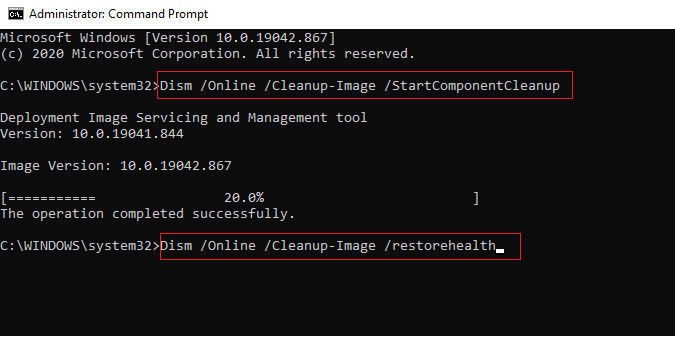
If there are any corrupt system files in your Windows Operating system, your PC may face a lot of internet connectivity issues. If you are experiencing error code 118 Steam very recently, there are some chances that your computer files have become corrupt or damaged. Windows 10 PC has inbuilt repair tools like SFC (System File Checker) and DISM (Deployment Image Servicing and Management) that will help you fix all the corrupt files. Read our guide on How to Repair System Files on Windows 10 and follow the steps as instructed to repair all your corrupt files.
Also Read: Fix Steam Keeps Crashing
Method 9: Run Malware Scan
Presence of viruses cause conflicts and errors like error code 118 Steam. So, install a reliable antivirus software on your computer and run a complete scan. If you are confused on running a malware scan, our guide How do I Run a Virus Scan on my Computer? will help you do so.
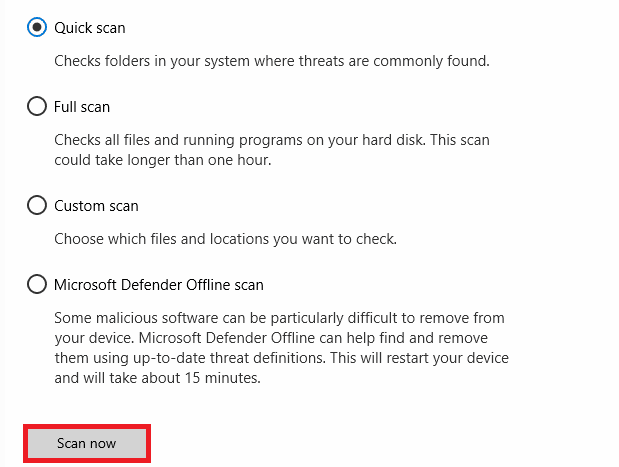
Also, if you want to remove malware in your computer, check our guide How to Remove Malware from your PC in Windows 10.
Method 10: Update Windows
You can also eradicate error code 118 Steam in your computer by updating your Operating System. Always ensure if you have updated your Windows Operating System and if there are any updates pending in action, use our guide How to Download and Install Windows 10 Latest Update
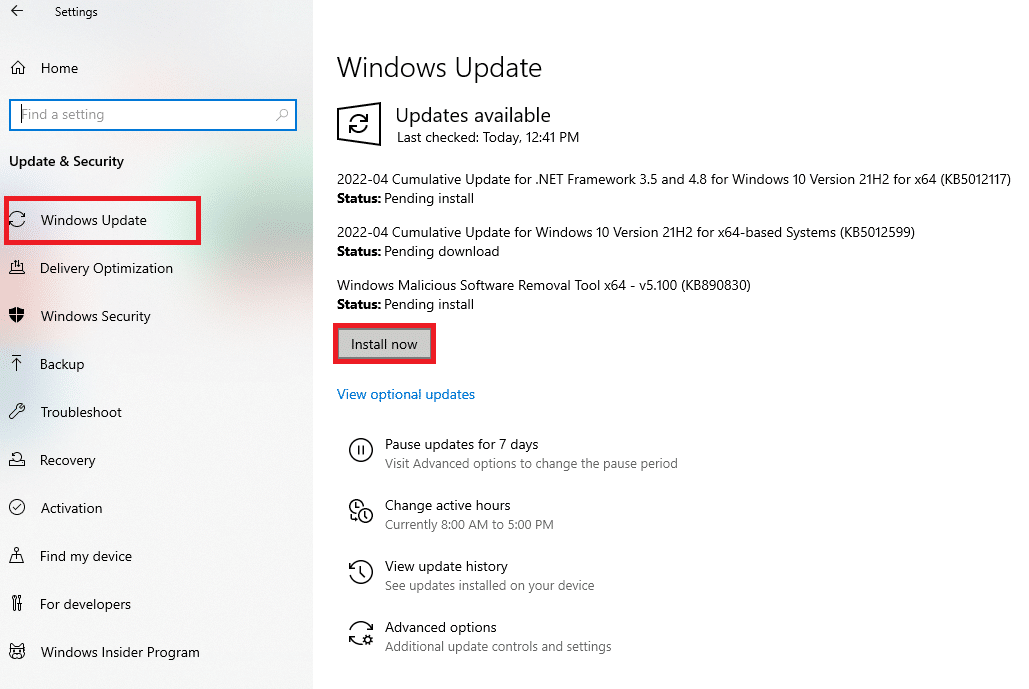
After updating your Windows Operating System, check whether you can connect to your network.
Also Read: How to Download Steam Games on External Hard Drive
Method 11: Disable Proxy Server
Sometimes, inappropriate network configurations on your Windows 10 computer, you will face Steam unable to connect to server error. If you have installed any VPN service or use proxy servers on your PC, read our How to Disable VPN and Proxy on Windows 10 and implement the steps as instructed in the article.
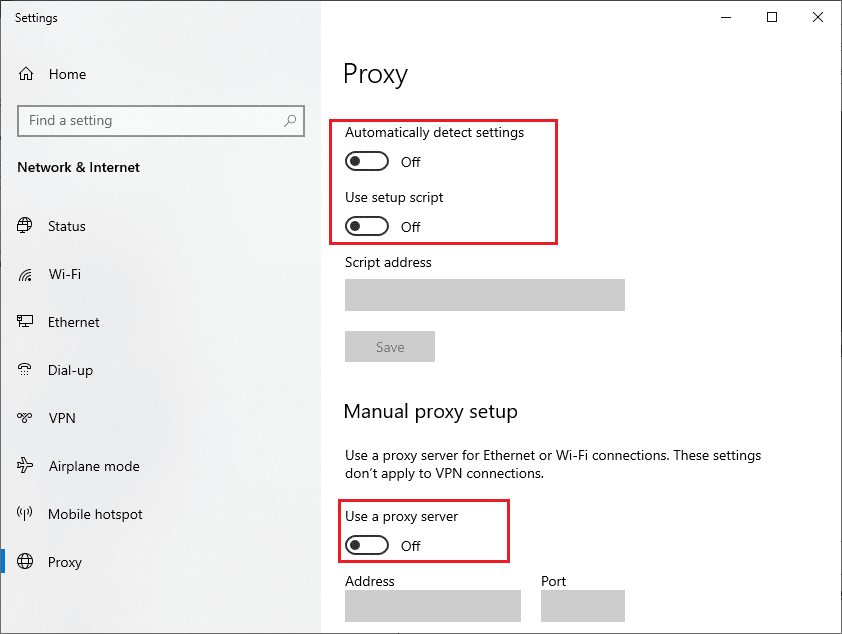
After disabling the VPN client and proxy servers, check if you have fixed Steam store error code 118. Still, if you face the same problem, try connecting to a mobile hotspot.
Method 12: Reset TCP/IP Protocols
TCP (Transmission Control Protocol) is an essential network connection protocol that allots and identifies rules and standard procedures over the internet. TCP/IP protocols are responsible for transferring data packets from the sender and the receiver. If there is a conflict in the process, resetting the protocol along with the IP address will help you fix the discussed issue. Follow our guide on How to Troubleshoot Network Connectivity Problems on Windows 10 to reset TCP/IP.
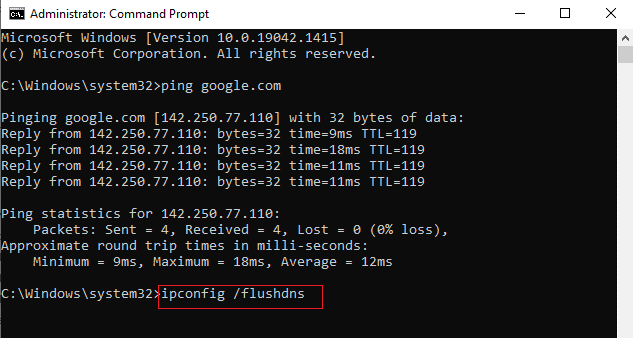
After implementing the steps, check if you can fix Steam unable to connect to server.
Method 13: Use Google DNS
Domain Name System (DNS) addresses are responsible to establish a network connection between the client and server-side. Many technical experts have suggested that using Google DNS addresses helped them to fix Steam unable to connect to server error code. To do so, follow our guide on How to change DNS settings in Windows 10.
![]()
Also Read: How to Change DNS Server Settings on Windows 11
Method 14: Disable Antivirus Temporarily (If Applicable)
Some incompatible antivirus programs installed in your computer will cause Steam unable to connect to server errors. To avoid conflicts, you must ensure the security settings of your Windows 10 computer and check if they are stable or not. To find whether the antivirus suite is the reason for network keeps dropping issue, disable it once and try connecting to a network. Read our guide on How to Disable Antivirus Temporarily on Windows 10 and follow the instructions to disable your Antivirus program temporarily on your PC.
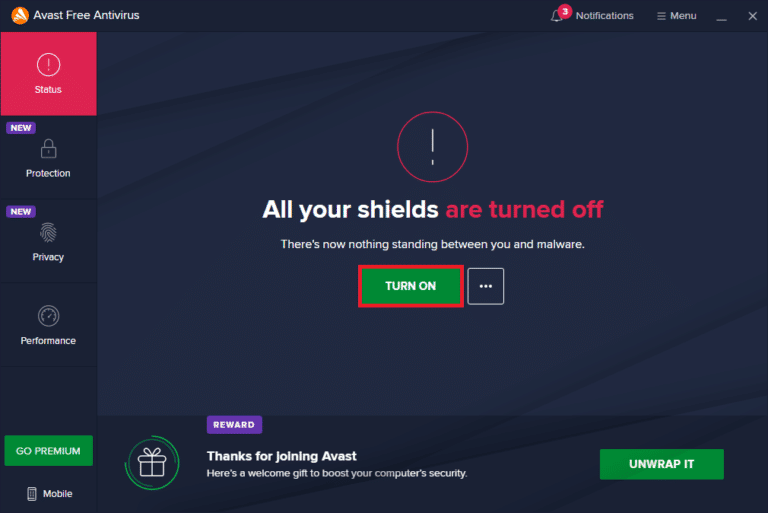
If you did not face any Steam issues after disabling the antivirus program in your computer, you are advised to uninstall the program completely from your PC. Read our guide Force Uninstall Programs which won’t Uninstall In Windows 10 to uninstall your antivirus program in your computer.
Method 15: Modify Windows Defender Firewall Setting
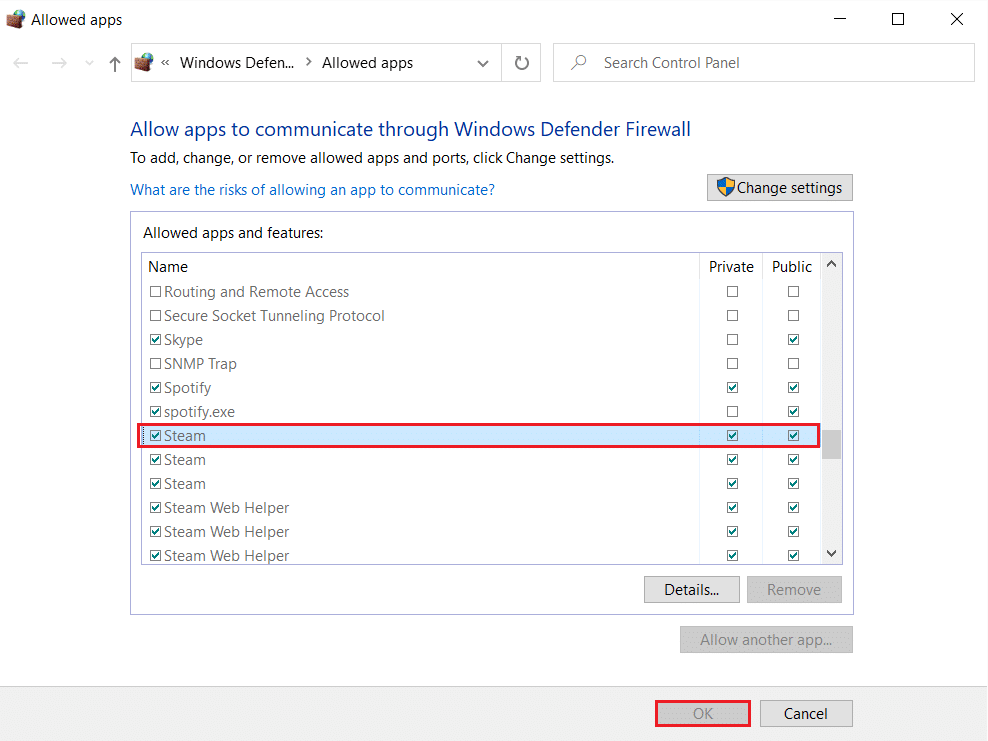
You will also face error code 118 Steam, due to an over-reactive or over-protective antivirus suite in your Windows 10 computer. This prevents the connection link between the game launcher and the server. So, to fix this problem, you can whitelist Steam in your Firewall settings or disable the problem temporarily.
Option I: Whitelist Steam
To allow Steam in your Windows Defender Firewall, follow our guide Allow or Block Apps through the Windows Firewall and implement the steps as instructed.
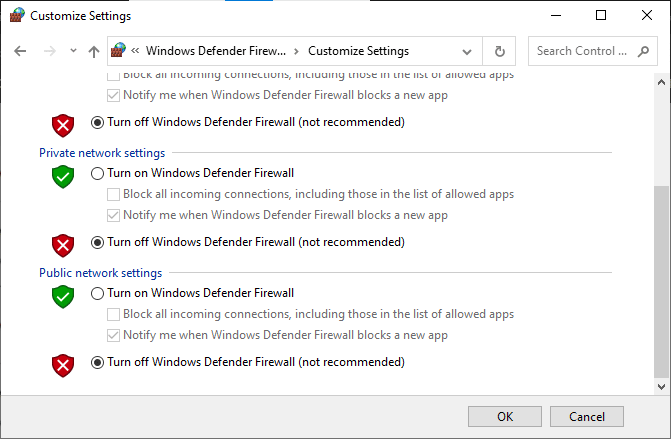
Option II: Disable Windows Defender Firewall (Not Recommended)
If you do not know how to disable Windows Defender Firewall, our guide on How to Disable Windows 10 Firewall will help you do so.
Option III: Create New Rule in Firewall
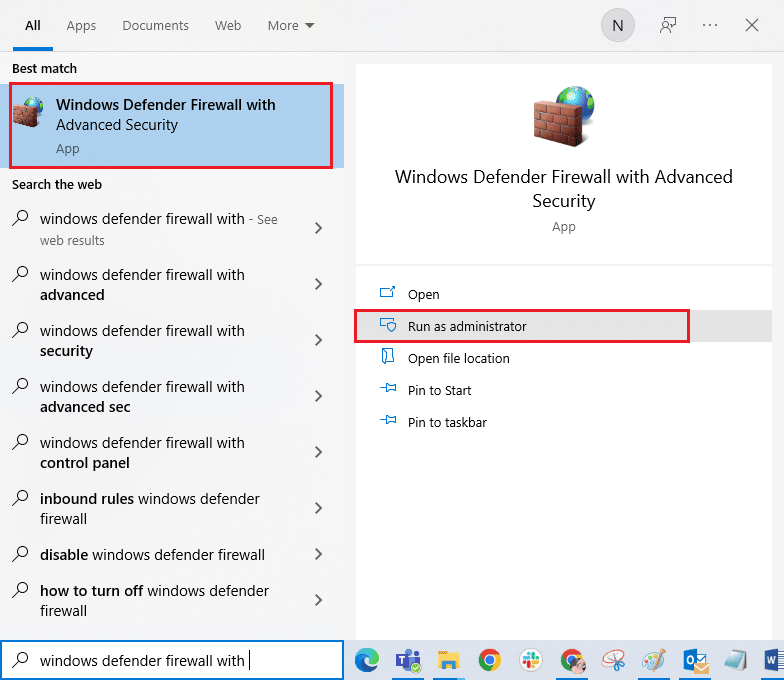
1. Hit the Windows key and type Windows Defender Firewall with Advanced Security. Then, click on Open.
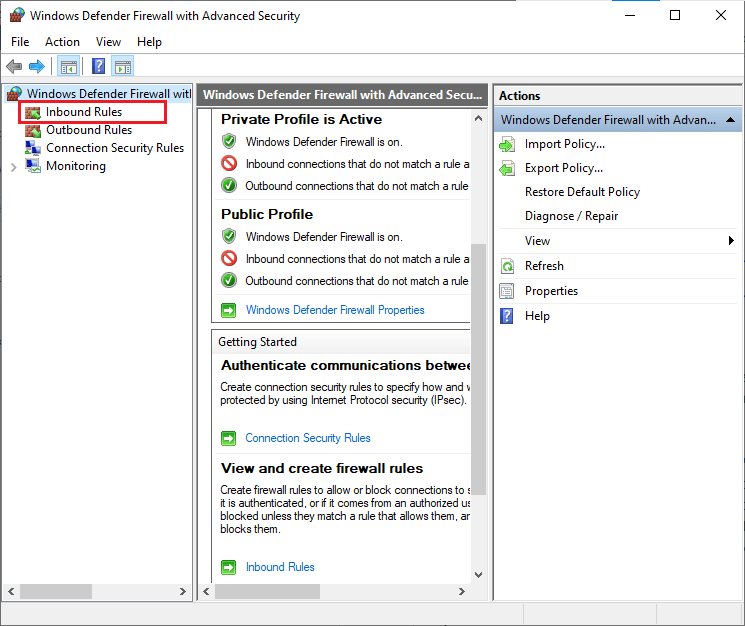
2. Now, in the left pane, click on Inbound Rules as depicted.
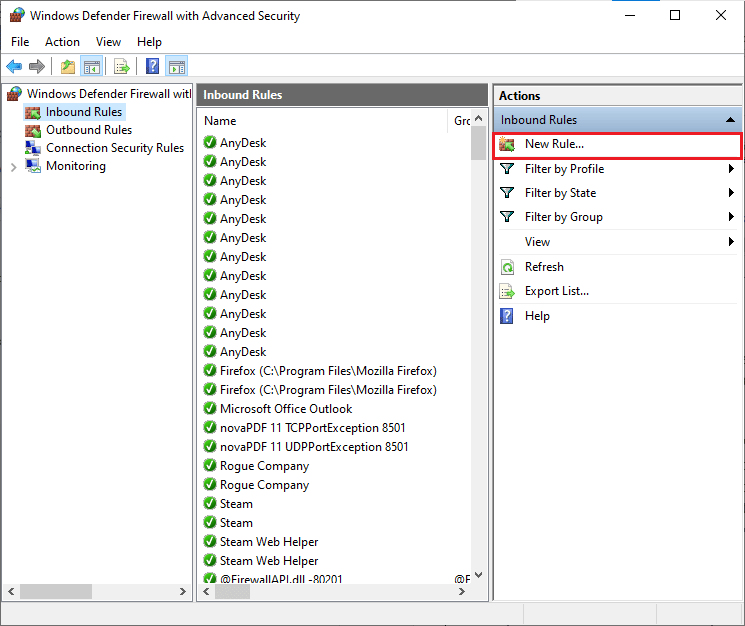
3. Then, in the right pane, click on New rule… as shown.
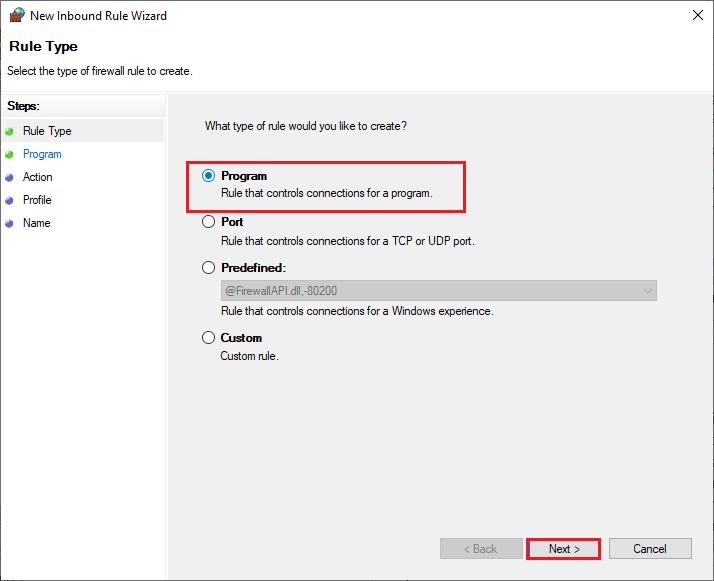
4. Now, make sure you select the Program option under What type of rule would you like to create? menu and click on Next> as shown.
5. Then, click on the Browse… button corresponding to This program path: as shown.
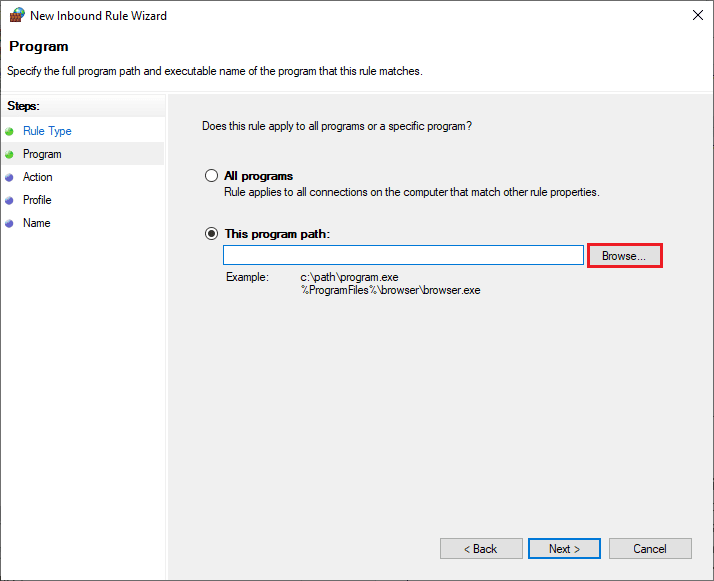
6. Then, navigate to the C:Program Files (x86)Steam path and double-click on the setup file. Then, click on the Open button.
7. Then, click on Next > in the New Inbound Rule Wizard window as shown.
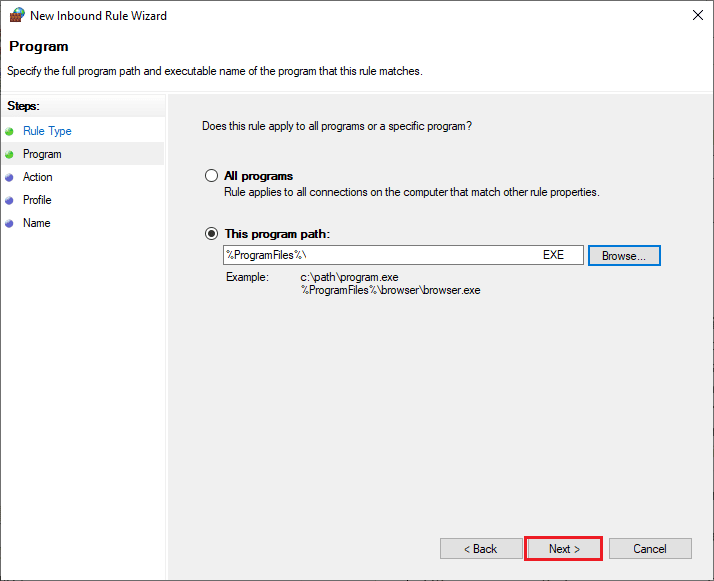
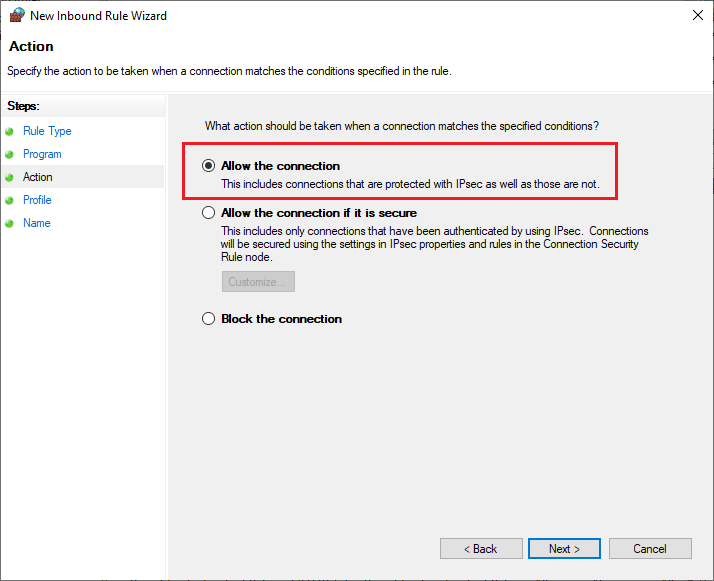
8. Now, select the radio button next to Allow the connection and click on Next > as depicted.
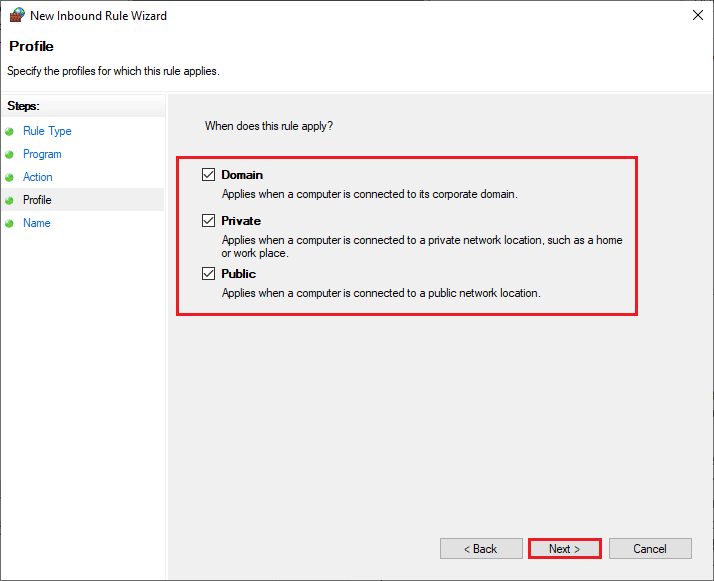
9. Make sure Domain, Private, Public boxes are selected and click on Next > as shown.
10. Finally, add a name to your new rule and click on Finish.
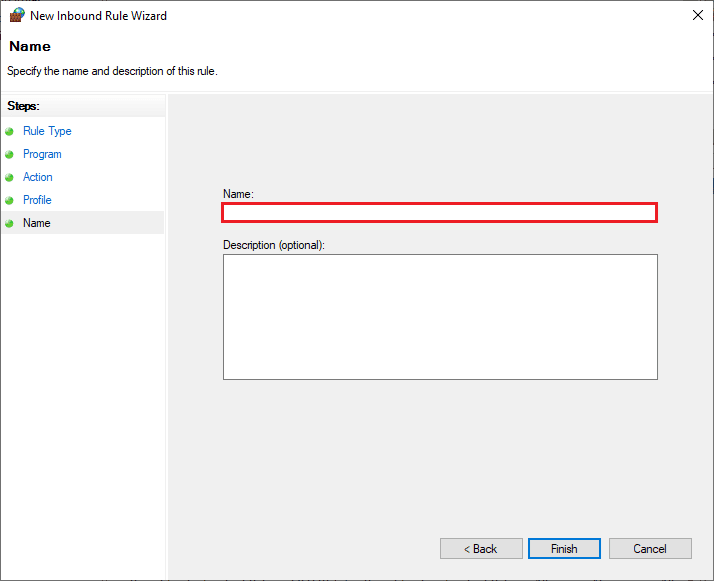
All done! Check if you have fixed Steam store error code 118 is fixed or not.
Also Read: How to Uninstall Steam Games
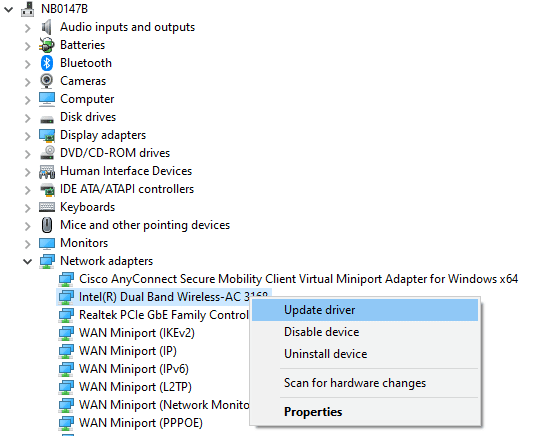
Method 16: Update Network Driver
Always ensure if you are using updated network drivers and if there are any updates pending in action, you are advised to download and install the same. Follow our guide on How to Update Network Adapter Drivers on Windows 10 to do so. Once you have updated your network driver, reboot your computer and test the network connection. You will not face Steam store error code 118 again.
Method 17: Reinstall Network Driver
Still, if you face error code 118 Steam even after updating network drivers, there is another fix to delete all the drivers in your computer and reinstall them again. This process stabilizes the network connectivity problems thereby resolving network keeps disconnecting Windows 10 issue. Follow our guide How to Uninstall and Reinstall Drivers on Windows 10 to reinstall drivers in your Windows 10 computer.
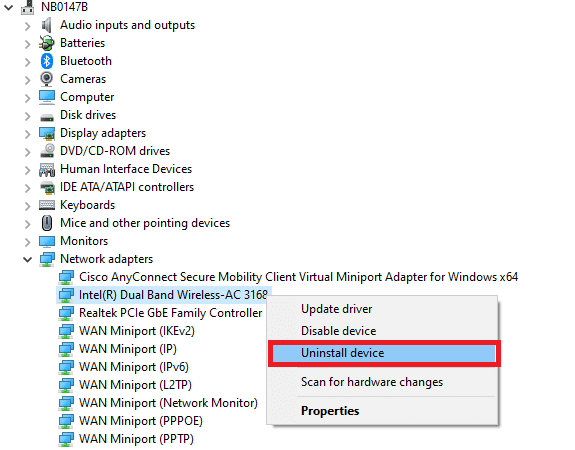
After reinstalling network drivers, check if you can connect to the network without any problems.
Method 18: Roll Back Network Drivers
All the current versions drivers will be deleted from your PC and previous version of them will be installed when you roll back your network drivers. This is a helpful feature when any new driver is incompatible with the system. Follow the steps as instructed in our guide How to Rollback Drivers on Windows 10 to fix Steam store error code 118.
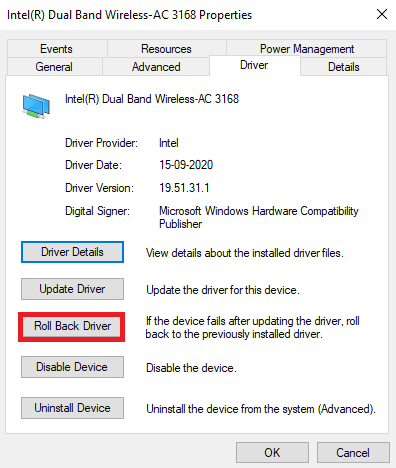
After your Windows 10 computer has installed the previous version of drivers, check if can connect to the network without any interruptions.
Also Read: Fix Steam is Slow in Windows 10
Method 19: Tweak Hosts File
If the hosts file has edited entries of Steam, you will face Steam unable to connect to server error code. Hence, you have to remove the entries to resolve the same. Here are a few instructions to tweak hosts entries.
1. Press Windows + E keys together to open File Explorer.
2. Now, switch to the View tab and check the Hidden items box in the Show/hide section.

3. Now, goto the following path into the navigation path of File Explorer.
C:WindowsSystem32driversetc
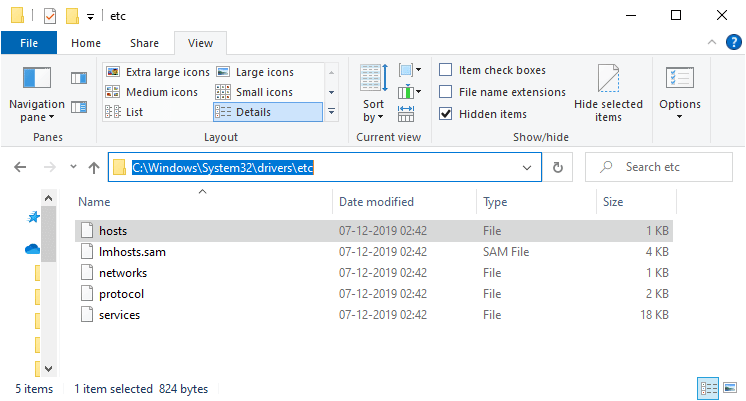
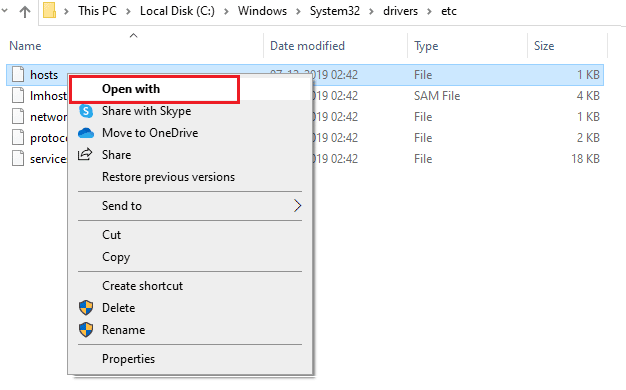
4. Now, select and right-click on the hosts file and select the Open with option as shown.
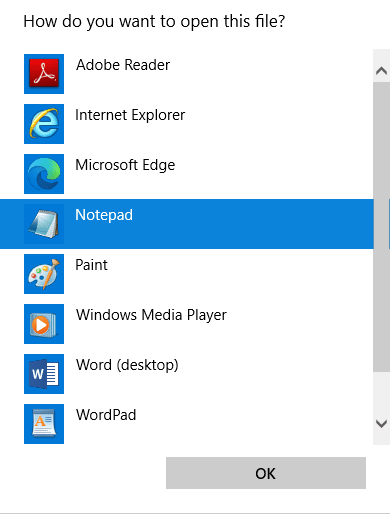
5. Now, select the Notepad option from the list and click on OK as depicted.
6. Now, the hosts file will be opened in Notepad as follows.
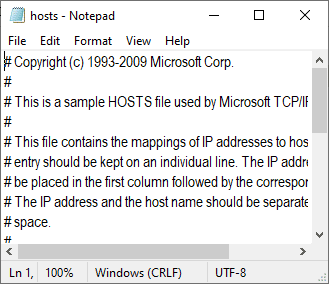
7. Remove all data except 127.0.0.1 localhost.
8. Now, save the file by clicking on Ctrl+ S keys together.
9. Exit Notepad and check if you have fixed error code 118.
Method 20: Uninstall Recently Installed Program
If you have installed a new program recently on your PC and then experiencing error code 118 Steam, then it indicates that the program is incompatible with the drivers in the computer. Firstly, boot your PC in safe mode and check whether you face the problem again. If you did not face the issue in safe mode, then uninstall the application or program that you have recently added to your PC. Here is how to do it. Follow our guide How to Boot to Safe Mode in Windows 10 to boot your PC in safe mode.
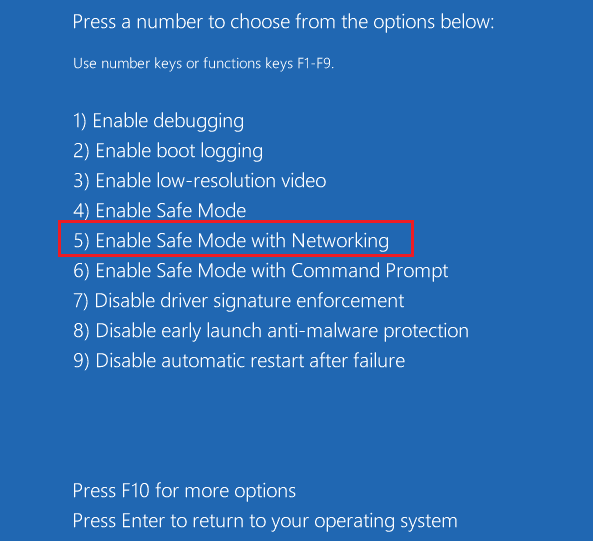
Now, check if recurs again in Safe mode. If you did not face the problem in safe mode, then follow the below-mentioned steps to uninstall any recently added application.
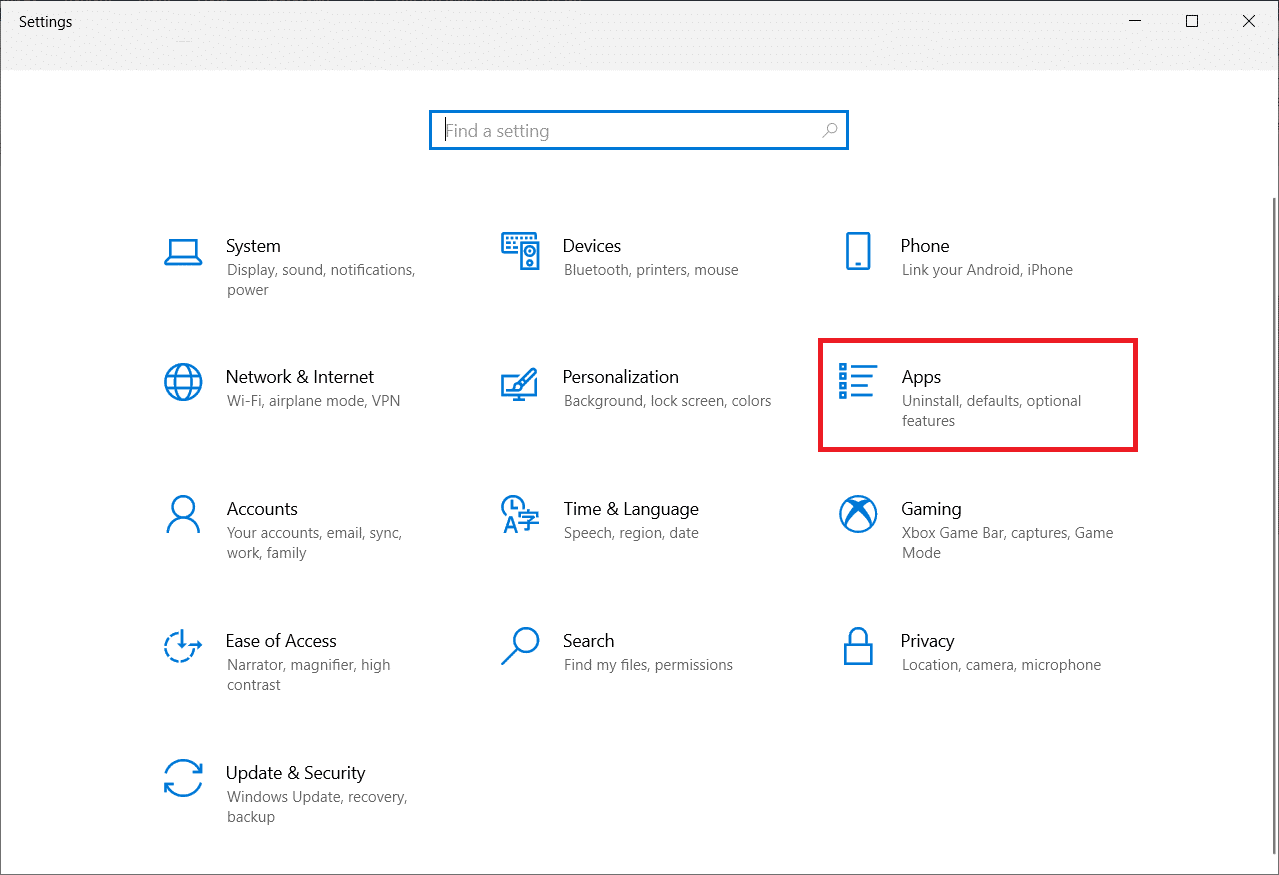
1. Press and hold Windows + I keys together to open Windows Settings.
2. Now, click on Apps.
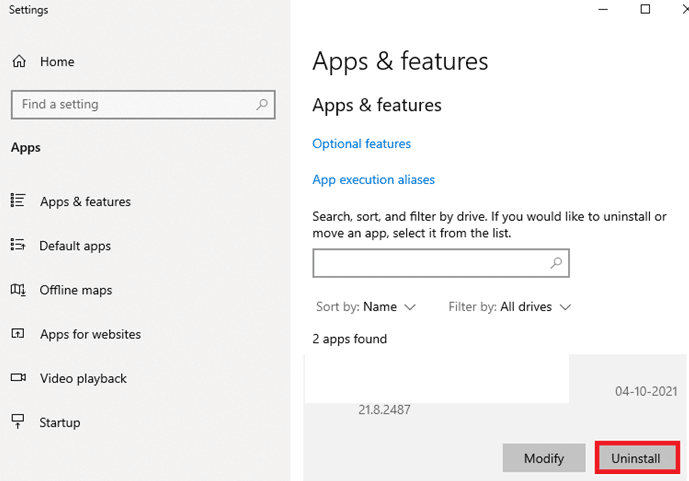
3. Type and search any recently added application in the list and select it.
4. Finally, click on Uninstall.
Also Read: Fix Steam Content File Locked Error
Method 21: Reinstall Steam
If you have not attained any fix for your problem, reinstall Steam as instructed below.
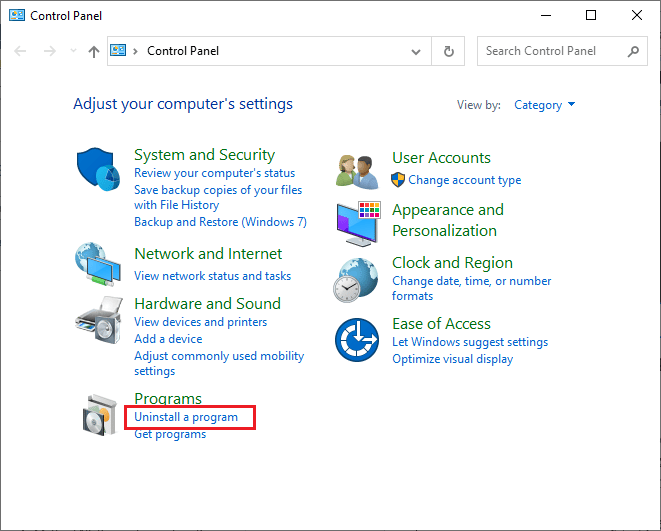
1. Hit the Windows key, type Control Panel and click on Open.
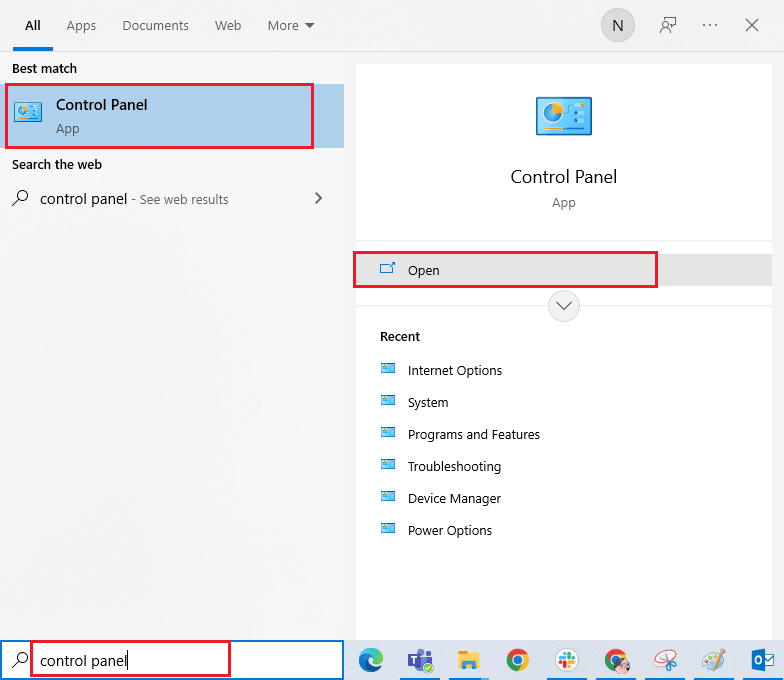
2. Now, click on Uninstall a program under the Programs menu as shown.
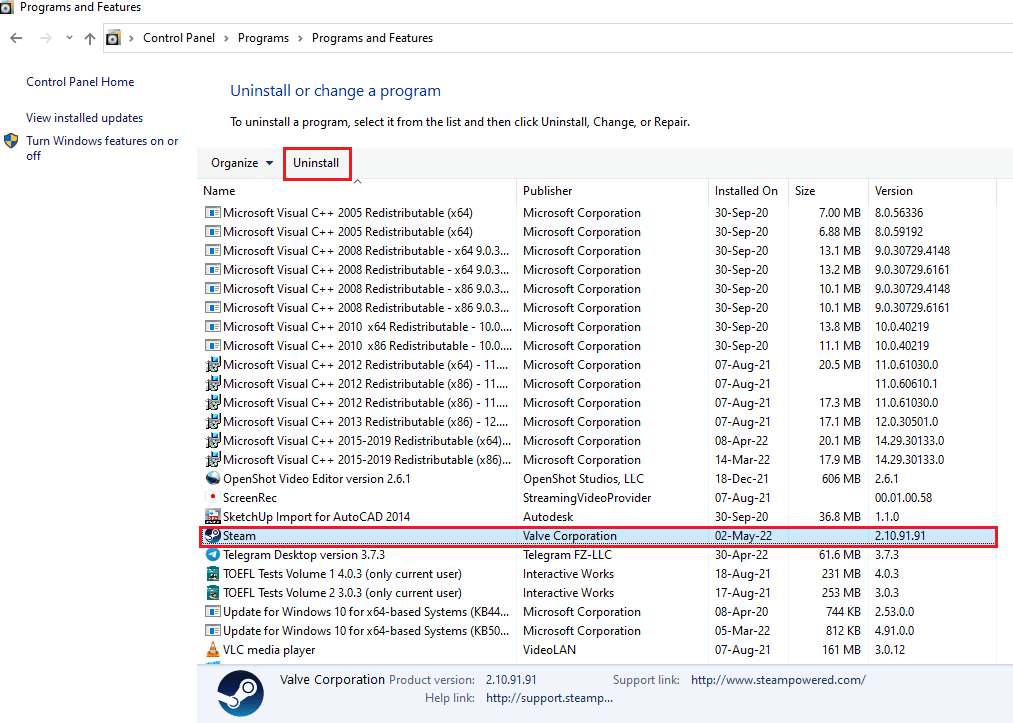
3. The Programs and Features utility will be opened up and now search for Steam.
4. Now, click on Steam and select Uninstall option as depicted in the below picture.
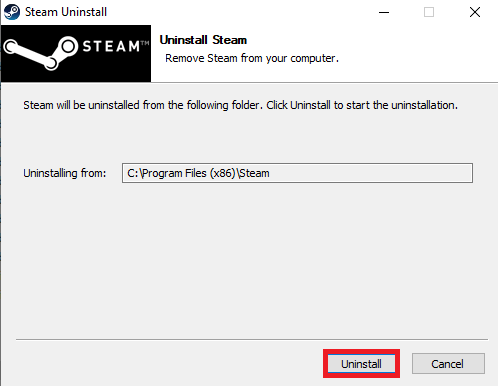
5. Click on the Uninstall button on the Steam Uninstall window to uninstall the Steam app on your PC.
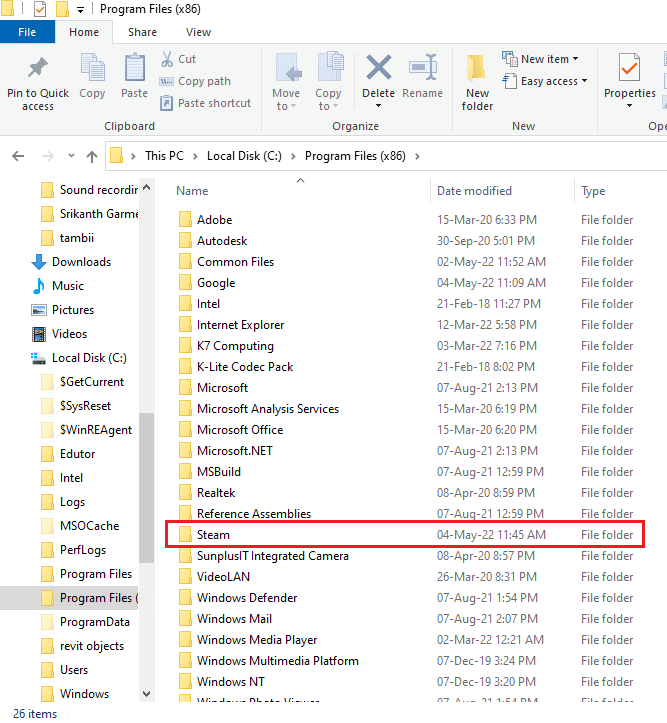
6. Delete the Steam folder in the location path Local Disk (C:) > Program Files (x86) by pressing the Delete key.
The steps explained below will help you reinstall the Steam app on your PC from scratch.
7. Open the official website of the Steam app on your default web browser and click on the Install Steam button on the top-right corner of the home page.

8. Click on the INSTALL STEAM button on the next page to download the Steam app on your PC.
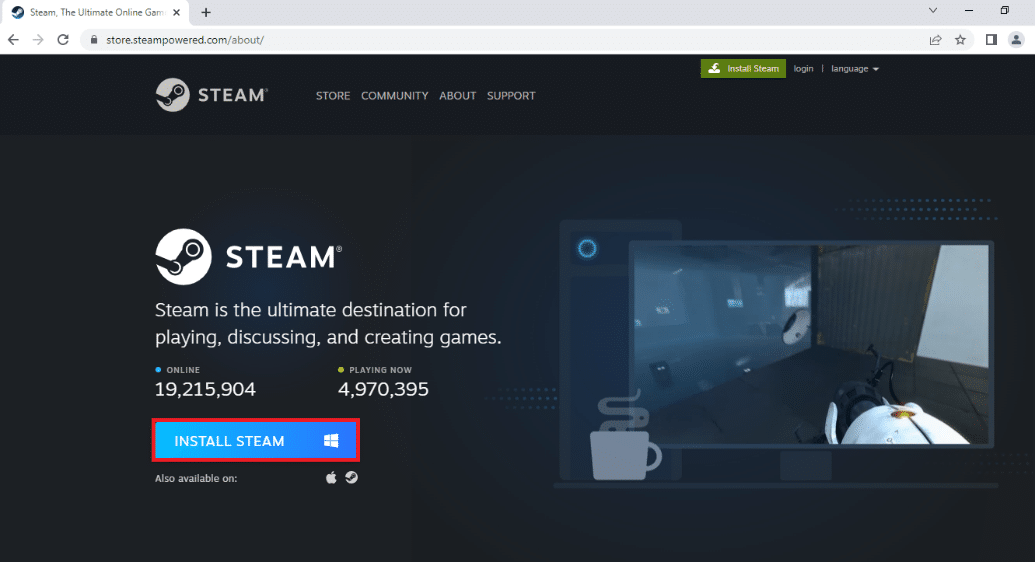
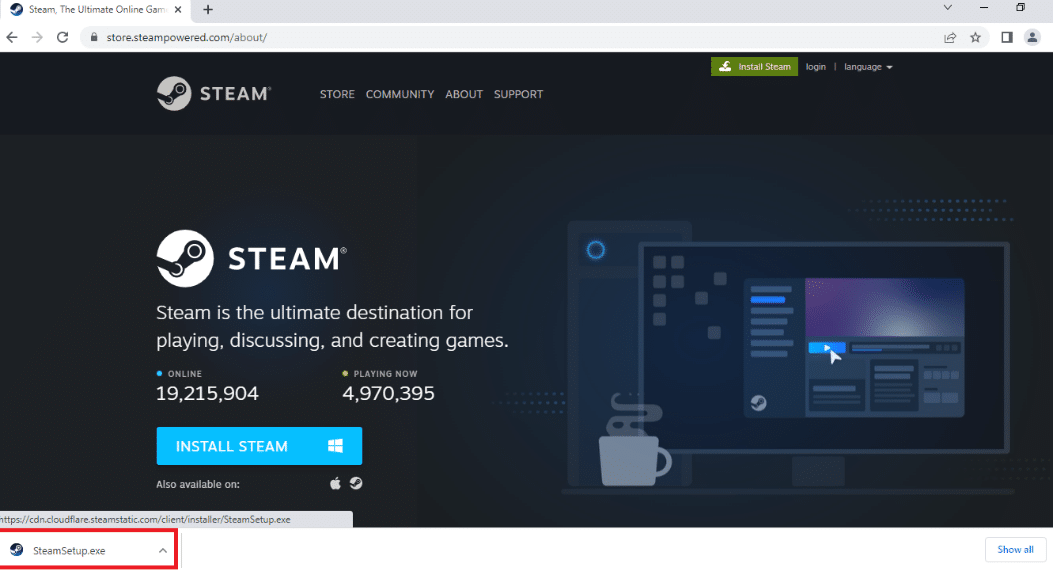
9. Click on the downloaded SteamSetup.exe file in the bottom-left corner of the page to launch the Steam app on your PC.
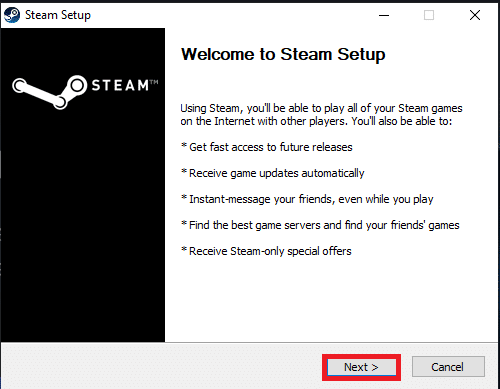
10. Click on the Next button on the Steam Setup window to initiate the setup of your Steam app on your PC.
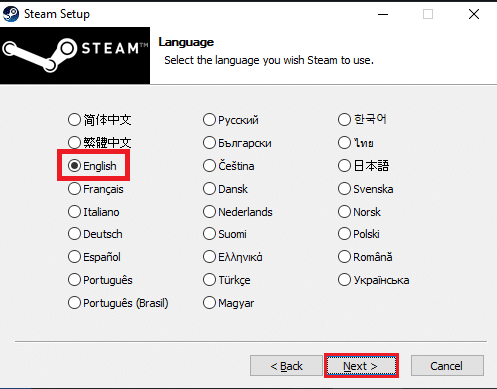
11. Select the language of your choice in the next window and click on the Next button in the wizard.
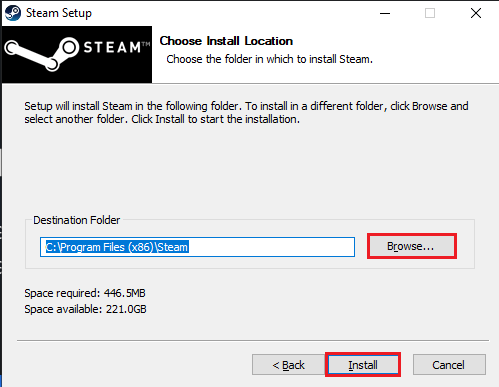
12. Select the destination folder of the Steam app by clicking on the Browse… button and clicking on the Install button to complete the installation of the app.
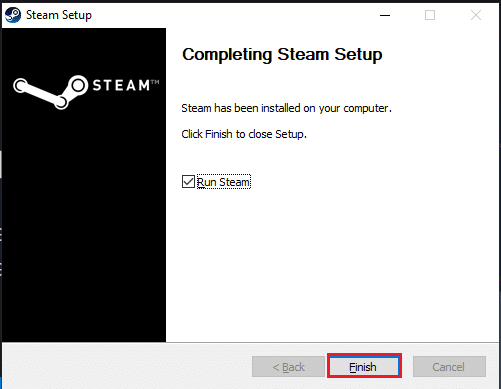
13. Click on the Finish button on the Completing Steam Setup window to complete the steam setup.
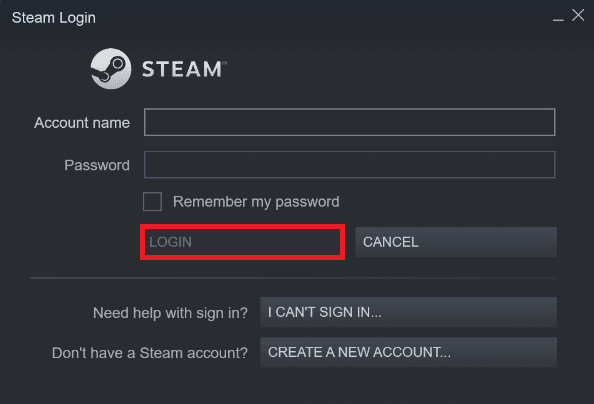
14. Create a new account or log in to your existing account using the login credentials on the Steam app.
Now, you have successfully reinstalled Steam on your Windows 10 PC.
Method 22: Reset Network Settings
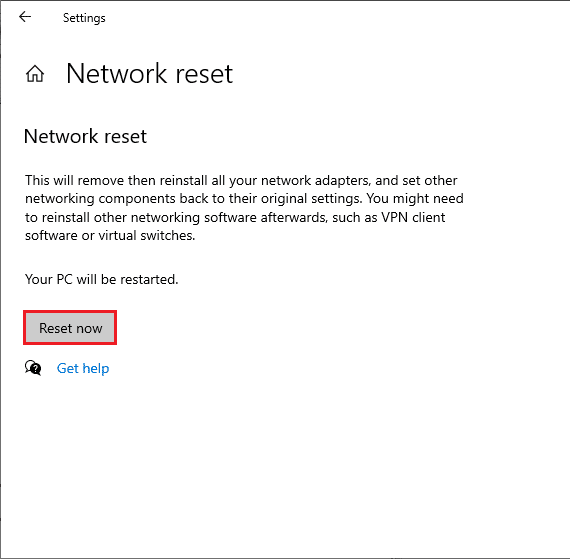
Several users have declared that, resetting network settings will resolve Steam unable to connect to server error. This method will forget all the network configuration settings, saved credentials, and a lot more security software like VPN and antivirus programs. To do so, follow our guide on How to Reset Network Settings on Windows 10
Also Read: How to Fix Steam Not Opening on Windows 10
Method 23: Perform System Restore
If you have recently updated your Windows 10 operating system and later facing Steam unable to connect to server error, the latest Windows update components may interfere with any software present in your computer and may cause the discussed problem. So, in this case, you must restore your computer to the previous version when it was working fine. To do so, follow our guide on How to use System Restore on Windows 10 and implement the instructions as demonstrated.
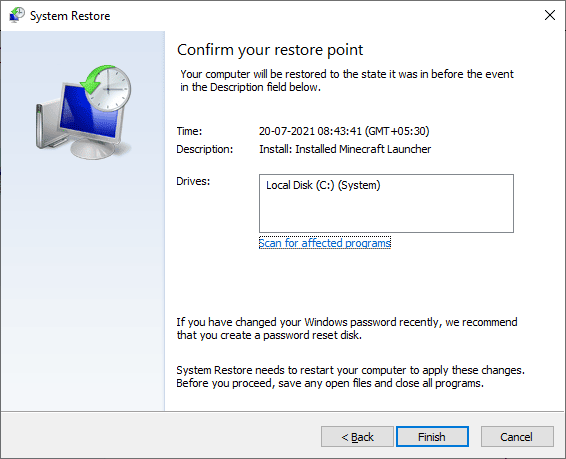
After restoring your Windows 10 PC, check if you can connect to any Steam games without any problems.
Recommended:
We hope that this guide was helpful and you could fix error code 118 Steam in Windows 10. Keep visiting our page for more cool tips & tricks and leave your comments below.
