Fix Full Screen Not Working on Windows 10
If you are trying to view an app or a game and are facing the issue of monitor not displaying full screen on Windows 10, you need to read the article. The article has the methods to fix the issue of full-screen not working Windows 10 and can help you restore full-screen Windows 10. Try implementing the methods described in the article to fix the issue and use the full-screen mode with ease.

How to Fix Full Screen Not Working on Windows 10
The possible reasons for full screen not working on Windows 10 issue are listed below.
- Incorrect Registry keys on the Registry Editor- If the value set on the Registry Editor is set to a wrong value, you may not be able to use the full-screen mode.
- Improper Graphic settings- If the graphic settings on your PC are configured wrongly, you may not be able to use the full-screen mode. The settings need to be configured properly on all the graphic cards like Intel, NVIDIA, and AMD Radeon software.
- Issues with Graphics card- If the Graphics card on your PC is corrupt, you may not be able to use full-screen mode if the driver is corrupt.
- Improper NVIDIA Control panel settings- If the NVIDIA control panel has not properly configured settings, you may not be able to use the full-screen mode on your PC.
Basic Troubleshooting Methods
The basic troubleshooting methods to fix the issue of full-screen not working on Windows 10 are described below. Try the basic methods first to solve the issue and then proceed to further methods.
1. Scale Display to 100%
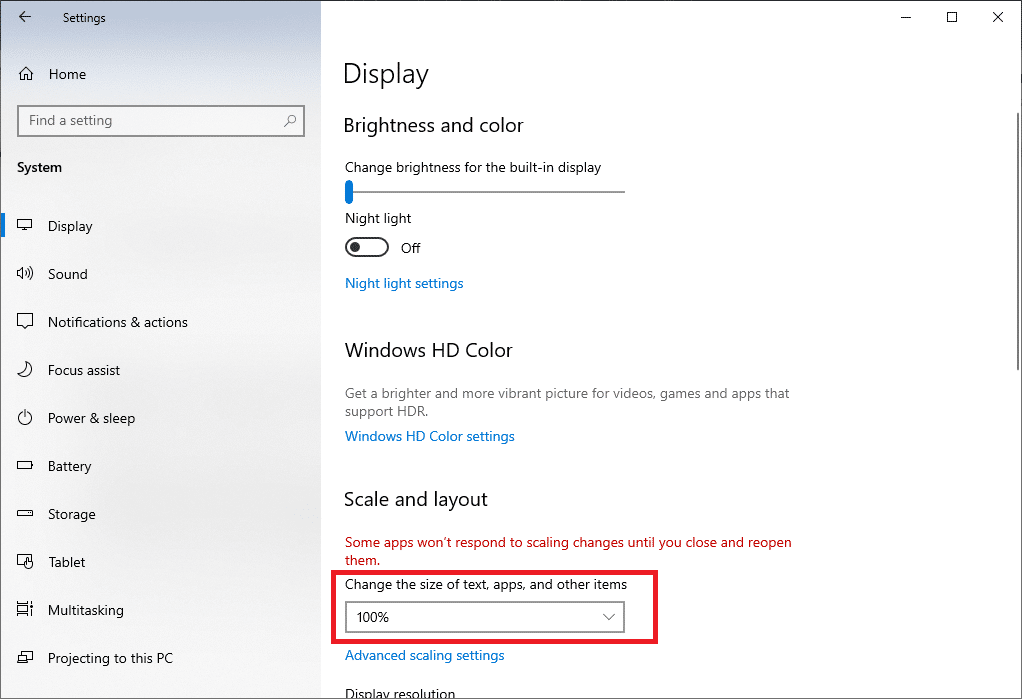
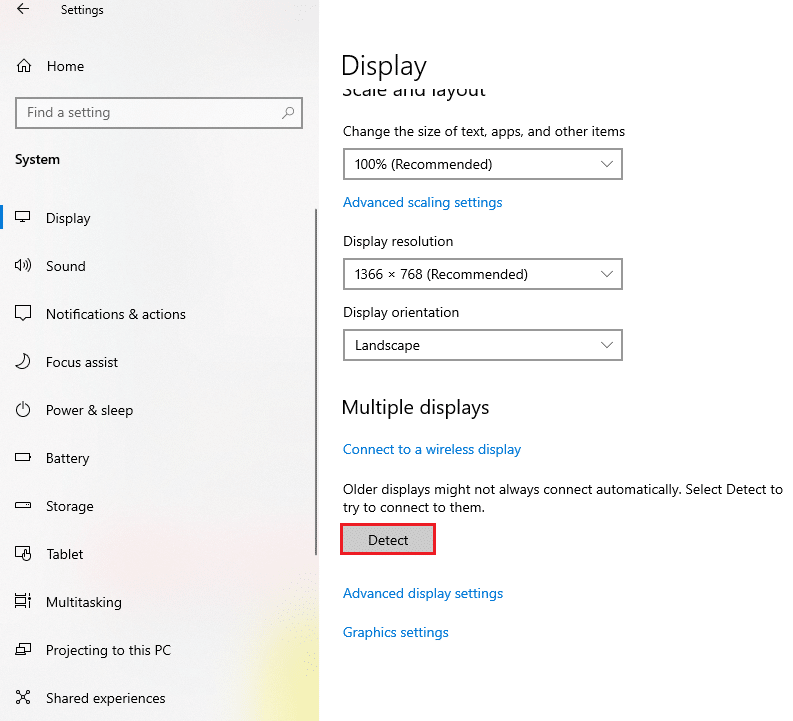
You need to set the display to 100% and set the resolution to full-screen size on the Settings app to use the app in full-screen mode. Follow these steps to scale display to 100% and fix monitor not displaying full screen on Windows 10.
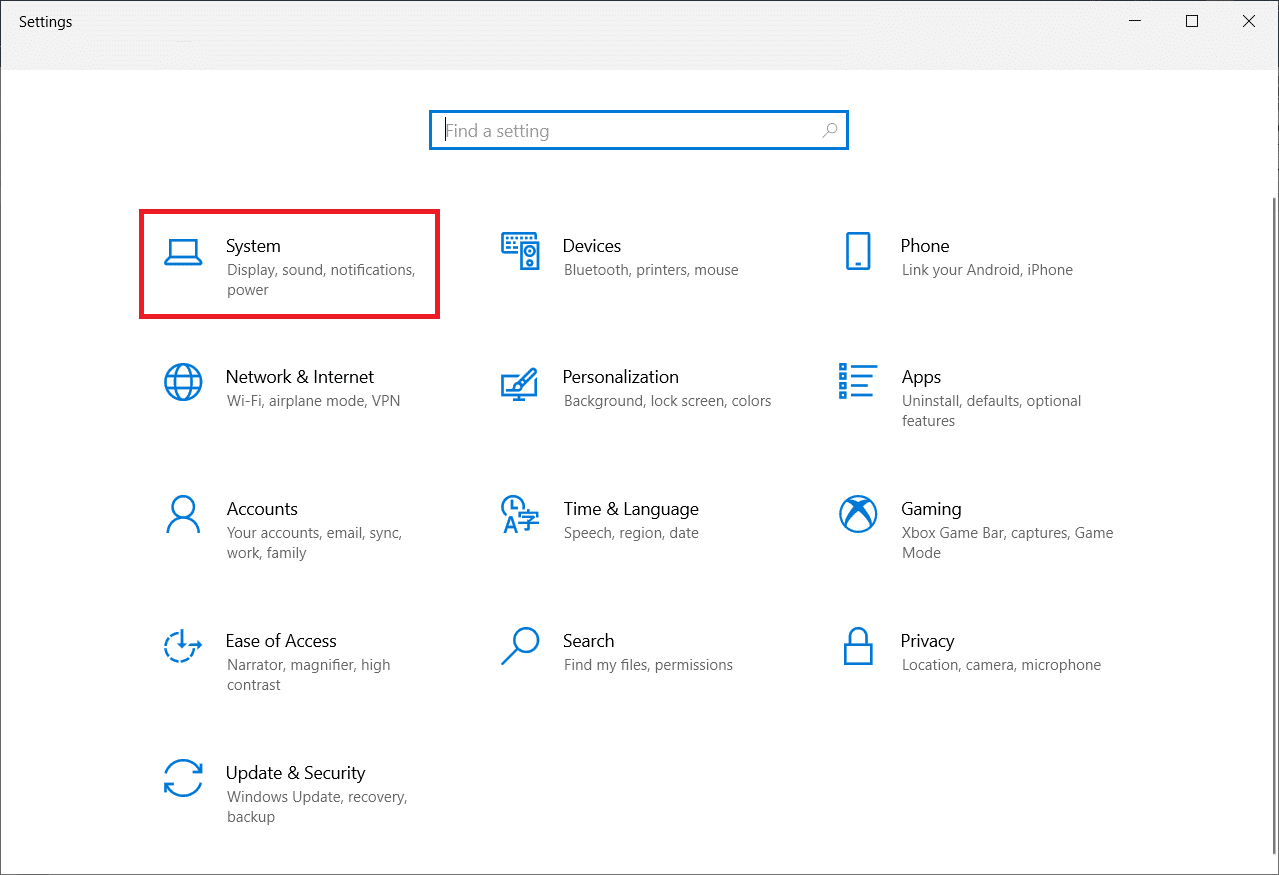
1. Press the Windows + I keys together to launch Settings.
2. Click on System.
3. Set Change the size of text, apps, and other items to 100%.
Note: It is always advised to set the scale to recommended setting for your system to respond properly.
2. Turn On Full Screen on App
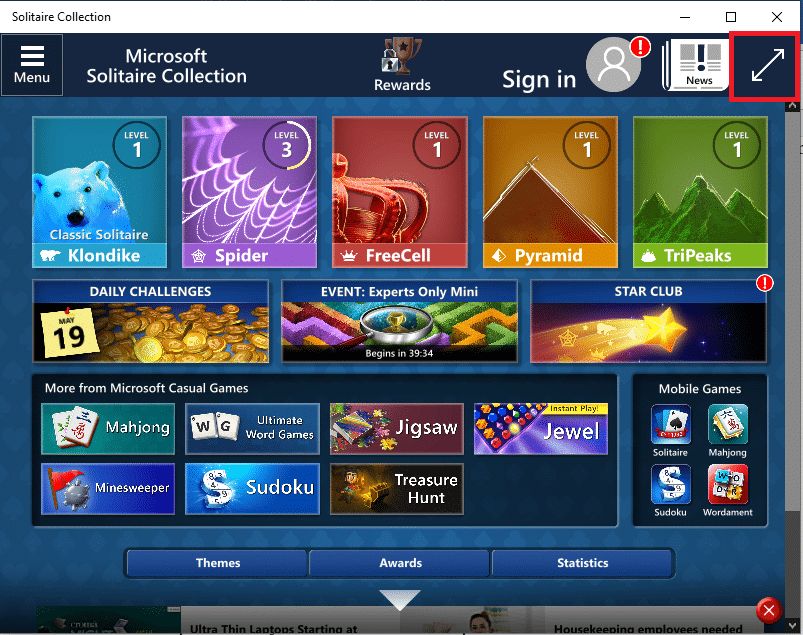
You can try enabling the full-screen mode on your game by clicking on the full-screen button.
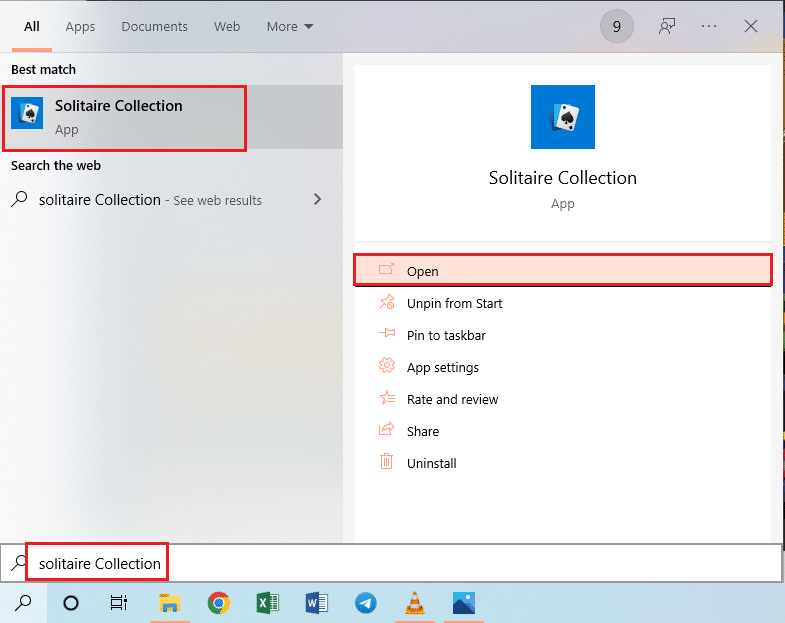
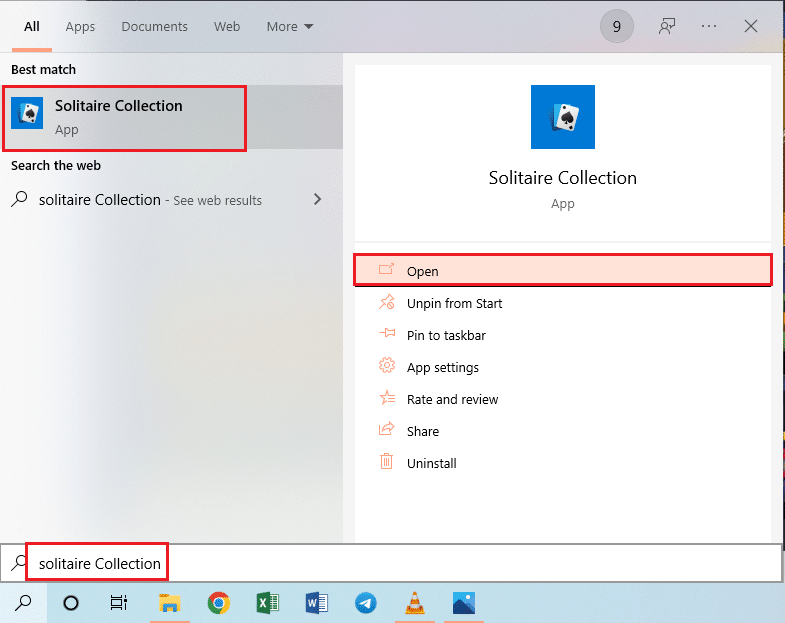
1. Hit the Windows key, type Solitaire Collection and click on Open to launch the app.
Note: The Solitaire Collection app is used for explanatory purposes.
2. Then, click on the full-screen button at the top-right corner of the Solitaire Collection app to enter into the full-screen mode on your PC.
3. Update Graphics Driver
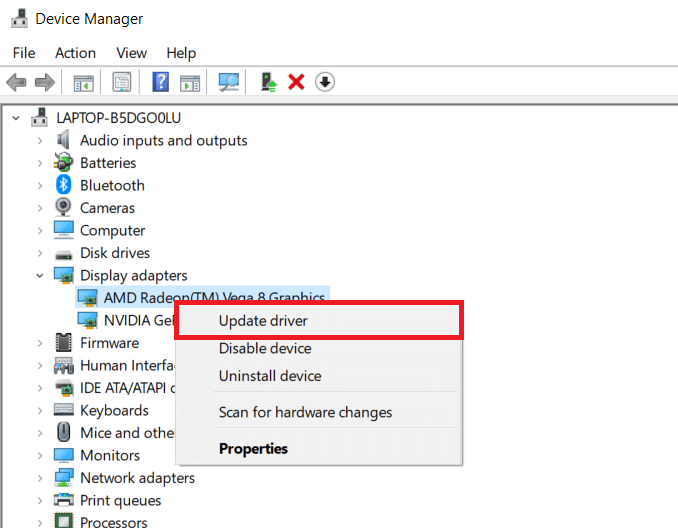
You need to update the Graphics driver on your PC to use the apps and games in the full-screen mode. Read the article to update the Graphics Driver on your PC to fix the issue.
4. Reinstall Graphics Driver
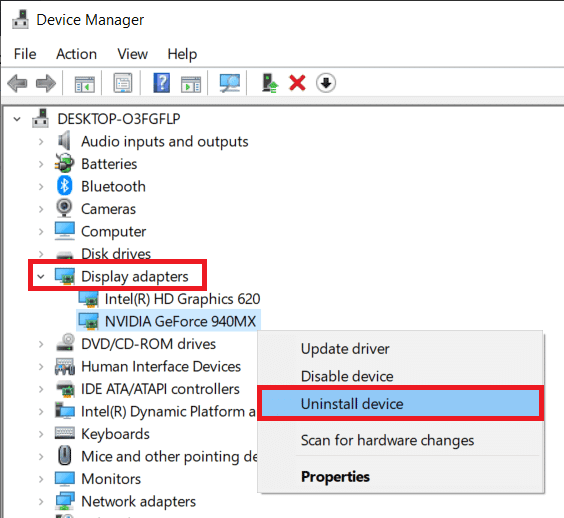
You can try uninstalling and reinstalling the Graphics driver on your PC to solve the issues with the full-screen mode. Read the steps in the methods to uninstall and reinstall the Graphics driver on your PC using the link given here.
Also Read: Fix Taskbar Showing in Fullscreen on Windows 10
5. Modify Compatibility Settings
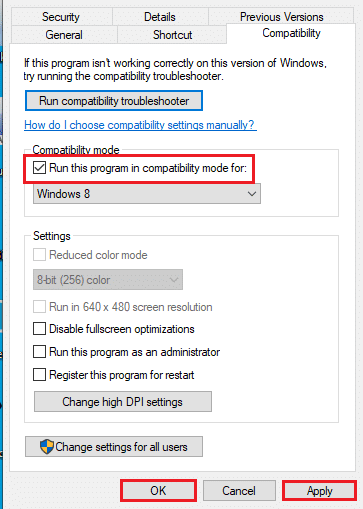
Sometimes, if you are using the games or apps on a PC that is incompatible with the Windows version on your PC, you can try running the games in a compatible mode to fix the issue. Read the steps mentioned in the method to run the games in compatibility mode.
6. Disable Antivirus Software
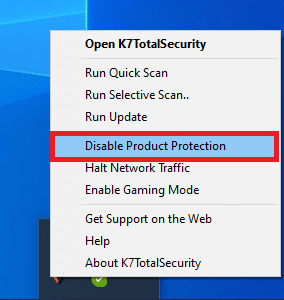
At times, the Anti-virus software may have disrupted you in using the apps and games in the full-screen mode. Read the article to know how to disable antivirus temporarily on Windows 10.
7. Run Game in Windowed Mode
You can try running the game in the Windowed mode to fix the full-screen not working on your PC. Follow the given steps to do so.
1. Search for Solitaire Collection on the search bar and click on the app result to launch the app.
2. Click on the Minimize button at the top-right corner of the app and resize the game by dragging the corners of the app.
8. Change Main Screen
If you are using multiple displays on your PC for using the apps, you can try changing your main screen to fix the issue with the full-screen mode. Read the method to switch the main monitor on your PC using the link provided here.
9. Restore Taskbar to Default Settings
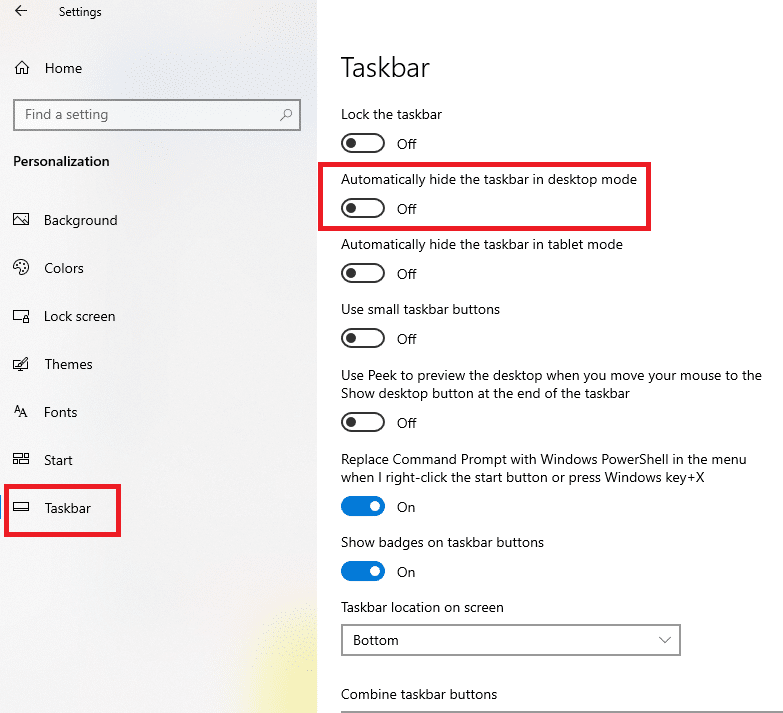
You can try modifying the settings on the Taskbar in the settings app to fix the issues with the full-screen mode. Follow the steps mentioned in the method to restore the Taskbar settings on your PC.
Also Read: How to Go Full-Screen in Google Chrome
Here are the advanced troubleshooting methods to fix the issue.
Method 1: Modify Gaming Settings
You can try modifying the settings on your PC to fix the full-screen not working Windows 10 issue.
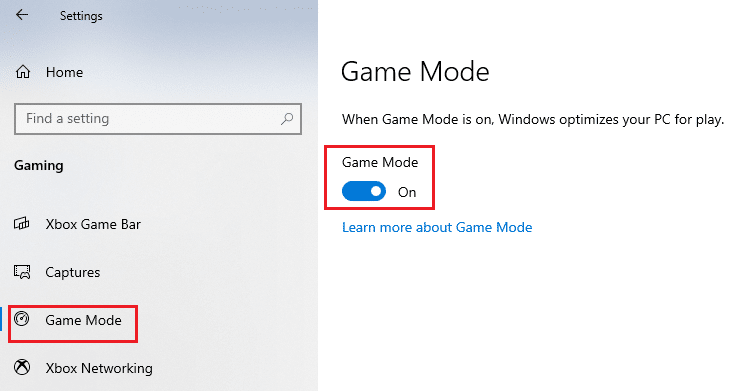
Option I: Disable Game Mode
Try disabling the game mode on the Settings app to view the games in the full-screen mode.
1. Hit the Windows + I keys together to open Settings.
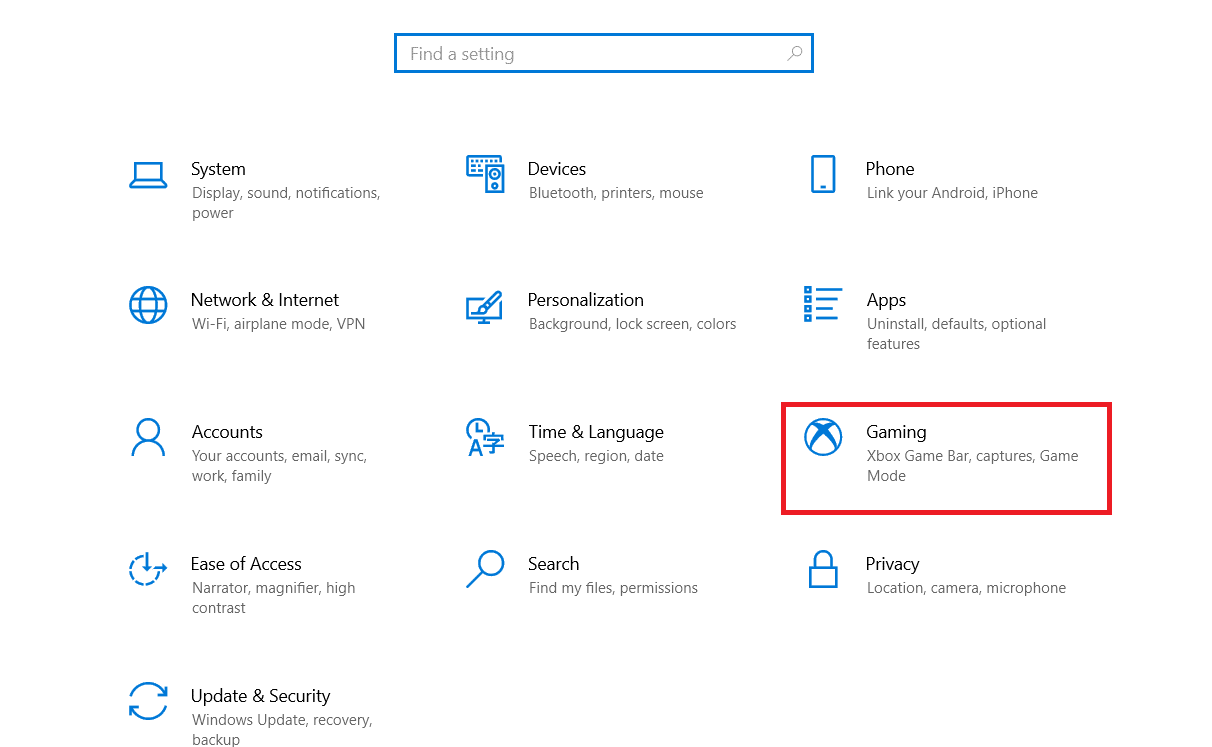
2. Click on the Gaming setting.
3. Click on the Game Mode tab in the left pane of the window and turn the toggle off in the Game Mode setting.
Option II: Enable DirectPlay Option
The DirectPlay option allows you to be connected over the Internet network to play the games and enabling the setting can help fix issues with the full-screen mode.
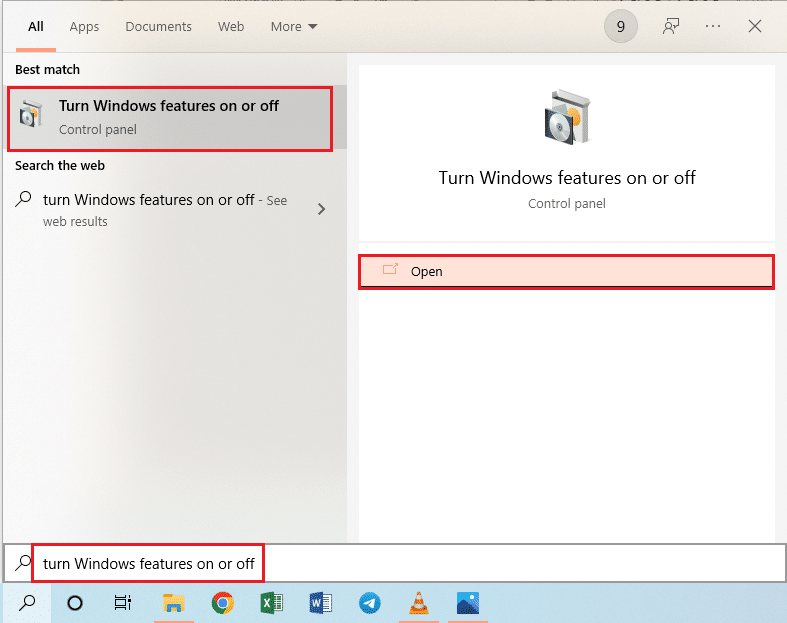
1. Press the Windows key, type the Turn Windows features on or off and click on Open.
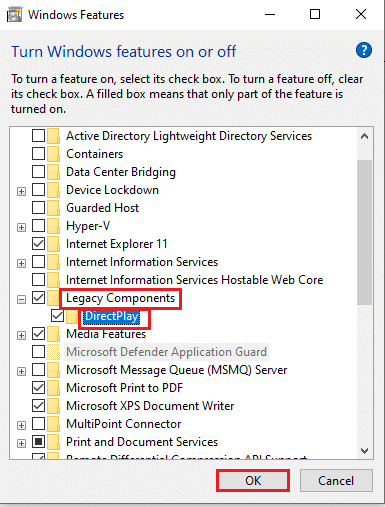
2. In the Windows Features window, expand the option Legacy Components, select the DirectPlay feature, and click on the OK button.
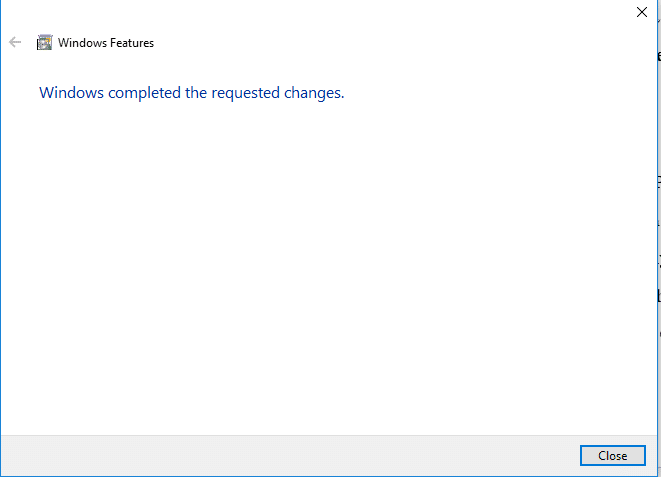
3. After the Windows features complete the search for the required files, you will see a screen with completed status.
Method 2: Modify Intel Graphic Control Panel Settings
If the settings on the Intel Graphic Control Panel setting to fix the full-screen not working Windows 10 issue.
1. Press the Windows + D keys simultaneously to view the Desktop on your PC.
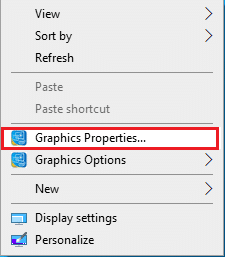
2. Right-click on an empty space and click on the option Graphic Properties… in the menu displayed.
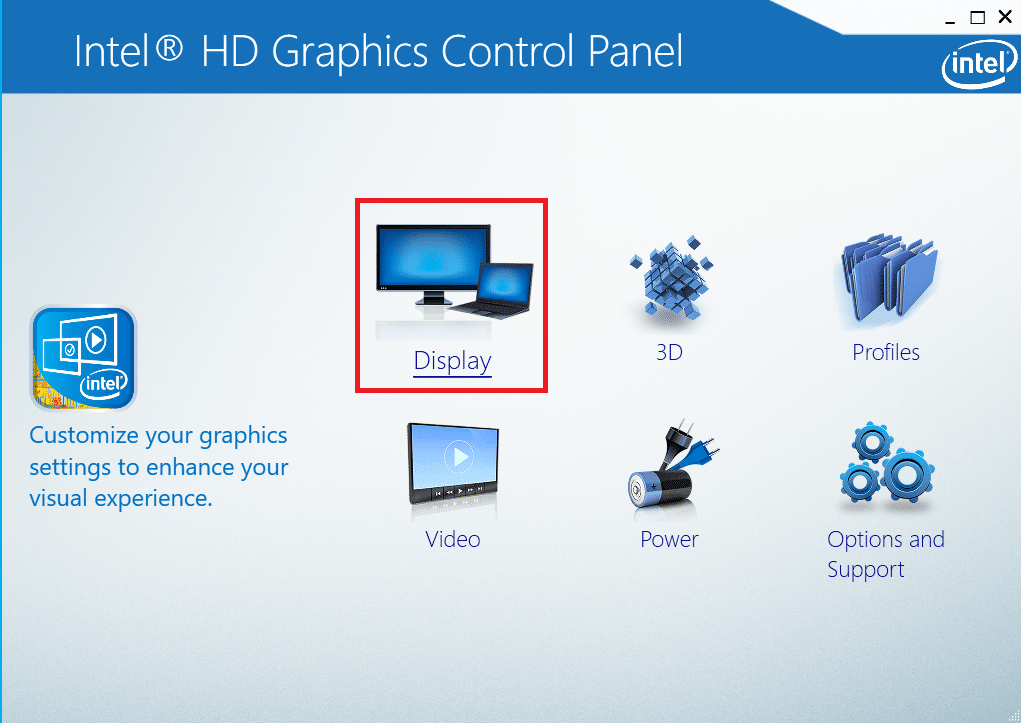
3. In the Intel® HD Graphics Control Panel window, click on the Display button in the menu.
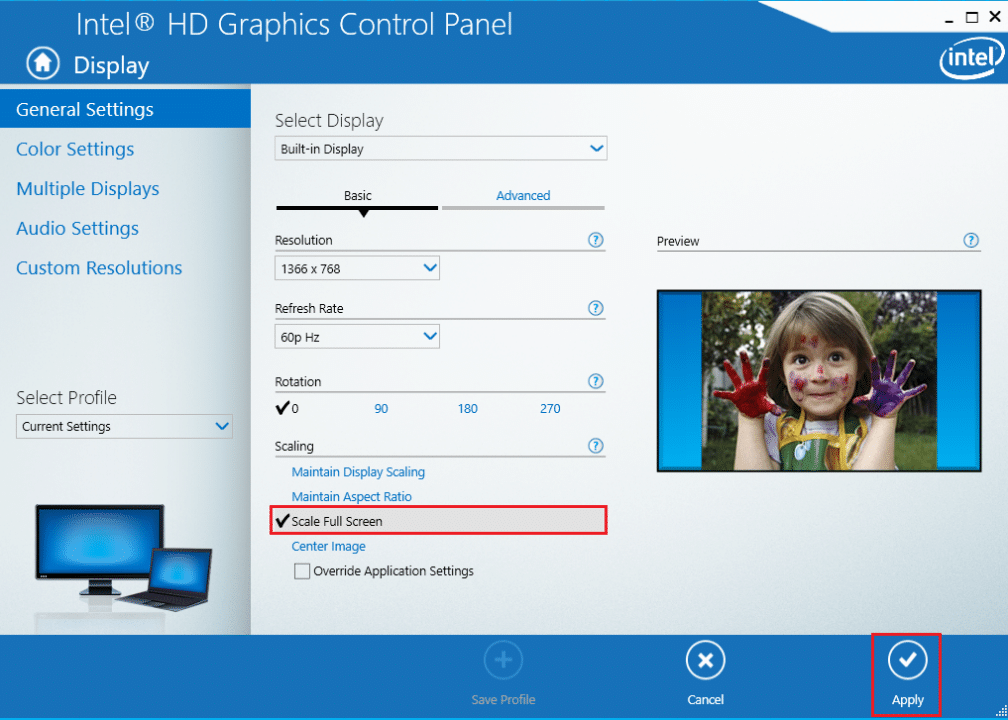
4. Select the Scale Full screen option in the Scaling section and click on the Apply button.
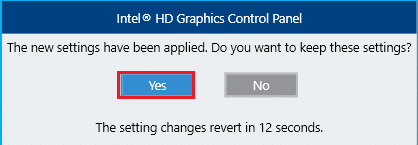
5. Click on the Yes button on the confirmation window to modify the Intel Graphic setting.
Also Read: Fix Intel RST Service Is Not Running in Windows 10
Method 3: Change Registry Keys
If the keys are configured wrongly in the Registry Editor, you need to change the entry keys to fix the full-screen not working Windows 10 issue.
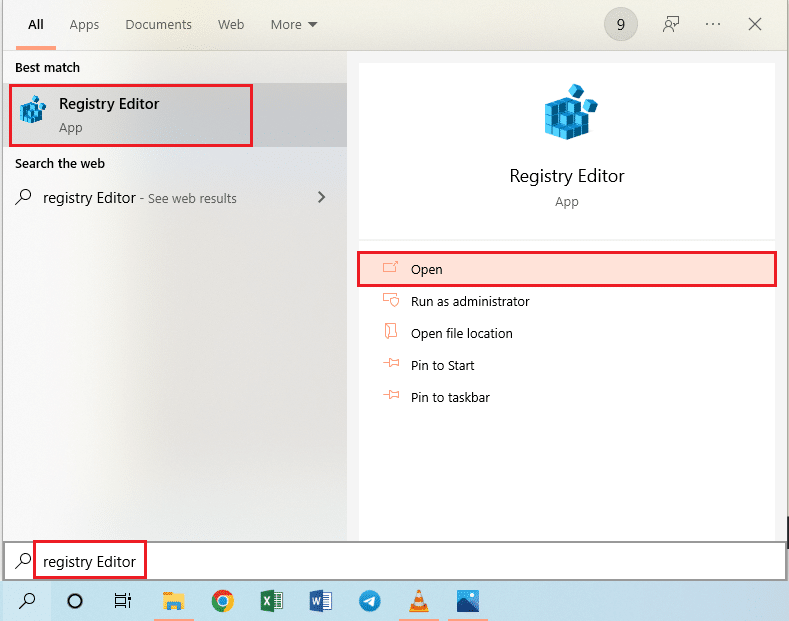
1. Hit the Windows key, type Registry Editor and click on Open.
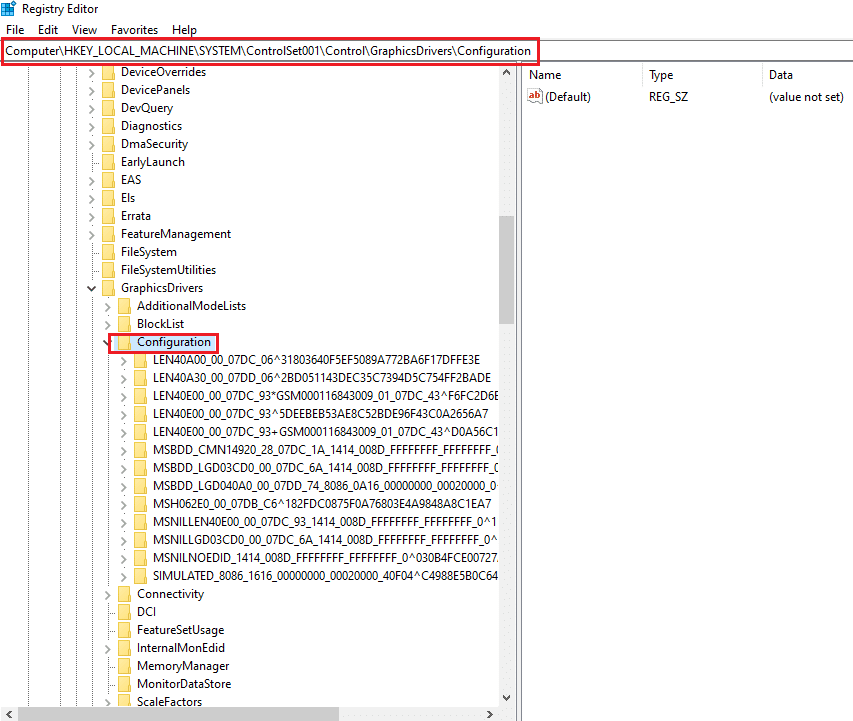
2. Navigate to the Configuration folder in the Registry Editor by following the given path.
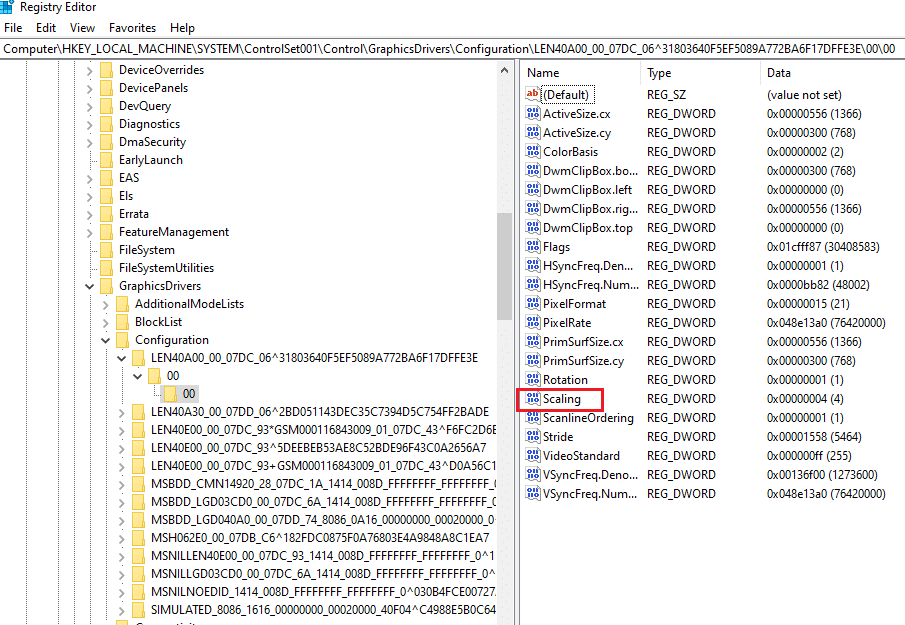
ComputerHKEY_LOCAL_MACHINESYSTEMControlSet001ControlGraphicsDriversConfiguration
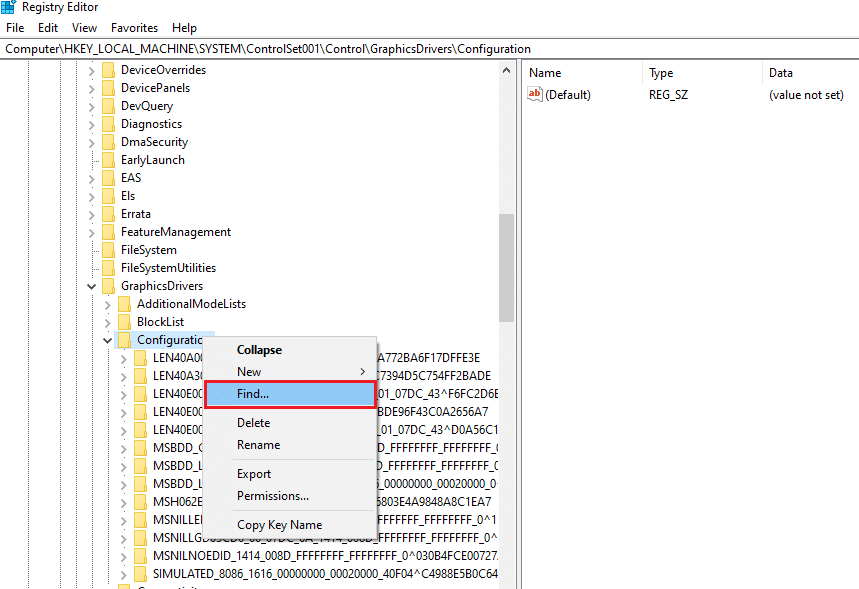
3. Right-click on the Configuration folder in the left pane of the window and click on the Find… option in the menu to open the Find window.
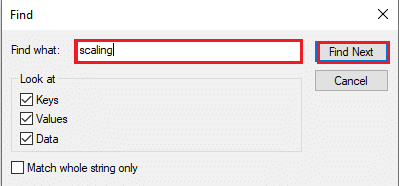
4. Type the term scaling in the Find what: bar, select all the options in the Look at section, and click on the Find Next button on the window.
5. Double-click on the Scaling key in the list displayed to edit the key.
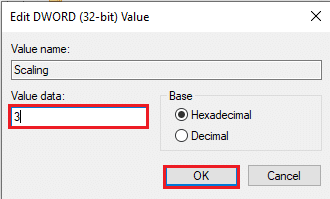
6. In the EDIT DWORD (32-bit) Value window, enter the value 3 in the Value data bar and click on the OK button to modify the key value.
Check if monitor not displaying YouTube full screen on Windows 10 issue persists or not.
Method 4: Disable Teamviewer
Teamviewer is an app that is used to access the devices far away and you need to disable the Teamviewer to fix full screen not working on Windows 10. The remote assistance application allows you to control any other PC remotely and is a popular app.
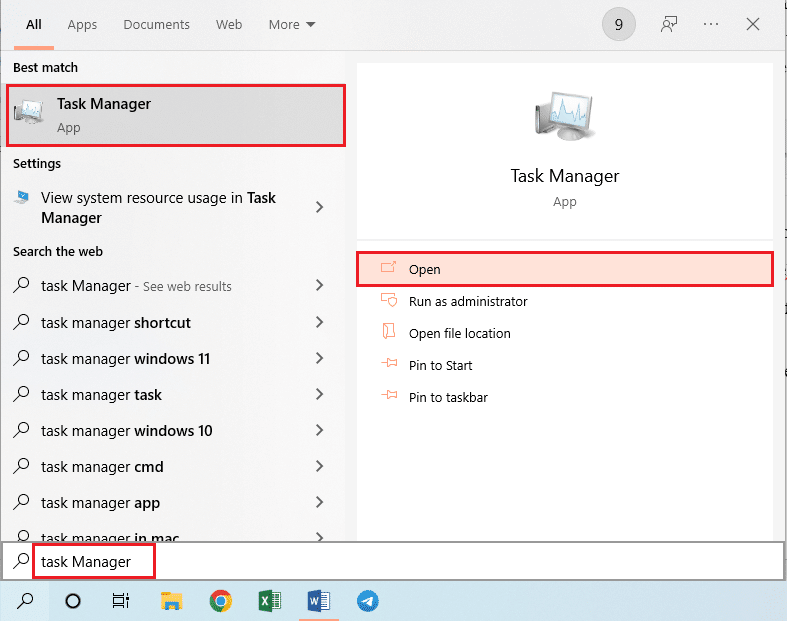
1. Press the Windows key, type Task Manager and click on Open.
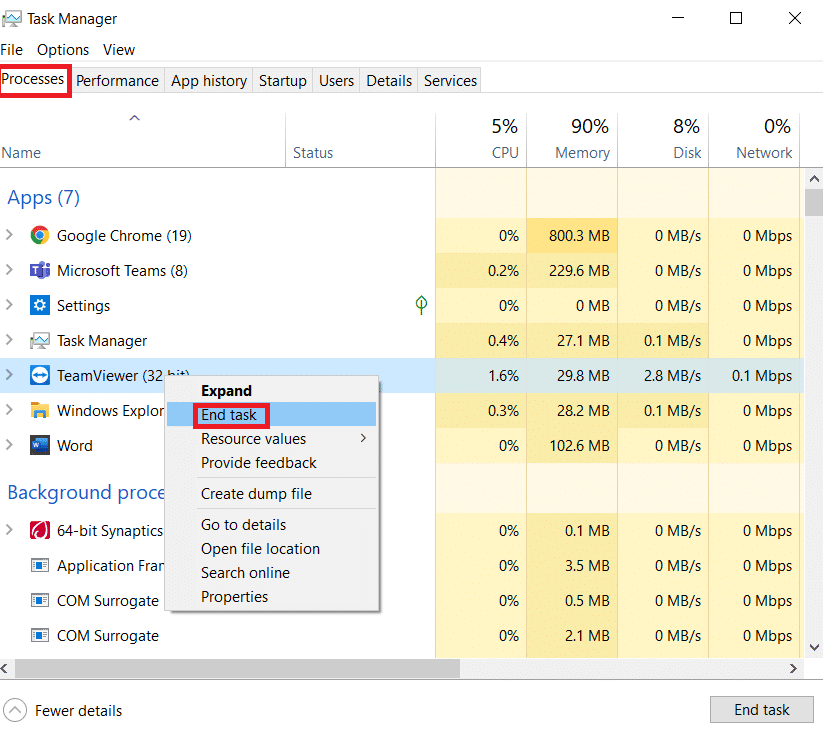
2. Select the Teamviewer app in the Apps section in the Processes tab and click on the End Task button to disable the Teamviewer app.
Method 5: Modify AMD Catalyst Control Center Settings
If you are using AMD Radeon Wattman Software as a Graphic design card, you may need to modify the settings in the Catalyst Control Center to fix the full-screen not working Windows 10 issue.
1. Press the Windows + D keys simultaneously to go to the Desktop.
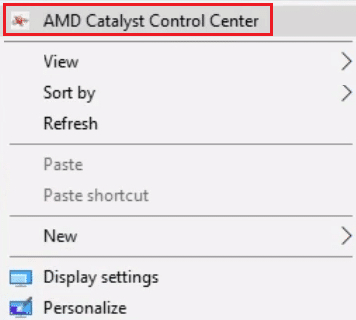
2. Right-click on an empty space and select the AMD Catalyst Control Center option.
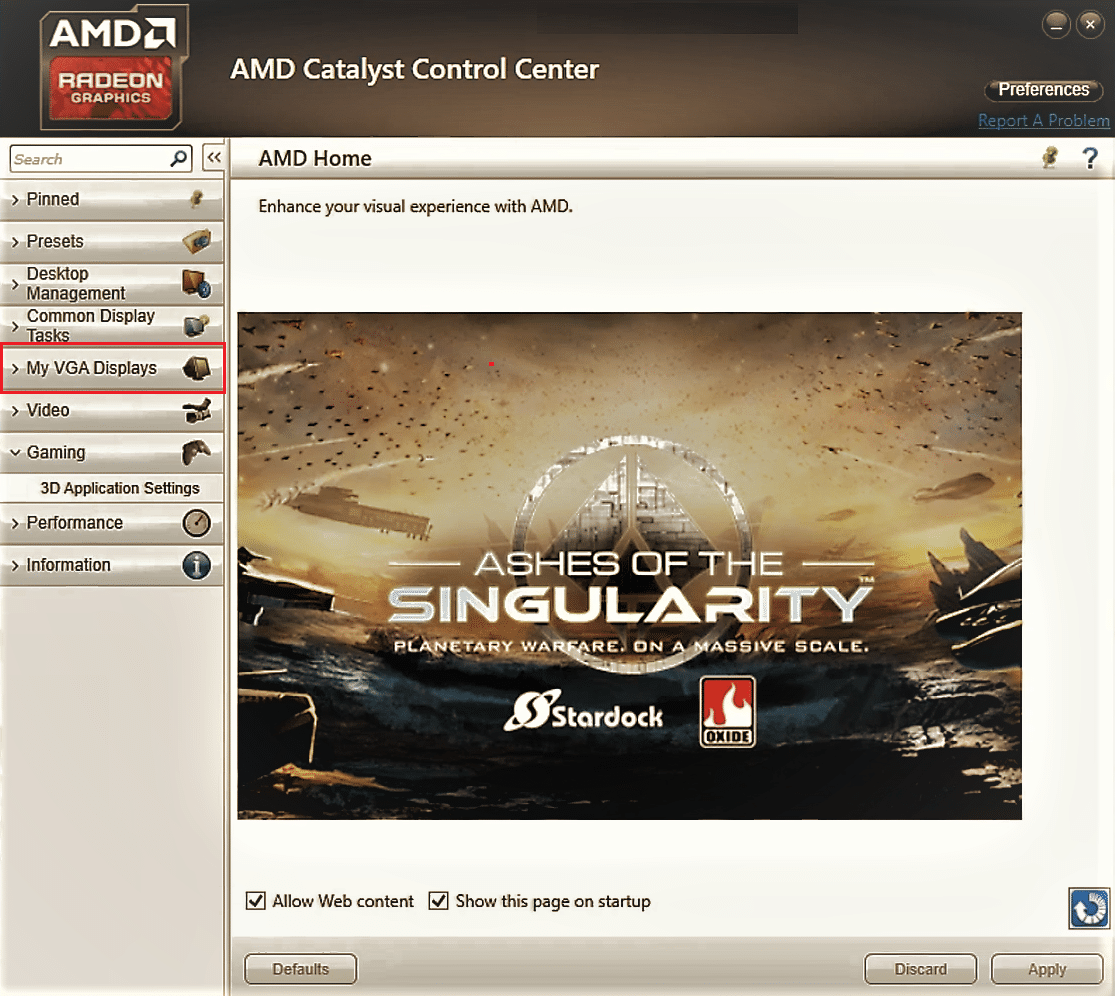
3. Navigate to the My VGA Displays section in the control center.
4. In the Big screen model section, click on the Triangle button, and then click on the Properties option.
5. Select a lower resolution in the menu and click on the Save button to save the changes on the control center.
6. Now, revert to the My VGA Displays window and click on the small laptop triangle button on the bottom-left corner of the window.
7. Click on the Fullscreen option in the list available and click on the Save button to save the changes.
Also Read: Fix AMD Catalyst Control Center Missing
Method 6: Disable Full Screen Optimization
If the issue is with a particular game, you can try disabling the full-screen optimization to fix the full-screen not working Windows 10 issue and enter into full-screen mode manually.
1. Right-click on the game executable file.
2. Select the Properties option in the context menu.
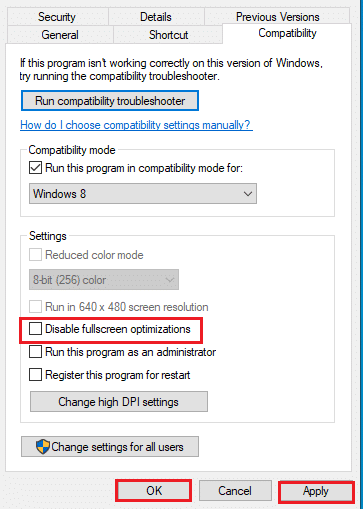
3. Navigate to the Compatibility tab, check the Disable fullscreen optimizations option under the Settings section.
4. Finally, click on the Apply > OK to disable full-screen optimization.
Recommended:
The article discusses the methods to fix the issue of full screen not working on Windows 10. If you are struggling with the issue of the monitor not displaying full-screen Windows 10, you can find the methods to restore full-screen Windows 10 in this article. We request you to drop your suggestions and queries on the topic discussed in the comments section below.
