Fix Keyboard Not Typing in Windows 10 Issue

Fix Keyboard Not Typing in Windows 10 Issue: If you are not able to type anything using your keyboard then don’t worry as today we will see how to fix this issue. Without the keyboard, you won’t be able to use your PC properly as Keyboard is the primary mode of input. There are various issues with the keyboard in the past such as keyboard has stopped working, keyboard typing numbers instead of letters, Windows keyboard shortcuts not working etc.
All of the above issues were resolved by using their respective guides on troubleshooter but this is the first time we have encounter the Keyboard not typing issue in Windows 10. To see if this is a hardware issue, connect an external keyboard and see if it works properly, if it does then your PC or laptop keyboard has a hardware problem. If it doesn’t then the issue is related to software which can be resolved easily. Anyway, without wasting any time let’s see How to Fix Keyboard Not Typing in Windows 10 Issue with the help of the below-listed guide.
Fix Keyboard Not Typing in Windows 10 Issue
Make sure to create a restore point just in case something goes wrong.
Note: Use the external keyboard (USB) to follow the below steps, if you can’t then use the mouse to navigate around Windows.
Method 1: Turn off Filter Keys
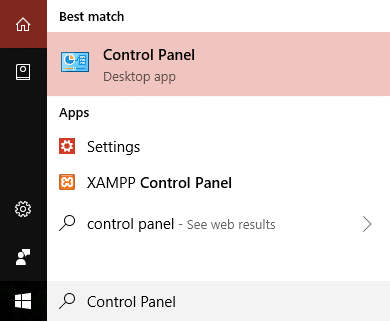
1.Type control in the Windows Search then click on Control Panel.
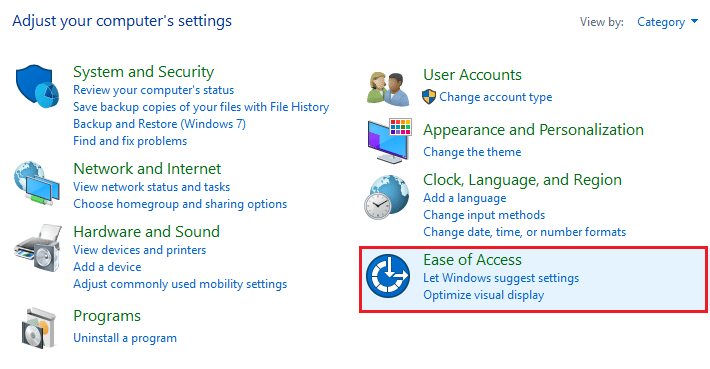
2.Click on Ease of Access under Control Panel.
3.Now you need to again click on Ease of Access.
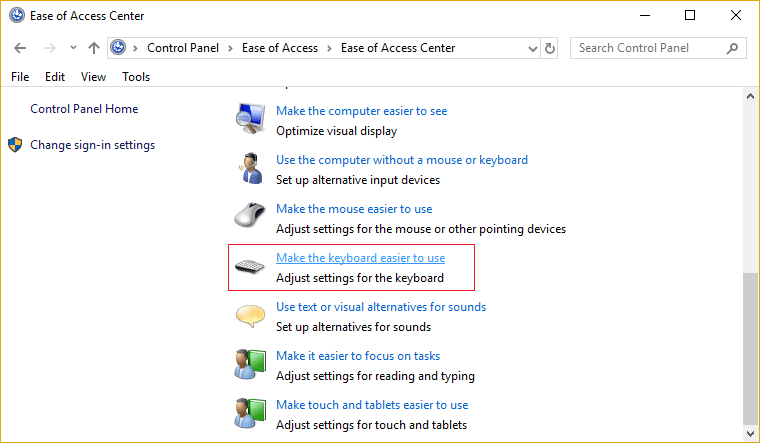
4.On the next screen scroll down and click on Make the keyboard easier to use link.
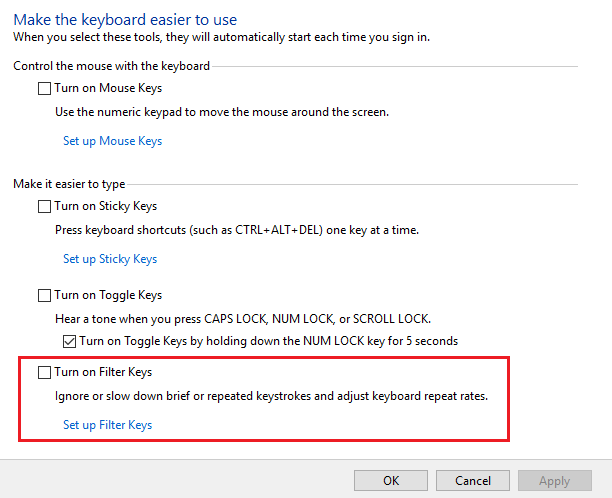
5.Make sure to uncheck Turn on Filter Keys under Make it easier to type.
6.Click Apply followed by OK.
7.Reboot your PC to save changes and see if you are able to Fix Keyboard Not Typing in Windows 10 Issue.
Method 2: Run the Hardware and Devices troubleshooter
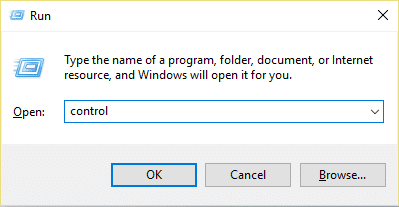
1.Press the Windows key + R then type ‘control‘ and hit Enter.
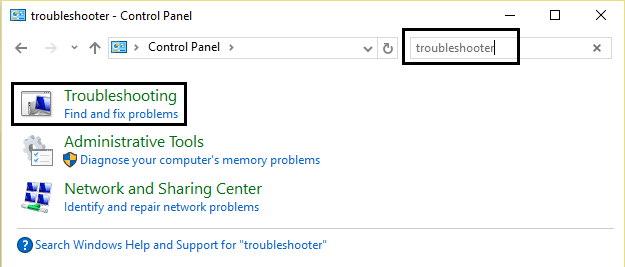
3.Search Troubleshoot and click on Troubleshooting.
4.Next, click on View all in the left pane.
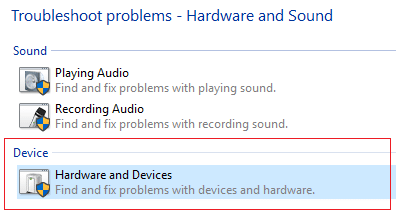
5.Click and run the Troubleshooter for Hardware and Device.
6.The above Troubleshooter may be able to Fix Keyboard Not Typing in Windows 10 Issue.
Method 3: Uninstall Keyboard drivers
1.Press Windows Key + R then type devmgmt.msc and hit Enter to open Device Manager.
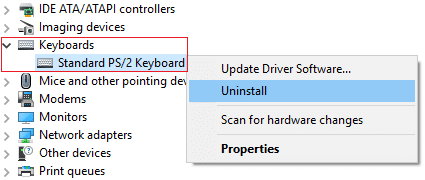
2.Expand keyboards and then right-click on your keyboard device and select Uninstall.
3.If asked for confirmation select Yes/OK.
4.Reboot your PC to save changed and Windows will automatically reinstall the drivers.
5.If you’re still not able to fix the issue then make sure to download and install the latest drivers of Keyboard from manufacturer’s website.
Method 4: Update Keyboard Drivers
1.Press Windows Key + R then type “devmgmt.msc” and hit Enter to open Device Manager.
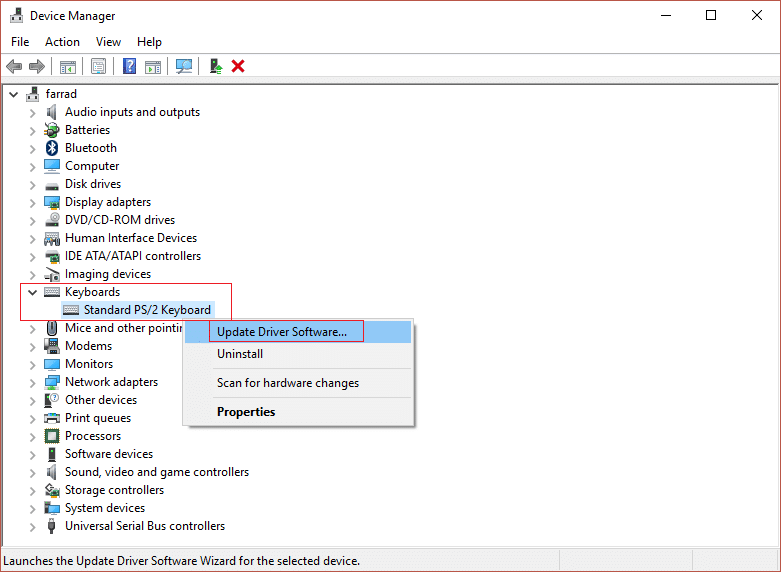
2.Expand Keyboard then right-click on Standard PS/2 Keyboard and select Update Driver.
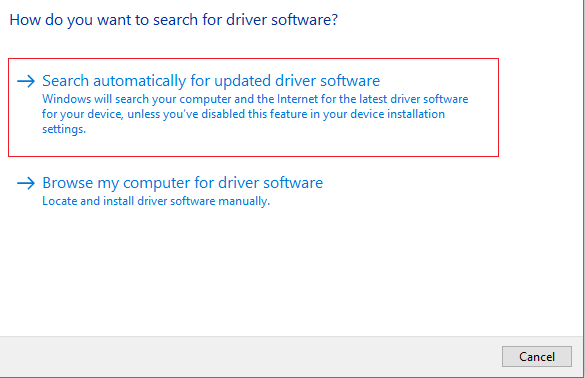
3.First, select Search automatically for updated driver software and wait for Windows to automatically install the latest driver.
4.Reboot your PC and see if you’re able to fix the issue, if not then continue.
5.Again go back to Device Manager and right-click on Standard PS/2 Keyboard and select Update Driver.
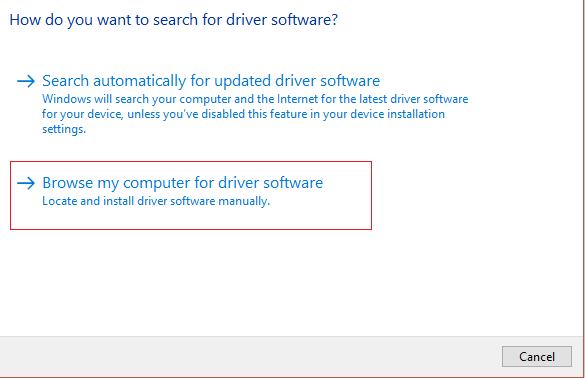
6.This time select “Browse my computer for driver software.“
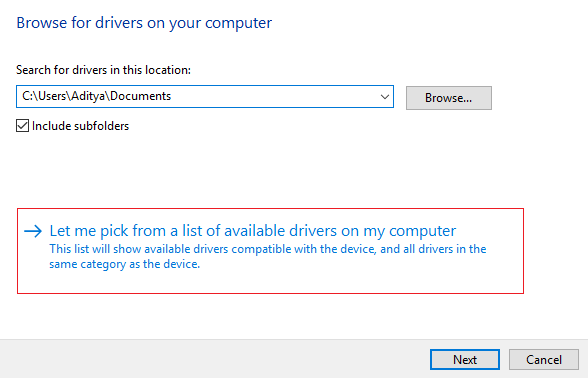
7.On the next screen click on “Let me pick from a list of available drivers on my computer.“
8.Select the latest drivers from the list and click Next.
9.Reboot your PC to save changes.
Method 5: Uninstall Sypnatic Software
1.Type control in the Windows Search then click on Control Panel.
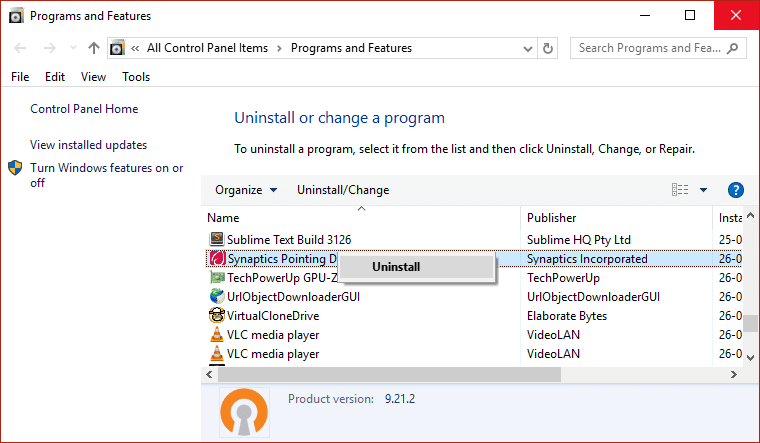
2.Now click on Uninstall a program and the find Sypnatic in the list.
3.Right-click on it and select Uninstall.
4.Reboot your PC and see if you are able to Fix Keyboard Not Typing in Windows 10 Issue.
Method 6: Run DSIM Tool
1.Press Windows Key + X then click on Command Prompt(Admin).
2.Now type the following in the cmd and hit enter:
Sfc /scannow
sfc /scannow /offbootdir=c: /offwindir=c:windows (If above fails then try this one)
3.Wait for the above process to finish and once done restart your PC.
4.Again open cmd and type the following command and hit enter after each one:
a) Dism /Online /Cleanup-Image /CheckHealth
b) Dism /Online /Cleanup-Image /ScanHealth
c) Dism /Online /Cleanup-Image /RestoreHealth
5.Let the DISM command run and wait for it to finish.
6. If the above command doesn’t work then try on the below:
Dism /Image:C:offline /Cleanup-Image /RestoreHealth /Source:c:testmountwindows
Dism /Online /Cleanup-Image /RestoreHealth /Source:c:testmountwindows /LimitAccess
Note: Replace the C:RepairSourceWindows with the location of your repair source (Windows Installation or Recovery Disc).
7.Reboot your PC to save changes and see if you’re able to Fix Keyboard Not Typing or Double Typing in Windows 10 Issue.
Method 7: Use Standard PS/2 Keyboard Drivers
1.Press Windows Key + R then type devmgmt.msc and hit Enter.
2.Expand Keyboard then right-click on Standard PS/2 Keyboard and select Update Driver.
3.Select “Browse my computer for driver software.“
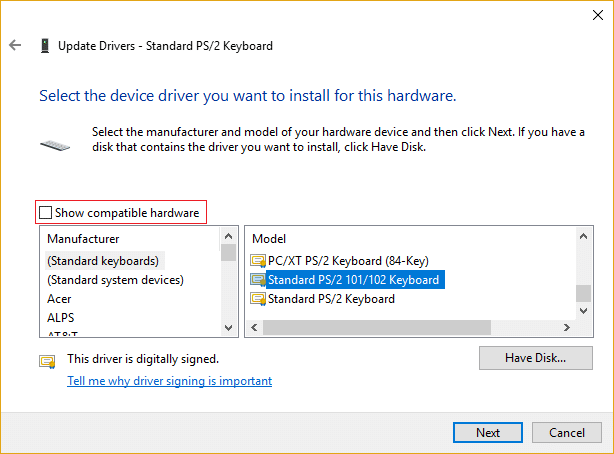
7.On the next screen click on “Let me pick from a list of available drivers on my computer.“
8.Uncheck Show compatible hardware and select any driver except the Standard PS/2 Keyboard.
9.Reboot your PC to save changes then again follow all the above steps except the above one, as this time choose the correct driver (PS / 2 standard keyboard).
10.Again Restart your PC and see if you are able to Fix Keyboard Not Typing in Windows 10 Issue.
Method 8: Update BIOS
Performing BIOS update is a critical task and if something goes wrong it can seriously damage your system, therefore, an expert supervision is recommended.
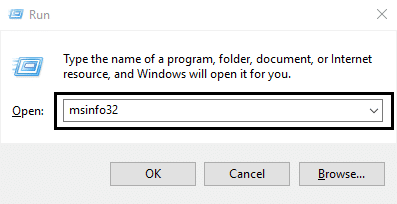
1.The first step is to identify your BIOS version, to do so press Windows Key + R then type “msinfo32” (without quotes) and hit enter to open System Information.
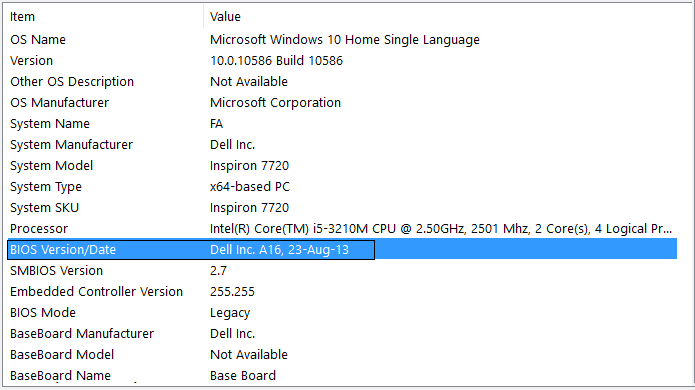
2.Once the System Information window opens locate BIOS Version/Date then note down the manufacturer and BIOS version.
3.Next, go to your manufacturer’s website for e.g in my case it’s Dell so I will go to Dell website and then I will enter my computer serial number or click on the auto detect option.
4.Now from the list of drivers shown I will click on BIOS and will download the recommended update.
Note: Do not turn off your computer or disconnect from your power source while updating the BIOS or you may harm your computer. During the update, your computer will restart and you will briefly see a black screen.
5.Once the file is downloaded, just double-click on the exe file to run it.
6.Finally, you have updated your BIOS and this may be able to Fix Keyboard Not Typing in Windows 10 Issue.
Method 9: Perform a Clean Boot
Sometimes 3rd party software can conflict with the keyboard and can cause the issue. In order to Fix Keyboard Not Typing in Windows 10 Issue, you need to perform a clean boot on your PC then try to use the keyboard.
Method 10: Repair Install Windows 10
This method is the last resort because if nothing works out then this method will surely repair all problems with your PC. Repair Install just uses an in-place upgrade to repair issues with the system without deleting user data present on the system. So follow this article to see How to Repair Install Windows 10 Easily.
Recommended:
That’s it you have successfully Fix Keyboard Not Typing in Windows 10 Issue but if you still have any queries regarding this tutorial then feel free to ask them in the comment’s section.
