Fix Red Screen of Death Error (RSOD) on Windows 10
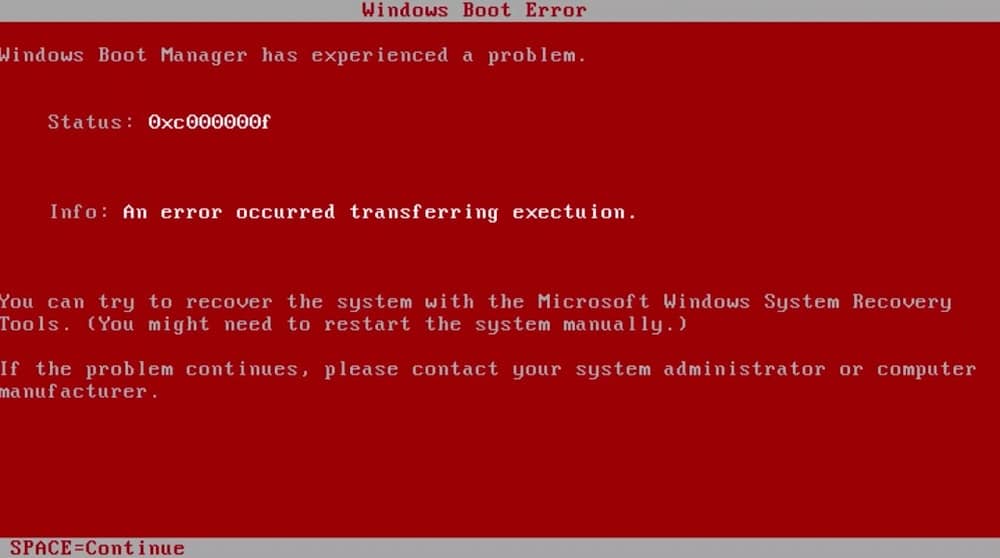
While the appearance of any error dialog box on Windows brings along a wave of frustration, the screens of death nearly give every user a heart attack. The screens of death surface when a fatal system error or a system crash has transpired. Most of us have had the unfortunate pleasure of encountering the blue screen of death at least once in our Windows lifetime. However, the blue screen of death has a few other notorious cousins in the Red Screen of Death and the Black Screen of Death.
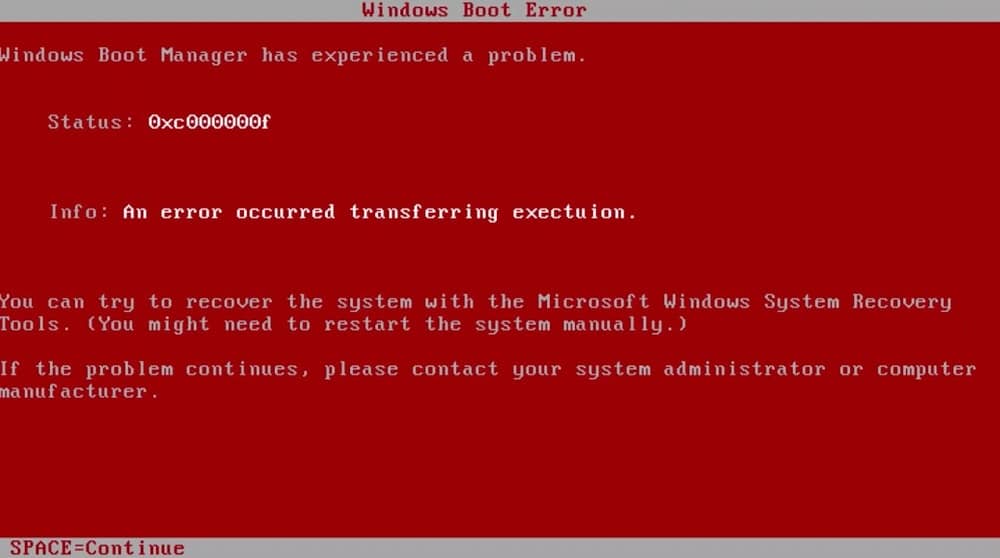
Compared to the Blue Screen of Death, a Red Screen of Death (RSOD) error is rather rare but encountered alike in all Windows versions. The RSOD was first witnessed in the early beta versions of Windows Vista and has continued to appear thereafter on Windows XP, 7, 8, 8.1, and even 10. However, in the newer versions of Windows 8 and 10, the RSOD has been replaced by some form of BSOD.
We will be discussing the causes that prompt the Red Screen of Death in this article and provide you with various solutions to get rid of it.
What causes the Red Screen of Death on Windows PC?
The frightening RSOD can arise on a number of occasions; some might encounter it while playing certain games or watching videos, while others might fall prey to the RSOD when booting up their computer or updating Windows OS. If you are really unlucky, the RSOD may also appear when you & your computer are sitting idle and doing nothing at all.
The Red Screen of Death is generally caused due to some hardware mishaps or unsupported drivers. Depending upon when or where the RSOD appears, there are various culprits. If the RSOD is encountered when playing games or performing any hardware straining task, the culprit might be corrupt or incompatible graphic card drivers. Next, outdated BIOS or UEFI software can prompt the RSOD while booting or updating Windows. Other culprits include poorly overclocked hardware components (GPU or CPU), using new hardware components without installing appropriate drivers, etc.
For most users, the Red Screen of Death will render their computers completely unresponsive, i.e., any input from the keyboard and mouse will not be registered. A few might get a totally blank red screen devoid of any instructions on how to continue, and some might still be able to move their mouse cursor on the RSOD. Nevertheless, there are a few things that you can fix/update to prevent the RSOD from appearing again.
5 Ways to Fix Red Screen of Death Error (RSOD) on Windows 10
Although rarely encountered, users have figured out multiple ways to fix the Red Screen of Death. Some of you might be able to fix it by simply updating your graphic card drivers or booting in safe mode, while a few might need to execute the below mentioned advanced solutions.
Note: If you started encountering the RSOD after installing a Battlefield game, check Method 4 first and then the other ones.
Method 1: Update your BIOS
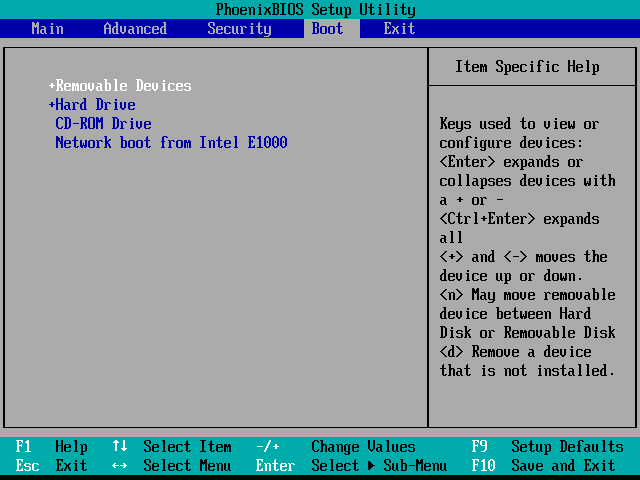
The most common culprit for the Red Screen of Death is an outdated BIOS menu. BIOS stands for ‘Basic Input and Output System’ and is the first program that runs when you press the power button. It initializes the booting process and ensures smooth communication (data flow) between your computer software and hardware.
If the BIOS program itself is outdated, your PC may have some difficulty getting started and hence, the RSOD. BIOS menus are unique for each motherboard, and their latest version can be downloaded from the manufacturer’s website. However, updating BIOS is not as simple as clicking on install or update and requires some expertise. Improper installation can render your computer non-functional, so be extremely careful when installing the update and do read the instructions mentioned on the manufacturer’s website.
To know more about BIOS and a detailed guide on how to update it, read – What is BIOS and How to Update?
Method 2: Remove Overclock Settings
Overclocking components to improve their performance is a commonly practiced deed. However, overclocking hardware is not as easy as pie and demands constant adjustments to attain the perfect combination. Users who encounter the RSOD after overclocking indicate that the components haven’t been configured properly, and you might be demanding a lot more from them than they can actually deliver. This will lead to the components overheating and result in a thermal shutdown ultimately.
So open up the BIOS menu and either reduce the amount of overclocking or return the values to their default state. Now use your computer and check if the RSOD returns. If it doesn’t, you most likely did a lousy job at overclocking. Although, if you still wish to overclock your computer, do not maximize the performance parameters or ask an expert for some assistance on the subject.
Also, overclocking components means they require way more juice (power) to operate, and if your power source is incapable of delivering the required amount, the computer might crash. This is also true if the RSOD appears when you play any graphics-heavy game on high settings or are performing a resource-intensive task. Before you rush to buy a new power source, unplug the power input to components that you do not need currently, for example, the DVD drive or a secondary hard drive, and re-run the game/task. If the RSOD doesn’t appear now, you should consider buying a new power source.
Method 3: Uninstall softOSD.exe process
In a few unique cases, the softOSD application has been found to cause the RSOD. To those unaware, soft old is a display-control software used to manage multiple connected displays & to modify display settings and comes pre-installed. The softOSD.exe process is not an essential service for the normal functioning of Windows and, therefore, can be uninstalled.
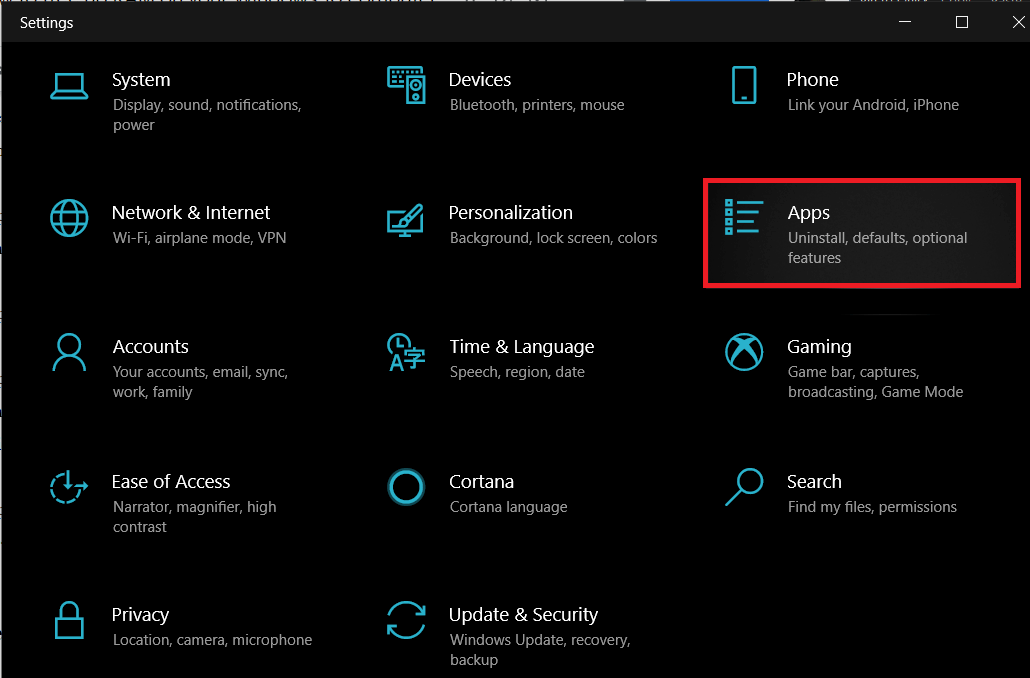
1. Open Windows Settings by pressing the Windows key and I simultaneously.
2. Click on Apps.
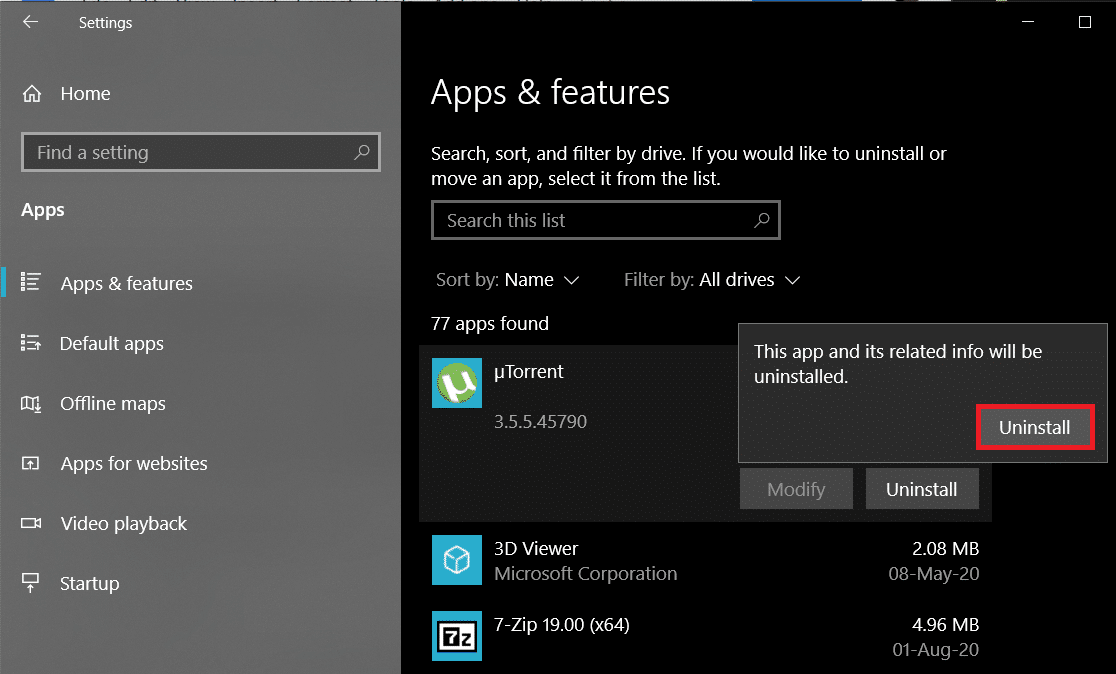
3. Ensure you are on the Apps & Features page and scroll down on the right until you find softOSD.
4. Once found, click on it, expand the available options, and select Uninstall.
5. You will receive another pop-up requesting confirmation; click on the Uninstall button again.
6. After the uninstallation process, you might be prompted to remove sds64a.sys file skips it.
Method 4: Modify settings.ini file
Battlefield: Bad Company 2, a popular first-person shooter game, has often been reported to cause the Red Screen of Death Error (RSOD) on Windows 10. While the exact reasons for it are unknown, one can resolve the issue by modifying the settings.ini file associated with the game.
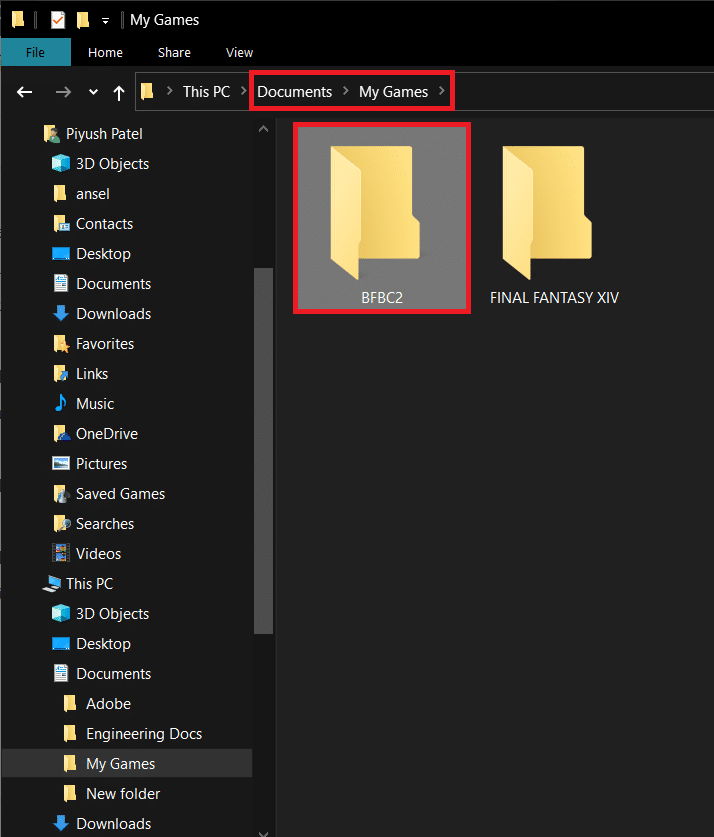
1. Press Windows key + E to launch the Windows File Explorer and navigate to the Documents folder.
2. Double-click on the BFBC2 folder to open it. For some, the folder will be located inside the ‘My Games’ sub-folder.
3. Locate the settings.ini file and right-click on it. In the ensuing context menu, select Open With followed by Notepad. (If the ‘Open With’ app selection menu doesn’t directly enlist Notepad, click on Choose Another App and then manually select Notepad.)
4. Once the file opens up, find the “DxVersion=auto” line and change it to “DxVersion=9”. Make sure you do not change any other lines or the game might stop working.
5. Save the changes by pressing Ctrl + S or by going to File > Save.
Now, run the game and check if you’re able to fix Red Screen of Death Error (RSOD).
Method 5: Check for Hardware malfunctions
If none of the above methods resolved the Red Screen of Death, you likely have a corrupt hardware component that needs immediate replacement. This is very common with older computers. The Event Viewer application on Windows keeps a log of all the errors you have encountered and details on them and can thus be used to detect a faulty hardware component.
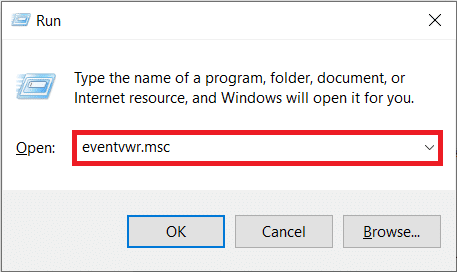
1. Press Windows key + R to bring up the Run Command box, type Eventvwr.msc, and click on OK to launch Event Viewer.
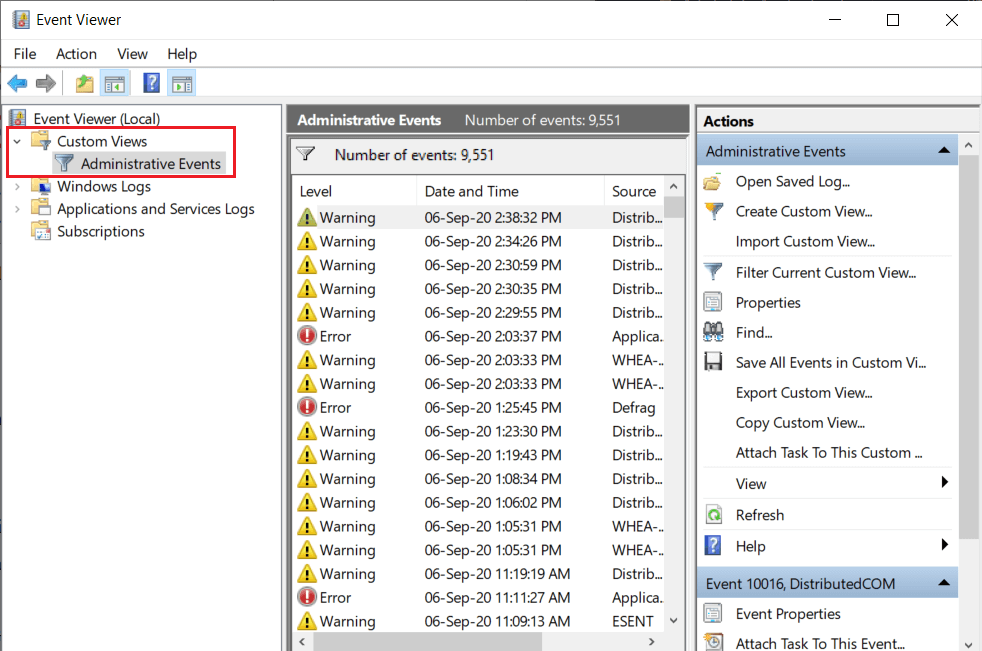
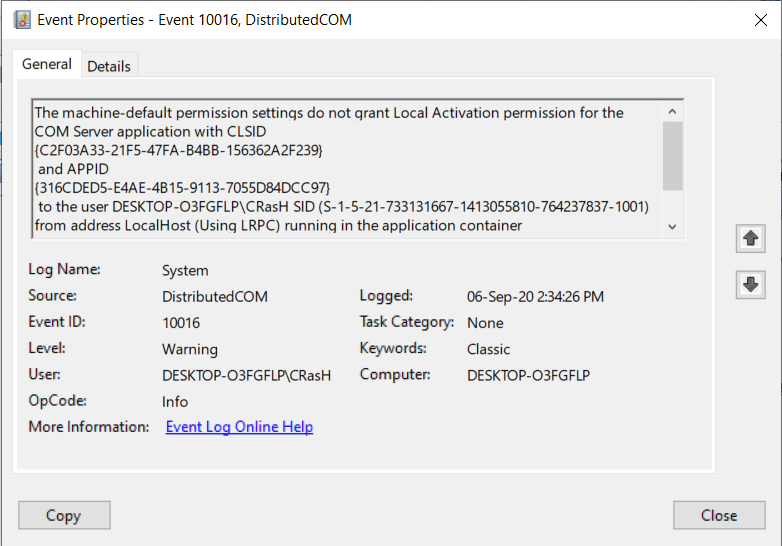
2. Once the application opens up, click on the arrow next to Custom Views, and then double-click on Administrative Events to look at all the critical errors and warnings.
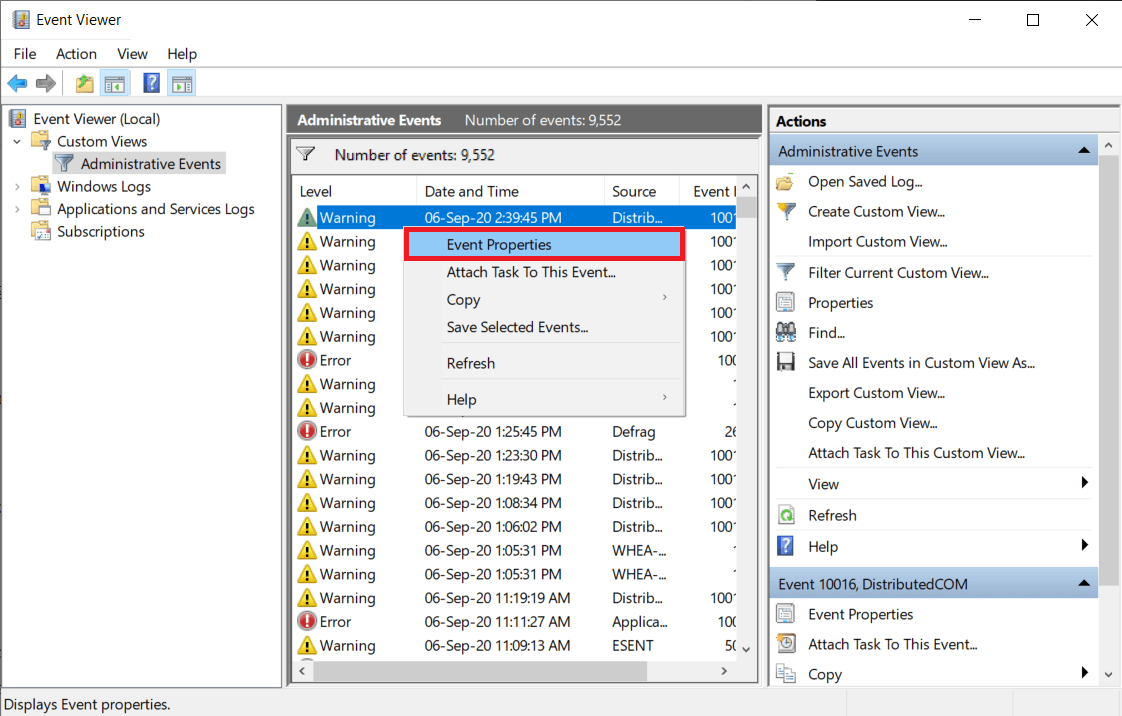
3. Using the Date and Time column, identify the Red Screen of Death error, right-click on it, and select Event Properties.
4. On the General tab of the following dialog box, you will find information regarding the source of the error, the culprit component, etc.
5. Copy the error message (there is a button for that on the bottom left) and perform a Google search to obtain more information. You can also switch to the Details tab for the same.
6. Once you have singled out the hardware that has been misbehaving and prompting the Red Screen of Death, update its drivers from the Device Manager or use a third-party application like DriverEasy to update them automatically.
If updating drivers of the faulty hardware didn’t help, you might need to replace it. Check the warranty period on your computer and visit the nearest service center to have it inspected.
Recommended:
So those were five methods (along with updating graphic card drivers and booting in safe mode) that users generally employ to get rid of the terrifying Red Screen of Death error on Windows 10. There is no guarantee that these might work for you, and if they don’t, contact a computer technician for help. You can also try performing a clean reinstall of Windows altogether. Connect with us in the comments section for any other assistance.
