Fix Site Can’t Be Reached, Server IP Could Not Be Found
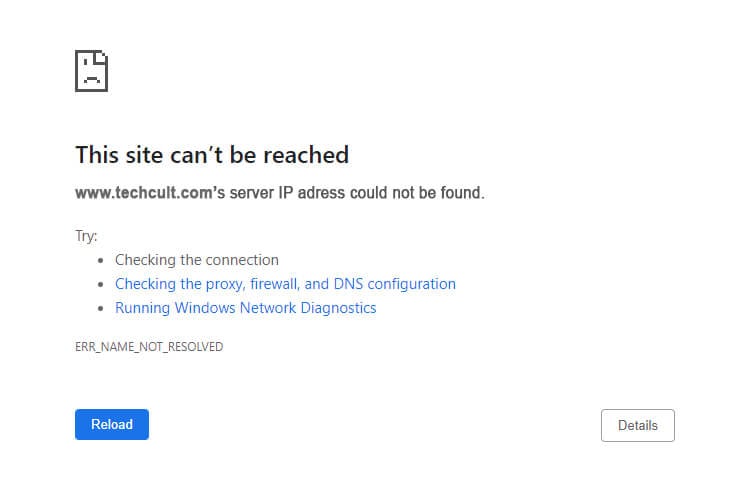
A common error that occurs when we try to browse the internet is the “Fix Site can’t be reached, Server IP could not be found” issue. This might happen due to a variety of reasons. It may be due to your internet connection issue related to ISP configuration or some settings interfering with the network resolution.
This might happen due to the DNS failing to fetch the correct IP address for the website that you are visiting. A website domain will be mapped to an IP address, and when the DNS server fails to translate this domain name to an IP address, the following error happens. Sometimes, your local cache might be interfering with the DNS lookup service and making the requests continuously.
Otherwise, the website might be down, or its IP configuration might be incorrect. This is a problem that we cannot fix, as the website admin configures it. However, we can check if the problem lies within our computer and fix them with the below-listed troubleshooting guide.
Fix Site Can’t Be Reached, Server IP Could Not Be Found
Method 1: Check the Ping of your Network connection
Checking the Ping of your connection is a useful method as it can measure the time between a sent request and a received packet of data. This can be used to determine faults in the internet connection as servers usually close the connection if the requests are lengthy or the responses take more time than expected. You need to use the command prompt for performing this task.
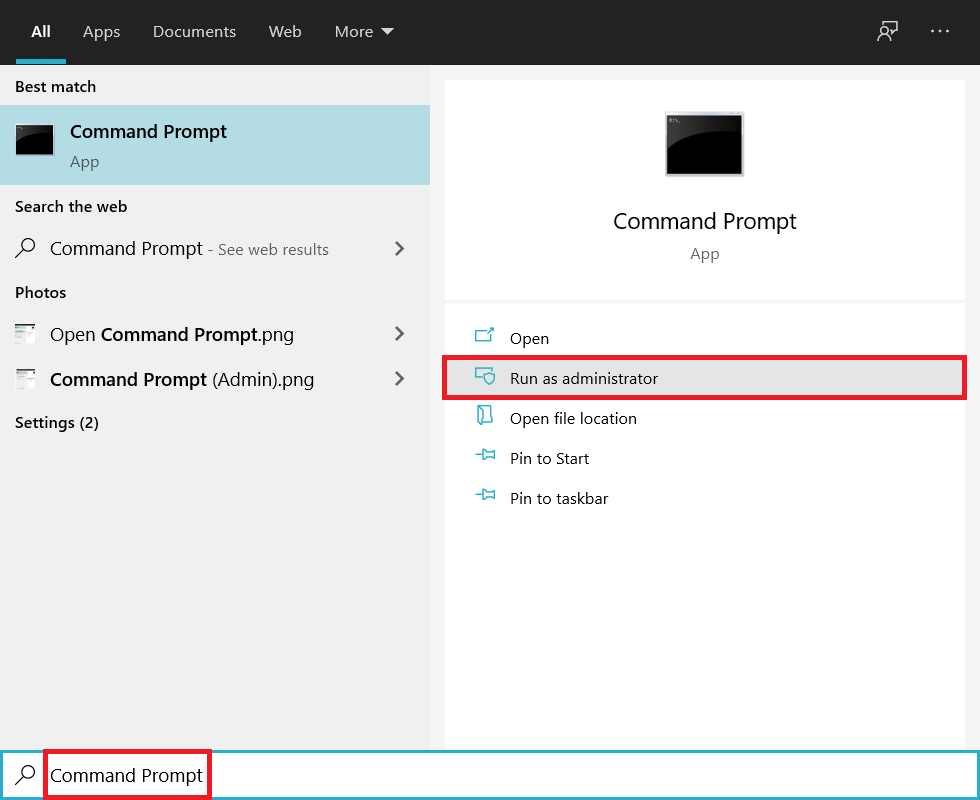
1. Press Windows Key + S to bring up the Windows search, then type cmd or Command Prompt and click on Run as Administrator.
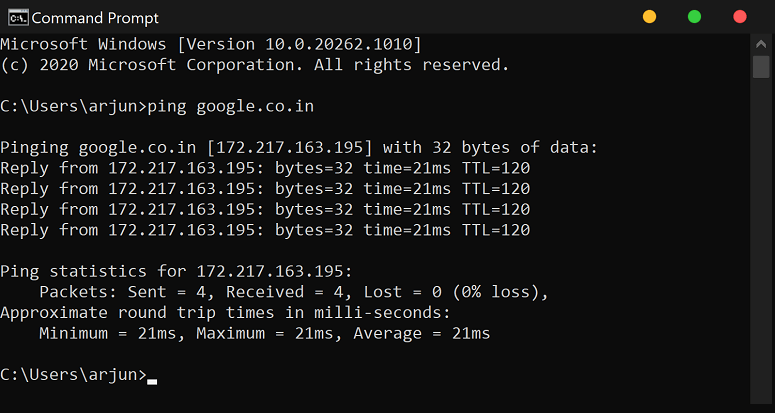
2. Type the following command “ping google.com” and press Enter. Wait until the command executes and the response is received.
3. If the results do not show an error and display 0% loss, your internet connection has no issues.
Method 2: Refresh the Website
Random DNS resolution errors might happen when you visit a website. Mostly, the issue might not be present once you refresh or reload the webpage. Press the Refresh button near the address bar and see if it fixes the problem. Sometimes you might need to close and reopen the browser to check if it works or not.
Method 3: Run Network Troubleshooter
Windows has a built-in network troubleshooting tool that is able to fix commonly occurring network issues by going through the system configuration. Issues like wrong IP address assignment or DNS resolution problems can be detected and fixed by the Network troubleshooter.
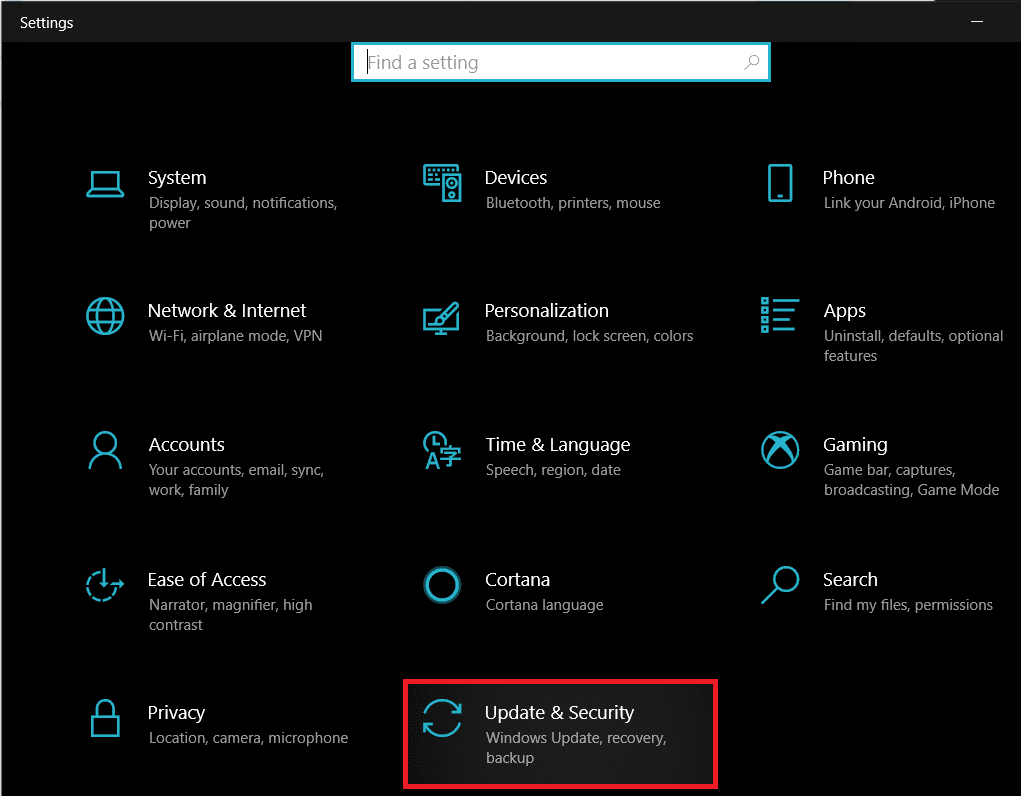
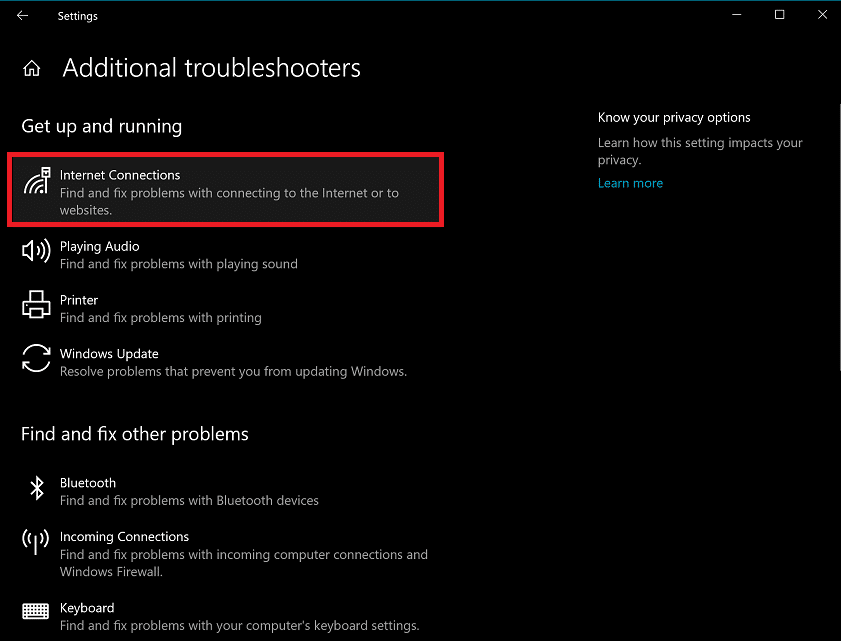
1. Press the Windows key + I to open Settings then click on the Update & Security option.
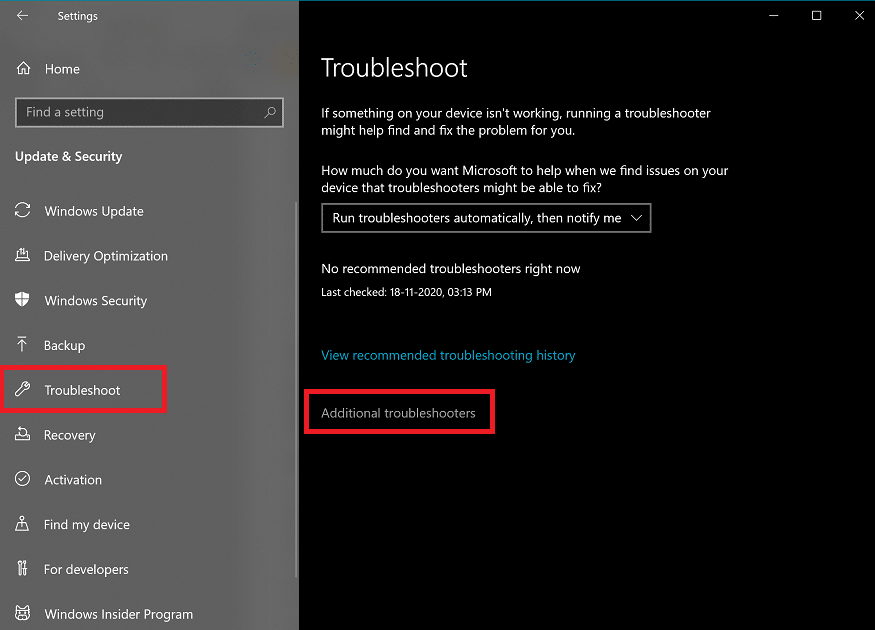
2. Go to the Troubleshoot tab and click on Advanced Troubleshooters.
3. Now click on the Internet Connections and follow the on-screen instructions to fix the issues that you are facing.
Method 4: Flush the DNS Resolver Cache to Re-initialize DNS
Sometimes, the local DNS resolver cache intervenes with its cloud counterpart and makes it difficult for new websites to load. The local database of frequently resolved websites prevents the online cache from storing new data on the computer. For fixing this issue, we have to clear the DNS cache.
1. Open the Command Prompt with admin privileges.
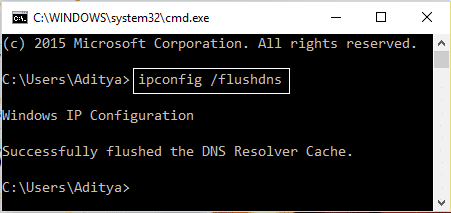
2. Now type ipconfig /flushdns and press Enter.
3. If the DNS cache is successfully flushed, it will show the following message: Successfully fetched DNS Resolver cache.
4. Now Reboot your Computer and check if you’re able to fix Site Can’t Be Reached, Server IP Could Not Be Found error.
Also Read: Fix Your DNS Server might be unavailable error
Method 5: Update Network Adapter Drivers
Updating the drivers might be another option to fix the “Site cannot be reached” issue. After a significant software update, incompatible network drivers might exist in the system, which interferes with the DNS resolution. It can be fixed by updating the device drivers.
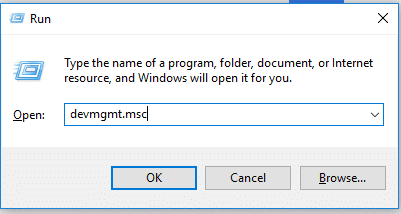
1. Press Windows Key + R then type devmgmt.msc and hit Enter to open Device Manager.
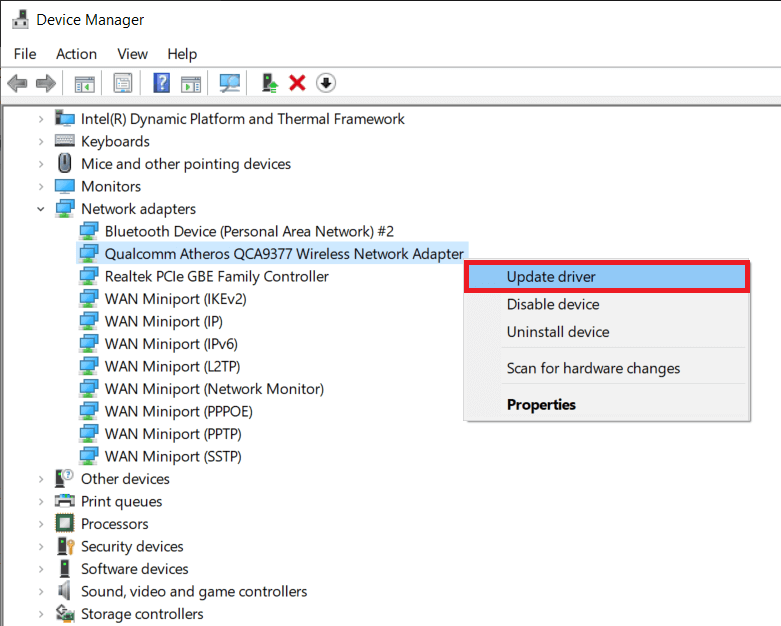
2. Now scroll down and expand the Network adapter section. You can see the network adapter installed on your computer.
3. Right-click on your Network adapter and select Update Driver. Now follow the on-screen instructions to install the updated driver software.
4. Once done, Reboot the system to save changes.
Method 6: Clear Browser Cache and Cookies
It is possible that the browser is unable to receive the response from the server due to an excess cache in the local database. In that case, the cache must be cleared before opening any new website.
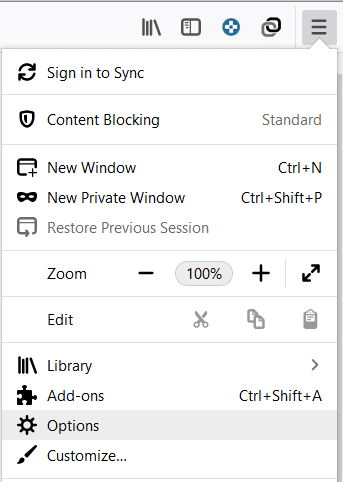
1. Open your web browser. In this case, we will be using Mozilla Firefox. Click on the three parallel lines (Menu) and select Options.
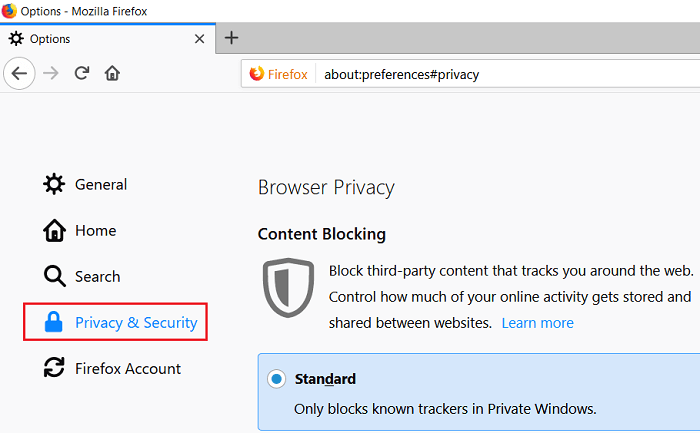
2. Now select Privacy & Security from the left-hand menu and scroll down to the History section.
Note: You can also directly navigate to this option by pressing Ctrl+Shift+Delete on Windows and Command+Shift+Delete on Mac.
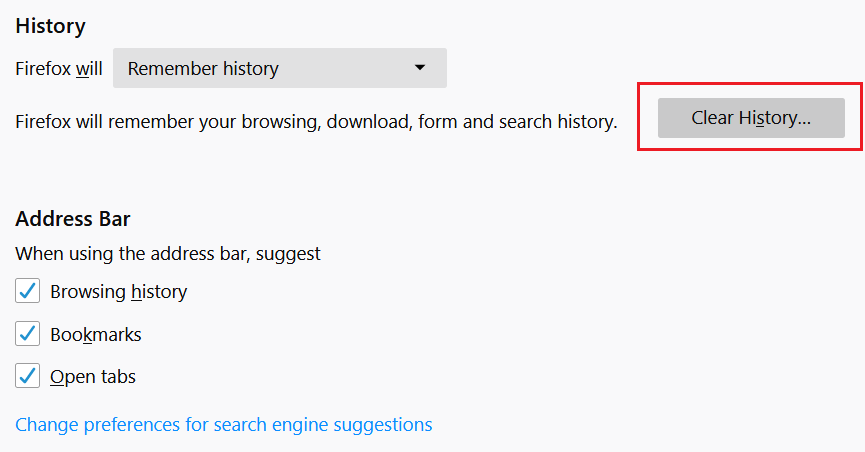
3. Here click on the Clear History button and a new window will open.
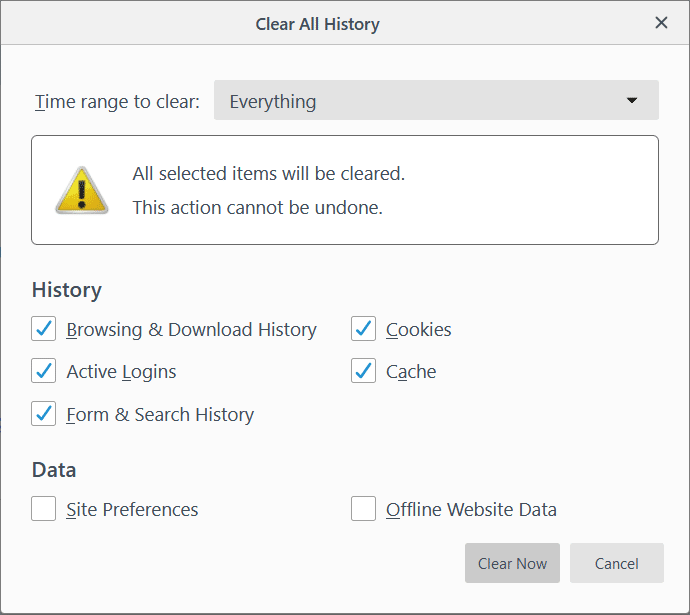
4. Now select the time range for which you want to clear history & click on Clear Now.
Method 7: Use a different DNS server
Default DNS servers provided by the service provider might not be as advanced and regularly updated as Google DNS or OpenDNS. It is better to use Google DNS to offer faster DNS lookup and provide a basic firewall against malicious websites. For this, you need to change the DNS settings.
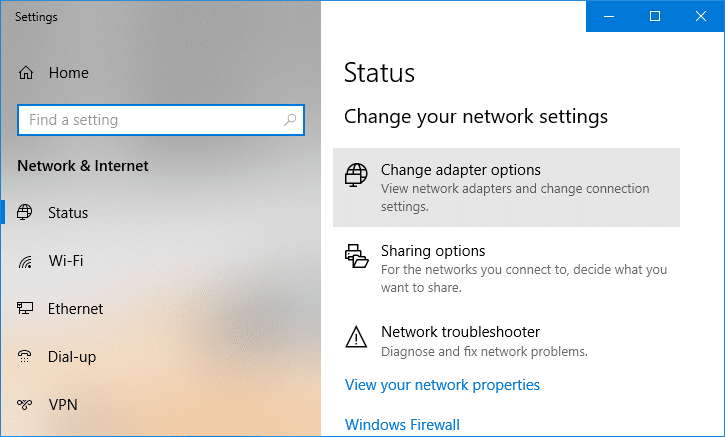
1. Right-click on the network (LAN) icon in the right end of the taskbar, and click on Open Network & Internet Settings.
2. In the Settings app that opens, click on Change adapter options in the right pane.
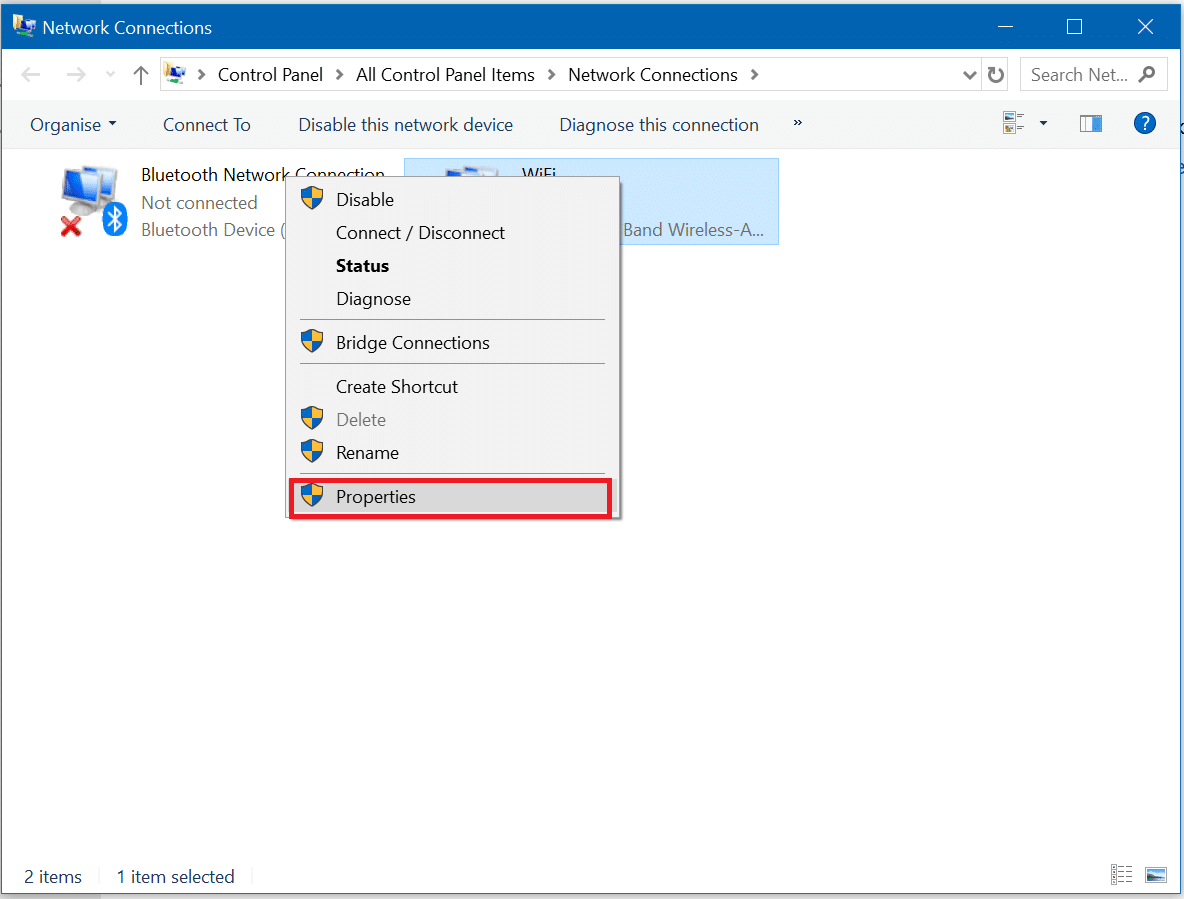
3. Right-click on the Network which you wish to configure, and click on Properties.
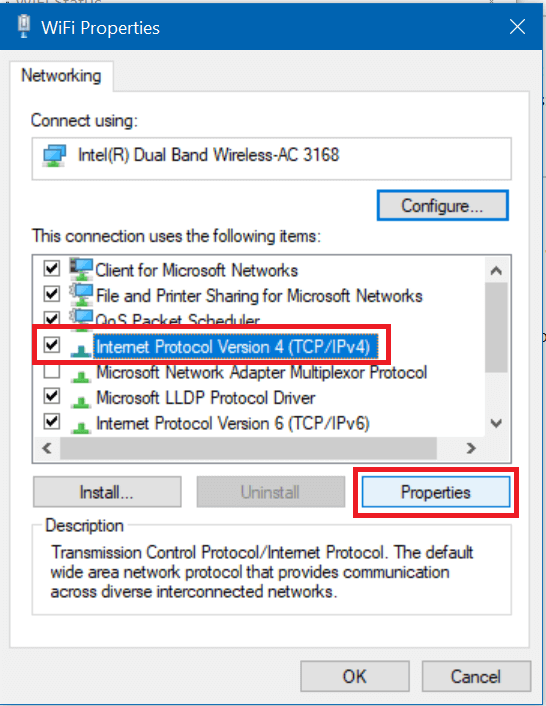
4. Click on Internet Protocol Version 4 (IPv4) in the list and then click on Properties.
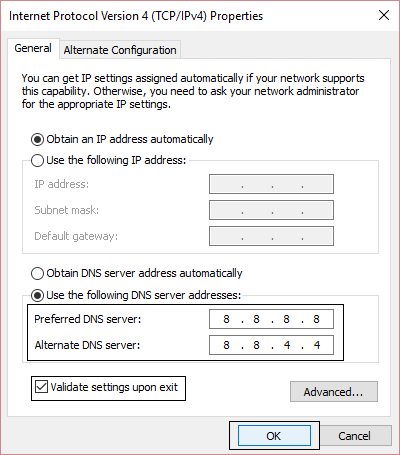
5. Under the General tab, choose ‘Use the following DNS server addresses’ and put the following DNS addresses.
Preferred DNS Server: 8.8.8.8
Alternate DNS Server: 8.8.4.4
6. Finally, click OK at the bottom of the window to save changes.
7. Reboot your PC to save changes and see if you’re able to fix Site Can’t Be Reached, Server IP Could Not Be Found error.
Also Read: How to Switch to OpenDNS or Google DNS on Windows 10
Method 8: Reset Windows Socket Configuration
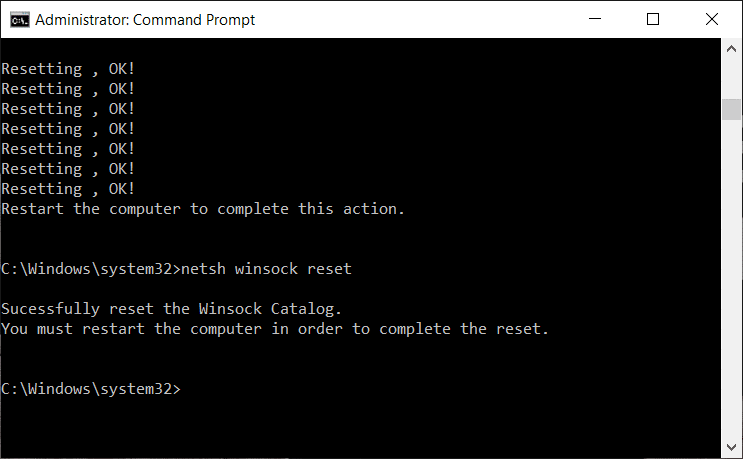
Windows Socket configuration (WinSock) is a collection of configuration settings used by the operating system to connect to the internet. It consists of some socket program code that sends a request and receives a remote server response. Using the netsh command, it is possible to reset every setting related to network configuration on Windows PC.
1. Press Windows Key + S to bring up the Windows search, then type cmd or Command Prompt and click on Run as Administrator.
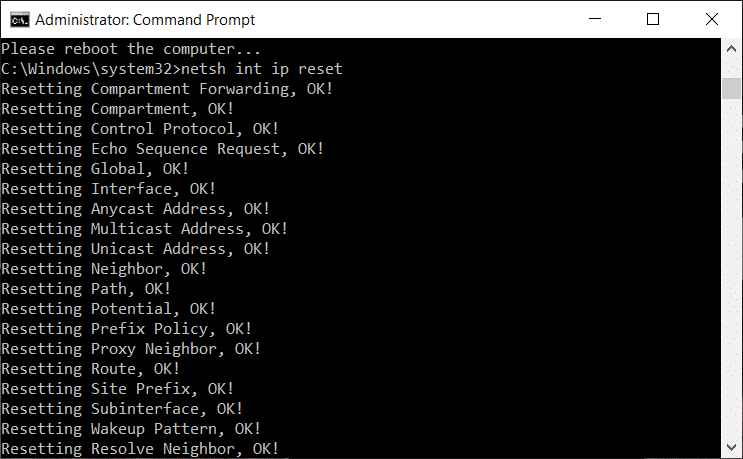
2. Type the following commands and hit Enter:
netsh winsock reset
netsh int ip reset
3. Once the Windows Socket Catalog is reset, Restart your PC to apply these changes.
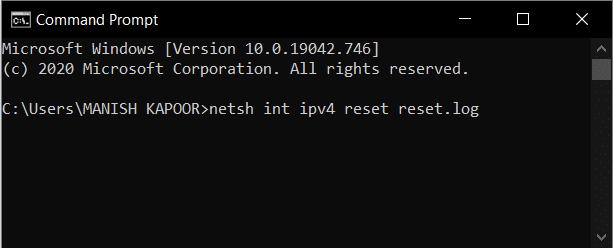
4. Again open the Command Prompt then type the following command and hit Enter:
netsh int ipv4 reset reset.log
Method 9: Restart DHCP Service
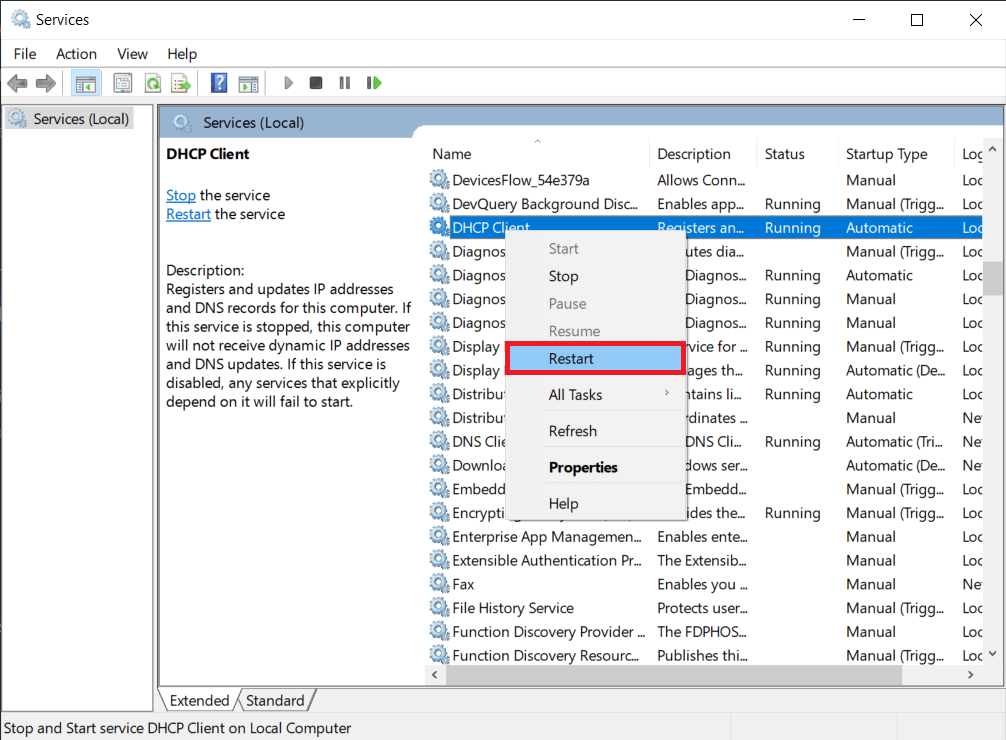
The DHCP Client is responsible for the resolution of DNS and mapping of IP addresses to the domain names. If the DHCP Client is not working correctly, the websites will not be resolved to their origin server address. We can check in the list of services if it is enabled or not.
1. Press the Windows key + R then type services.msc and hit Enter.
2. Find the DHCP Client service in the list of services. Right-click on it and select Restart.
3. Flush the DNS cache and reset Windows Socket configuration, as mentioned in the above method. Again try to open the webpages and this time you will be able to fix Site Can’t Be Reached, Server IP Could Not Be Found error.
Recommended:
If the error persists after trying all these methods, then it is likely that the issue lies in the website’s internal server configuration. If the problem was with your computer, these methods would help fix them and get your computer connected to the internet again. The problem is that this error occurs randomly and maybe due to the fault of the system or the server or both combined. Only by using trial and error, it is possible to fix this issue.
