Fix WiFi Authentication Error on Android
Android phones are capable of doing a lot of things. With time, it has developed leaps and bounds, and now it is possible to do almost everything on your phone. However, for utilizing your phone to the full extent, you need a stable internet connection. This is where your Wi-Fi comes in. Wi-Fi has become an absolute necessity in the urban world. Therefore, it is extremely inconvenient when we are not able to connect to it.
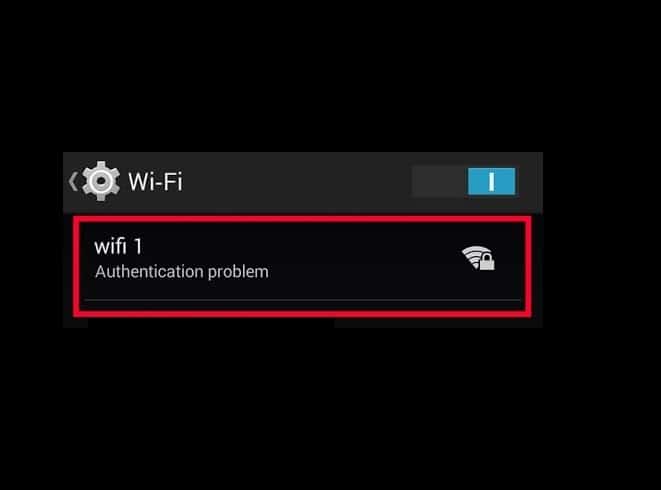
There are several errors that might hinder a wireless connection and prevent you from accessing the internet. One such error is the WiFi authentication error. This error message pops up on your screen when your device isn’t able to connect to a particular Wi-Fi network. Even though you have made no mistake in typing the password or trying to connect to a previously used Wi-Fi network, you might still encounter this error once in a while. However, the good news is that this error can be easily fixed.
How to Fix WiFi Authentication Error on Android
In this article, we are going to discuss a number of solutions that will solve your problem easily and quickly but before that, let’s understand what causes this error.
What is the reason behind WiFi authentication error on Android?
Let us take a look at how a Wi-Fi connection is established between your mobile and the router. When you tap on a particular Wi-Fi network, your device sends a connection request to the router along with the password for that network. The router now checks whether or not this password matches that of the one stored in its memory. If the two passwords do not match, then you are denied permission to connect to the network and the WiFi authentication error occurs. The strange part is when this error occurs on a familiar or previously saved Wi-Fi network.
See Also:
Fix Machine Check Exception Error in Windows
What is Background App Refresh on Android?
Top 10 Ways to Fix Google Chrome Keeps Crashing on Android
How to See if Someone Read Your Text on Android
7 Best Fixes for Spotify Something Went Wrong Error on Android
There are multiple reasons why this error occurs. It could be due to:
1. Wi-Fi signal strength – If the signal strength is low, authentication error occurs more often. In this case, the users are advised to ensure the signal connectivity and try again after rebooting the device.
2. Airplane mode – If the user accidentally turns ON the Airplane mode on their device, it can no longer connect to any network.
3. Updates – Some system and firmware updates may also cause such errors. In such a case, a prompt will pop up asking you to re-enter the username and password.
4. Router – When the router function fails, it also leads to connectivity issues with Wi-Fi.
5. User count limit – If the user count limit for a Wi-Fi connection is exceeded, it may cause an authentication error message.
6. IP configuration conflicts – Sometimes, Wi-Fi authentication error occurs due to IP configuration conflicts. In this case, altering the network settings will help.
Here are some simple methods to fix Wi-Fi authentication errors in Android devices. The solutions may vary a little depending on the cause & model of your smartphone.
Method 1: Forget Network and then Reconnect
The easiest way to resolve this problem is to simply click on Forget Wi-Fi and reconnect. This step would require you to re-enter the password for the Wi-Fi. Thus, make sure that you have the correct password before clicking on the Forget Wi-Fi option. This is an effective solution and often solves the problem. Forgetting and reconnecting to the network gives you a new IP route and this could actually fix the issue of no internet connectivity. To do this:
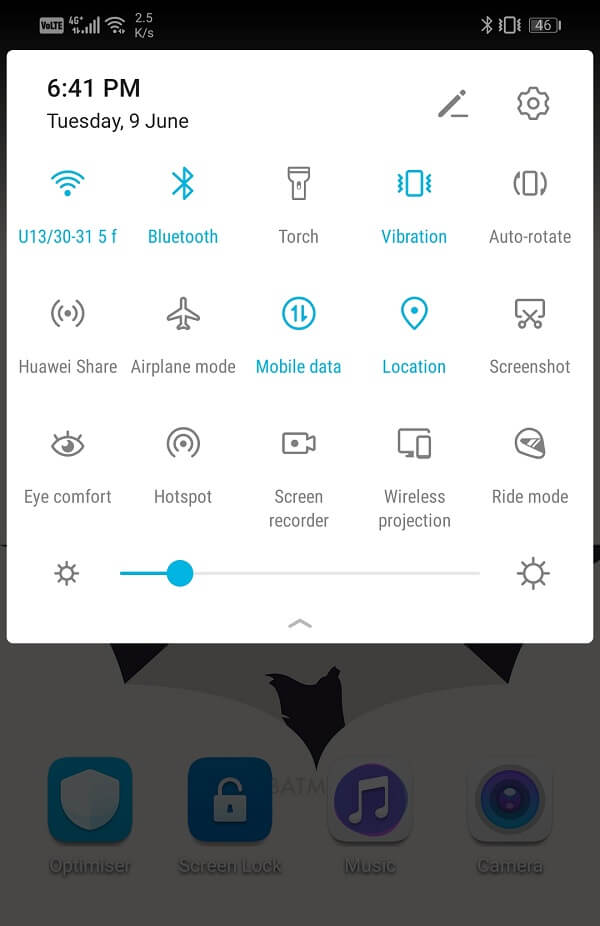
1. Drag down the drop-down menu from the notification panel on the top.
2. Now, long-press the Wi-Fi symbol to open to the list of Wi-Fi networks.
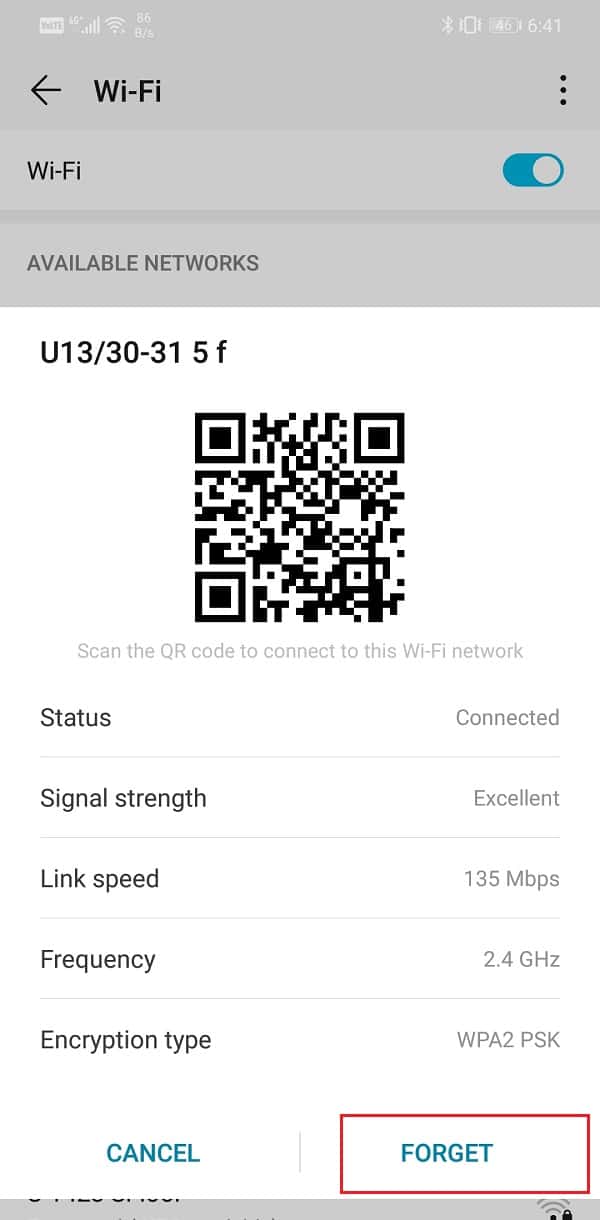
3. Now, simply tap on the name of the Wi-Fi that you are connected to and click on the ‘Forget’ option.
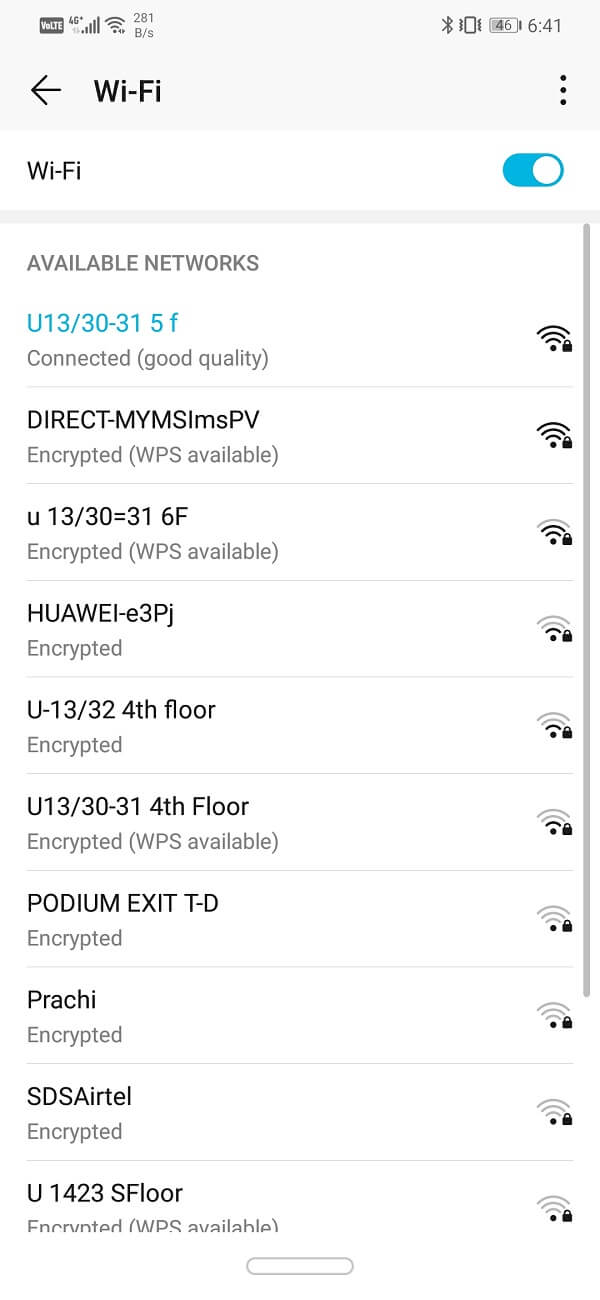
4. After that, simply tap on the same Wi-Fi again and enter the password and click on connect.
Method 2: Switch from DHCP Network to Static Network
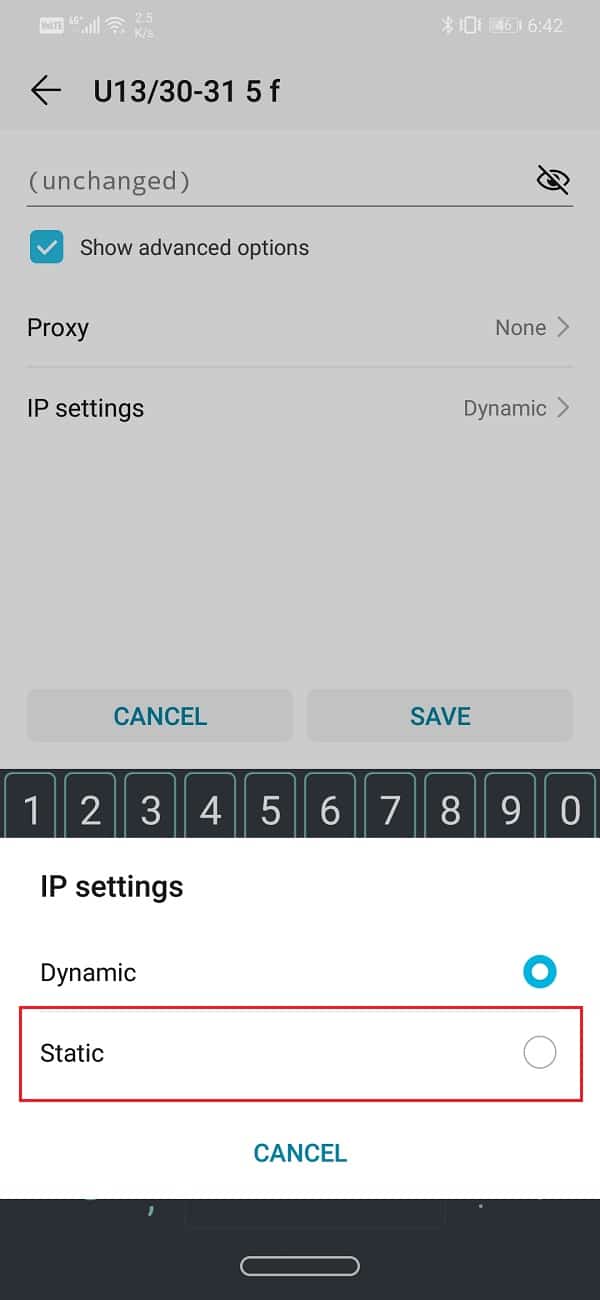
WiFi Authentication error can be caused by an IP conflict. If other devices can be affected by it, then so can Android smartphones. There is, however, a simple solution to this problem. All that you need to do is change the network configuration from DHCP to Static.
1. Drag down the drop-down menu from the notification panel on the top.
2. Now, long-press the Wi-Fi symbol to open to the list of Wi-Fi networks.
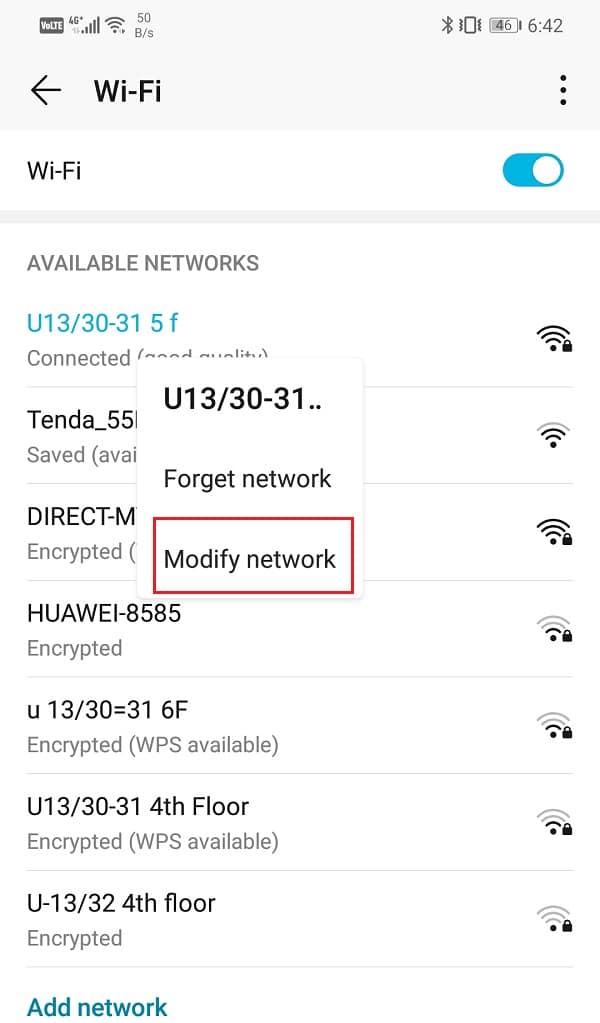
3. Now, tap on the name of the Wi-Fi and keep holding it down to view the advanced menu. Then click on the Modify Network option.
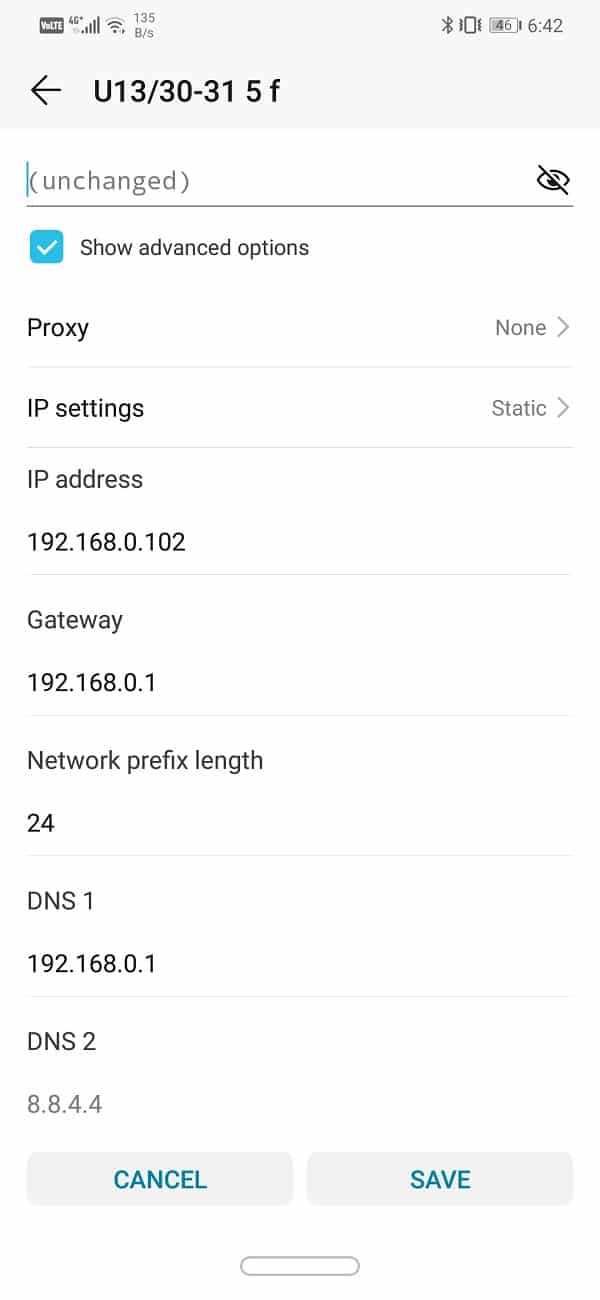
4. Now, select IP settings and change them to static.
5. Note down the details that you see in the IP address field and then delete it. Later enter it again and click on the Save button.
6. As for other details like DNS, Gateway, Netmask, etc. you will either find it on the back of your router or you can contact your network service provider for the information.
Also Read: Fix Internet May not be Available Error on Android
Method 3: Update the Android Operating System
Sometimes when an operating system update is pending, the previous version might get a little buggy. As a result, you might experience WiFi authentication error on Android. The best solution to this is to download and install the latest update which usually comes with a bug fix for the existing problems.
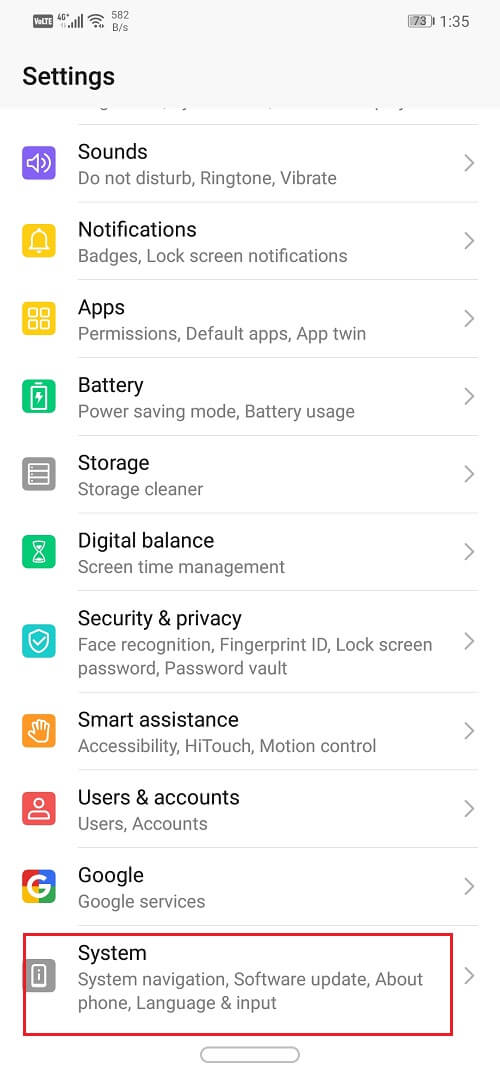
1. Open Settings on your device. Next, tap on the System option.
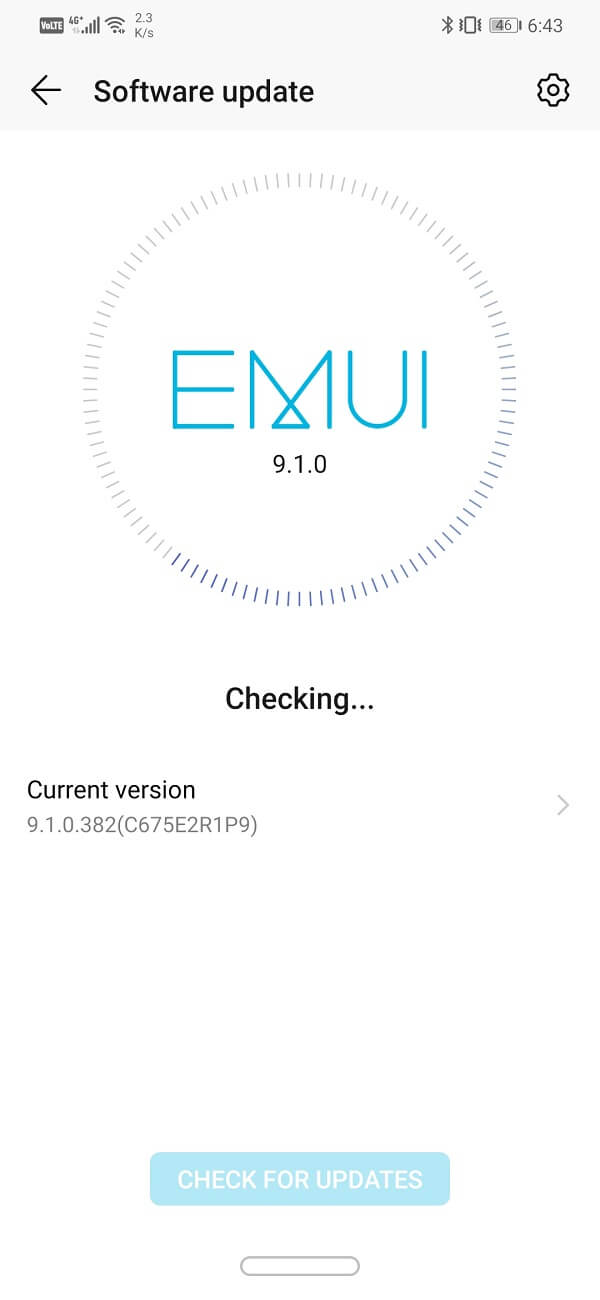
2. Here, you will find the option for Software updates. Click on it and your phone will now automatically search for updates.
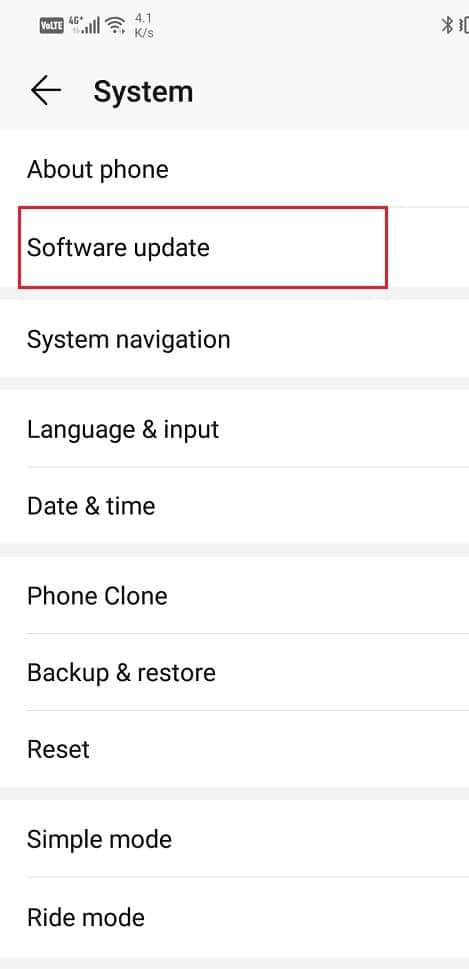
3. If you see that updates are available, then tap on the Download Updates button.
4. This will take some as the updates will get downloaded and then installed on your device. It will then automatically restart and when it does try connecting to the WiFi network again and see if you’re able to fix WiFi Authentication Error on your Android phone.
Method 4: Toggle Airplane Mode
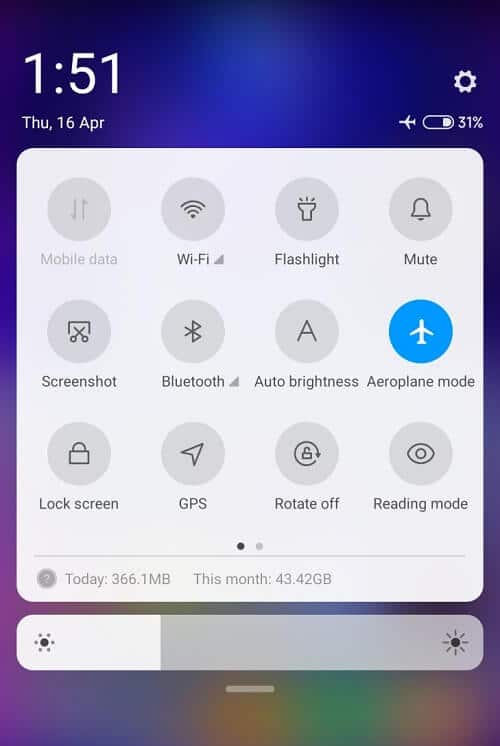
Another easy solution is to switch on the airplane plane mode and then turn it back off again in a short while. It basically resets the entire network reception center of your phone. Your phone will now automatically search for both mobile and WiFi networks. It is a simple technique that proves to be quite effective on multiple occasions. Simply drag down from the notification panel and tap on the Airplane mode button present in the Quick Settings menu.
Also Read: Fix Android Wi-Fi Connection Problems
Method 5: Restart your Router
As mentioned earlier, a WiFi authentication error can be caused by your WiFi router. Due to a technical glitch, it is possible that the router is not able to compare the passwords and hence, give the green light to establish a connection. However, a simple restart can often solve the problem. Now, there are three ways in which you can restart your router.
1. Remove the power cord – The simplest and the easiest way to switch off a router is by disconnecting it from the power supply. For some basic routers, this is the only way to turn it off as they do not even have a power switch. Wait for a couple of minutes and then plug it back in.
2. Switch off using the Power button – If it is not possible to get to the router’s power cable, then you can also switch it off using the power button. Simply turn off your router for a few minutes and then turn it back on again.
3. Alter connection settings – As mentioned earlier, you might experience the WiFi authentication error if there are already too many devices connected to the network and the maximum limit has been reached. The simple solution to this problem is to adjust the router settings to increase the maximum number of devices that can connect to the network. This is, however, only valid if it is possible to further extend the limit from what it is at present. Once you have done that, simply restart your router by using any of the two methods described above.
Method 6: Reset Network Settings
The next option in the list of solutions is to reset the Network Settings on your Android device. It is an effective solution that clears all saved settings and networks and reconfigures your device’s WiFi. To do this:
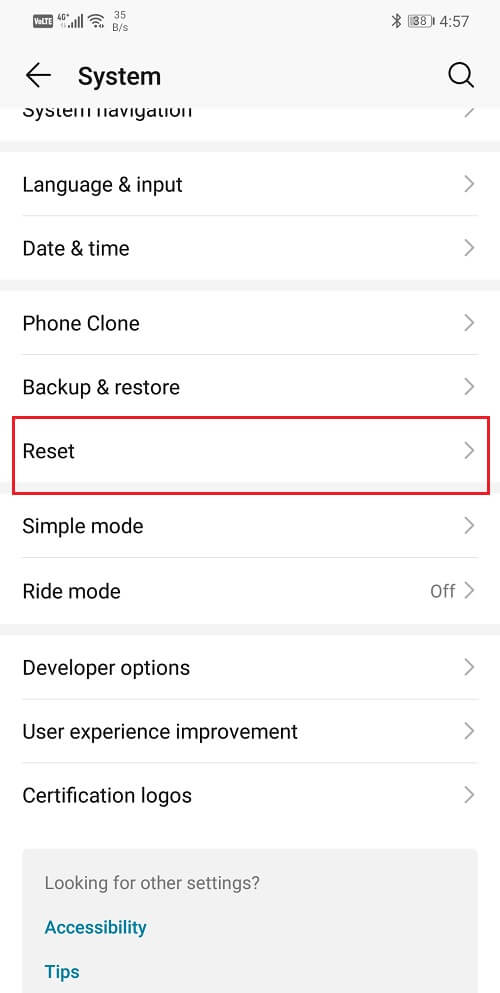
1. Go to the Settings of your phone. Next, click on the System tab.
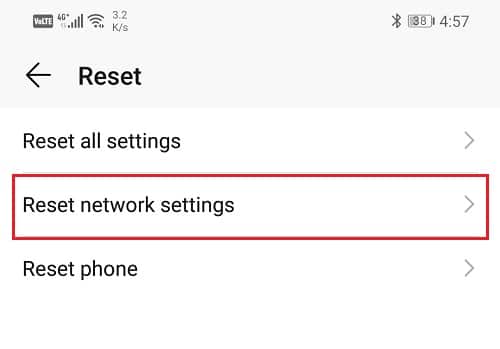
2. Click on the Reset button.
3. Now, select the Reset Network Settings.
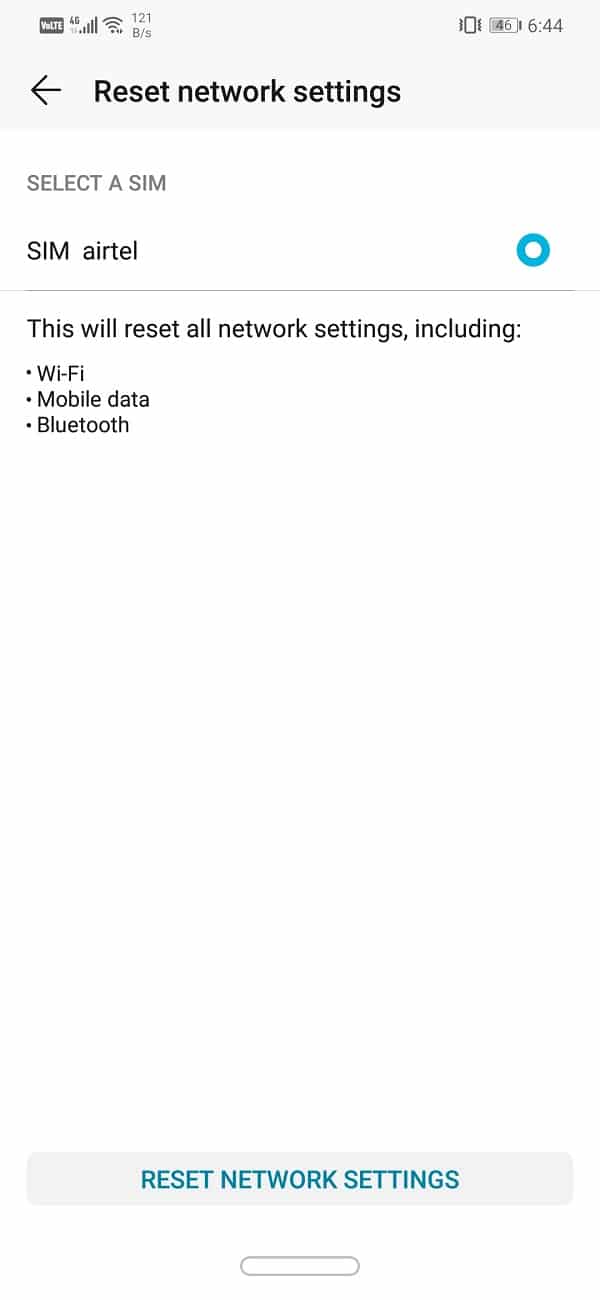
4. You will now receive a warning as to what are the things that are going to get reset. Click on the “Reset Network Settings” option.
5. Now, try connecting to the WiFi network again and see if you’re able to fix the WiFi Authentication error on your Android phone.
Method 7: Use a Repair Tool
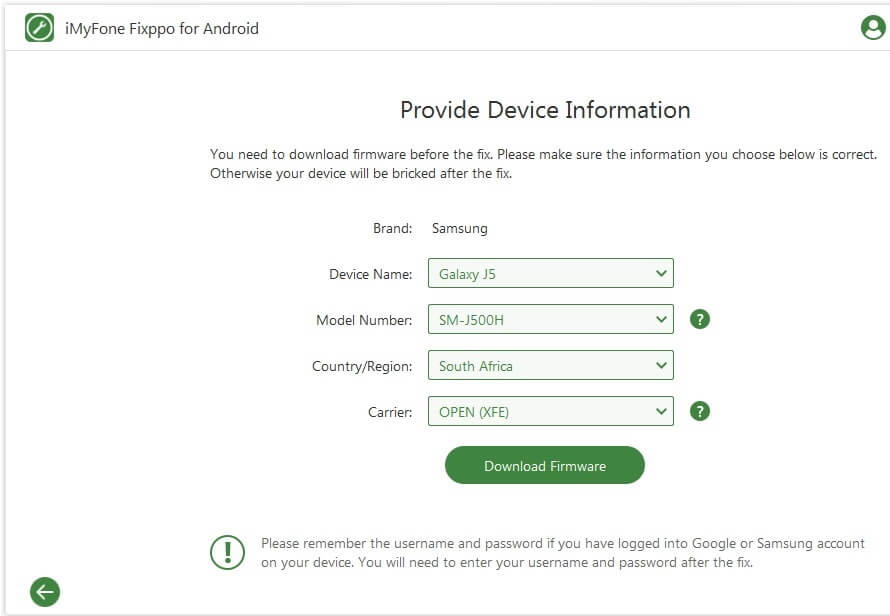
It is also possible that the source of the error is some malicious app or bug in some software. Locating and eliminating the source of all problems might fix the WiFi authentication problem. In order to do this, you can take the help of third-party repair tools. These apps will scan your device for probable sources of conflicts and glitches. You can download iMyFoneFixppo for your Android device and use its professional services to troubleshoot your device. It is extremely fast and effective and can solve your problem in a few minutes.
1. You need to download and install the software on your computer and once the software is up and running, you need to provide the necessary information about your device.
2. The tool will ask you for information like the brand, model number, country/region, and the network carrier.
3. Once you have filled in all the details, the software will ask you to download the firmware for your device.
4. After that, simply connect your device to the computer using a USB cable and you are good to go.
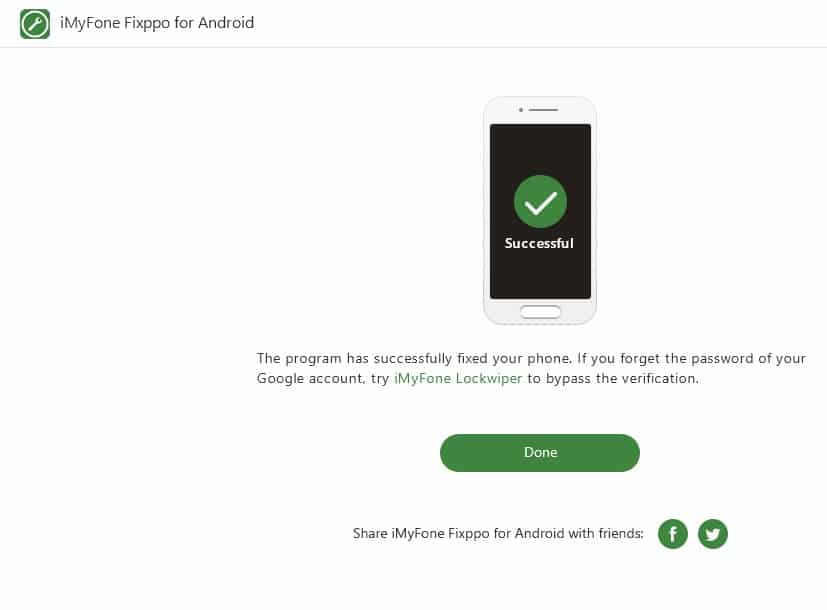
5. The repair tool will now scan your device for problems and fix them automatically.
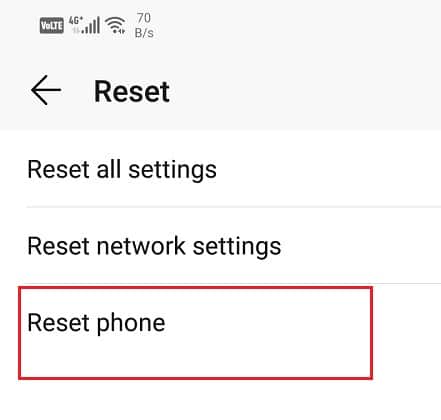
Method 8: Perform a Factory Reset
If all the above methods fail, then you will have to pull out the big guns and that is the factory reset. Opting for a factory reset would delete all your apps, their data, and also other data like photos, videos, and music from your phone. Due to this reason, it is advisable that you create a backup before going for a factory reset. Most phones prompt you to backup your data when you try to factory reset your phone. You can use the in-built tool for backing up or do it manually, the choice is yours.
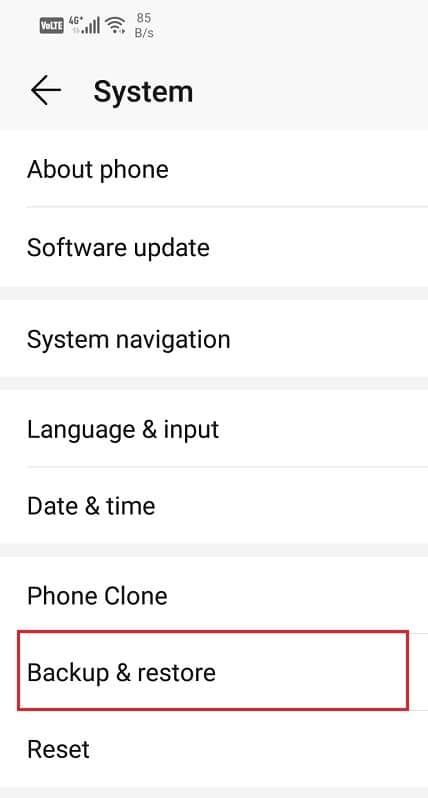
1. Go to the Settings of your phone then tap on the System tab.
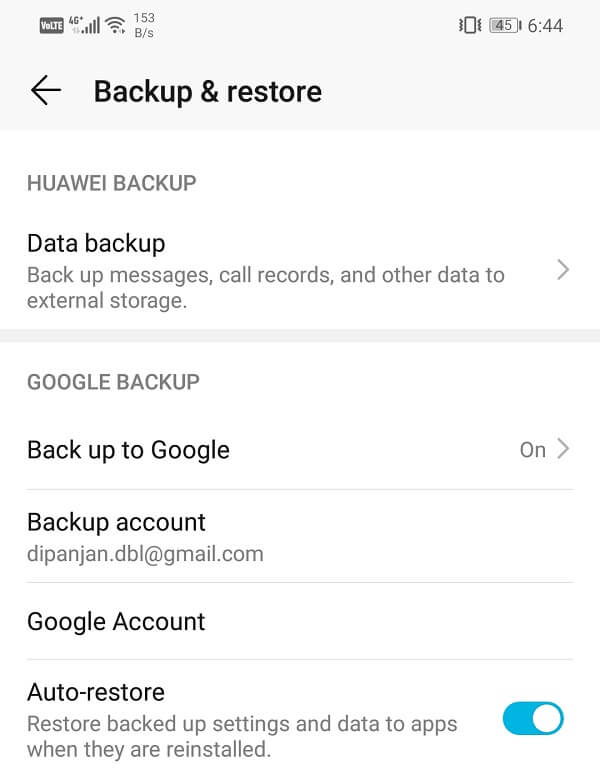
2. Tap on Backup & Restore under the System tab.
3. Now, if you haven’t already backed up your data, click on the Backup Your Data option to save your data on Google Drive.
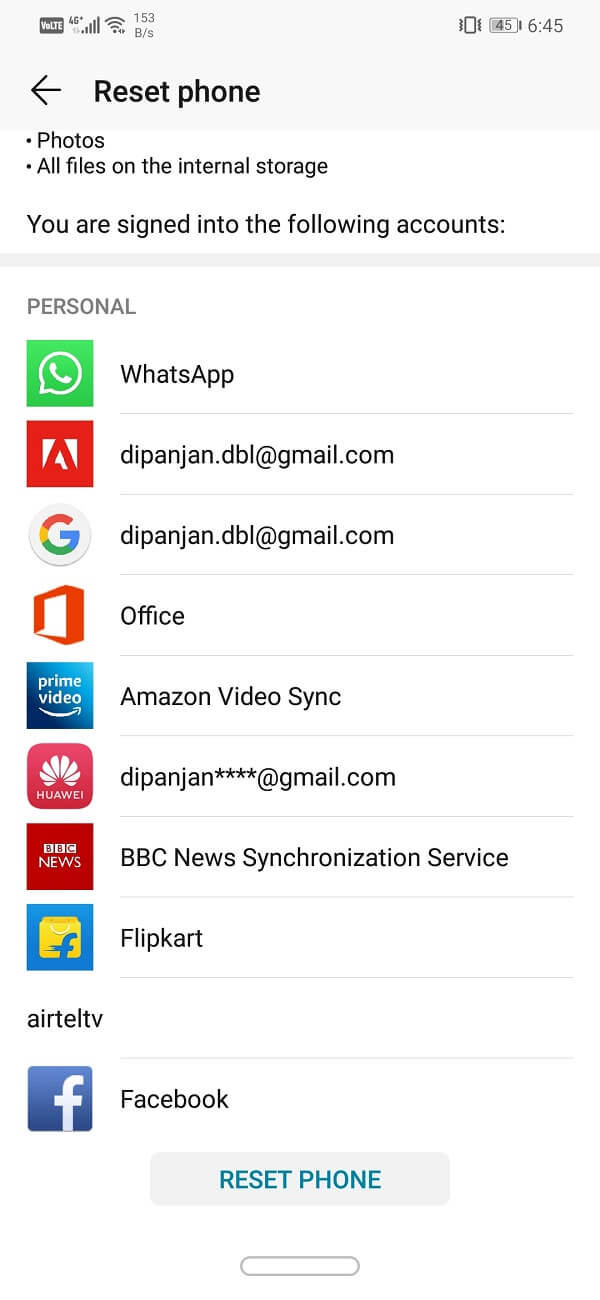
4. After that, click on the Reset tab. And click on the Reset Phone option.
5. This will take some time. Once the phone restarts again, try connecting to the Wi-Fi network again. If the problem still persists then you need to seek professional help and take it to a service center.
Recommended:
With this, we come to the end of the list of various solutions that you can try to fix the WiFi authentication error on Android. If the problem still persists, it is most likely due to some server-related error on your internet service provider’s end. It is better that you contact them and complain about this problem and wait for them to resolve the issue. We hope that by using the above-described methods, you can solve the problem and your device gets connected successfully to the WiFi network.
