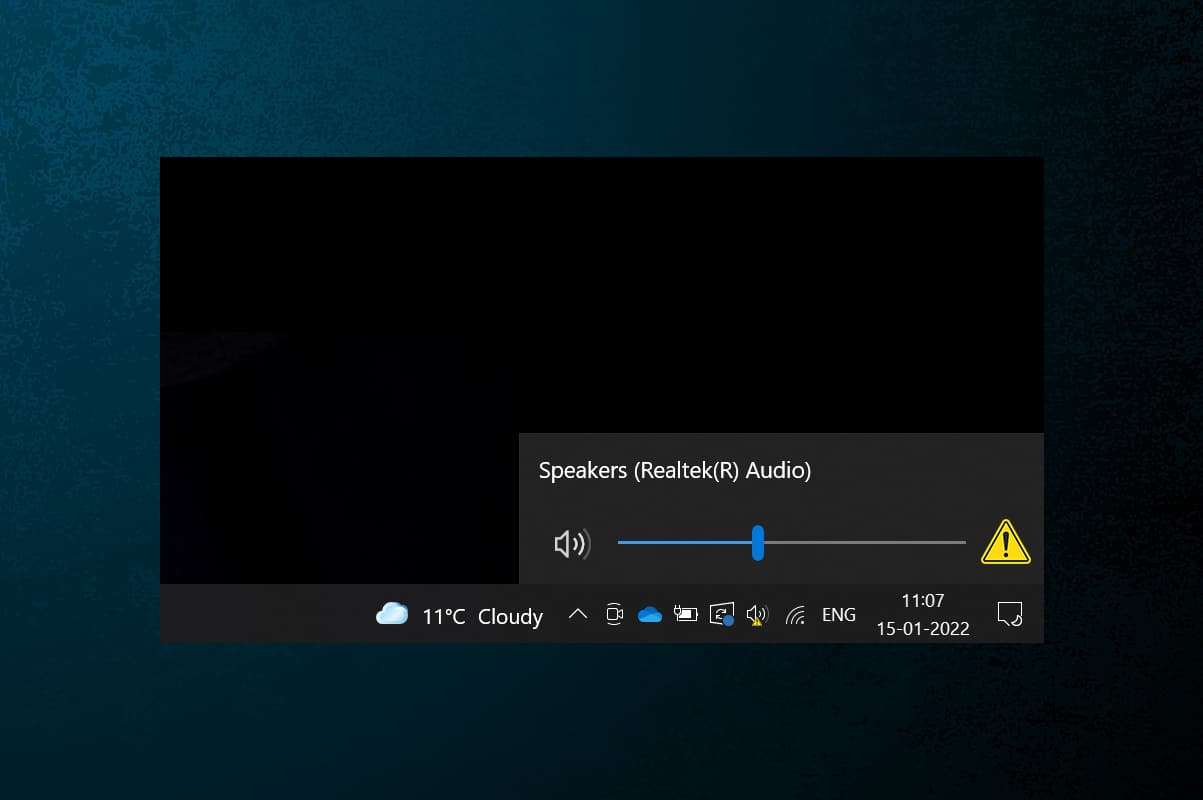
Do you constantly tinker with the output volume until it hits the sweet acoustic spot? If yes, the Speakers or Volume Control icon present at the extreme right of the Taskbar must be a true blessing. But sometimes, there may arise an issue with Windows 10 desktop/laptop volume control icon not working. The Volume Control icon may be greyed out or missing altogether. Clicking on it might do absolutely nothing. Also, the volume slider may not budge or auto-adjusts/locks to an undesirable value. In this article, we will be explaining the potential fixes for the infuriating volume control not working Windows 10 problem. So, continue reading!
Fix Windows 10 Volume Control Not Working Issue
Volume system icon is used to navigate through the various audio settings like:
- Single-click on the icon brings forth the volume slider for quick adjustments
- Right-click on the icon displays options to open Sound settings, Volume mixer, etc.
The output volume can also be adjusted using the Fn keys or dedicated multimedia keys on some keyboards. However, several users have reported that both these methods of adjusting volume have stopped working on their computers. This issue is quite problematic as you wouldn’t be able to adjust your system volume on Windows 10.
Pro Tip: How to Enable Volume System Icon
If the volume slider icon is missing from the Taskbar, follow these steps to enable it:
1. Press Windows + I keys simultaneously to open Settings.
2. Click on Personalization settings, as shown.
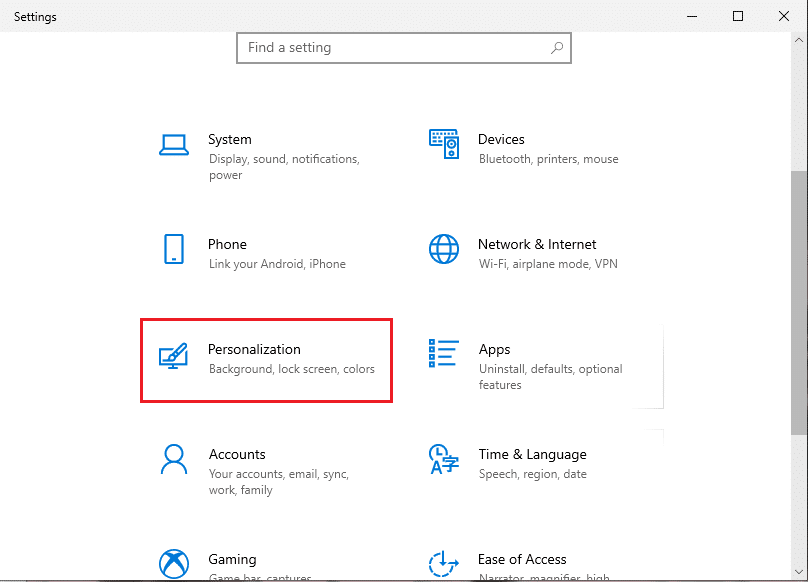
3. Go to the Taskbar menu from the left pane.
4. Scroll down to the Notification area and click on the Turn system icons on or off option, shown highlighted.
![]()
5. Now, switch On the toggle for the Volume system icon, as depicted.
![]()
Why Volume Control Not Working in Windows 10 PC?
- The volume controls will not work for you if the audio services are glitched.
- If your explorer.exe application has issues.
- The audio drivers are corrupt or outdated.
- There are bugs or errors in operating system files.
Preliminary Troubleshooting
1. Firstly, restart your PC and check if that fixes volume control not working Windows 10 issue.
2. Also, try unplugging external speaker/headset and connecting it back again after system restart.
Also Read: Fix Skype Stereo Mix Not Working in Windows 10
Method 1: Run Audio Troubleshooter
Before getting our hands dirty and doing all the troubleshooting ourselves, let’s make use of the built-in Audio troubleshooter tool in Windows 10. The tool runs a bunch of pre-defined checks for audio device drivers, audio service & settings, hardware changes, etc., and automatically resolves a number of frequently faced issues.
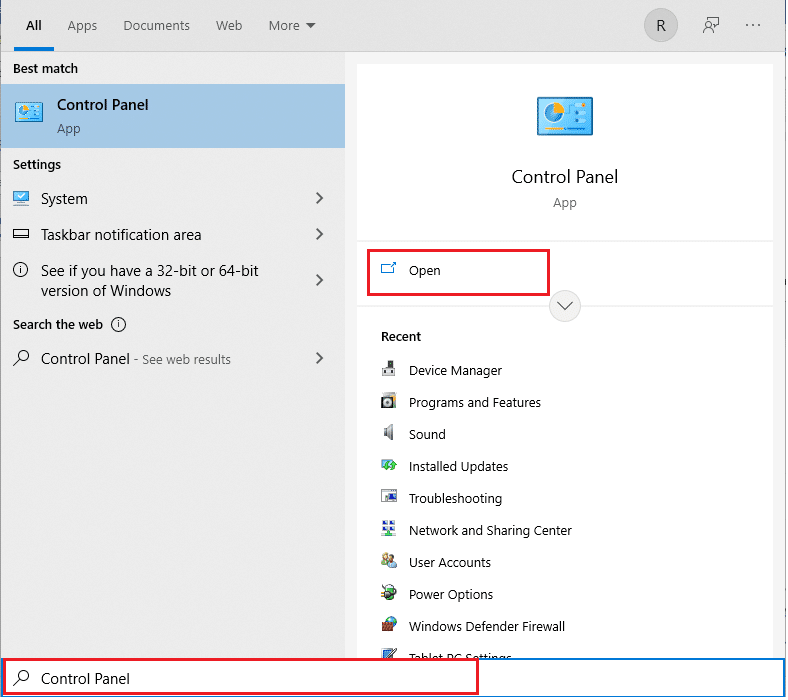
1. Hit the Windows key, type Control Panel, and click on Open.
2. Set View by > Large icons then, click on the Troubleshooting option.
![]()
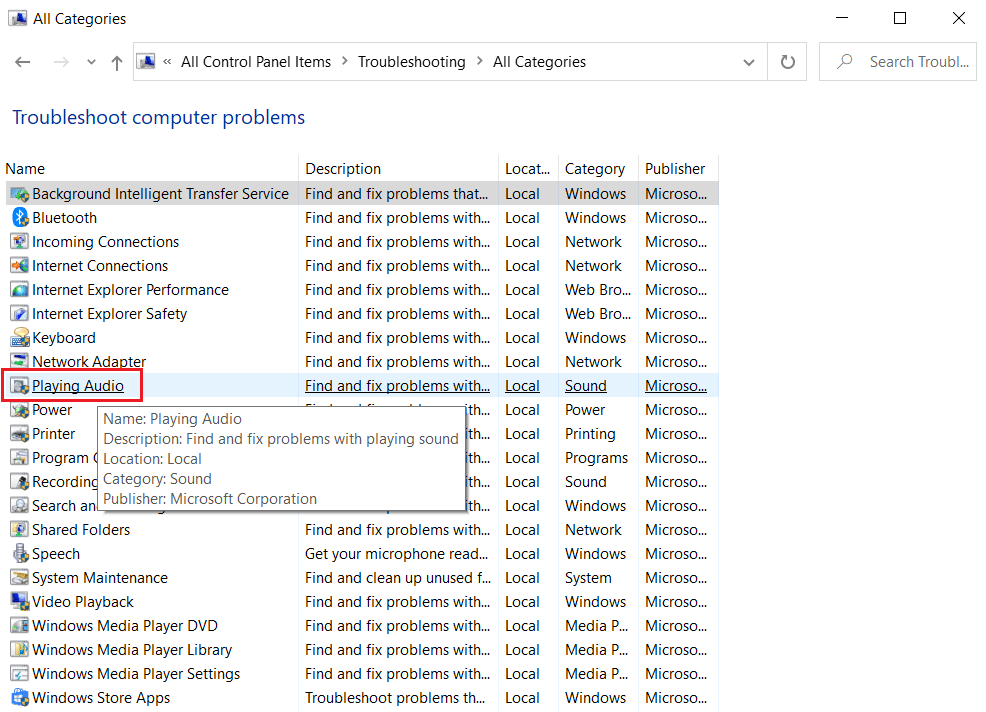
3. Click on View All option in the left pane.

4. Click on the Playing Audio troubleshooter option.
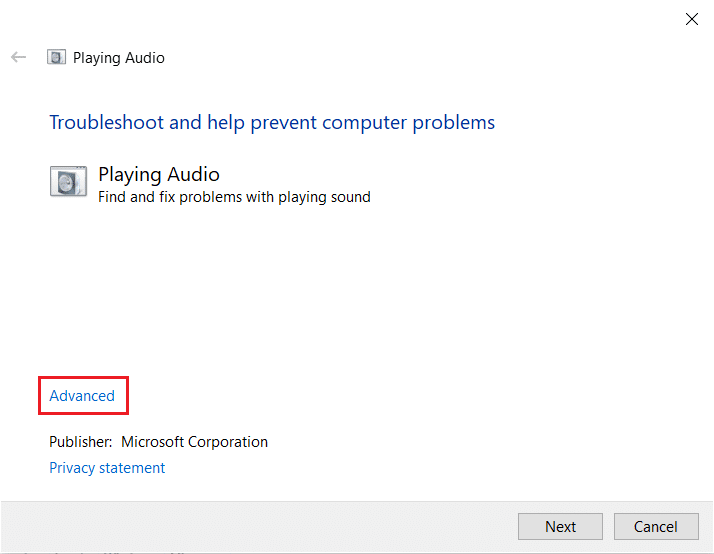
5. Click on the Advanced option in Playing Audio troubleshooter, as shown.
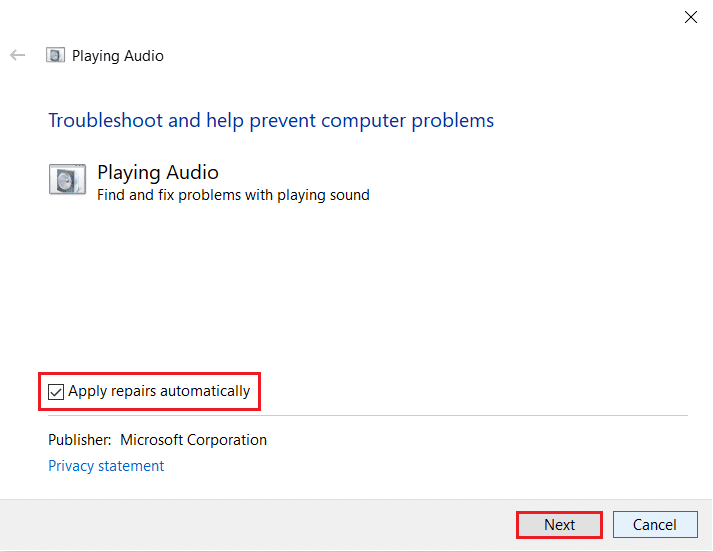
6. Then, check the Apply repairs automatically option and click on Next, as shown highlighted.
7. The Troubleshooter will start Detecting problems and you should follow the on-screen instructions to fix the issue.

Method 2: Restart Windows Explorer
The explorer.exe process is responsible for displaying all desktop elements, the taskbar, and other user interface features. If it has been rendered corrupt or damaged, it will result in an unresponsive taskbar and desktop among other things. To resolve this and bring back the volume controls, you can manually restart the explorer.exe process from Task manager as follows:
1. Press Ctrl + Shift + Esc keys simultaneously to open Task Manager.
2. Here, the Task Manager displays all active processes running in foreground or background.
Note: Click on More details on the bottom-left corner to view thw same.

3. In the Processes tab, right-click on the Windows Explorer process and select Restart option, as depicted below.

Note: The whole UI will disappear for a second i.e. the screen will go black before reappearing. The volume controls should be back now. If not, try the next solution.
Also Read: Fix Low Microphone Volume in Windows 11
Method 3: Restart Windows Audio Services
Similar to the explorer.exe process, a glitched instance of the Windows audio service can be the culprit behind your volume control woes. The said service manages audio for all Windows-based programs and should always stay active in the background. Otherwise several audio-related issues like volume control not working windows 10 will be encountered.
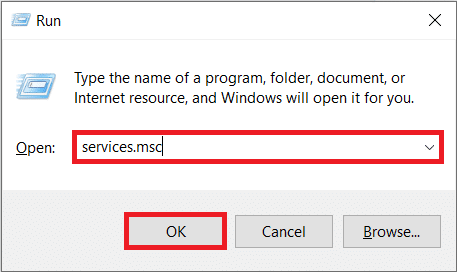
1. Hit the Windows + R keys simultaneously to open Run dialog box.
2. Type services.msc and click on OK to launch Services Manager application.
Note: Also read, 8 Ways to Open Windows Services Manager in Windows 10 here.
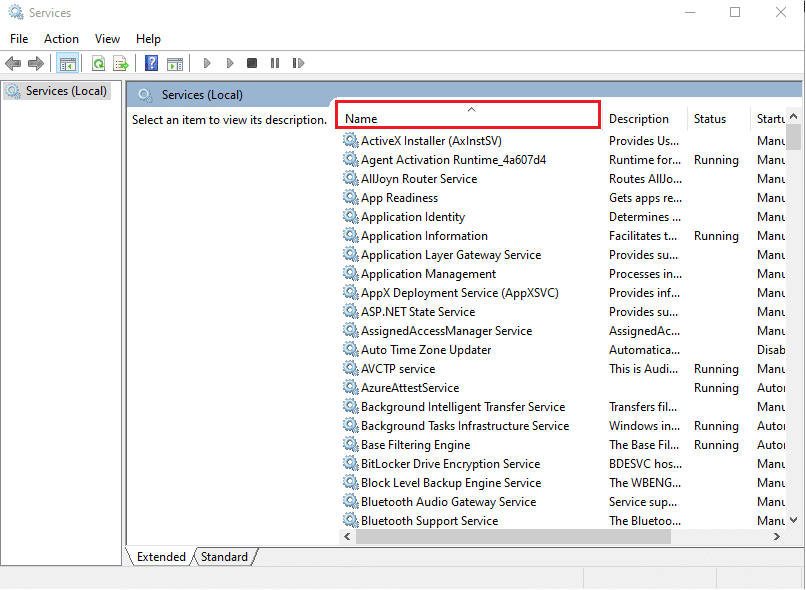
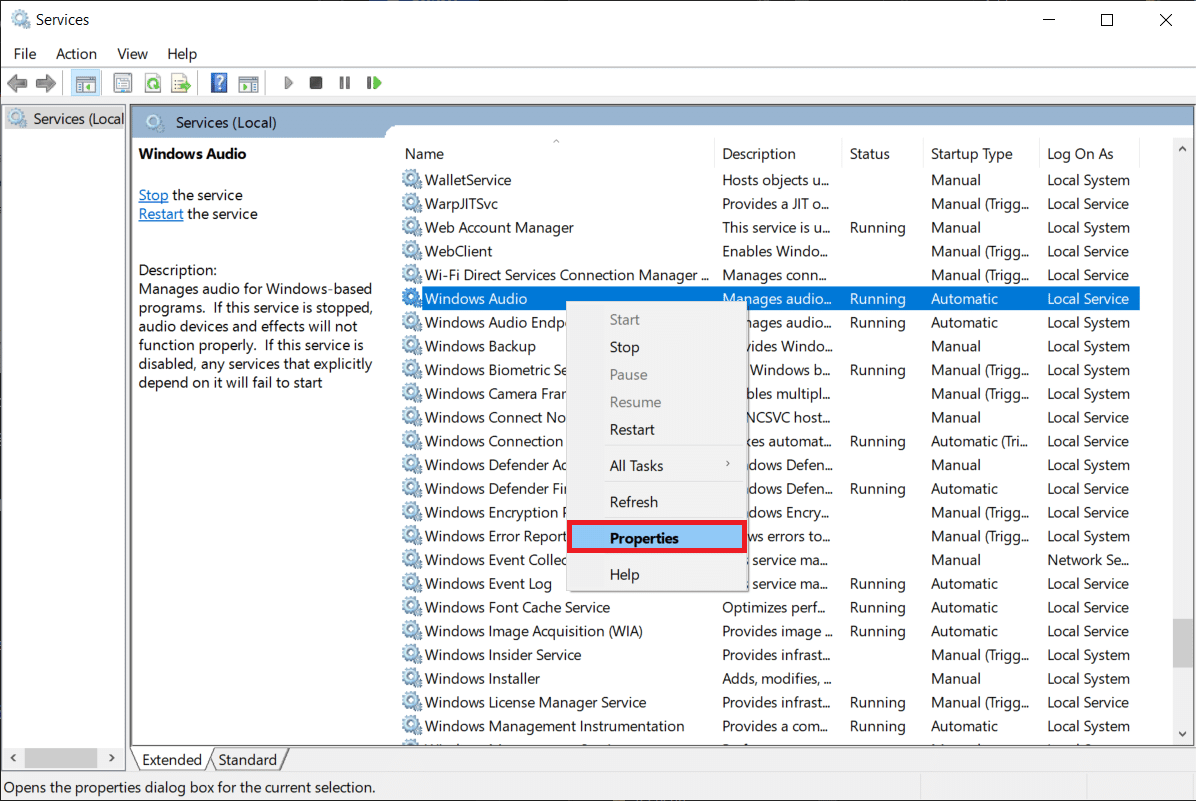
3. Click on Name, as shown, to sort the Services alphabetically.
4. Locate and select the Windows Audio service and click on the Restart the service option that appears in the left pane.

This should fix the issue and the red cross will now disappear. In order to prevent the said error from occurring again at the next boot, implement the given steps:
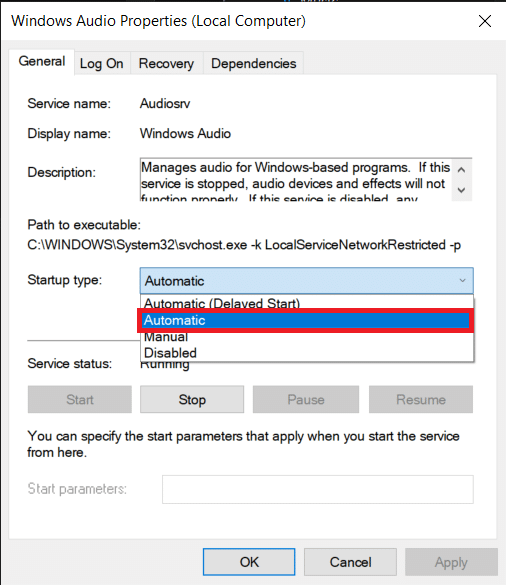
5. Right-click on the Windows Audio service and choose Properties.
6. In the General tab, select the Startup type as Automatic.
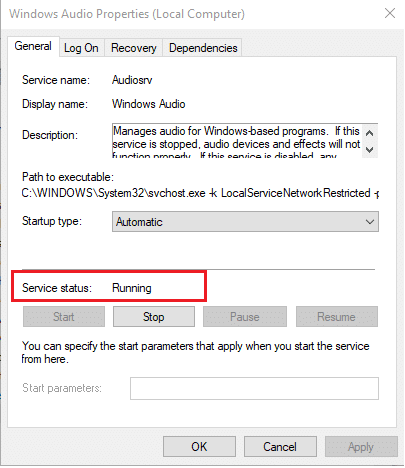
7. Also, check the Service status. If it reads Stopped, click on the Start button to change Service status to Running.
Note: If the status reads Running, move to the next step.
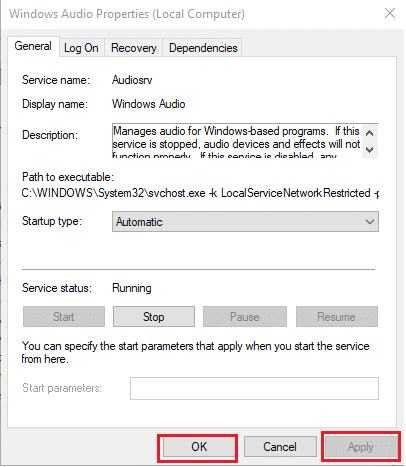
8. Click on Apply to save the modification and then click on the Ok button to exit.
9. Now, right-click on Windows Audio once again and choose Restart to restart the process.

10. Right-click on Windows Audio Endpoint Builder and select Properties. Make sure the Startup type is set to Automatic for this service as well.

Also Read: Fix Windows 10 No Audio Devices are Installed
Method 4: Update Audio Driver
The device driver files should always be kept up-to-date for the hardware components to function flawlessly. If volume control not working Windows 10 issue started after installing a new Windows update, it is likely that the build has some inherent bugs that are prompting the issue. It also could be because of incompatible audio drivers. If the latter is the case, manually update the driver files as follows:
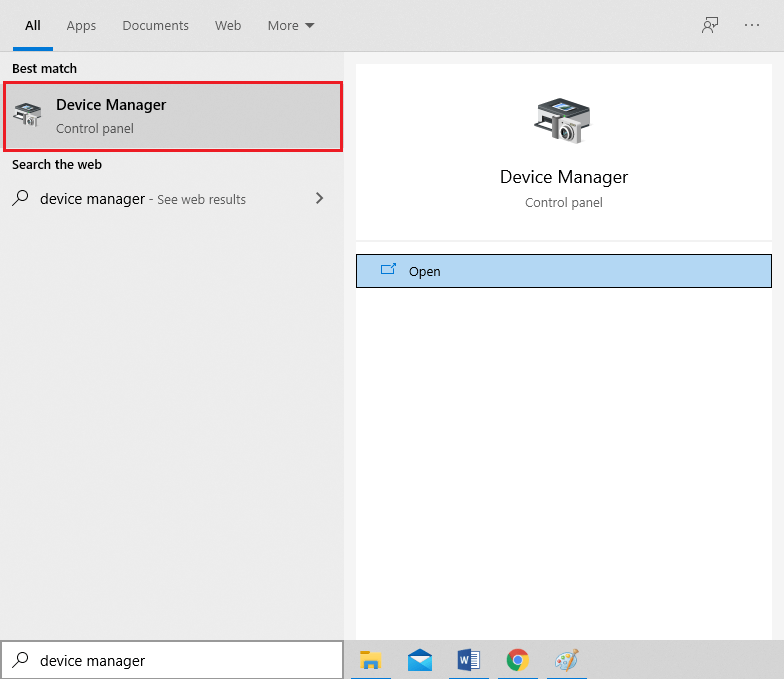
1. Click on Start and type device manager, then hit the Enter key.
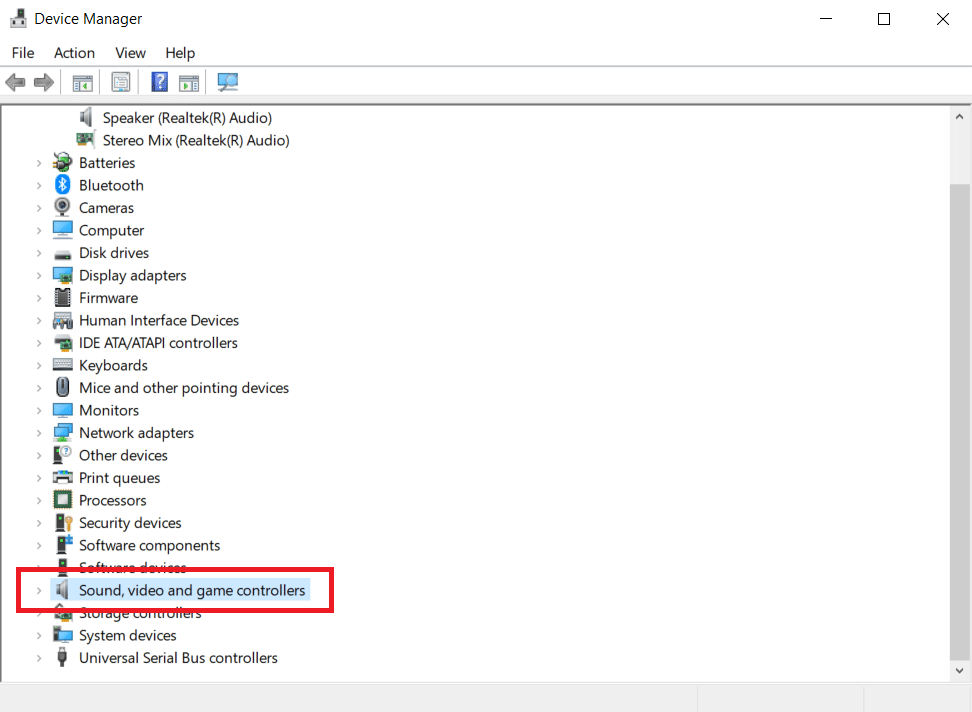
2. Double-click on Sound, video, and game controllers to expand.
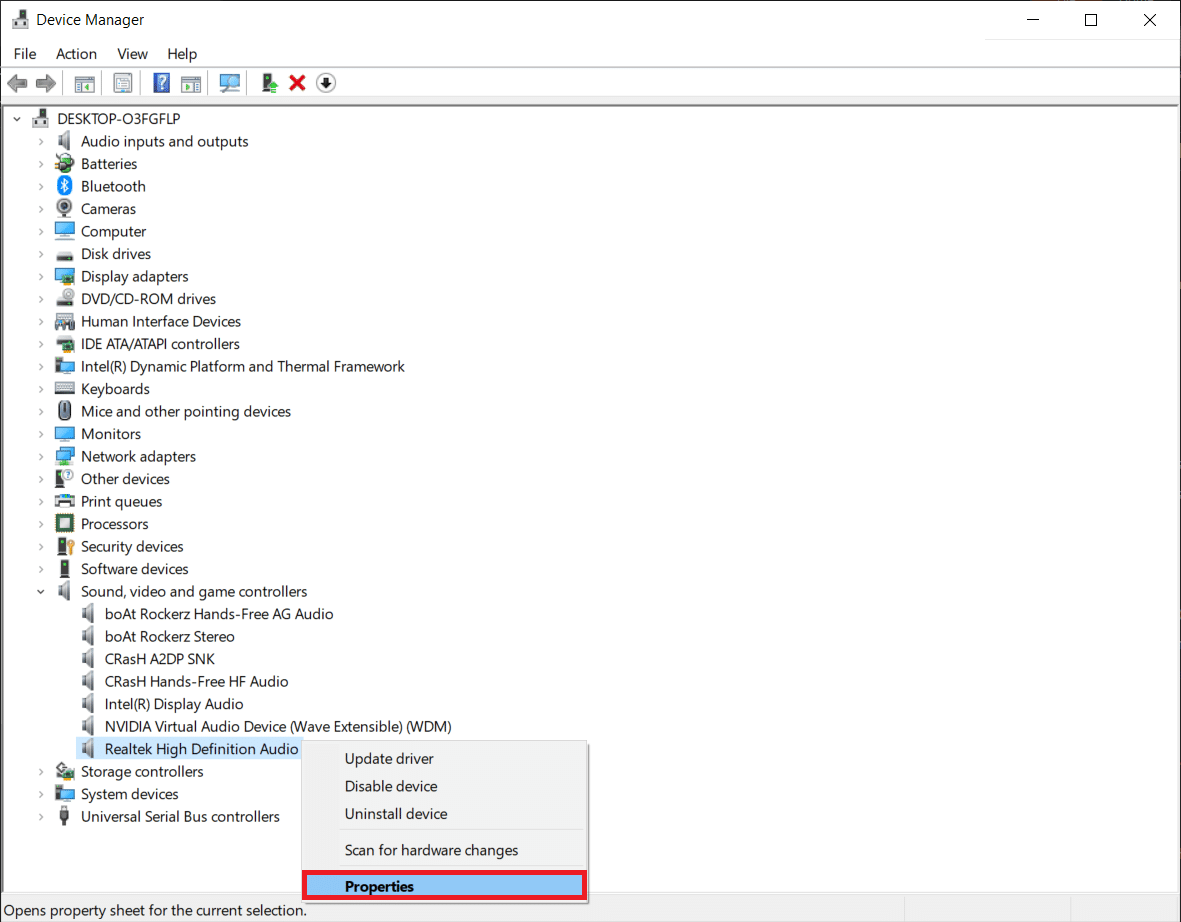
3. Right-click on your audio driver (e.g. Realtek High Definition Audio) and choose Properties.
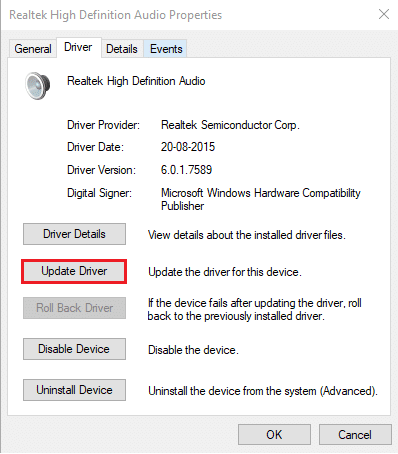
4. Go to the Driver tab and click on Update Driver
5. Choose Search automatically for drivers
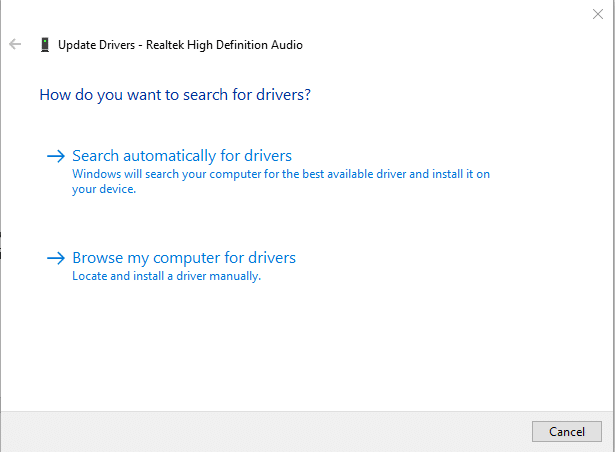
6. Windows will automatically search the drivers needed for your PC and install it. Restart your PC to implement the same.
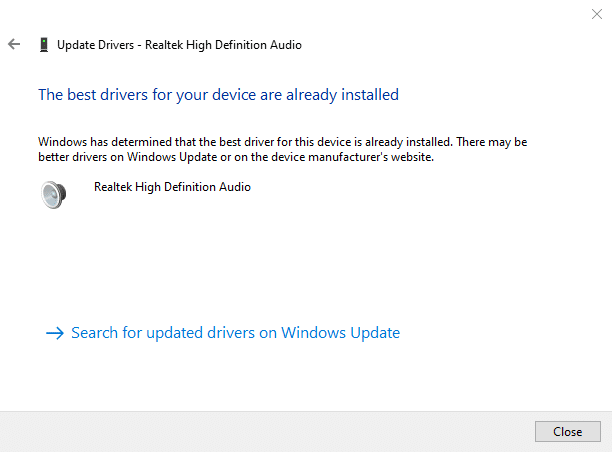
7A. Click on Close if The best drivers for your device are already installed message is displayed.
7B. Or, click on Search for updated drivers on Windows Update which will take you to Settings to search for any recent Optional driver updates.
Method 5: Reinstall Audio Driver
If the issue continues to persist because of incompatible audio drivers, even after the update, uninstall the current set and perform a clean install as explained below:
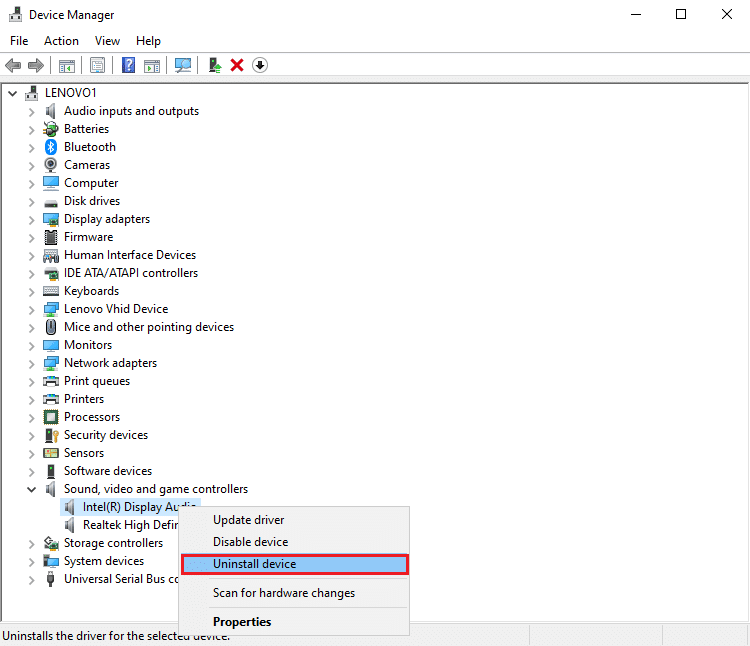
1. Navigate to Device Manager > Sound, video and game controllers as earlier.
2. Right-click on your audio driver and click on Uninstall device, as shown below.
3. After uninstalling the sound driver, right-click on the group and select Scan for hardware changes, as illustrated below.

4. Wait for Windows to automatically scan and install the default audio drivers on your system.
5. Finally, restart your PC and check whether you were able to fix volume control not working issue on Windows 10.
Also Read: Fix Computers Not Showing Up on Network in Windows 10
Method 6: Run SFC and DISM Scans
Lastly, you can try running repair scans to fix corrupt system files or replace any missing ones to revive the volume controls until a new update with the issue permanently fixed is released by Microsoft.
1. Hit the Windows key, type Command Prompt and click on Run as administrator.
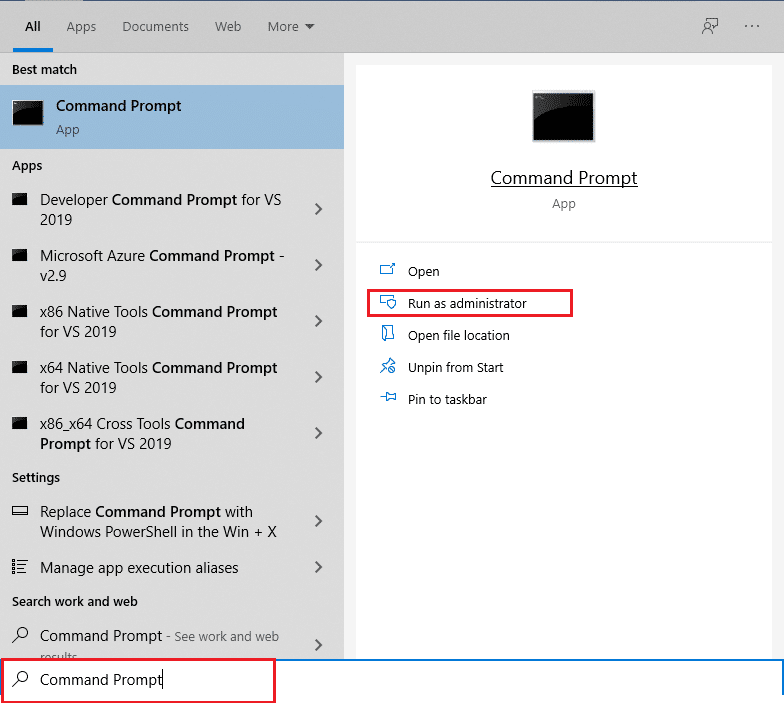
2. Click on Yes in the User Account Control prompt.
3. Type sfc /scannow and hit Enter key to run the System File Checker tool.
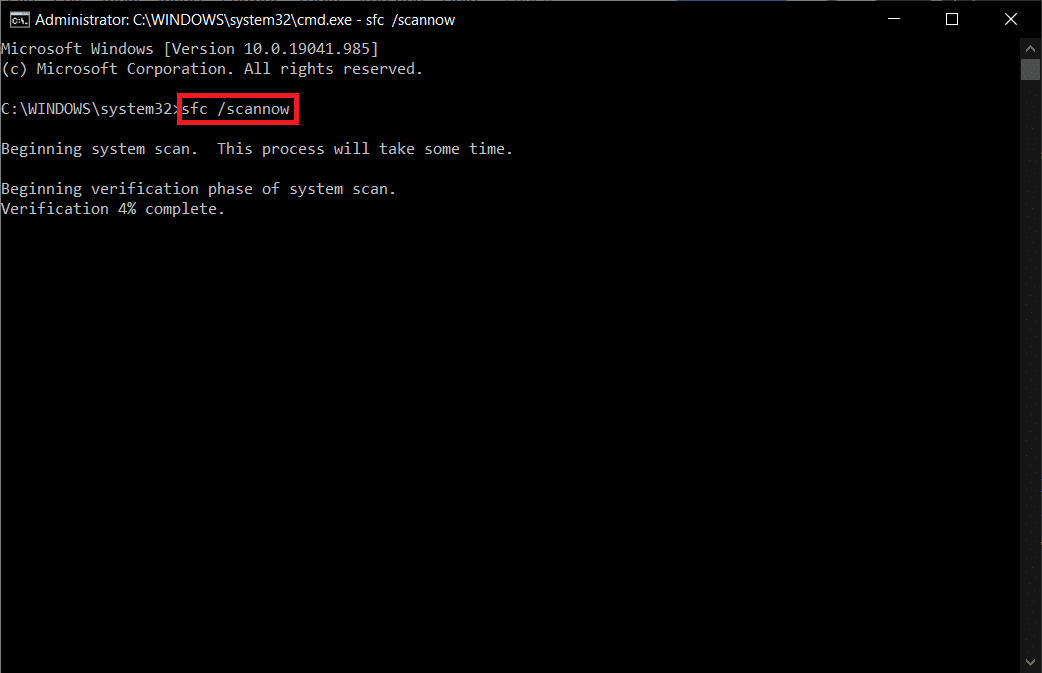
Note: The process will take a couple of minutes to finish. Be mindful of not closing the Command Prompt window.
4. After the System File Scan is finished, restart your PC.
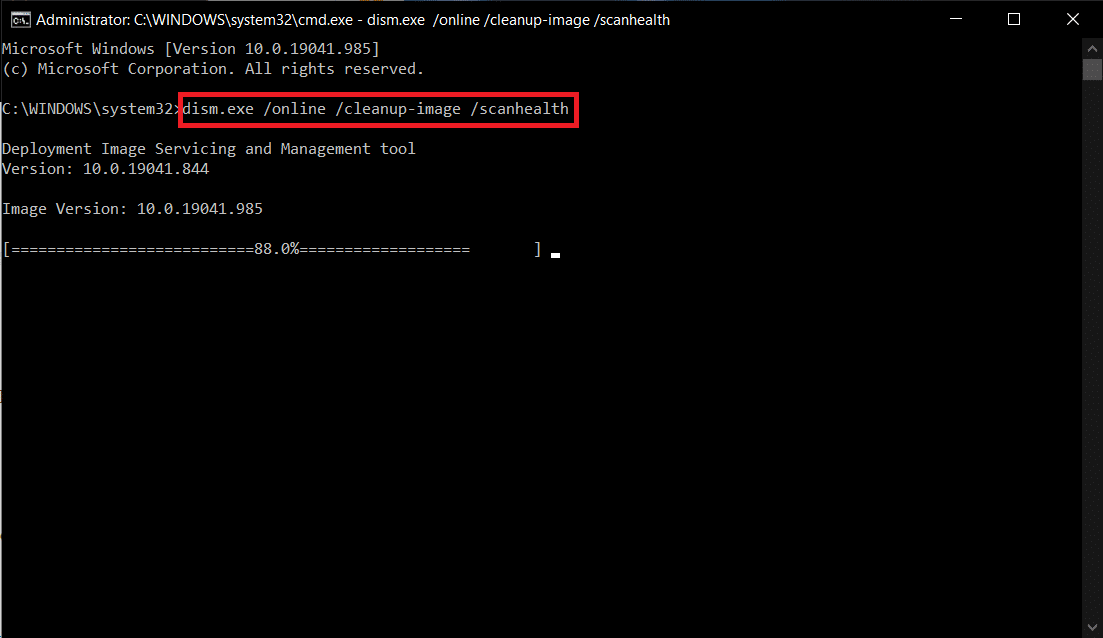
5. Again, launch Elevated Command Prompt and execute the given commands one after the other.
-
dism.exe /Online /cleanup-image /scanhealth
-
dism.exe /Online /cleanup-image /restorehealth
-
dism.exe /Online /cleanup-image /startcomponentcleanup
Note: You must have a working internet connection to execute DISM commands.
Recommended:
Hopefully, the above list of solutions proved helpful in fixing Windows 10 volume control not working issue on your computer. If you have any queries or suggestions, then feel free to drop them in the comments section below.