Fix Your Account Wasn’t Changed To This Microsoft Account 0x80070426
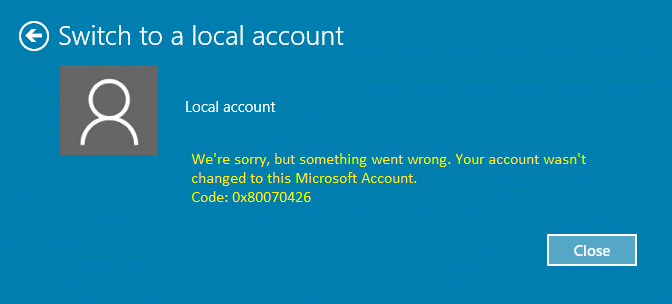
Whenever you upgrade your Windows from one version to another using a Microsoft account you might receive the following error:
The above error is also faced by users who were using a local account but now decided to change it to a Microsoft live account or vice versa. While there is no information in the error code as to why you see this error, the main cause seems to be permitted to the Microsoft email account might be corrupted in the Registry. This issue can be simply resolved by deleting some specific registry keys which we have talked about in this post.
Fix Your Account Wasn’t Changed To This Microsoft Account 0x80070426
Make sure to back your registry and create a system restore point, just in case something goes wrong. So without wasting any time, let’s see How to Fix Your Account Wasn’t Changed To This Microsoft Account 0x80070426 with the help of the below-listed tutorial.
Method 1: Run Microsoft Account troubleshooter and set the correct time and date.
1. Run the Microsoft Account troubleshooter.
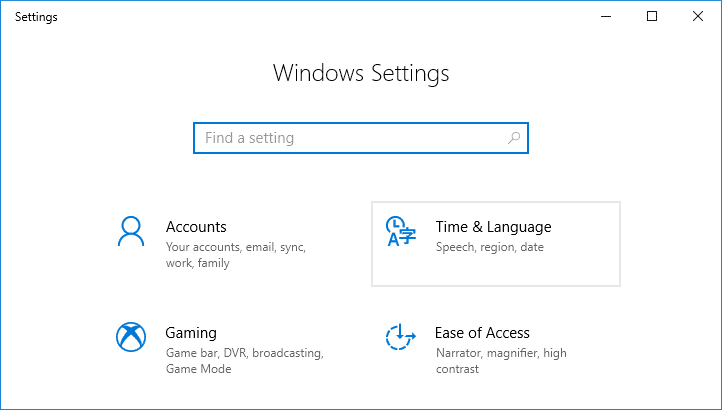
2. Press Windows Key + I to open Window Settings and then select Time & Language.
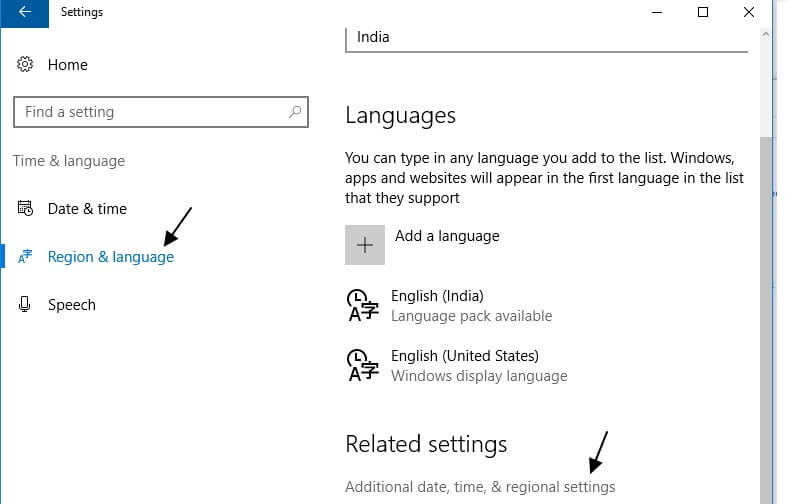
3. Then find the Additional date, time, & regional settings.
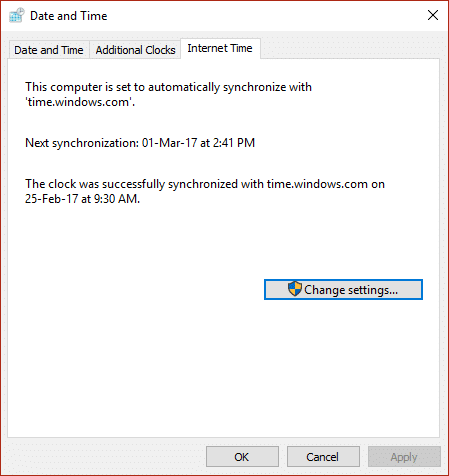
4. Now click on Date and Time then select the Internet Time tab.
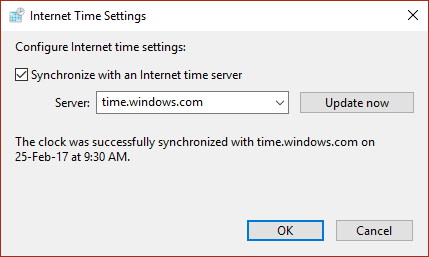
5. Next, click on Change settings and make sure Synchronize with an Internet time server is checked then click on Update Now.
6. Click OK and close the control panel.
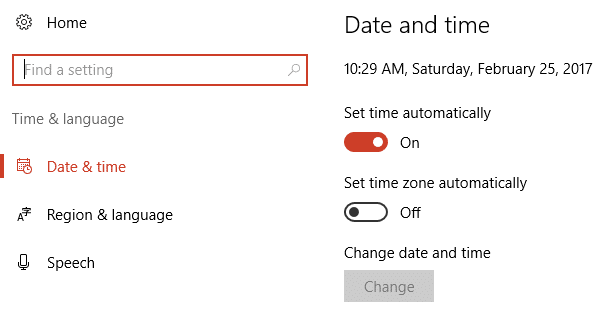
7. In settings window under Date & time, make sure Set time automatically is enabled.
8. Disable “Set time zone automatically” and then select your desired Time zone.
9. Close everything and restart your PC. Again try to switch to your Microsoft account and this time you may have to Fix Your Account Wasn’t Changed To This Microsoft Account 0x80070426.
Method 2: Delete the problematic Registry entry associated with Microsoft Email
1. Press Windows Key + R then type “regedit” (without quotes) and hit enter to open Registry Editor.
2. Make sure you have selected Computer (instead of any sub-keys) and then click on Edit then on Find.
3. Type your Microsoft Account email ID which you use to login in Windows. Make sure you have checked options Key, Values, and Data. Next, click on Find.
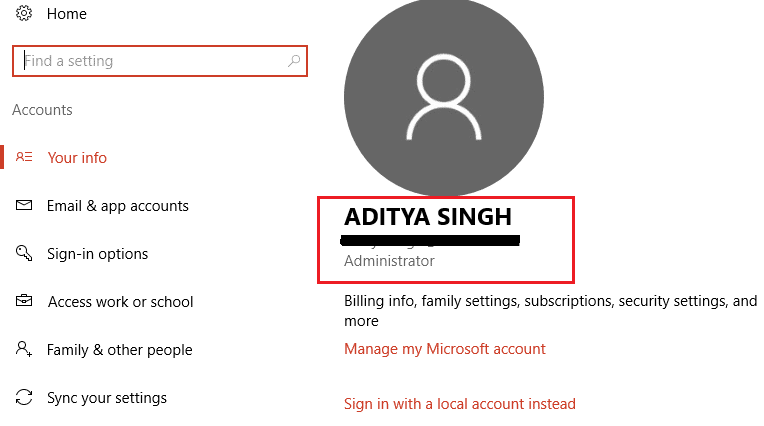
Note: If you don’t know your Microsoft Account email ID then press Windows Key + I then click on Accounts and find the email id below you profile photo and name (under Your info).
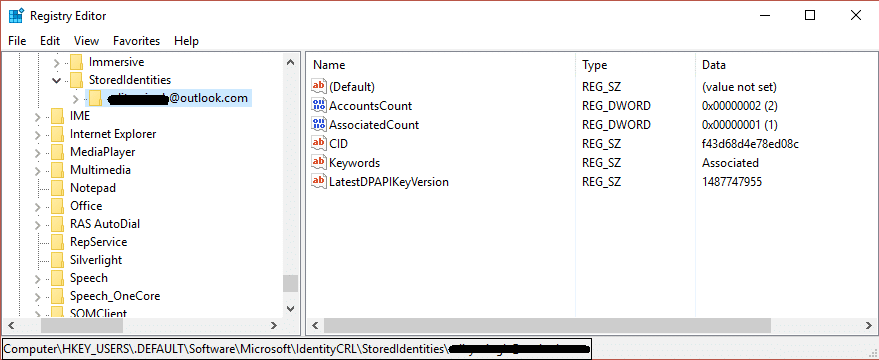
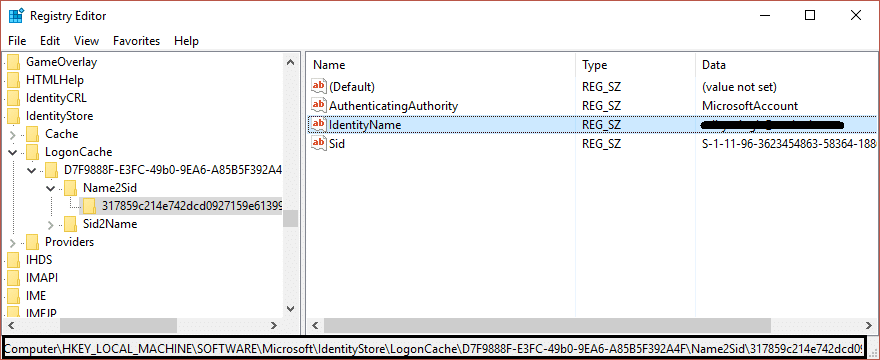
4. Repeatedly click F3 to find the below-listed registry keys:
ComputerHKEY_LOCAL_MACHINESOFTWAREMicrosoftIdentityStoreLogonCacheD7F9...... (In Windows 10)
                                                       OR
ComputerHKEY_LOCAL_MACHINESOFTWAREMicrosoftIdentityStoreCacheGlobalStoreIdentityCache S-1-96... (In Windows 7 or 8)

ComputerHKEY_USERS.DEFAULTSoftwareMicrosoftIdentityCRLStoredIdentitiesexample@outlook.com
5. Once you have found the keys make sure to delete them. In Windows 10 there won’t be a Cache folder; instead, there would be LogonCache, therefore, make sure to delete the keys under it containing your email address. In all the previous version of Windows, there will be Cache folder make sure to only delete the key under it containing your email address.
6. Close the Registry Editor and reboot your PC to fix the issue.
Also, see FIX Your Microsoft Account wasn’t changed to a local account 0x80070003.
Method 3: Create a New User Account
1. Create a new user account and add the Microsoft Account that you are trying to switch to and check if the issue persists.
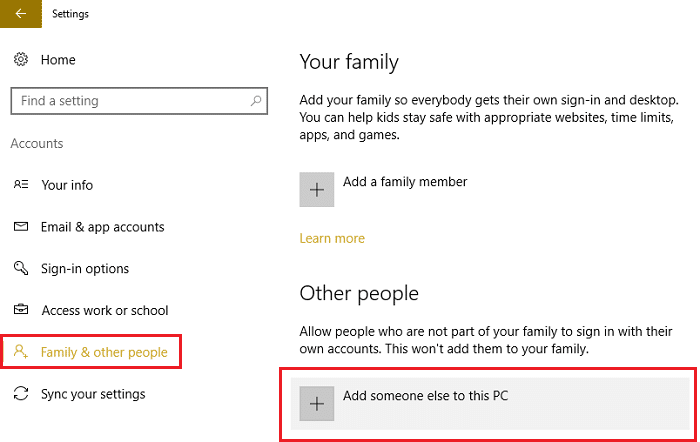
2. Press Windows Key + I to open Settings then click Account and select Family & other people from the right-side menu.
3. Then click on Add someone else to this PC under Other People.
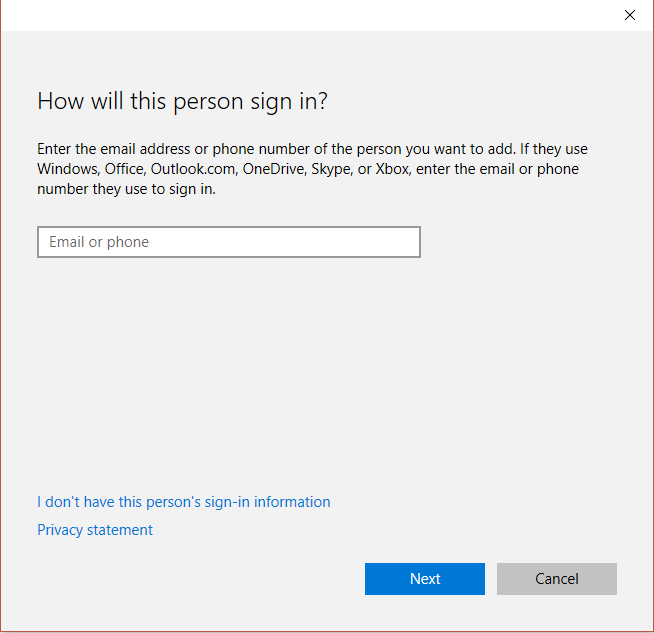
4. Enter the new user account (use the email account to which you were trying to switch).
5. Fill up the necessary details and set this email as the sign-in for the new Windows Account.
6. If you are able to successfully create a new user account using the same Microsoft Account to which you try to switch to then navigate to C:UsersCorrupted_Profile_Name (This will be the username of your previous account from which you were trying to switch).
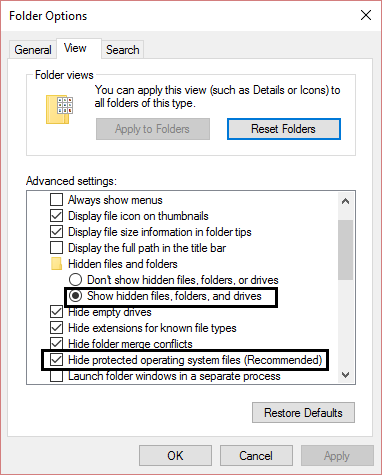
7. Once you are in the folder click View> Options then select View tab in Folder Options.
8. Now, checkmark Show hidden files, folders, and drives.
9. Next, find “Hide protected operating system files“ and make sure to uncheck it. Click Ok.
10. Copy all the files from the above folder except these:
NtUser.dat
NtUser.ini
NtUser.log
NtUser.dat.log1
NtUser.dat.log2
NtUser.dat{7a85b...} (There will be at least 5-10 files of this type)
11. Now navigate to C:UsersNew_Profile_Name (to the username you just created) and paste all those files here.
That’s it you have successfully Fix Your Account Wasn’t Changed To This Microsoft Account 0x80070426 but if you still have any questions regarding this post feel free to ask them in the comment’s section.
